Table of Contents
Advertisement
Advertisement
Table of Contents

Summary of Contents for ULTICARE IPET PRO
- Page 1 Blood Glucose Monitoring System User Guide...
-
Page 2: Table Of Contents
Troubleshooting ..................32 Setting Up the HI/LO Alarms ............12 Specifications ....................33 Important Information ..............13 Icon Descriptions...................34 Blood Glucose Testing ...............14 Service and Warranty ................35 Obtaining a Blood Sample ..............15 Customer Service ..................36 Applying a Blood Sample to iPet PRO Test Strip ..16... -
Page 3: Introduction
Introduction iPet PRO Blood Glucose Monitoring System is specifically designed for in-home and professional use capillary or venous blood samples taken from a cat, dog or horse. This manual contains all information required to operate and maintain the device. Please read carefully before use. -
Page 4: Blood Glucose Monitoring System
The complete kit contains: 1 iPet PRO blood glucose meter • 1 iPet PRO test strip vial • (25 strips) 1 glucode chip • 1 lancing device • 30 gauge lancets • 1 bottle of control solution • 1 carrying case •... -
Page 5: About Ipet Pro Meter
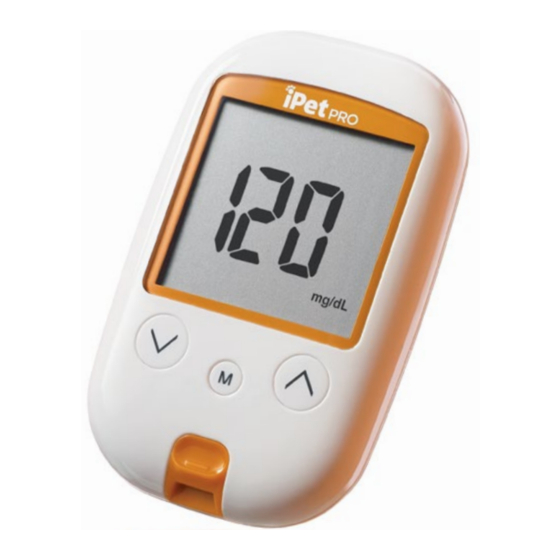
1. Display: To display results in numbers and icons Button: Press and hold to enter reminder alarm and HI/ LO alarm setting, or to adjust numbers and to toggle settings Button: Press and hold to enter buzzer setting or to adjust numbers and to toggle settings Button: Press and hold to enter the year/date/time setting,... -
Page 6: About The Ipet Pro Meter Display
1. Memory Icon: memory mode 2. Year/Date: To display year/date 3. Control Solution Icon: during a control solution test and indicates a control solution test result an alarm is set 5. Test Result: To display test results 6. Buzzer Icon: 10. -
Page 7: About The Ipet Pro Test Strip
PRO test strips are for blood iPet PRO meter. Each test strip can be used only ONCE! The test strip consists of the test strip To confirm that sufficient blood has been applied to the target area top side back side 3. -
Page 8: About The Ipet Pro Test Strip Vial
Test Strip Vial Label Test Strip Vial Do not use expired test strips as • this may cause inaccurate results • the vial, replace the vial cap immediately and close it tightly... -
Page 9: Installing/Replacing Batteries
Installing/Replacing Batteries 1. From the back of the meter, gently slide and remove the battery cover (Fig.1). ends matching indication marks on the battery compartment. 3. Slide battery cover back into batteries to operate. (Fig.1) -
Page 10: Setting Up Ipet Pro Meter
Setting Up iPet PRO Meter Be sure the batteries are properly appear and flash. Press installed. The default is set to to adjust and press to confirm (Fig.5). instructions to properly set up the meter. appear and flash. Press to adjust and press to confirm... -
Page 11: Coding Ipet Pro Meter
Coding iPet PRO Meter Insert glucode chip to start the procedure (Fig.10) Glucode Chip is inserted (Fig.11). (Fig.10) (Fig.11) a flashing animal icon. Press to select a desired animal type (Fig.12). make sure the code exactly matches the test strip vial label. -
Page 12: Setting Up Reminder Alarms
PRO meter provides 4. Press to adjust and press and hold button for 4 seconds to confirm. 4 reminder alarms for each or longer to enter setting. animal type. flash (Fig.17). Press To change to a different animal type, appear on the display (Fig.14). -
Page 13: Setting Up The Hi/Lo Alarms
Setting Up the HI/LO Alarms The iPet PRO blood glucose meter 3. To change the alarm setting, 4. Continue to the LO alarm press until you reach setting (Fig.21), repeat Steps provides an individual HI/LO alarm your desired HI setting and then 2 and 3 (Fig.22, 23) to confirm... -
Page 14: Important Information
Any change of medications based • Always keep test strips in the date printed on the package since on the iPet PRO Blood Glucose • original vial. Tightly close the this may cause inaccurate results. Monitoring System results... -
Page 15: Blood Glucose Testing
Blood Glucose Testing Before testing, you need the You may not proceed to do any following items: testing unless the meter is coded. iPet PRO blood glucose meter • Reminder: iPet PRO test strip Make sure that the code number on •... -
Page 16: Obtaining A Blood Sample
Obtaining a Blood Sample For further instructions, please Removing the lancet from the CAUTION To reduce chances see the insert provided with the lancing device. of infection: 1. After use, twist off the lancing lancing device. Always use a new and sterile •... -
Page 17: Applying A Blood Sample To Ipet Pro Test Strip
be automatically stored into the discard the first drop to prevent meter memory (Fig.30). Please DO NOT point the contamination. Introduce the tip test strip at humans or animals of the test strip to the drop of if there is no further test, the strip (Fig.29). -
Page 18: Understanding Blood Glucose Test Results
Understanding Blood Glucose Test Results The meter displays results in The meter displays results from 20 – 600 mg/dL (1.1 – 33.3 mmol/L). either mg/dL or mmol/L. The unit of measure is preset. You cannot indicate a potentially serious medical change this setting. -
Page 19: Hi & Lo Readings
1. Using the iPet PRO blood Note: glucose meter for the first time. For more information regarding the 2. Using a new vial of iPet PRO control solution, please read the test strips. control solution package insert. -
Page 20: Performing A Control Solution Test
If button is test strip. Hold until the meter 3. Insert iPet PRO test strip, top pressed again for 2 seconds, the beeps. The meter will now start side facing up, contact bar end... -
Page 21: Control Solution Results
• in day average calculation when solution test result is within the the iPet PRO meter is set in the specified range printed on the test control solution test mode. strip vial. If the test result is out of range, please repeat the test. -
Page 22: Memory Features
Memory Features How to view results stored will then be displayed (Fig.40). 6. When the meter displays the last The most recent memory results stored test result, press button in memory will be displayed first. so the meter will display day 1. -
Page 23: View Day Average Results
View Day Average Results 1. Press to turn the meter on and Note: the meter’s specified operating select a desired animal type, then 1. The consecutive 7/14/30 temperature range and may press the button to view day day average is calculated from not be accurate. -
Page 24: Exiting The Memory Mode
General Cleaning Care and Storage It is advised that you store all Switch the meter OFF. Please handle the meter with parts of iPet PRO Blood Glucose • • care. Dropping the meter may Monitoring System in the carrying Using a soft cloth moistened with •... -
Page 25: Display Messages
Display Messages DISPLAY DESCRIPTION ACTION The system is ready to accept a blood sample. Apply a blood sample. This message is displayed when your meter Please code the meter according to page 10. has NOT been coded. The default setting is 180 mg/dL (9.5 mmol/L) appears when the result is HIGHER and it can be changed according to page 12. - Page 26 Display Messages (continued) DISPLAY DESCRIPTION ACTION The default setting is 70 mg/dL (3.2 mmol/L) appears when the result is LOWER and it can be changed according to page 12. than the “LO” alert setting. Repeat the test by using a new test strip. If Test result is HIGHER than 600 mg/dL the same message displays again, the result (33.3 mmol/L).
- Page 27 Display Messages (continued) DISPLAY DESCRIPTION ACTION Temperature is TOO HIGH during the test procedure. Large variation may occur between results due to high or low temperature. Move to a different environment (50ºF - 104˚F or 10ºC - 40˚C) and wait for 30 minutes before retesting.
-
Page 28: Display Messages
Display Messages (continued) DISPLAY DESCRIPTION ACTION Battery power is LOW. Meter will only provide Replace with 2 AAA batteries. approximately 10 more measurements. -
Page 29: Error Messages
Error Messages DISPLAY DESCRIPTION ACTION The control solution temperature is HIGHER than permitted for analysis. Move to a different environment The control solution temperature is (50ºF - 104˚F or 10ºC - 40˚C) and LOWER than permitted for analysis. wait for 30 minutes before retesting. Temperature is TOO HIGH to perform a test. - Page 30 Error Messages (continued) DISPLAY DESCRIPTION ACTION Move to a different environment Temperature is TOO LOW to perform a test. (50ºF - 104˚F or 10ºC - 40˚C) and wait for 30 minutes before retesting. Battery power is too depleted for any Replace with 2 AAA batteries immediately.
- Page 31 Error Messages (continued) DISPLAY DESCRIPTION ACTION An error message indicates a problem with the test strip. Review the instructions and try again with a new test strip. If the problem persists, contact customer service. An error message indicates a problem with the test strip or meter.
-
Page 32: Error Messages
Error Messages (continued) DISPLAY DESCRIPTION ACTION Review the instructions and try again with An error message indicates a problem a new test strip. If the problem persists, with the test strip. contact customer service. Remove batteries and wait for 1 minute, then An error message indicates a problem reinstall batteries to see if meter is working with the meter. -
Page 33: Troubleshooting
Troubleshooting OTHER PROBLEMS WHICH MAY OCCUR ACTION A test strip has not been inserted into the Review the instructions and reinsert a meter properly. test strip correctly. Defective test strip. Replace with a new test strip. A test strip remains in the test port for more than Meter will automatically turn off. -
Page 34: Specifications
Specifications Working Temperature Humidity 50°F - 104°F (10°C - 40°C) Hematocrit 10 - 90% RH Test Sample 20 - 60% Sample Volume 0.7 µl Measuring Unit mg/dL or mmol/L Measuring Range 20 - 600 mg/dL (1.1 - 33.3 mmol/L) Test Time 5 seconds countdown Memory Capacity 500 most recent results... -
Page 35: Icon Descriptions
Icon Descriptions Do not reuse Temperature limitation Use by Consult instructions for use Batch Code Caution Keep dry Do not use if package is damaged... -
Page 36: Service And Warranty
UltiMed, Inc. cannot endorse the performance of iPet PRO Blood Glucose iPet PRO meter. UltiMed, Inc. offers a lifetime guarantee on this product. Our company shall person for any incidental, consequential, or punitive damages arising from or its parts. UltiMed, Inc. for help. -
Page 37: Customer Service
Customer Service Customer Service Hotline: 1-877-854-3434 Distributed by: UltiMed, Inc. Telephone: 1-877-854-3434 B05Z106058/REV.1/V002-2016-11...
Need help?
Do you have a question about the IPET PRO and is the answer not in the manual?
Questions and answers