Hubsan X4 PRO Instruction Manual
Hide thumbs
Also See for X4 PRO:
- User manual (31 pages) ,
- Instruction manual (28 pages) ,
- Manual (28 pages)

Related Manuals for Hubsan X4 PRO


Summary of Contents for Hubsan X4 PRO
- Page 1 ® Ages 14+ Read the instruction manual carefully ITEM NO.:H109S X4 PRO WITH FPV TRANSMITTER...
-
Page 2: Important Safety Notes
Be extremely careful and responsible when using the X4 Pro. Small electronic components can be damaged by crashes or by dropping the X4 Pro in water. To avoid further damage to the unit, people, or property, do not use X4 Pro with broken or damaged components. Always inspect propellers for damage and proper tightness. -
Page 3: Table Of Contents
1.1 LiPo battery in the X4 Pro 6.1 Calibration 1.2 Charging 6.2 Check the GPS Condition 1.3 Power on/ off the X4 Pro LiPo Battery 7 START/ STOP THE MOTORS 1.4 Check The LiPo Battery Power 8 BASIC FLIGHT 2 SAFETY NOTES 9 SIGNAL LOSS PROTECTION FUNCTION 2.1 Important Notes... -
Page 4: General Introduction
Pro will help you shoot stable, professional-grade HD videos and pictures. FPV: First Person View provides a one of a kind flying experience to X4 Pro users. It allows you to see every moment of the flight from the quad's view. -
Page 5: Introduction
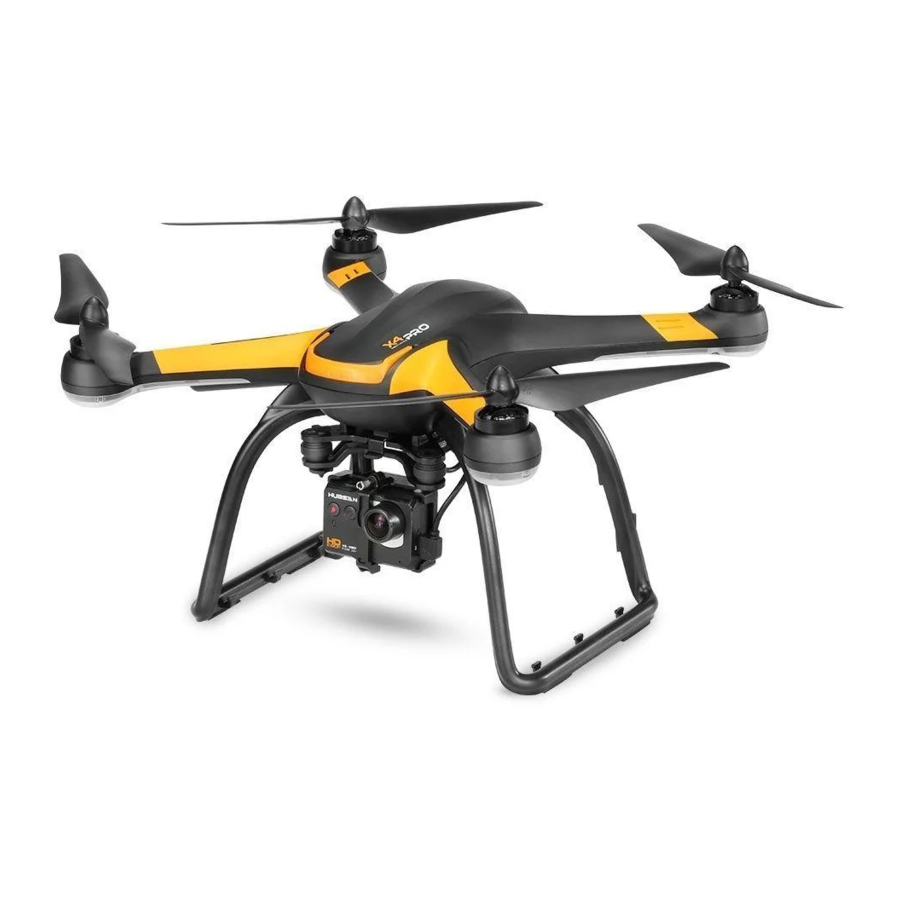
Transmitter Antenna 5.8 GHz Transmitter Antenna 2. INTRODUCTION The Hubsan X4 Pro system consists of the quadcopter, camera, gimbal, propeller guard, power system, flight control system, and radio transmission system. Transmitter equipment: Dual data transmission, FPV transmission mode, Video and picture shooting modes. -
Page 6: Prepare The Lipo Battery
X4 Pro with gimbal 11.1V 7000mAh rechargeable LiPo battery 1.1 LIPO BATTERY IN THE X4 PRO The X4 Pro is equipped with a 11.1V, 3 cell, 7000mAh rechargeable LiPo battery. Always charge the LiPo battery with the Hubsan charger. BATTERY SPECIFICATIONS Charging temperature: 0°C~40°C... -
Page 7: Power On/ Off The X4 Pro Lipo Battery
1.3 POWER ON/ OFF THE X4 PRO LIPO BATTERY Power on: Put the battery into the battery compartment and connect the battery plug with the correct polarity. When the X4 Pro is power on, the blue LEDs on X4 Pro will blink in a rotating pattern. -
Page 8: Safety Notes
2 SAFETY NOTES 2.1 IMPORTANT NOTES This X4 Pro is not a toy. Any improper use of this product will result in serious injury. Be aware of your personal safety, the safety of others and your surrounding environment. We strongly recommend that beginners learn to fly with proper instruction from more experienced pilots before attempting to fly the X4 Pro for the first time. -
Page 9: Prepare The X4 Pro
[11] 3.1.1 FLIGHT CONTROL SYSTEM INTRODUCTION The Hubsan X4 Pro is easy to operate and very stable. It is capable of all basic flight actions and also includes control loss failsafes, a power alarm, and IOC functions. Modules on flight control system... - Page 10 Only insert or remove the micro memory card when the power is off. The right picture shows where to insert the memory card. A micro memory card is not included in the Hubsan X4 Pro package. Users must supply their own class 4-6, 4GB-32GB memory card and format it before use.
- Page 11 CAMERA The camera will recharge while connected to the X4 Pro or the PC. It recharges at about ● 500mAh and has a 3.7V/670mAh battery. 3.2.4 CAMERA LIGHTS Camera LIGHT Camera condition Blue light turns on Standby Blue light turns on, red light blinks once every...
-
Page 12: Prepare The 1 Axis Gimbal
Step 3: Insert the camera signal plug into the left slot. After installation, power on the X4 Pro and the 1 axis gimbal will power on and adjust automatically. The T2 rotary switch can also be used to control gimbal rotation. -
Page 13: Install 5.8Ghz Transmitter
GIMBAL 3.3.3 INSTALL THE 1 AXIS GIMBAL WITH SMART PHONE CLIP The Hubsan X4 Pro also includes 1 axis gimbal wtih smart phone clip. It can hold your smart phone to shooting videos. Step 1: Install the gimbal as 3.3.1 shows. -
Page 14: Prepare The Propeller Set
● The propellers are designed to tighten automatically. Do not overtighten the screws and do not use any type of screw glue. ● Make sure that the black and gray, A and B propellers are installed correctly. The X4 Pro will not fly if propellers are improperly installed. -
Page 15: Preparae The Fpv Transmitter
● Exchange broken, aging, or poor quality propellers before every flight. ● To avoid injury, do not touch the high-speed props or motors during operation. ● Always use Hubsan propellers to ensure best flight experience. 3.5.4 PREPARE THE PROPELLER GUARD Propeller guards are optional, but we recommend that beginners use them to facilitate safe flying. - Page 16 1 Throttle /Rudder Stick 2 Elevator/Aileron stick EXT Function Key ENT Function Key 5 Rudder Trim 3 Aileron Trim 4 Elevator Trim 6 Throttle Trim Down Function UP Function 7 Power SW (MODE 2) Socket Video glasses socket © 2016 Hubsan 哈博森科技 版权所有...
- Page 17 Throttle /Aileron stick of the stick makes the X4 Pro roll left/right to initiate a turn. Forward and backward movement of the stick makes the X4 Pro nose point up/down respectively. Left and right movement of the Elevator/Rudder Stick stick makes the X4 Pro yaw left/right respectively.
-
Page 18: Installing The Tx Battery
The LCD screen will show “Caliberate Stick”. Move the joysticks in a circling motion about 3 times, and then release the joystick and press any trim to save and exit. You can change the mode as you like by following the above method. 2016 Hubsan 哈博森科技 版权所有... -
Page 19: Antenna Signal Instruction
X4 Pro when in flight. Keep the antenna vertical and always point the signal surface (the logo side) towards the X4 Pro video signal antenna. -
Page 20: Start To Fly
THE FLIGHT ENVIRONMENT FOR X4 PRO (1) Fly the X4 Pro in a large open area. The GPS signal may become weaker and the position hold and RTH function may not be reliable when the X4 Pro flies around trees and buildings. -
Page 21: Compass Calibration
6. COMPASS CALIBRATION After the X4 Pro powers on, the blue LED of the X4 Pro will blink in a rotating pattern. Put the X4 Pro on a level surface and do not move it. The transmitter display will show "Check Compass", indicating that the X4 Pro is checking the compass. -
Page 22: Start/ Stop The Motors
X4 Pro Control Ways The throttle stick controls the ascent and descent of the X4 Pro. The X4 Pro will ascend when the sticks are moved up, descend when the stick is moved down, and remain unchanged when the stick is centered. - Page 23 BASIC FLIGHT The elevator stick moves the X4 Pro forward and backward. Move the stick forward, the X4 Pro will tilt and fly forward. Move the stick backward, the X4 Pro will tilt and fly backward. forward backward At center stick the aircraft should hold position.
-
Page 24: Signal Loss Protection Function
SIGNAL LOSS PROTECTION FUNCTION 9 SIGNAL LOSS PROTECTION FUNCTION If the X4 Pro loses transmitter signal, the flight control system will take control of the model and either land it or return it to the 'home' position and land automatically. This helps prevent operators from losing or crashing their X4 Pro. -
Page 25: Intelligent Battery Alarm Function
When the voltage of the X4 Pro battery drops below 10.8V, the LCD screen will show "Aircraft Low Battery", the quad will begin to descend slowly. At this point, the quad will still ascend when throttle is increased, but you should land the X4 Pro as soon as possible. -
Page 26: Fcc Information
This device complies with Part 15 of the FCC Rules. Operation is subject to the following two conditions: (1) this device may not cause harmful interference, and (2) this device must accept any interference received, including interference that may cause undesired operation. © 2016 Hubsan 哈博森科技 版权所有... - Page 27 User manual is subject to change without prior notice. Download the latest user manual from VERSION 1.1 EN WWW.HUBSAN.COM...
Need help?
Do you have a question about the X4 PRO and is the answer not in the manual?
Questions and answers