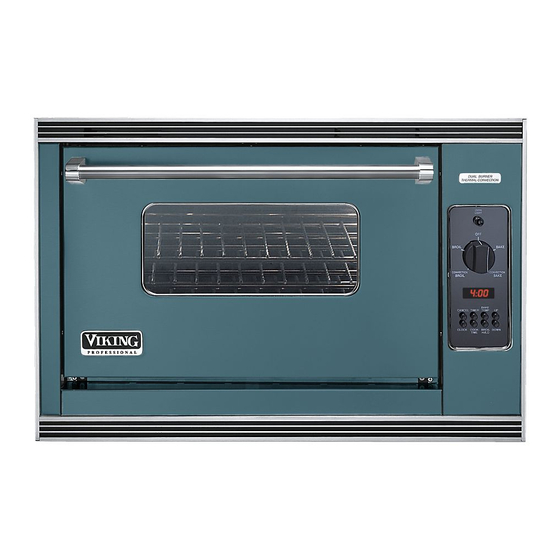
Viking VGSO166 Service Manual
36” gas single wall oven
Hide thumbs
Also See for VGSO166:
- Installation manual (14 pages) ,
- Specification sheet (4 pages) ,
- Brochure (56 pages)
Table of Contents
Advertisement
Service
Preferred Service
Manual
This manual is to be used by qualified appliance technicians only.
Viking does not assume any responsibility for property damage
or personal injury for improper service procedures done by an
unqualified person.
36" Gas
This Base Manual covers general and
Single Wall Oven
specific information including, but not
limited to the following models:
VGSO166
SMC-0007
January 2009
Advertisement
Chapters
Table of Contents

Related Manuals for Viking VGSO166


Summary of Contents for Viking VGSO166
- Page 1 Service Preferred Service Manual This manual is to be used by qualified appliance technicians only. Viking does not assume any responsibility for property damage or personal injury for improper service procedures done by an unqualified person. 36” Gas This Base Manual covers general and Single Wall Oven specific information including, but not...
-
Page 2: Important Information
“DANGER”, “WARNING” or “CAUTION”. These words mean: CAUTION DANGER VIKING will not be responsible for any injury or property damage from improper service Immediate hazards which WILL result in severe procedures. If performing service on your personal injury or death. -
Page 3: Warranty Information
(12) months from the date of original retail purchase. Viking Range Corporation, warrantor, agrees to repair or replace, at its option, any part which fails or is found to be defective during the warranty period. -
Page 4: Warranty Service Information
The return of the Owner Registration Card is not a condition of warranty coverage. You should, however, return the Owner Registration Card so that Viking Range Corporation can contact you should any question of safety arise which could affect you. -
Page 5: Table Of Contents
Oven Cavity Light Testing ........21 Convection Fan Motor Testing .......22 Thermostat Timer Testing ........22 Selector Switch Testing ...........24 Bake Igniter Testing ..........24 Broil Igniter Testing ..........25 Dual Bake Valve Testing .........25 Broil Valve Testing ..........26 Wiring Diagram ............27 © 2009 Viking Preferred Service... -
Page 6: General Information
Gas inlet 1-3/8” 11-7/8” 2” (3.5 cm) (30.2 cm) (5.1 cm) 4 ” 23-7/8” 14-5/8” - 1 / (60.6 cm) (37.1 cm) ( 6 4 39-7/8” 8 ” - 3 / (101.3 cm) ( 6 9 © 2009 Viking Preferred Service... -
Page 7: Warnings
The oven is designed specifically for natural gas or liquid propane (LP) gas. It is shipped from the factory adjusted for use with natural or propane (LP) gas. Before beginning installation verify that the model is compatible with the intended gas supply. © 2009 Viking Preferred Service... -
Page 8: Manual Shut-Off Valve
Removing the door must be done by your connector of at least 1/2” (1.3 cm) ID NPT (with dealer, a qualified licensed plumber, or certified suitable strain reliefs) in compliance with ANSI gas installer. Z21.41and Z21.69. © 2009 Viking Preferred Service... -
Page 9: Model - Serial Number Matrix
G=Gas 36” Wide E=Electric S=Single D=Double O=Oven Serial Numbers 12 01 08 C0000000001 Month Serial Number Year of Manufacture The model and serial number tag is located on the base behind the lower access panel. © 2009 Viking Preferred Service... -
Page 10: Operation
HI/LO BROIL. ALWAYS be sure the controls are in the OFF position when the oven is not in use. Convection Defrost (CONVECTION BAKE) Use this function to defrost foods. IMPORTANT–The time-of-day must be set before any other program can be used. © 2009 Viking Preferred Service... -
Page 11: Bake, Convection Bake, Convection Dehydration, Convection Defrost
flavor on the inside with less shrinkage. This even circulation of air equalizes the temperature throughout the oven cavity and eliminates the hot and cold spots found in conventional ovens. © 2009 Viking Preferred Service... -
Page 12: Broil (Infrared Broil), Convection Broil
Smoke is reduced since the airflow also reduces peak temperatures on the food. Use this setting for broiling thick cuts of meats. © 2009 Viking Preferred Service... -
Page 13: Diagnostics
(BA and BR). With unit set for convection, 120 VAC should be present from AT3 to ground. If no voltage is present, replace thermostat timer. If voltage is present, verify wiring between thermostat timer and selector (CV). © 2009 Viking Preferred Service... -
Page 14: Service Diagnostics And Procedures
Oven Rack Supports Broil Burner Broil Igniter Bake Burner Bake Igniter Convection Motor Assembly Oven Light Assembly Oven Temperature Probe Oven Control Panel Selector Switch Thermostat Timer Oven Light Switch Dual Bake Valve Broil Valve Shut-off Valve © 2009 Viking Preferred Service... -
Page 15: Parts Location - Main Oven
28.8Ω +/-10Ω) 29.5Ω +/-10Ω) 28.8Ω +/-10Ω) 29.5Ω +/-10Ω) Bake Burner Bake Burner Bake Igniter (Left cold resistance (Right cold resistance (Left cold resistance (Right cold resistance approximately 91.1Ω) approximately135Ω) approximately 91.1Ω) approximately135Ω) © 2009 Viking Preferred Service... -
Page 16: Parts Location - Control Panel
Service Diagnostics and Procedures ® Parts Location – Control Panel Oven Sensor Room temperature resistance Room temperature resistance of 1050 – 1100Ω of 1050 – 1100Ω Oven Light Switch Selector Switch Themostat Timer © 2009 Viking Preferred Service... -
Page 17: Parts Location - Side Oven
* Note: The voltage to the bake and broil valve is 3.2 – 3.6. Using voltage above this range can damage the valve. **Note: It is important that the shut-off valve be in the on position. © 2009 Viking Preferred Service... -
Page 18: Door Removal
In order to reinstall the door, grasp firmly from each side and align the door hinges. Place door onto hinge arms. Pull door stops up and slowly slide door down. Gently close until the door rests against one of the stop notches. © 2009 Viking Preferred Service... -
Page 19: Component Testing Chart - Rtd Chart
The oven sensor is also know as a P.T.C. (Positive Temperature Control) device which means that as the temperature rises, the resistance increases. RTD (Resistive Thermal Service) Temperature (˚F) Resistance (approximate) 1038 1090 1143 1350 1553 1654 1754 1852 1950 2047 © 2009 Viking Preferred Service... -
Page 20: Component Troubleshooting Guide
Repair or replace defective wiring No lights Defective bulb Check for 120 VAC to the lights Oven light switch Verify light switch changes states when switch is pushed Defective or broken wiring Repair or replace defective wiring © 2009 Viking Preferred Service... -
Page 21: Rtd Temperature Sensor Testing
RTD is grounded and the physical wires must be checked for a grounded connection. If the RTD resistance is within range and the wires are not grounded, the RTD is functional and should not be replaced. © 2009 Viking Preferred Service... -
Page 22: Convection Fan Motor Testing
The thermostat timer receives line power via terminal AT1 (double black wire) directly from the line cord. Neutral is supplied by the line cord at terminal AT2 (double white wire). The thermostat timer receives input from the sensor at terminals © 2009 Viking Preferred Service... - Page 23 (BA and BR). With unit set for convection, 120 VAC should be present from AT3 to ground. If no voltage is present, replace thermostat timer. If voltage is present, verify wiring between thermostat timer and selector (CV). © 2009 Viking Preferred Service...
-
Page 24: Selector Switch Testing
A glowing igniter does not mean it is good. Often times the igniter will glow, however it is weak and does not supply enough current flow to open the gas valve. © 2009 Viking Preferred Service... -
Page 25: Broil Igniter Testing
BK. Current flow through the gas valve should be 3.2 – 3.6 Amps. Voltage to the valve is 3.2 – 3.6. Applying voltage above this range to the valve can cause damage to the valve. © 2009 Viking Preferred Service... -
Page 26: Broil Valve Testing
1.2 Ω from W-BK. Current flow through the gas valve should be 3.2 – 3.6 Amps. Voltage to the valve is 3.2 – 3.6. Applying voltage above this range to the valve can cause damage to the valve. © 2009 Viking Preferred Service... -
Page 27: Wiring Diagram
Wiring and Schematics ® © 2009 Viking Preferred Service...
Need help?
Do you have a question about the VGSO166 and is the answer not in the manual?
Questions and answers