Advertisement
Available languages
Available languages
KOBALT® and the K Design® are registered
trademarks of LF, LLC. All Rights Reserved.
ATTACH YOUR RECEIPT HERE
Serial Number
Questions, problems, missing parts? Before returning to your retailer, call our
customer service department at 1-888-3KOBALT (1-888-356-2258), 8 a.m - 8 p.m., EST,
Monday - Friday.
AB15106
Purchase Date
1
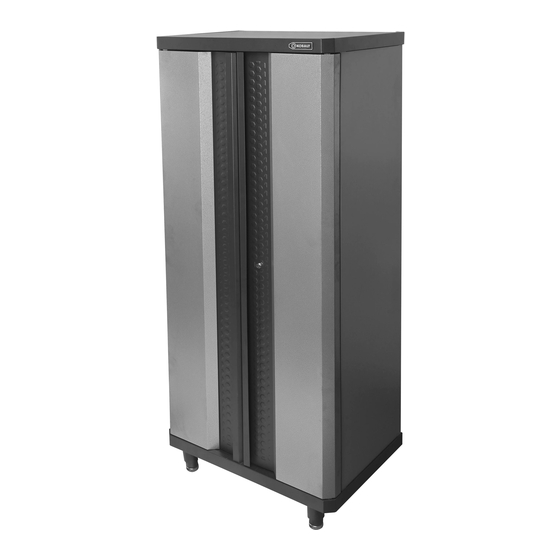
ITEM #0019818
STORAGE
CABINET
MODEL #0054849
Français p. 13
Español p. 25
Lowes.com
Advertisement
Table of Contents

Related Manuals for Kobalt 0054849


Summary of Contents for Kobalt 0054849
- Page 1 STORAGE CABINET MODEL #0054849 Français p. 13 Español p. 25 KOBALT® and the K Design® are registered trademarks of LF, LLC. All Rights Reserved. ATTACH YOUR RECEIPT HERE Serial Number Purchase Date Questions, problems, missing parts? Before returning to your retailer, call our customer service department at 1-888-3KOBALT (1-888-356-2258), 8 a.m - 8 p.m., EST,...
- Page 2 TABLE OF CONTENTS Package Contents........................3 Hardware Contents........................4 Safety Information ........................4 Preparation ..........................4 Assembly Instructions ......................5 Troubleshooting ........................12 Warranty ..........................12 Replacement Parts List ......................12 Lowes.com...
- Page 3 PACKAGE CONTENTS PART DESCRIPTION QUANTITY PART DESCRIPTION QUANTITY Top back panel Left door Left side Right door Right side Leg leveler assembly Top middle back panel Base Bottom middle back panel Bottom shelf Bottom back panel Shelf Lowes.com...
- Page 4 HARDWARE CONTENTS ST4.8 x 10 mm #8-32 x 3/8 in. #8-32 Nut ST4 x 20 mm Wall strap Screw Bolt Qty. 2 Screw Qty. 1 Qty. 8 + 2 Qty. 2 Qty. 2 Lock ST4.8 x 100 mm Pan 5 x 15 x 1.2 mm (preassembled to right door (I)) (preassembled to right door (I)) head screws...
- Page 5 ASSEMBLY INSTRUCTIONS 1. Slide preassembled screws into key slots of top back panel (A) to connect top back panel (A) to top middle back panel (K). Tighten the screws. Repeat process to connect bottom middle back panel (L) to top middle back panel (K) and bottom back panel (M) to bottom middle back panel (L).
- Page 6 ASSEMBLY INSTRUCTIONS 3. Screw leg leveler assemblies (J) to base (E) until tight. 4. Push and tighten the preassembled screws on the assembled unit from Step 2 to the key slots of base (E). Tighten the ST4.8 x 10 mm screws (AA) to the front edge of the base (E) to connect left side (B) and right side (C) to base (E).
- Page 7 ASSEMBLY INSTRUCTIONS 5. Slide and tighten the preassembled screws in the top (D) to the assembled unit. Tighten ST4.8 x 10 mm screws (AA) to the front edge of top (D) to connect the left side (B) and right side (C) to top (D).
- Page 8 ASSEMBLY INSTRUCTIONS 7. Install the bottom shelf (F) by tipping it to the side and inserting it into the cabinet. With bottom shelf (F) at an angle, align the cut-outs on the bottom shelf (F) with the back seams caused by left side (B), right side (C), and bottom back panel (M).
- Page 9 ASSEMBLY INSTRUCTIONS 9. Screw one end of wall strap (EE) to the top back panel (A) with #8-32 x 3/8 in. bolts (BB) and #8-32 nuts (CC). Secure the other end to the wall with ST4 x 20 mm screws (DD). Note: This cabinet should be anchored to the wall using the wall strap (EE) to avoid any potential danger from cabinet falling.
- Page 10 OPTIONAL K-RAIL MOUNTING INSTRUCTIONS 1. Ensure wall studs are plumb and ® square. Place the K-Rail (Item #0103683, sold separately) on the wall Minimum studs at the desired location, with the 61-3/4 in. from ® center of the K-Rail a minimum of the floor 61-3/4 in.
- Page 11 OPTIONAL K-RAIL MOUNTING INSTRUCTIONS 3. Position the bottom outside cabinet ® brackets onto K-Rail as shown. Lock the bottom outside cabinet brackets into position as shown. Lowes.com...
- Page 12 ST4.8 x 100 mm Pan head screws 19818B-HH Bottom middle back panel 19818B-L 5 x 15 x 1.2 mm Washer 19818B-II Bottom back panel 19818B-M Electrical bushing 19818B-JJ Printed in China KOBALT® and the K Design® are registered trademarks of LF, LLC. All Rights Reserved. Lowes.com...
- Page 13 ARTICLE #0019818 ARMOIRE DE RANGEMENT MODÈLE #0054849 KOBALT® et le motif de K® sont des marques de commerce déposées de LF, LLC. Tous droits réservés. JOIGNEZ VOTRE REÇU ICI Numéro de série Date d’achat Des questions, des problèmes, des pièces manquantes? Avant de retourner l’article au détaillant, appelez notre service à...
- Page 14 TABLE DES MATIÈRES Contenu de l’emballage Quincaillerie incluse Consignes de sécurité Préparation Instructions pour l’assemblage Dépannage Garantie Liste des pièces de rechange Lowes.com...
- Page 15 CONTENU DE L’EMBALLAGE PIÈCE DESCRIPTION QUANTITÉ PIÈCE DESCRIPTION QUANTITÉ Panneau arrière supérieur Porte gauche Panneau latéral gauche Porte droite Panneau latéral droit Pied réglable Dessus Panneau central arrière supérieur Base Panneau central arrière inférieur Tablette inférieure Panneau arrière inférieur Tablette Lowes.com...
- Page 16 CONTENU DE L’EMBALLAGE Boulon de Écrou de Courroie de mur ST4,8 de 10 mm 8/32 po x 3/8 po 8/32 po ST4 de 20 mm Qté : 1 Qté : 8 + 2 Qté : 2 Qté : 2 Qté : 2 Vis à...
- Page 17 INSTRUCTIONS POUR L’ASSEMBLAGE 1. Faites glisser les vis préassemblées dans les orifices à rainure du panneau arrière supérieur (A), de façon à raccorder le panneau arrière supérieur (A) au panneau central arrière supérieur (K). Serrez les vis. Répétez ce processus pour raccorder le panneau central arrière inférieur (L) au panneau central arrière supérieur (K), et le panneau arrière...
- Page 18 INSTRUCTIONS POUR L’ASSEMBLAGE 3. Vissez les pieds réglables (J) à la base (E) jusqu’à ce qu’ils soient bien serrés. 4. Poussez et serrez les vis préassemblées de l'unité assemblée à l’étape 1 dans les orifices à rainures de la base (E). Serrez les vis T4,8 de 10 mm (AA) sur le devant du rebord de la base (E) pour assembler le panneau latéral gauche (B) et le...
- Page 19 INSTRUCTIONS POUR L’ASSEMBLAGE 5. Faites glisser et serrez les vis préassemblées sur le dessus (D) de l’armoire assemblée. Serrez les vis ST4,8 de 10 mm (AA) à l’avant du dessus de l’armoire (D) pour assembler le panneau latéral gauche (B) et le panneau latéral droit (C) au dessus de l’armoire (D).
- Page 20 INSTRUCTIONS POUR L’ASSEMBLAGE 7. Installez la tablette inférieure (F) en l’inclinant sur le côté et en l'insérant dans l’armoire. Tout en maintenant la tablette inférieure (F) en angle, alignez les entailles de la tablette inférieure (F) avec les joints arrière formés par le panneau latéral gauche (B), le panneau latéral droit (C) et le panneau arrière inférieur (M).
- Page 21 INSTRUCTIONS POUR L’ASSEMBLAGE 9. Vissez une des extrémités de la courroie de mur (EE) au panneau arrière supérieur (A) au moyen de boulons de 8/32 po x 3/8 po (BB) et d’écrous de 8/32 po (CC). Fixez l’autre extrémité de la courroie au mur, au moyen de vis ST4 de 20 mm (DD).
- Page 22 INSTRUCTIONS DE MONTAGE FACULTATIVES POUR LA TRAVERSE K-RAIL 1. Assurez-vous que les montants de Au moins à 156,85 cloison sont d’aplomb et droits. Placez cm du plancher ® la traverse K-Rail (article #0103683, au minimum vendu séparément) à l’endroit désiré sur les montants de cloison, en prenant soin de placer son centre au moins à...
- Page 23 INSTRUCTIONS DE MONTAGE FACULTATIVES POUR LA TRAVERSE K-RAIL 3. Placez les supports extérieurs inférieurs de l’armoire sur la ® traverse K-Rail , comme le montre l’illustration. Bloquez en place les supports extérieurs inférieurs de l’armoire, tel qu’il est illustré. Lowes.com...
- Page 24 Panneau central arrière inférieur 19818B-L Rondelle de 5 x 15 x 1,2 mm 19818B-II Panneau arrière inférieur 19818B-M Embout électrique 19818B-JJ Imprimé en Chine KOBALT® et le motif de K® sont des marques de commerce déposées de LF, LLC. Tous droits réservés. Lowes.com...
- Page 25 ARTÍCULO #0019818 GABINETE PARA ALMACENAJE MODELO #0054849 KOBALT® y K Design® son marcas registradas de LF, LLC. Todos los derechos reservados. ADJUNTE SU RECIBO AQUÍ Número de serie Fecha de compra ¿Preguntas, problemas, piezas faltantes? Antes de volver a la tienda, llame a nuestro Departamento de Servicio al Cliente al 1-888-3KOBALT (1-888-356-2258), de lunes a viernes de 8 a.m.
- Page 26 ÍNDICE Contenido del paquete Aditamentos Información de seguridad Preparación Instrucciones de ensamblaje Solución de problemas Garantía Lista de piezas de repuesto Lowes.com...
- Page 27 CONTENIDO DEL PAQUETE PIEZA DESCRIPCIÓN CANTIDAD PIEZA DESCRIPCIÓN CANTIDAD Panel posterior superior Puerta izquierda Lado izquierdo Puerta derecha Lado derecho Conjunto nivelador de la pata Cubierta Panel posterior superior central Base Panel posterior inferior central Repisa inferior Panel posterior inferior Repisa Lowes.com...
- Page 28 ADITAMENTOS Tornillo Perno Tornillo Banda para pared Tuerca ST4,8 x 10 mm #8-32 x 3/8 pulg ST4 x 20 mm Cant. 1 #8-32 pulg Cant. 8 + 2 Cant. 2 Cant. 2 Cant. 2 Tornillos de cabeza plana 5 mm x 15 mm x 1,2 mm ST4,8 x 100 mm Arandela Seguro...
- Page 29 INSTRUCCIONES DE ENSAMBLAJE 1. Deslice los tornillos ensamblados previamente en los chaveteros del panel posterior superior (A) para conectarlo al panel posterior superior central (K). Apriete los tornillos. Repita el proceso para conectar el panel posterior inferior central (L) al panel posterior superior central (K) y el panel posterior inferior (M) al panel posterior inferior central (L).
- Page 30 INSTRUCCIONES DE ENSAMBLAJE 3. Atornille los ensambles de los niveladores de las patas (J) a la base (E) hasta que queden firmes. 4. Coloque y apriete los tornillos previamente ensamblados en la unidad ensamblada en el Paso 1 en las ranuras de la llave de la base (E).
- Page 31 INSTRUCCIONES DE ENSAMBLAJE 5. Deslice y apriete los tornillos previamente ensamblados en la cubierta (D) en la unidad ensamblada. Apriete los tornillos ST4,8 x 10 mm (AA) en el borde frontal de la cubierta (D) para conectar el lado izquierdo (B) y el lado derecho (C) con la cubierta (D).
- Page 32 INSTRUCCIONES DE ENSAMBLAJE 7. Instale la repisa inferior (F) inclinándola hacia un costado, luego introdúzcala en el gabinete. Manteniendo la repisa inferior (F) angulada, alinee los cortes de la repisa inferior (F) con las uniones posteriores que forman el lado izquierdo (B), el lado derecho (C) y el panel posterior inferior (M).
- Page 33 INSTRUCCIONES DE ENSAMBLAJE 9. Atornille un extremo de la banda para pared (EE) en el Panel posterior superior (A) con pernos #8/32 x 3/8 pulg (BB) y tuercas #8/32 pulg (CC). Fije el otro extremo a la pared con tornillos ST4 x 20 mm (DD). Nota: Este gabinete se debe anclar a la pared con la banda para pared (EE) para Pared...
- Page 34 INSTRUCCIONES PARA MONTAJE CON RIEL EN FORMA DE K 1. Asegúrese de que todos los montantes A una distancia estén a plomo y a escuadra. Coloque mínima de 156,85 ® el K-Rail (artículo #0103683, se cm del piso vende por separado) en los montantes de la pared en la ubicación deseada, ®...
- Page 35 INSTRUCCIONES PARA MONTAJE CON RIEL EN FORMA DE K 3. Coloque las abrazaderas del gabinete ® inferior exterior en el K-Rail , como se muestra. Fije las abrazaderas para gabinete exteriores inferiores en su posición, como se muestra. Lowes.com...
- Page 36 Tornillos de cabeza plana ST4,8 x 100 mm 19818B-HH Panel posterior inferior central 19818B-L 5 x 15 x 1,2 mm Arandela 19818B-II Panel posterior inferior 19818B-M Conector eléctrico 19818B-JJ Impreso en China KOBALT® y K Design® son marcas registradas de LF, LLC. Todos los derechos reservados. Lowes.com...
Need help?
Do you have a question about the 0054849 and is the answer not in the manual?
Questions and answers