
Related Manuals for Westinghouse QR0313


Summary of Contents for Westinghouse QR0313
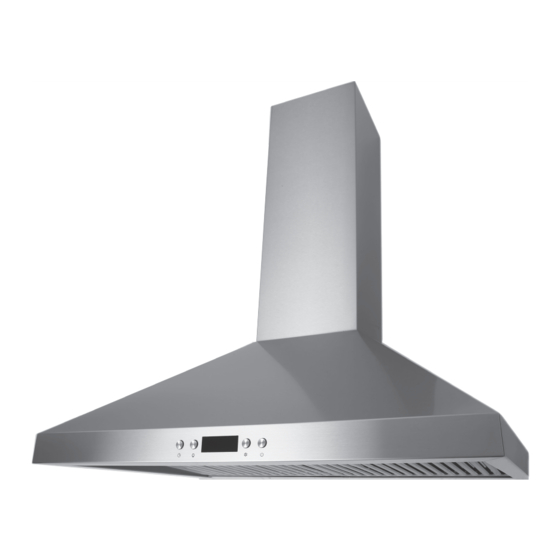
- Page 1 CHIMNEY STYLE STAINLESS STEEL RANGE HOOD HOTTE CHEMINÉE EN ACIER INOXYDABLE OWNER’S MANUAL MANUEL DE L’UTILISATEUR # QR0313...
-
Page 2: Table Of Contents
Table of Contents Table of Contents . . . . . . . . . . . . . . . . . . . . . . . . . . . . . . . . . . . 2 Operation . - Page 3 Safety Information Cooking Safety Information WARNING: To reduce the risk of fire, use only metal duct 1 . Never leave the range hood unattended when in use . work . Never use plastic duct work . 2 . Never cook over open flames under the range hood. WARNING: To reduce the risk of fire or electric shock, do 3 .
-
Page 4: Warranty
Warranty ONE YEAR LIMITED WARRANTY A thorough inspection must be made before installation and any damage must be promptly reported . We will not be liable for failures or damage that could have been discovered or avoided by proper inspection and testing prior to installation . Conglom Kitchen &... -
Page 5: Pre-Installation
Pre-Installation TOOLS REQUIRED Measuring tape Level Utility knife Adjustable Marker or pencil Duct tape wrench Electric drill Flathead Phillips screwdriver or powered screwdriver screwdriver Safety goggles Safety gloves HARDWARE INCLUDED NOTE: Parts not shown to actual size. Part Description Quantity Toggle Bolt M5 x 16 mm Screw / Washer M4 x 8 mm Tapping Screws... -
Page 6: Package Contents
Pre-Installation (continued) PACKAGE CONTENTS Part Description Quantity Range hood (including pre-installed controls, lights, blower, filters and damper) Lower chimney Upper chimney Hood bracket Chimney support bracket... -
Page 7: Planning Installation
Pre-Installation (continued) PLANNING INSTALLATION WARNING: Always wear safety goggles and gloves Number of people required: 2 or more during installation . Carefully check the range hood for damage and for missing parts prior to installation . If there is any damage or if you are missing parts, NOTE: do not proceed with the installation . - Page 8 Pre-Installation (continued) 6 . Adjust old duct work or install new duct work, as necessary, by following these guidelines: - Your venting system must vent to the outdoors either horizontally through the back wall (4) or vertically through the roof (5) . - A straight, short duct run will allow the hood to perform most efficiently.
- Page 9 Pre-Installation (continued) WIRING CONNECTION REQUIREMENTS DANGER: Risk of electrical shock . This range hood Installation work and electrical wiring must be done by a qualified must be properly grounded . person(s) in accordance with all applicable codes and standards, including fire-rated construction. DANGER: Turn off the power circuit breaker or the power switch on the junction box before installing this OBSERVE ALL GOVERNING CODES AND ORDINANCES WARNINGS...
-
Page 10: Installation
Installation DRILLING THE PILOT HOLES Ceiling 0.8 in. (20 mm) - Draw a vertical line (1) on the supporting wall up to the ceiling, or as high as practical, at the center of the area in which the hood will be installed . 5.36 in. - Page 11 Installation (continued) INSTALLING THE DAMPER (IF NECESSARY) WARNING: Sharp edges . Wear safety gloves . CAUTION: Be very careful when installing the damper . Applying too much force or bending the damper too much may damage or break the damper hinge ends . The damper is pre-installed at the factory.
-
Page 12: Installing The Chimney
Installation (continued) INSTALLING THE CHIMNEY WARNING: Sharp edges . Wear safety gloves . CAUTION: Minimize movement of the chimney extensions to avoid scratches . - Remove the plastic covering on the chimney extensions (B,C) and place them on the floor. - Lower the upper chimney (C) onto the lower chimney (B) . -
Page 13: Operation
Operation There are four buttons, ON/OFF, SPEED, LIGHT and CLOCK SETUP . The center screen will show the clock (12 hour) . TURNING ON/OFF THE UNIT DELAY SHUT OFF FUNCTION - Press (5) to turn on the power . - While the fan is working, press (5) once, the fan and lights When you turn the power on, the unit starts working in low will automatically turn off after 2 minutes . -
Page 14: Maintenance
Maintenance FILTERS DANGER: Turn off the power circuit breaker or the power switch on the junction box before performing maintenance. When filters wear out, replace them with similar filters with stainless Touching circuitry inside the range hood while it is steel clips. -
Page 15: Care And Cleaning
Care and Cleaning RANGE HOOD WARNING: Failure to maintain basic standards of care and cleaning of the range hood will increase the risk of fire. The range hood should be cleaned (regularly internally and externally) to preserve its appearance and performance. Do Not: - Always clean in the direction of the grain (original - Do not use corrosive or abrasive detergents, steel... -
Page 16: Troubleshooting
Troubleshooting DANGER: Turn off the power circuit breaker or the power switch on the junction box before performing maintenance . Touching circuitry inside the range hood while it is energized will result in death or serious injury . Problem Solution The range hood will not operate . -
Page 17: Specifications
Top venting LCD Screen 1 .5A lock base light bulb QR0313 10.2 in. (260 mm) H Lower Chimney 8.74 in. W x 8.82 in D x 24.02 in H (222 mm W x 224 mm D x 610 mm H) Upper Chimney 8.66 in. -
Page 18: Service Parts
Service Parts If you are missing parts or if you require replacement parts, please contact our customer service team at customer .service@conglomkb .com or 1-877-333-0098 (8:30 am – 5 pm, EST, Monday–Friday). Identify the required part(s) and have the part number(s) ready. Part Description Code Quantity... -
Page 19: Consignes De Sécurité
Table des matières OWNER'S MANUAL . . . . . . . . . . . . . . . . . . . . . . . . . . . . . . . . . . 2 Installation . - Page 20 Consignes de sécurité (suite) Information sur la sécurité lors de la cuisson AVERTISSEMENT : Pour réduire le risque d’incendie, n’utiliser que des conduits de métal. Ne jamais utiliser des 1 . Ne jamais laisser sans surveillance lorsqu’en service . conduits en plastique . 2 .
-
Page 21: Garantie
Garantie GARANTIE LIMITÉE D’UN AN Inspecter minutieusement le produit avant l’installation et signaler tout dommage sans délai. Nous ne serons pas responsables des défaillances ou des dommages qui auraient dû être découverts ou évités par une inspection adéquate et des essais avant l’installation. Conglom Kitchen and Bath garantit ce produit contre tout défaut dans les matériaux ou la fabrication, pour une période d’un (1) an à... -
Page 22: Préinstallation
Préinstallation OUTILS REQUIS Couteau tout Ruban à mesurer Niveau usage Crayon Ruban adhésif Clé Tournevis Tournevis Phillips Tournevis plat électrique Lunettes de sécurité Gants de sécurité QUINCAILLERIE INCLUSE REMARQUE : La quincaillerie montrée n'est pas de taille réelle. Pièce Description Quantité... -
Page 23: Contenu De L'emballage
Préinstallation (suite) CONTENU DE L'EMBALLAGE Pièce Description Quantité Hotte cheminée (avec commandes, lumières, ventilateur, filtres et clapets) Cheminée inférieure Cheminée supérieure Crochets de hotte Support du conduit supérieur CONGLOMKB .COM Veuillez contacter customer.service@conglomkb.com ou 1-877-333-0098 pour toute assistance supplémentaire. -
Page 24: Planification De L'installation
Préinstallation (suite) PLANIFICATION DE L'INSTALLATION AVERTISSEMENT : Toujours porter des lunettes et des Nombre de personnes requises : 2 ou plus . gants de sécurité pendant l'installation. Vérifier soigneusement la hotte cheminée pour tout dommage et pour toute pièce manquante avant l’installation. S’il y a des dommages REMARQUE : ou des pièces manquantes, ne pas procéder à... - Page 25 Préinstallation (suite) 6. Pour réglez des vieux conduits ou installer des nouveaux conduits, si nécessaire, suivre les directives suivantes: - Votre système de ventilation doit évacuer à l’extérieur, soit horizontalement à travers le mur arrière (4) ou verticalement à travers le toit (5) . - Un conduit droit et court permettra à...
- Page 26 Préinstallation (suite) EXIGENCES POUR CONNEXIONS DE CÂBLAGES DANGER : Risque de choc électrique. La hotte doit être mise en terre adéquatement. Les travaux d’installation et le câblage électrique doivent être effectués par une personne qualifiée et en conformité avec tous les codes et normes applicables, y compris la résistance au feu.
-
Page 27: Installation
Installation Plafond PERÇAGE DU MUR 0,8 po (20 mm) - Dessinez une ligne verticale sur le mur qui supportera la hotte jusqu'au plafond, ou aussi haut que possible, au centre de la zone dans laquelle la hotte sera installée. 5,36 po (136 mm) - Dessinez une ligne horizontale (2) à... - Page 28 Installation (suite) INSTALLATION DU CLAPET AVERTISSEMENT : Les bords sont tranchants . Porter des gants de sécurité. AVERTISSEMENT : Soyez très prudent lors de l'installation des clapets . Le fait d'appliquer trop de force ou de ne pas assez plier le clapet peut endommager ou briser les extrémités des charnières à...
- Page 29 Installation (suite) INSTALLATION DE LA CHEMINÉE AVERTISSEMENT : Les bords sont tranchants . Porter des gants de sécurité. ATTENTION : Réduire au minimum le mouvement des prolongements de cheminée pour éviter les rayures. - Enlever le film en plastique sur les prolongements de cheminée (recouvrement de conduits).
-
Page 30: Fonctionnement
Fonctionnement Il y a quatre boutons, la mise en marche / l'arrêt, la vitesse, la lumière et l'horloge. L'écran du centre affiche l'heure (12 heures). MISE EN MARCHE/ARRÊT DE L'UNITÉ DÉLAI D'ARRÊT - Appuyez sur (5) pour allumer l'appareil . Lorsque - Appuyez sur (5) lorsque la hotte est en marche, elle va vous allumez l’appareil, l’appareil commencera à... -
Page 31: Entretien
Entretien REMPLACEMENT DES FILTRES DANGER : Éteignez le disjoncteur électrique ou l’interrupteur d’alimentation sur la boîte de jonction avant d’installer cet Lorsque les filtres sembles usés, remplacez-les avec des filtres appareil. Toucher un circuit intérieur de la hotte alors qu’il est sous similaires en aluminium ou à... -
Page 32: Soin Et Nettoyage
Soin et nettoyage HOTTE CHEMINÉE AVERTISSEMENT : Le fait de ne pas faire les tâches de soin et de nettoyage de la hotte cheminée peut accroître le risque d’incendie. La hotte cheminée doit être nettoyée régulièrement (à l’intérieur et à l’extérieur) afin de préserver son apparence et son fonctionnement. À... -
Page 33: Dépannage
Dépannage DANGER : Éteignez le disjoncteur électrique ou l’interrupteur d’alimentation sur la boîte de jonction avant de réparer cet appareil. Toucher un circuit intérieur de la hotte alors qu’il est sous tension peut entraîner des blessures graves, voir mortelles. Problème Solution La hotte cheminée ne fonctionne pas. -
Page 34: Caractéristiques
JDR 16, GU10 à base Hz / 1,5A Écran ACL le haut tournante QR0313 10,2 po (260 mm) H Basse Cheminée inférieure 8,74 po L x 8,82 po P x 24,02 po H (222 mm L x 224 mm P x 610 mm H) Cheminée supérieure 8,66 po L x 8,74 po P x 24,02 po H (220 mm L x 222 mm P x 610 mm H) -
Page 35: Pièces De Rechange
Pièces de rechange Si des pièces sont manquantes ou si vous avez besoin de pièces de rechange, veuillez nous contacter au customer.service@conglomkb.com ou 1-877-333-0098 (lundi au vendredi, 8h30 à 17h, HNE). Veuillez identifier les pièces nécessaires et ayez les codes à portée de main. Pièces Description Code Quantité... - Page 36 Imported by / Importé par : St-Laurent, Québec, H4S 2C3 1-877-333-0098 | customer.service@conglomkb.com (service available in English and French, Monday - Friday from 8:30am - 5pm EST) (service disponible en anglais et français, du lundi au vendredi, 8h30 à 17h, H.N.E.) www.conglomkb.com Made in China / Fabriqué...
Need help?
Do you have a question about the QR0313 and is the answer not in the manual?
Questions and answers