
Subscribe to Our Youtube Channel
Related Manuals for Westinghouse QR044


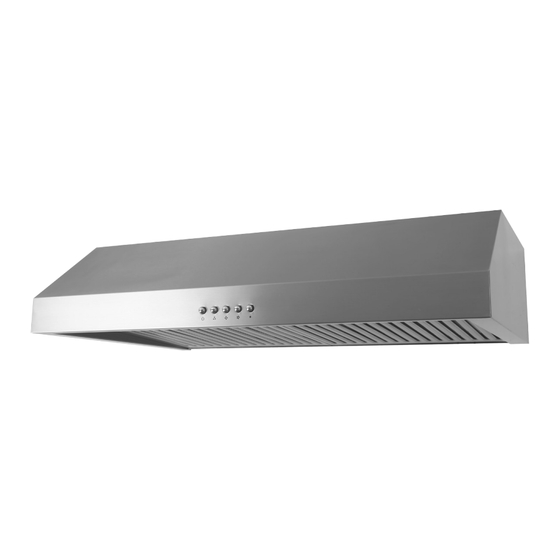
Summary of Contents for Westinghouse QR044
- Page 1 UNDER CABINET STAINLESS STEEL RANGE HOOD HOTTE DE CUISINIÈRE POUR DESSOUS D’ARMOIRE EN ACIER INOXYDABLE OWNER’S MANUAL MANUEL DE L’UTILISATEUR # QR044...
-
Page 2: Table Of Contents
Keep this appliance clean and free of grease and residue build-up at all times to prevent fires. CAUTION: This device is for general ventilating use only . Do not use to exhaust hazardous or explosive materials and vapors . QR044... - Page 3 Safety Information (continued) Cooking Safety Information To reduce the risk of fire, use only metal WARNING: 1 . Never leave the range hood unattended when in use . duct work . Never use plastic duct work . 2 . Never cook over open flames under the range hood. To reduce the risk of fire or electric shock, WARNING: 3 .
-
Page 4: Warranty
Before you make your call, please ensure that you have: - Model number or description . - Proof of sale . - Details regarding the defect and/or part number . - Name(s) and address(es) of the owner and/or installer . QR044... -
Page 5: Pre-Installation
Pre-Installation TOOLS REQUIRED Measuring tape Level Utility knife Adjustable Pencil Duct tape wrench Flathead Needle nose Phillips screwdriver screwdriver pliers Hammer Electric drill Safety goggles Safety gloves HARDWARE INCLUDED NOTE: Parts not shown to actual size. Part Description Quantity Long tapping screw - (M5 mm x 12 mm) Short tapping screw - (M4 mm x 8 mm) CONGLOMKB .COM Please contact customer.service@conglomkb.com or 1-877-333-0098 for further assistance. -
Page 6: Package Contents
Pre-Installation (continued) PACKAGE CONTENTS Part Description Quantity Range hood (including filters) Damper (located inside the hood) QR044... -
Page 7: Planning Installation
Pre-Installation (continued) PLANNING INSTALLATION WARNING: Always wear safety goggles and gloves Number of people required: 2 or more during installation . Carefully check the range hood for damage and for missing parts prior to installation . If there is any damage or if you are missing parts, do not proceed with the installation . - Page 8 5 ft (1 .52 m) 90° Flat Elbow 12 ft (3 .66 m) 2 x 90° Elbow 10 ft (3 .05 m) 9 ft (2.74 m) Straight duct 9 ft (2.74 m) Wall cap 0 ft (0 m) Fig. 8 QR044...
- Page 9 Pre-Installation (continued) WIRING CONNECTION REQUIREMENTS DANGER: Risk of electrical shock . This range hood Installation work and electrical wiring must be done by a qualified must be properly grounded . person(s) in accordance with all applicable codes and standards, including fire-rated construction. OBSERVE ALL GOVERNING CODES AND ORDINANCES WARNINGS DANGER: Turn off the power circuit breaker or the power switch on the junction box before installing this...
-
Page 10: Installation
- Lift the lid (8) of the damper and screw the damper (B) to the range hood (A) with the two short tapping screws (BB) . - Seal the damper (B) to the range hood (A) on all four sides with duct tape . QR044... - Page 11 Installation (continued) INSTALLING THE RANGE HOOD DANGER: Turn off the power circuit breaker or the power switch on the junction box before installing this unit . Touching circuitry inside the range hood while it is energized will result in death or serious injury . DANGER: If installing this unit over a gas range, turn off the gas at the source before installing or servicing this unit .
-
Page 12: Operation
[Low Speed (2), Medium Speed (3), High Speed (4)] to select the desired level of power . Once a button is pressed, the previous speed mode will be cancelled . - Press the power switch (1) to turn off the fan . QR044... -
Page 13: Maintenance
Maintenance REPLACING FILTERS DANGER: Turn off the power circuit breaker or the power switch on the junction box before performing When filters need replacing, exchange with similar filters with maintenance . Touching circuitry inside the range hood while stainless steel clips. Also replace filters that are damaged with it is energized will result in death or serious injury . -
Page 14: Care And Cleaning
. a low temperature and a short cycle setting . The filter may become discoloured in a dishwasher, but this does not affect its performance . - Dry the filters before re-installing them in the range hood . QR044... -
Page 15: Troubleshooting
Troubleshooting DANGER: Turn off the power circuit breaker or the power switch on the junction box before performing maintenance . Touching circuitry inside the range hood while it is energized will result in death or serious injury . Problem Solution The range hood will not operate . -
Page 16: Specifications
29.8 in. (757 mm) W High 2 x Max . 25W or 380 ± 120~60Hz 35W/ JDR 16, GU10 Top venting QR044 18 in. (458 mm) D Medium 1 .5A twist and lock base Back venting 7 in . (177 mm) H... -
Page 17: External Diagram Of Range Hood
Specifications (continued) EXTERNAL DIAGRAM OF RANGE HOOD 757 mm (29.8 in) 706 mm (27.79 in) 250 mm (9 .81 in) 28 mm 22 mm (0.87 in) (1.25 in) 39 mm dia. hole (1.5 in) 18 mm (0.68 in) 80 mm (3.12 in) 93.5 mm (3.68 in) 50 mm (2 in) -
Page 18: Service Parts
1-877-333-0098 (8:30 am – 5 pm, EST, Monday–Friday). Identify the required part(s) and have the part number(s) ready. Part Description Code Quantity Control Switch QHR106 Capacitor QHR100 Light QHR121 Light Base QHR123 Motor QHR125 QHR109 Fan Guard QHR110 Filter QHR117 QHR139 Long Tapping Screws (M5 x 12mm) Tapping Screws (M4 x 8mm) QHR132 QR044... -
Page 19: Manuel De L'utilisateur
Table de matières OWNER’S MANUAL . . . . . . . . . . . . . . . . . . . . . . . . . . . . . . . . . . 2 Fonctionnement . - Page 20 1 . Les filtres doivent être nettoyés périodiquement pour éliminer l’accumulation de résidus de cuisson. Les filtres qui présentent des signes d’usure doivent être changés immédiatement. 2 . Ne jamais enlever de pièces à nettoyer. Le démontage ne peut être fait que par une personne qualifiée. QR044...
-
Page 21: Garantie
Garantie GARANTIE LIMITÉE D’UN AN Inspecter minutieusement le produit avant l’installation et signaler tout dommage sans délai. Nous ne serons pas responsables des défaillances ou des dommages qui auraient dû être découverts ou évités par une inspection adéquate et des essais avant l’installation. Conglom Kitchen and Bath garantit ce produit contre tout défaut dans les matériaux ou la fabrication, pour une période d’un (1) an à... -
Page 22: Préinstallation
Marteau électrique sécurité Gants de sécurité QUINCAILLERIE INCLUSE REMARQUE : La quincaillerie montrée n’est pas de taille réelle. Pièce Description Quantité Vis taraudeuses longues - (M5 mm x 12 mm) Vis taraudeuses courtes - (M4 mm x 8 mm) QR044... -
Page 23: Contenu De L'emballage
Préinstallation (suite) CONTENU DE L’EMBALLAGE Pièce Description Quantité Hotte de cuisinière Clapet (à l’intérieur de la hotte) CONGLOMKB .COM Veuillez contacter customer.service@conglomkb.com ou 1-877-333-0098 pour toute assistance supplémentaire. -
Page 24: Planification De L'installation
à l’électricité dans la partie inférieure de l’armoire ou sur le mur extérieur, en fonction de la direction de l’évacuation choisi. Ventilation par le haut Ventilation par l’arrière Centrale Centrale dia. trou 10-1/4” dia. trou 10-1/4” Fig.3 Fig.4 QR044... - Page 25 Préinstallation (suite) Suivre ces lignes directrices lors de l’installation de conduits : - Votre système de ventilation doit évacuer à l’extérieur, soit horizontalement à travers le mur arrière (13) ou verticalement à travers le toit (14) (Voir la Fig . 5/Fig . 6/Fig . 7) . - Calculer la longueur des conduits en additionnant les longueurs dans le tableau (Fig.
- Page 26 9. Le gabarit du câble doit respecter les exigences fixées par Vert/Jaune/Vert (mise à la terre) le National Electrical Code ANSI/NFPA 70, ou les normes CSA C22.1-94, le code canadien de l’électricité Parti 1 et C22.2 no 0-M91 et tous les codes et normes locaux. QR044...
-
Page 27: Installation
Installation RETRAIT DU DISQUE DÉFONÇABLE DE CÂBLAGE RETRAIT DU TROU DÉFONÇABLE DE ÉLECTRIQUE VENTILATION - Choisir le disque défonçable de ventilation à retirer selon AVERTISSEMENT : Toujours porter des lunettes et votre type d’installation. Utiliser le trou supérieur (3) pour des gants de sécurité... - Page 28 (A). Sceller les joints avec du ruban adhésif, en assurant un ajustement hermétique. - Rebrancher le câble d’alimentation et les fils à l’alimentation électrique. ÉTAPE FINALE - Mettre la hotte en marche et s’assurer que les lumières et le ventilateur fonctionnent correctement . QR044...
-
Page 29: Fonctionnement
Fonctionnement REMARQUE: Le ventilateur et les lumières sont gérés indépendamment les uns des autres. MISE EN MARCHE/ARRÊT DE L’UNITÉ ALLUMER/FERMER LA LUMIÈRE - Pour mettre le ventilateur en fonction, appuyer sur le - Appuyer sur le bouton d’éclairage (5) pour éteindre les commutateur de contrôle de vitesse [basse vitesse (2), lumières . -
Page 30: Entretien
- Pousser la nouvelle ampoule (2) en place et la tourner dans le sens horaire . Ne pas relâcher l’ampoule jusqu’à ce que vous soyez sûr que l’ampoule soit fermement installée. - Si les nouvelles ampoules ne fonctionnent pas, s’assurer que l’ampoule soit insérée correctement. QR044... -
Page 31: Soin Et Nettoyage
Soin et nettoyage HOTTE DE CUISINIÈRE AVERTISSEMENT : Le fait de ne pas faire les tâches de soin et de nettoyage de la hotte de cuisinière peut accroître le risque d’incendie . La hotte de cuisinière doit être nettoyée régulièrement (à l’intérieur et à l’extérieur) afin de préserver son apparence et son fonctionnement. À... -
Page 32: Dépannage
- Vérifier si l’ampoule est bien vissée. Visser à fond au besoin. - Retirer l’ampoule et en insérer une que vous savez être fonctionnelle. Si l’ampoule qui fonctionne correctement ne s’allume pas, le problème peut être l’assemblage de la lumière. Réparer ou remplacer l’assemblage de lumière. QR044... -
Page 33: Caractéristiques
29.8 po. (757 mm) L Haute 2 x Max . 25W ou 35W/ Bouton- 380 ± 120~60Hz Ventilation par le haut QR044 18 po. (458 mm) P Moyenne JDR 16, GU10 à base 1 .5A Poussoir Ventilation par l’arrière tournante 7 po . -
Page 34: Schéma Externe De La Hotte De Cuisinière
18 po (458 mm) ARRIÈRE 0,75 po 0,87 po (22 mm) (20 mm) 0,38 po (10 mm) 9,81 po (250 mm) dia. trou 3,12 po (80 mm) 7 po 3,68 po (177 mm) (93.5 mm) 29,8 po (757 mm) QR044... -
Page 35: Pièces De Rechange
Pièces de rechange Si des pièces sont manquantes ou si vous avez besoin de pièces de rechange, veuillez nous contacter au customer .service@conglomkb .com ou 1-877-333-0098 (lundi au vendredi, 8h30 à 17h, HNE). Veuillez identifier les pièces nécessaires et ayez les codes à portée de main. Pièce Description Code Quantité... - Page 36 Imported by / Importé par : St-Laurent, Québec, H4S 2C3 1-877-333-0098 | customer.service@conglomkb.com (service available in English and French, Monday - Friday from 8:30am - 5pm EST) (service disponible en anglais et français, du lundi au vendredi, 8h30 à 17h, H.N.E.) www.conglomkb.com Made in China / Fabriqué...
Need help?
Do you have a question about the QR044 and is the answer not in the manual?
Questions and answers