
Related Manuals for Panasonic AK-LZ20M85G


Summary of Contents for Panasonic AK-LZ20M85G
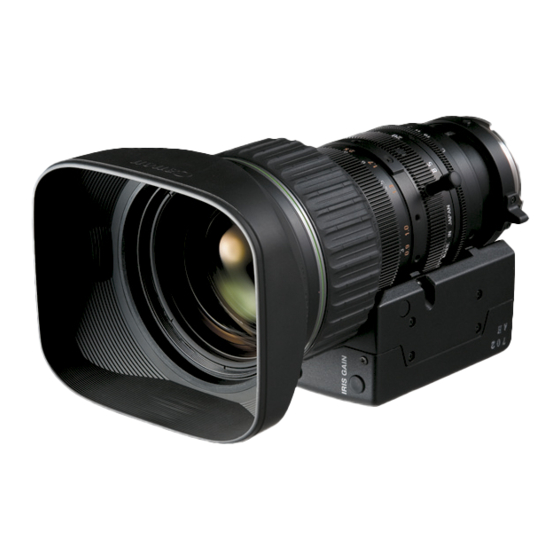
- Page 1 Operating Instructions Broadcast Television Lens AK-LZ20M85G Model No. Before operating this product, please read the instructions carefully and save this manual for future use.
-
Page 2: Operating Instructions
ENGLISH VERSION For your safety WARNING: CAUTION • TO REDUCE THE RISK OF FIRE OR SHOCK RISK OF ELECTRIC SHOCK HAZARD, DO NOT EXPOSE THIS EQUIPMENT TO DO NOT OPEN RAIN OR MOISTURE. CAUTION: TO REDUCE THE RISK OF ELECTRIC SHOCK, •... -
Page 3: Important Safety Instructions
IMPORTANT SAFETY INSTRUCTIONS Read these operating instructions carefully before using the unit. Follow the safety instructions on the unit and the applicable safety instructions listed below. Keep these operating instructions handy for future reference. 1) Read these instructions. 10) Protect the power cord form being walked on or pinched particularly plugs,... -
Page 4: Table Of Contents
Adjustment ..............9 Overview Thank you for purchasing this Panasonic 20 broadcast television lens. The model AK-LZ20M85G is a 20 broadcast television lens designed to be used with 2/3˝ image tube cameras and HDTV cameras. Configuration Make sure all of the following items are included in the packing box. -
Page 5: Precautions For Use
Precautions for use Dealing with abnormalities Handling the product Should any of the abnormalities described below occur, Never allow water to enter or be spilled on the product. immediately unplug the lens cable from the camera, Immediately stop using the product if water enters the and then contact the dealer where you purchased this product. - Page 6 Precautions for use To the customer Matsushita shall bear no responsibility for damage resulting from improper operation of this product by the customer. Matsushita shall make no guarantees about the product quality, functions, or Operating Instructions and its marketability and suitability for the customer’s purpose.
-
Page 7: Major Operating Controls And Their Functions
Major operating controls and their functions Focus ring Auto/Manual iris selecting switch Turn this ring to focus on the object. Use the iris operation mode change-over switch to change from manual to automatic iris operation and back. Iris ring ... -
Page 8: Installation
Installation Mounting the lens on the camera Connect the pigtail cord connector on the back of the drive unit to the iris connector on the camera head. Before mounting the lens on the camera, make sure that the camera’s power is turned off. Pigtail cord connector Position the camera horizontally or tilt it up slightly. -
Page 9: Hood
Installation Mounting the hood on the lens Usually, when the lens is shipped from the factory, the hood is put on the lens. If you remove the hood in some reason, please attach it as instructed below. Snap the hood on the front barrel of the lens. Snap the hood on the front barrel of the lens, and shift the mark on the front barrel of the lens 90 degrees from the index mark on the hood. -
Page 10: Adjustment
Adjustment Flange back adjustment of the Bring the object into focus by turning the focus ring. lens Adjust the flange back of the lens as follows: Note Refer to the “Operating procedure” on the page 13 as for details on zooming, focusing and iris operation performed with the flange back adjustment. - Page 11 Adjustment Turn the flange back adjustment ring to bring the object into focus. Flange back adjustment ring Repeat steps 3 to 7 several times until the objects is brought into focus at both the wide and telephoto ends. After making sure that the object is in sharp focus, tighten the flange back lock screw.
- Page 12 Adjustment Iris gain adjustment Set iris of the camera to AUTO mode and the An iris gain adjustment trimmer is located on the front of the auto/manual iris selecting switch to “A”. lens drive unit. See Operating Instructions as for the operation of the The iris gain is properly set at the factory.
- Page 13 Siemens Star 12 (E)
-
Page 14: Zoom Lever (Mounted On The Lens Unit)
Operating procedure Focus operation The zoom, focus and iris of this lens are operated with the manual. Set the auto/manual focus selecting switch at the front of the lens drive unit to “M” position. Manual operation Zooming Set the auto/manual zoom selecting switch at the front Auto/Manual focus of the lens drive unit to “M”... - Page 15 Operating procedure Macro operation Iris operation To operate the macro, manually turn the macro button at the Set the auto/manual iris selecting switch at the front of back of the lens. the lens drive unit to “M” position. Press the macro button to unlock the macro ring. While holding it down, turn the macro ring clockwise as viewed from the camera side to allow macro shooting.
-
Page 16: General Circuit Diagram
General circuit diagram 1: This line is not connected. 15 (E) -
Page 17: Appearance
Appearance Unit: mm 16 (E) -
Page 18: Troubleshooting
Troubleshooting Symptom Cause and remedial action Focusing doesn’t work on close objects. Please engage the macro function. Focusing doesn’t work when zoomed in. Please adjust the flange back. Light hunting occurs. Please adjust the iris gain. Images are too bright (or too dark). 17 (E) -
Page 19: Specifications
Specifications Input voltage: 12 V DC (10 V to 17 V DC) Power consumption: 5.2 W or less (at 12 V DC) indicates safety information. Application: 2/3-inch image tube and HDTV cameras Focal Length: 8.5 mm to 170 mm Zoom ratio: 20... - Page 20 PANASONIC BROADCAST & TELEVISION SYSTEMS COMPANY UNIT COMPANY OF PANASONIC CORPORATION OF NORTH AMERICA Executive Office: One Panasonic Way 4E-7, Secaucus, NJ 07094 (201) 348-7000 EASTERN ZONE: One Panasonic Way 4E-7, Secaucus, NJ 07094 (201) 348-7621 Southeast Region: 1225 Northbrook Parkway, Ste 1-160, Suwanee, GA 30024 (770) 338-6835...
Need help?
Do you have a question about the AK-LZ20M85G and is the answer not in the manual?
Questions and answers