Advertisement
Quick Links
Download this manual
See also:
Instruction Manual
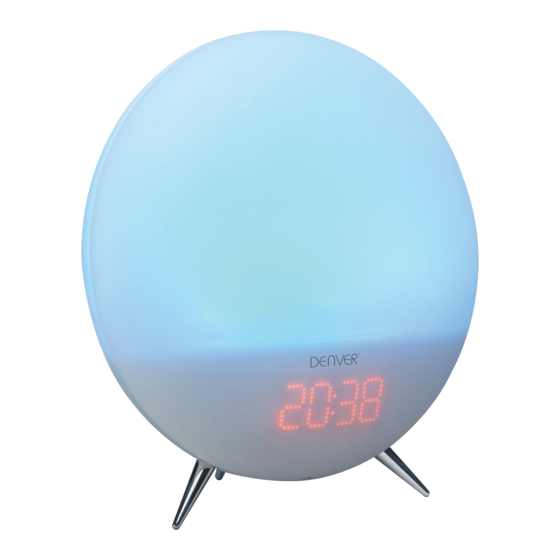
DENVER CRL-310
ENGLISH
FUNCTION AND CONTROLS
1. LAMP SHADE
2. DISPLAY
3. LIGHT ON-OFF
4. TO SET THE LIGHT INTENSITY LOW
5. TO SET THE LIGHT INTENSITY HIGH
6. MOOD LIGHT ON –OFF / MOOD LIGHT SELECT
7. TIME SET / TEMPERATURE / MEMORY / MEMORY+
8. SNOOZE / SLEEP / DIMMER
9. SOURCE/ DISPLAY OFF
10. << / TUNE - / YEAR/MONTH-DAY / C-F / BETWEEN DISPLAY
CONTENTS ON-OFF / NATURAL SOUND SELECT <<
11. >> / TUNE + / NAP / DST / NATURAL SOUND SELECT >>
12. ALARM 1 CONTROL / VOLUME DOWN
13. ALARM 2 CONTROL / VOLUME UP
14. ON / OFF / ALARM OFF
15. AUX IN JACK
16. DC POWER INPUT
17. TEMPERATURE SENSOR (IN DOOR)
18. SPEAKER
19. RATING LABEL (BOTTOM OF UNIT)
20. FM ANTENNA
21. BATTERY COMPARTMENT (BOTTOM OF UNIT)
ENG-1
Advertisement

Related Manuals for Denver CRL-310


Summary of Contents for Denver CRL-310
- Page 1 DENVER CRL-310 ENGLISH FUNCTION AND CONTROLS 1. LAMP SHADE 2. DISPLAY 3. LIGHT ON-OFF 4. TO SET THE LIGHT INTENSITY LOW 5. TO SET THE LIGHT INTENSITY HIGH 6. MOOD LIGHT ON –OFF / MOOD LIGHT SELECT 7. TIME SET / TEMPERATURE / MEMORY / MEMORY+ 8.
- Page 2 LOCATION OF REMOTE CONTROLS 1. ON/OFF / ALARM OFF 2. SOURCE / DISPLAY OFF 3. SNOOZE / SLEEP / DIMMER 4. LIGHT ON/OFF 5. MOOD LIGHT ON / OFF 6. TEMPERATURE / C-F 7. << / TUNE - / BETWEEN DISPLAY CONTENTS ON-OFF 8.
- Page 3 LED DISPLAY MODE TIME Indicator PM Indicator FM Indicator AUX Indicator ALARM 1 Indicator ALARM 2 Indicator MONTH Indicator DAY Indicator TEMPERATURE Indicator Get started • Select a proper place for the device such as a dry, and even non slip area where you can easily operate the device.
- Page 4 remote control button (7), (11) for faster scanning backward or forward. Tap the unit button (7) or the remote control button (12) to confirm. 4. Repeat steps #2 to #3 to adjust the month, day, time format, current hour and finally current minute in the same way. Notes: The display sequence in calendar / time set mode will be as follows:...
-
Page 5: Radio Tuning
Display on/off function • In standby mode, press and hold unit SOURCE button (9) or the remote control SOURCE button (2) for 3 seconds. “ON” appears on the display (2). • After 15 seconds, the display (2) turns off. • Press any button to turn the display (2) on for another 15 seconds. - Page 6 2. The LED DISPLAY will show the radio frequency for about 5 seconds and then revert to normal time display. AUTOMATIC SEARCH FOR RADIO STATIONS To automatically search for stations with strong signals, press and hold the main unit button (10) and (11) or the remote control button (7) and (11) until the frequency readout on the display begins to scan.
-
Page 7: Alarm Setting
the unit button (7) or the remote control button (12) repeatedly until you reach the desired preset number/radio station. ALARM SETTING You can set two alarm times. 6 different alarm options are available: Radio + Light / Radio / Buzzer + Light / Buzzer / Natural sound + Light / Natural sound. - Page 8 SETTING THE ALARM 2 (NATURAL SOUND) Normal Time → AL 2 Hour → AL 2 Minute → AL 2 weekday → AL 2 beeper → AL 2 radio →AL 2 natural sound →(Use the unit buttons (10) and (11) or the remote control buttons (7) and (11) to select the desired natural sound) →AL 2 final natural sound volume →AL 2 Light →...
- Page 9 • NS (natural sound): As soon as your set alarm time is shown, the natural sound switches on. The natural sound is played. The volume increases slowly to the set volume. The volume cannot be adjusted. NOTE: • The alarm function turns off automatically after 30 minutes until the next day.
-
Page 10: Sleep Operation
SNOOZE FUNCTION (MAIN UNIT) When the alarm source is sounding, press the unit any buttons (except on/off button (14)) or the remote control SNOOZE button (3) to suspend the alarm and activate the snooze function. The Alarm will temporarily stop and sound again 9 minutes later but the AL1 (or AL2) indicator will keep flashing. - Page 11 Note: When using the NAP alarm the wake up light function is inactive. NATURAL SOUND 1. In standby mode, tap the unit ON-OFF button (14) or the remote control ON-OFF button (1) to turn the unit ‘On’. 2. Press the unit button (9) or the remote control button (2) to switch to natural sound mode.
-
Page 12: Specifications
ALTERNATE DISPLAY BETWEEN TIME AND TEMPERATURE MONTH-DATE DISPLAY 1. In radio off mode, press and hold the unit button (10) or the remote control button (7) for about 3 seconds until “ON” appears in the LED DISPLAY. 2. The DISPLAY will alternate between the current Time for 10 seconds and month- date for 5 seconds and temperature for 5 seconds as follows: TIME Indicator... - Page 13 WARNING 1. No naked flame sources, such as lighted candles, should be placed on the apparatus. 2. Do not place the product in closed bookcases or racks without proper ventilation. 3. The mains plug is used as the disconnect device, the disconnect device shall remain readily operable.
- Page 14 DISPOSAL OF YOUR OLD APPLIANCE OR BATTERY: 1. When this crossed-out wheeled bin symbol is attached to a product, it means the product is covered by the European Directive. 2. All electrical and electronic products including battery should be disposed of separately from the municipal waste stream via designated collection facilities appointed by the government or the local authorities.
- Page 15 ALL RIGHTS RESERVED, COPYRIGHT DENVER ELECTRONICS A/S www.denver-electrionics.com Electric and electronic equipment and included batteries contains materials, components and substances that can be hazardous to your health and the environment, if the waste material (discarded electric and electronic equipment and batteries) is not handled correctly.
Need help?
Do you have a question about the CRL-310 and is the answer not in the manual?
Questions and answers