Table of Contents
Advertisement
Quick Links
Advertisement
Table of Contents

Related Manuals for Planet EPN-402NV


Summary of Contents for Planet EPN-402NV
-
Page 2: Federal Communication Commission Interference Statement
Copyright Copyright 2014 by PLANET Technology Corp. All rights reserved. No part of this publication may be reproduced, transmitted, transcribed, stored in a retrieval system, or translated into any language or computer language, in any form or by any means, electronic, mechanical, magnetic, optical, chemical, manual or otherwise, without the prior written permission of PLANET. - Page 3 Federal Communication Commission (FCC) Radiation Exposure Statement This equipment complies with FCC radiation exposure set forth for an uncontrolled environment. In order to avoid the possibility of exceeding the FCC radio frequency exposure limits, human proximity to the antenna shall not be less than 20 cm (8 inches) during normal operation. R&TTE Compliance Statement This equipment complies with all the requirements of DIRECTIVE 1999/5/CE OF THE EUROPEAN PARLIAMENT AND THE COUNCIL OF 9 March 1999 on radio equipment and telecommunication terminal...
- Page 4 Revision User Manual of PLANET GEPON Wi-Fi ONU Model: EPN-402NV Rev: 1.0 (Oct., 2014) Part No. EM-EPN-402NV_v1.0 (2081-BA0110-000)
-
Page 5: Table Of Contents
CONTENTS Chapter 1. Product Introduction ..................1 Package Contents .......................1 Product Description......................2 Product Features......................... 5 Product Specifications .......................6 Chapter 2. Hardware Installation ..................8 Hardware Description ......................8 2.1.1 Front Panel ......................10 2.1.2 Rear Panel......................11 2.1.3 Side Panel ......................12 2.1.4 Bottom Side ......................13 Chapter 3. - Page 6 5.3.1 WAN Access Setup....................52 5.3.2 Firewall........................53 5.3.3 MAC Filter.......................53 5.3.4 IP Filter........................54 APPLICATION ........................57 5.4.1 DDNS Setup ......................57 5.4.2 Advanced NAT ......................58 5.4.3 UPnP Setup ......................61 5.4.4 VoIP ........................61 5.4.5 IGMP........................74 5.4.6 MLD Setup......................75 5.4.7 Daily Application .....................75 MANAGEMENT ........................78 5.5.1 User Management ....................78 5.5.2...
-
Page 7: Chapter 1. Product Introduction
User Manual of EPN-402NV Chapter 1. Product Introduction 1.1 Package Contents Thank you for choosing PLANET EPN-402NV. Before installing the ONU, please verify the contents inside the package box. EPN-402NV Quick Installation Guide Power Adapter Ethernet Cable RJ45 Cable 12V DC, 1A 100~240V AC If there is any item missing or damaged, please contact the seller immediately. -
Page 8: Product Description
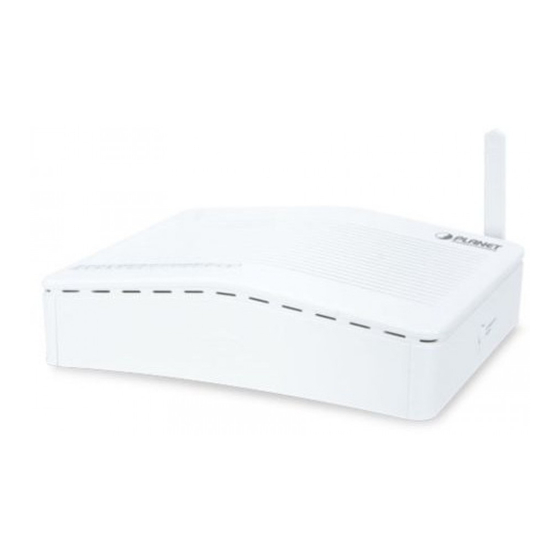
PLANET EPN-402NV is a fiber to the home (FTTH) broadband access equipment type. With built-in 1.25Gbps GEPON fiber interface, the EPN-402NV supports different optic types for WAN and the distance can be up to 20km through the fiber connection. It can handle multiple high-throughput services such as IPTV, on-line gaming, VoIP and Internet access, and keep the bandwidth usage smoothly via its QoS features. - Page 9 Standard Compliance with FXS Port The EPN-402NV provides two FXS ports that can easily integrate with general voice over IP system. The EPN-402NV makes it simple for the enterprise featuring voice and data system or expanding voice system to...
- Page 10 Robust ONU Management The EPN-402NV is designed to work with PLANET OLT EPL-2000 to provide robust FTTx applications. With the Element Management System (EMS) built in the EPL-2000, the administrators can manage and configure the facilities such as adding or removing PLANET OLTs and ONUs to or from the network architecture easily and economically.
-
Page 11: Product Features
User Manual of EPN-402NV 1.3 Product Features GEPON Supports 802.3ah CTC external OAM 1 x SC type GEPON port Up to 1.25Gbps upstream and downstream Up to 20km Supports 128-bit triple churning algorithm ... -
Page 12: Product Specifications
User Manual of EPN-402NV 1.4 Product Specifications EPN-402NV Product GEPON Wi-Fi ONU Hardware Specifications Downstream: 1.25 Gbps Transmission Speed Upstream: 1.25 Gbps PON Port 1 x PON Port Ethernet Port 4 x RJ45 (10/100Base-TX) Port FXS Port 2 x RJ11 Port USB Port 1 x USB 2.0 Port Type A, 5V 500mA... - Page 13 User Manual of EPN-402NV Provides wireless LAN ACL (Access Control List) filtering Wireless URL filtering Wireless Security Supports WPS (Wi-Fi Protected Setup) Enables/Disables SSID broadcast WMM (Wi-Fi multimedia): 802.11e wireless QoS Wireless Advanced Provides wireless statistics Max. Supported Clients NAT firewall with SPI (Stateful Packet Inspection)
-
Page 14: Chapter 2. Hardware Installation
User Manual of EPN-402NV Chapter 2. Hardware Installation Please follow the instructions below to connect the EPN-402NV to the existing network devices and your computers. 2.1 Hardware Description Dimensions: 190x 137 x 48 mm (L x W x H) ... - Page 15 User Manual of EPN-402NV Figure 2-3 Figure 2-4...
-
Page 16: Front Panel
The front panel provides a simple interface monitoring the ONU. Figure 2-5, 2-6 shows the front panel of the EPN-402NV. Front Panel Figure 2-5 SC Type GEPON Figure 2-6 EPN-402NV Front Panel COLOR STATE FUNCTION (Left to Right) Device power on... -
Page 17: Rear Panel
Linked unsuccessfully Linked and in master mode Green Flash Data is transmitting No link 2.1.2 Rear Panel Rear Panel Figure 2-7 EPN-402NV Rear Panel Object Description RJ11 FXS Connecter, connected to telephone or fax. FXS1 FXS2 Supply Voice Service ETH1 ETH3 Connected to Local Area Network. -
Page 18: Side Panel
User Manual of EPN-402NV 12V DC Power input port. Power Power switch. 2.1.3 Side Panel Figure 2-8 EPN-402NV Side Panel Port Type Function Indicator LED turn on/off Press down to turn LED on; pop up to turn LED off. -12-... -
Page 19: Bottom Side
User Manual of EPN-402NV 2.1.4 Bottom Side Figure 2-8 EPN-402NV Bottom Side -13-... -
Page 20: Chapter 3. Connecting To The Wi-Fi Onu
Wi-Fi ONU according to the following steps. Don't forget to pull out the power plug and keep your hands dry. Step 1. Power off your PC and PLANET EPN-402NV. Step 2. Locate an optimum location for the EPN-402NV. The best place is usually at the center of your wireless network. - Page 21 User Manual of EPN-402NV Figure 3-1 Step 4. Please fix the fiber cable on the bottom of the EPN-402NV as shown in Figure 3-2. Figure 3-2 -15-...
-
Page 22: Chapter 4. Quick Installation Guide
User Manual of EPN-402NV Chapter 4. Quick Installation Guide This chapter will show you how to configure the basic functions of your Wi-Fi ONU. A computer with wired Ethernet connection to the Wi-Fi ONU is required for the first-time configuration. - Page 23 User Manual of EPN-402NV Change adapter settings. Figure 4-1 Change Adapter Settings 3) Right-click on the Wireless Network Connection and select Properties in the appearing window. Figure 4-2 Network Connection Properties -17-...
- Page 24 User Manual of EPN-402NV 4) In the prompt window shown below, double-click on the Internet Protocol Version 4 (TCP/IPv4). Figure 4-3 TCP/IP Setting 5) Choose Obtain an IP address automatically, and Obtain DNS server address automatically as shown in the figure below. Then click OK to save your settings.
-
Page 25: Configuring The Ip Address Manually
User Manual of EPN-402NV Figure 4-4 Obtain an IP Address Automatically 4.1.2 Configuring the IP Address Manually Summary: Set up the TCP/IP Protocol for your PC. Configure the network parameters. The IP address is ("xxx" is any number from 2 to 192.168.1.xxx... - Page 26 User Manual of EPN-402NV Figure 4-5 IP and DNS Server Addresses Now, you can run the ping command in the command prompt to verify the network connection between your PC and the ONU. The following example is in Windows 7 OS. Please follow the steps below: Click on Start Type “cmd”...
- Page 27 User Manual of EPN-402NV If the result displayed is similar to Figure 4-7, it means the connection between your PC and the ONU has been established well. Figure 4-7 Successful Ping Command If the result displayed is similar to...
- Page 28 User Manual of EPN-402NV If the ONU's IP address is 192.168.1.1, your PC's IP address must be within the range of 192.168.1.2 ~ 192.168.1.254. -22-...
-
Page 29: Starting Setup In The Web Ui
User Manual of EPN-402NV 4.2 Starting Setup in the Web UI It is easy to configure and manage the EPN-402NV with the web browser. Step 1. To access the configuration utility, open a web-browser and enter the default IP address http://192.168.1.1... -
Page 30: Chapter 5. Configuring The Wi-Fi Onu
Figure 5-1 Wi-Fi ONU Functions 5.1 STATUS 5.1.1 Device Info On this page, you can view information about the current running status of the EPN-402NV, including device identifier, hardware version, software version and PON status. Figure 5-1-1 Device Info The page includes the following information:... - Page 31 User Manual of EPN-402NV Figure 5-1-2 WAN Info -25-...
-
Page 32: Userside Info
User Manual of EPN-402NV Figure 5-1-3 EPON information 5.1.3 Userside Info This page shows the status of your WLAN, LAN and USB. -26-... - Page 33 User Manual of EPN-402NV Figure 5-1-4 WLAN information Figure 5-1-5 LAN information Figure 5-1-6 USB information -27-...
-
Page 34: Voip Info
User Manual of EPN-402NV 5.1.4 VoIP Info This page shows the status of your VoIP. Figure 5-1-7 VoIP status Figure 5-1-8 Phone status 5.1.5 Remote Management This page shows the status of your WAN connection. Figure 5-1-9 Connection Figure 5-1-10 Configuration... -
Page 35: Network
User Manual of EPN-402NV 5.2 NETWORK 5.2.1 WAN Setup This page displays the information of the WAN interface for you to set up. Figure 5-2-1 WAN Setup The page includes the following fields: Object Description The default setting is TR-069. You can add a new WAN connection. -
Page 36: Banding Setup
User Manual of EPN-402NV If your ISP offers you static IP Internet connection type, select “Static IP" from corresponding drop-down menu and then enter IP Static address, subnet mask, primary DNS and secondary DNS information provided by your ISP in the corresponding fields. - Page 37 User Manual of EPN-402NV Figure 5-2-3 IPv4 Setup -31-...
-
Page 38: Wlan Setup
User Manual of EPN-402NV Figure 5-2-4 IPv6 Setup 5.2.4 WLAN Setup On the coming page, you can configure the basic wireless parameters. -32-... - Page 39 User Manual of EPN-402NV Figure 5-2-5 WLAN Setup Object Description Enable Wi-Fi You may choose to enable or disable wireless function. You may choose to enable or disable SSID broadcast. When it is enabled, the ONU SSID will be broadcast in the wireless network, so that it can be...
- Page 40 User Manual of EPN-402NV want to connect with. Default: EPN-402NV Display the MAC address of the wireless interface. BSSID For an optimal wireless performance, you may select the least interferential channel. It is advisable that you select an unused channel or Channel Select “Auto”...
- Page 41 User Manual of EPN-402NV WMM QoS Enable or disable QoS features. To enable the Power Saving mode in Wi-Fi Multimedia. WMM APSD Click “Advanced” to configure wireless security policies. Figure 5-2-6 WLAN Security Setup Object Description SSID To choose the appropriate SSID that you configured.
- Page 42 User Manual of EPN-402NV Figure 5-2-7 WLAN Security OPEN mode Object Description SSID Select an SSID for configuring the security settings. Select the Open mode. Authentication Mode Enable or disable WEP encryption. After enabling this function, you can set the encryption strength, current network key, and network WEP Encryption keys.
- Page 43 User Manual of EPN-402NV Figure 5-2-8 WLAN Security Shared Mode For the parameters’ description of shared mode, please refer to the Open Mode. WPA Mode Figure 5-2-9 WLAN Security WPA Mode Object Description Select SSID Select an SSID for configuring the security settings.
- Page 44 User Manual of EPN-402NV Authentication Select the WPA-PSK mode. Mode The key for WPA encryption. Click the “Click Here to display” button WPA Pre-share to display the current key. The default key is 12345678. WPA Refresh Session key Setting the interval for refresh session key.
-
Page 45: Remote Management
User Manual of EPN-402NV Figure 5-2-11 WLAN Security WPA2/WPA-PSK Mode For the parameters’ description of WPA2/WPA-PSK mode, please refer to the WPA Mode. 5.2.5 Remote Management On the coming page, you can configure the parameters for remote management of the ONU through TR069. - Page 46 User Manual of EPN-402NV Figure 5-2-12 TR069 The page includes the following fields: Object Description Inform To Enable or Disable TR069 Safety Connection To import the license for the ITMS Server Inform Interval The time interval to send a notification (seconds)
-
Page 47: Qos
User Manual of EPN-402NV To enable or disable the middleware Enabled (including TR069): To enable middleware with TR069 functionalities Middleware Disabled: Check the box to disable middleware Disabled (excluding TR069): To enable middleware without TR069 functionalities Middleware Address... - Page 48 User Manual of EPN-402NV Figure 5-2-14 QoS The page includes the following fields: Object Description To choose the available templates or to customize the template to determine what services to enable the QoS for. Internet, TR069 – To enable QoS for Internet Data and TR069 service ...
- Page 49 User Manual of EPN-402NV Upstream Bandwidth To set the uploading bandwidth for the customized QoS template To determine the alternative QoS mode. You can choose to use Scheduling Policy QoS PQ, QoS WRR or QoS CAR mode. To enable the DSCP (Differentiated Services Code Point) flag for...
- Page 50 User Manual of EPN-402NV Figure 5-2-15 QoS The page includes the following fields: Object Description The Service Name that you want to enable QoS for, e.g, VoIP, Name TR069 Queue The QoS queue for the service specified Delete Remove the service from the QoS template...
- Page 51 User Manual of EPN-402NV Figure 5-2-16 QoS The page includes the following fields: Object Description The Service Name that you want to enable QoS for, e.g, VoIP, Name TR069 Queue The QoS queue for the service specified Delete Remove the service from the QoS template...
- Page 52 User Manual of EPN-402NV Figure 5-2-17 QoS The page includes the following fields: Object Description To set the priority for the flow classification that you enabled. 1 is the highest QoS level Queue 2 is the high QoS level ...
-
Page 53: Sntp
User Manual of EPN-402NV Max Value The maximum QoS level for the enabled Service To determine which protocol to enable QoS Protocol Type FLOW CACHE Figure 5-2-18 Flow Cache The page includes the following fields: Object Description Check the box for ‘Enable Flowcache’ to enable Cache for the... -
Page 54: Route Setup
Connection Mode To determine the way to connect to NTP servers. Time Server Select the available NTP servers for your NTP Server Time Zone To choose the appropriate Time Zone for your EPN-402NV 5.2.8 Route Setup Static Route -48-... - Page 55 User Manual of EPN-402NV Figure 5-2-21 Static Route The page includes the following fields: Object Description Destination Network The destination address that you want to add a route for Address The Subnet Mask for your Destination Routing address Subnet Work Mask...
- Page 56 Figure 5-2-23 IPv6 Static Route The page includes the following fields: Object Description Click ‘Add’ to add an IPV6 Static Route for your EPN-402NV Destination IPv6 Input the destination IPV6 address that you want to add a Static Address Route for...
- Page 57 User Manual of EPN-402NV between 0-4261412864) -51-...
-
Page 58: Security
User Manual of EPN-402NV 5.3 SECURITY 5.3.1 WAN Access Setup On this page, you can enable or disable URLs to pass through the WAN interface. Figure 5-3-1 WAN Access Setup The page includes the following fields: Object Description Check the box on ‘Enable’ to enable URL filter; check the box on URL Filter ‘Disable’... -
Page 59: Firewall
Port Number The port number that you want to enable for the whitelist URL 5.3.2 Firewall On this page, you can set the firewall level for the multiple services that pass through the EPN-402NV. Security Level Figure 5-3-3 Security Level ... -
Page 60: Ip Filter
User Manual of EPN-402NV Figure 5-3-5 MAC Filter The page includes the following fields: Object Description MAC Filter Enable or Disable to create a filter based on MAC address Blacklist: Enable banning a specific MAC Address Filter Mode Whiltelist: Enable allowing a specific MAC Address... - Page 61 User Manual of EPN-402NV Figure 5-3-6 IP Filter The page includes the following fields: Object Description IP Filter Enable or disable the IP filter Blacklist: To disable the specified port to pass through LAN to Filter Mode Whiltelist: To enable the specified port to pass through WAN...
- Page 62 User Manual of EPN-402NV Source Network The subnet mask for the IP range that you specified Mask The Destination IP or host that you want to allow or deny for the Destination IP Address (range) filter Destination Network The Subnet Mask for the Destination IP or host that you allowed...
-
Page 63: Application
User Manual of EPN-402NV 5.4 APPLICATION 5.4.1 DDNS Setup On this page, you can create a Dynamic DNS for your EPN-402NV. Figure 5-4-1 DDNS Figure 5-4-2 Add DDNS -57-... -
Page 64: Advanced Nat
User Manual of EPN-402NV The page includes the following fields: Object Description DDNS provider To determine the DDNS service provider Domain The URL/Host name for your DDNS service provider To determine which WAN connection to be applied with DDNS Interface... - Page 65 User Manual of EPN-402NV DMZ SETUP Figure 5-4-4 DMZ The page includes the following fields: Object Description Enable DMZ Host Check the box to enable DMZ DMZ Host IP The LAN IP address that you want to enable with DMZ Address ...
- Page 66 User Manual of EPN-402NV Figure 5-4-6 Add Virtual Server The page includes the following fields: Object Description Click ‘Add’ to add a virtual host server Delete Click ‘Delete’ to remove a Virtual Host Server The WAN interface that you want to enable with Virtual Host...
-
Page 67: Upnp Setup
User Manual of EPN-402NV Private Start Port The inbound start port of your Virtual Host Server The inbound end port of your Virtual Host Server Private End Port 5.4.3 UPnP Setup On this page you can enable or disable UPNP. - Page 68 User Manual of EPN-402NV Figure 5-4-8 VoIP Basic The page includes the following fields: Object Description Check the box to select the WAN connection interface for your Banding WAN for VoIP service VoIP To input the port number for SIP, generally default SIP port is...
- Page 69 User Manual of EPN-402NV Enable Backup SIP The backup SIP Server address can be Host name or IP address Outbound Proxy Enable Backup SIP The backup SIP port by default is 5060 Register Figure 5-4-8 VoIP Account The page includes the following fields:...
- Page 70 User Manual of EPN-402NV Figure 5-4-9 Digital Map The page includes the following fields: Object Description Status Enable Standard Digital Map/Dial plans for VoIP service Digital Map Match The matching mode of the specified dialing plans Mode Bit Space Long...
- Page 71 User Manual of EPN-402NV Matching Supply Match with the specified number Enable hotline number Status Voice Media Figure 5-4-10 Voice Media The page includes the following fields: Object Description Status Enable Standard Digital Map/Dial plans for VoIP service Digital Map Match...
- Page 72 User Manual of EPN-402NV Status Enable hotline number Figure 5-4-11 Voice Media The page includes the following fields: Object Description Enable T38 Check the box to enable T.38 fax redundancy Redundancy Enable VBD Check the box to enable VBD (Voice Band Data) redundancy...
- Page 73 User Manual of EPN-402NV Redundancy Fax Negotiation Set the fax session mode Mode Fax Codec Set the codec for fax Enable T.38 fax Enable T38 Fax Enable fax with G.711 codec Enable G711 Fax Enable VAD Check the box to enable VAD (Voice Activation Detection)
- Page 74 User Manual of EPN-402NV Check the box to enable Echo Suppression settings for SIP Echo Suppression account 1 and 2 Receiving Gain Set the Receiving Gain value for Echo Suppression Transmission Gain Set the Sending Gain value for Echo Suppression...
- Page 75 User Manual of EPN-402NV Figure 5-4-13 SIP Configuration The page includes the following fields: Object Description “URL” “*” Sign Check the box to enable URL and ‘*’ Escape setting Translate Setting “URL” “#” Sign Check the box to enable URL and ‘#’ Escape setting...
- Page 76 User Manual of EPN-402NV Heartbeat Time Set the SIP Heartbeat Switch time interval Set the SIP heartbeat mode Heartbeat Mode Set SIP heartbeat switch in different authentication modes Heartbeat Format User Agent Type Set the SIP agent type Register Refresh...
- Page 77 User Manual of EPN-402NV Figure 5-4-14 IMS Service Debug On this page you can debug the VoIP SIP configurations. -71-...
- Page 78 User Manual of EPN-402NV Figure 5-4-15 Debug The page includes the following fields: Object Description The Server Address that you want to store your SIP Syslog Log Server IP -72-...
- Page 79 User Manual of EPN-402NV Log Server Port The port number of your SIP Syslog server Check the box to enable SIP Syslog Enable Syslog Check the box to enable SIP Klog Enable Klog Vodsl Console Log Set the Vodsl console level of your SIP Syslog...
-
Page 80: Igmp
User Manual of EPN-402NV 5.4.5 IGMP IGMP Snooping Check the box to enable IGMP Snooping of your Wi-Fi ONU. Figure 5-4-16 IGMP Snooping IGMP Proxy On this page, you can enable IGMP pass-through a specific WAN interface. Figure 5-4-17 IGMP proxy... -
Page 81: Mld Setup
User Manual of EPN-402NV 5.4.6 MLD Setup MLD Snooping This page allows you to enable or disable MLD Snooping function. Figure 5-4-18 MLD Snooping MLD Proxy On this page you can enable MLD Proxy for a special WAN connection. - Page 82 User Manual of EPN-402NV Figure 5-4-20 Family Storage The page includes the following fields: Object Description Download File Specify the downloading directory of your USB Storage device Storage Your remote FTP user name Username The password for your remote FTP server...
- Page 83 User Manual of EPN-402NV Figure 5-4-21 IPTV The page includes the following fields: Object Description Connection Name The WAN interface for your IPTV Application Public Multicast Specify the VLAN ID for your public Multicast streaming VLAN -77-...
-
Page 84: Management
User Manual of EPN-402NV 5.5 MANAGEMENT 5.5.1 User Management On this page you can set up the User Account password for your EPN-402NV. By default, the password for user account is ‘admin’. You can modify this password. Figure 5-5-1 Password... -
Page 85: Log Management
On this page, you can click the button to reset the ONU to factory default setting. Figure 5-5-4 Reset to Default 5.5.3 Log Management LOG LEVEL On this page, you can manage the log of your EPN-402NV. Figure 5-5-5 Log Level -79-... - Page 86 The Server that you will store the logs The port number for the Server which you will store up the logs Server UDP Port On this page, you can check or manage logs of your EPN-402NV. Figure 5-5-6 Log The page includes the following fields: Object Description Click the ‘Access Log’...
- Page 87 User Manual of EPN-402NV Figure 5-5-7 Maintenance -81-...
-
Page 88: Diagnosis
User Manual of EPN-402NV 5.6 DIAGNOSIS 5.6.1 Line Diagnosis On this page, you can to view the connection status of your LAN and WLAN interfaces. Click the ‘Retesting’ button to refresh the page Figure 5-6-1 Line Diagnosis 5.6.2 Ping Test On this page you can diagnose the Internet connections. -
Page 89: Tracert Diagnosis
5.6.4 Inform Manual Inform manual is a function for reporting failures or logs to the ACS server. On this page you can diagnose the inform report function of the EPN-402NV. Figure 5-6-4 Inform Manual Click the ‘Testing’ button to manually send message to a remote TR069 ACS Server. -
Page 90: Help
User Manual of EPN-402NV 5.7 HELP You can view the help information of this device on this page. Figure 5-7-1 Help -84-... -
Page 91: Chapter 6. Quick Connection To A Wireless Network
Step 1: Right-click on the wireless network icon displayed in the system tray Figure 6-1 Step 2: Select [View Available Wireless Networks] Step 3: Highlight and select the wireless network (SSID) to connect (1) Select SSID (Take PLANET for example) (2) Click the [Connect] button Figure 6-2 Wireless Network Connection -85-... - Page 92 User Manual of EPN-402NV Step 4: Enter the encryption key of the Wi-Fi ONU (1) The Wireless Network Connection box will appear (2) Enter the encryption key that is configured in section 5.7.3 (3) Click the [Connect] button Figure 6-3 Step 5: Check if “Connected”...
-
Page 93: Windows 7 (Wlan Autoconfig)
User Manual of EPN-402NV 6.2 Windows 7 (WLAN AutoConfig) WLAN AutoConfig service is built-in in Windows 7 that can be used to detect and connect to wireless network. This built-in wireless network connection tool is similar to wireless zero configuration tool in Windows XP. - Page 94 User Manual of EPN-402NV (2) Enter the encryption key that is configured in section 5.7.3 (3) Click the [OK] button Figure 6-7 Connect to a Network Figure 6-8 Connecting Step 5: Check if “Connected” is displayed Figure 6-9 -88-...
-
Page 95: Mac Os X 10.X
The AirPort Network Connection menu will appear Figure 6-10 Step 2: Highlight and select the wireless network (SSID) to connect (1) Select and SSID (Take PLANET for example) (2) Double-click on the selected SSID Figure 6-11 Step 4: Enter the encryption key of the Wi-Fi ONU (1) Enter the encryption key that is configured in section 5.7.3... - Page 96 User Manual of EPN-402NV If you want to connect this Wi-Fi ONU in the future, check [Remember this network]. Step 5: Check if the AirPort is connected to the selected wireless network. If “Yes”, then there will be a “check” symbol in the front of the SSID.
-
Page 97: Iphone / Ipod Touch / Ipad
User Manual of EPN-402NV 6.4 iPhone / iPod Touch / iPad Step 1: Tap the [Settings] icon displayed in the home screen Figure 6-14 Step 2: Check Wi-Fi setting and select the available wireless network (1) Tap [General] \ [Network] (2) Tap [Wi-Fi] If this is the first time to connect to the Wi-Fi ONU, it should show “Not Connected”. - Page 98 Figure 6-16 Step 3: Tap the target wireless network (SSID) in “Choose a Network…” (1) Turn on Wi-Fi by tapping “Wi-Fi” (2) Select SSID (Take PLANET for example) Figure 6-17 Step 4: Enter the encryption key of the Wi-Fi ONU...
- Page 99 User Manual of EPN-402NV Figure 6-18 Step 5: Check if the iDevice is connected to the selected wireless network. If “Yes”, then there will be a “check” symbol in the front of the SSID. Figure 6-19 -93-...
-
Page 100: Appendix A: Specifications
User Manual of EPN-402NV Appendix A: Specifications EPN-402NV Product GEPON Wi-Fi ONU Hardware Specifications Downstream: 1.25 Gbps Transmission Speed Upstream: 1.25 Gbps 1 x PON Port PON Port Ethernet Port 4 x RJ45 (10/100BASE-TX) Port FXS Port 2 x RJ11 Port USB Port 1 x USB 2.0 Port Type A, 5V 500mA... - Page 101 User Manual of EPN-402NV WEP (64/128-bit) encryption security Encryption Security WPA-Personal / WPA2-Personal (TKIP/AES) Mixed WPA / WPA2-PSK Provides wireless LAN ACL (Access Control List) filtering Wireless URL filtering Wireless Security Supports WPS (Wi-Fi Protected Setup) Enables/Disables SSID broadcast WMM (Wi-Fi multimedia): 802.11e wireless QoS...
-
Page 102: Appendix B: Glossary
User Manual of EPN-402NV Appendix B: Glossary 802.11n - 802.11n builds upon previous 802.11 standards by adding MIMO (multiple-input multiple-output). MIMO uses multiple transmitter and receiver antennas to allow for increased data throughput via spatial multiplexing and increased range by exploiting the spatial diversity, perhaps through coding schemes like Alamouti coding. - Page 103 User Manual of EPN-402NV wireless local area network. For the wireless devices in a network to communicate with each other, all devices must be configured with the same SSID. This is typically the configuration parameter for a wireless PC card. It corresponds to the ESSID in the wireless Access Point and to the wireless network name.
- Page 104 ΛΟΙΠΕΣ com os requisitos essenciais e outras disposições da ΣΧΕΤΙΚΕΣ ΔΙΑΤΑΞΕΙΣ ΤΗΣ ΟΔΗΓΙΑΣ Directiva 1999/5/CE. 1999/5/ΕΚ Por medio de la presente, PLANET Technology Español Slovensky Corporation, declara que 802.11ac Wireless Výrobca PLANET Technology Corporation, týmto Broadband ONU cumple con los requisitos deklaruje, že táto 802.11ac Wireless Broadband...
Need help?
Do you have a question about the EPN-402NV and is the answer not in the manual?
Questions and answers