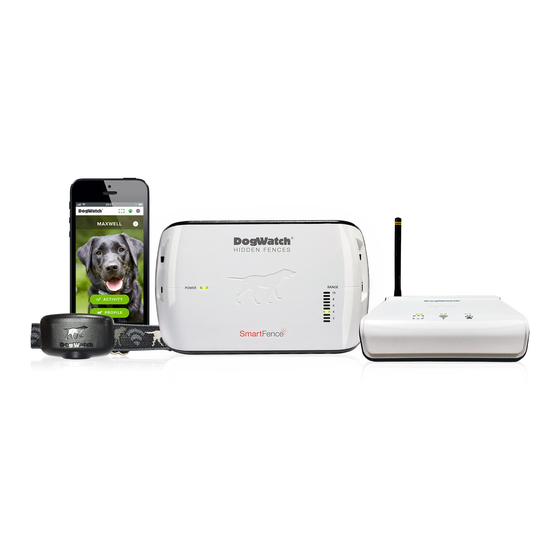
DogWatch SmartFence Owner's Manual
Pet containment system
Hide thumbs
Also See for SmartFence:
- Owner's manual (36 pages) ,
- Dealer training manual (28 pages) ,
- Quick start manual (6 pages)
Table of Contents
Advertisement
Quick Links
Advertisement
Table of Contents

Related Manuals for DogWatch SmartFence


Summary of Contents for DogWatch SmartFence
- Page 1 Owner’s Guide...
-
Page 2: Table Of Contents
Hidden Fence Installation.............. SmartFence Features and Settings SmartFence Transmitter ............SmartFence Collar ..............SmartFence Collar Batteries ........... SmartFence Collar Status Light ..........SmartFence Transmitter Mode and Rate Settings ....Troubleshooting Tips ..............FAQs .................... Training Tips & Reminders ............Warranty... - Page 3 SYSTEM COMPONENTS All System Components are included with the SmartFence unless noted as 'Optional'. ™ Transmitter Sends a coded digital FM radio signal through the Hidden SmartFence ™ Fence boundary wire in your yard. Transmitter PowerPak ™ Provides a battery back-up to keep the Transmitter (optional) operating in the event of a power failure.
-
Page 4: System Components
SmartFence. The Hidden Fence containment features will continue to work if: The Portal or the Internet is turned ' or loses power. The SmartFence Collar goes out of communication range of the Portal. - Page 5 Fence C O M P U T E R COMMUNICATION PORTAL T R A N S M I T T E R The SmartFence Transmitter sends the radio signal to the Hidden Fence boundary wire communicates with Portal ...
-
Page 6: System Basics
Collar: Training Level, Frequency Transmitter: Training Mode, Rate, Frequency and Range. SmartFence Notification Options (Alerts) Battery Status Sends an alert when it’s time to replace the SmartCollar battery. A notification will appear on the WebApp and will disappear when the battery is replaced. -
Page 7: Getting Started
This number links your Profile to your SmartFence Transmitter. Collar UID: This number links your Profile to your SmartCollar. THE SMARTFENCE WEBAPP The SmartFence WebApp is where you find information about: SmartFence system settings SmartFence system alerts Your pet's activity ... -
Page 8: Webapp Setup
STEP 1: CREATE YOUR CUSTOMER PROFILE Setup can be completed on Smartphone, Tablet, or Computer Open the WebApp Open the browser on your smartphone, tablet or computer. (Works best on Chrome or Safari.) smartfence.dogwatch.com Go to: Click “NEW ACCOUNT” Tablet Desktop/Laptop Fill in the “CREATE ACCOUNT”... - Page 9 WEB APP SETUP Fill in “NEW SYSTEM SETUP” fields System Name - (Home, Lake House, Cabin, etc.) Dealer ID Number Communication Portal UID Transmitter UID Collar UID Click '+ Collar’ to add additional Collar UID - or - ...
- Page 10 Click ‘Next’ to finish your Pet Profile Select option to Add Another Pet -or- Complete Setup CONGRATULATIONS, you have completed the SmartFence Profile! Interpreting the Home Screen Icons The Loop Icon indicates Transmitter and Boundary Loop status Green...
- Page 11 View your pet’s activity. Profile Button View your pet’s profile. Settings Button The gear button is your menu link to view all SmartFence settings. PETS View and edit pet information and add additional pets ALERTS Set which alerts you want to receive via...
- Page 12 WEB APP SETUP STEP 2: SAVE THE WEB APP ICON You can save a SmartFence™ WebApp icon to the Home screen of your mobile device(s). The icon provides a link from your Home screen to your SmartFence information. Complete your Account Setup and Profiles in Step 1 before adding the SmartFence icon to your mobile devices.
-
Page 13: Step 3: Communication Portal Setup
COMMUNICATION PORTAL INSTALLATION STEP 3: COMMUNICATION PORTAL SETUP The SmartFence Communication Portal collects status information from your SmartFence Collar and Transmitter and updates your SmartFence WebApp. Ethernet Power Antenna Port Supply Port Rear View Internet Connection Status Boundary Collar Loop Status... - Page 14 COMMUNICATION PORTAL INSTALLATION Setup Instructions Power Outlet Place the Portal in a location near your Home Router home router and near a power outlet. Plug the Portal into power using the Portal power supply provided. Portal Power Outlet Connect the Portal to your home router using an Ethernet cord (included.) When the Portal connects to the Home Router...
-
Page 15: Webapp Settings & Configuration
Manage Pets Manage Alerts Manage Collars Manage Systems Account Info Contacts Resources Manage PETS Displays SmartFence Collar information for each Pet. • Collar UID • System location Link to View and Edit your Pet's Profile: • Pet Name • Photo... - Page 16 WEB APP SETTINGS & CONFIGURATION Manage COLLARS Displays SmartFence Collar information. • Collar UID • Training Level (pg 28) • Frequency • Pet's Name • System Location Link to Edit your Pet's Collar information • Collar UID • System Location Link to 'Add Collar' screen ...
-
Page 17: Resources
Alerts ' ' for each Contact Link to Add Contact screen CALL DEALER • Name • Phone • Email Call your DogWatch Dealer RESOURCES Link to important resources on the full website • QuickStart Guide RESOURCES QUICK START GUIDE • Owner's Guide... -
Page 18: Activity Tracking
The SmartCollar is designed with the understanding that your pet will probably spend ™ time in parts of the yard that may be beyond the transmission range of your SmartFence ™ Communication Portal. That's OK! If your dog is beyond the transmission range of the Portal, the activity data is not lost. -
Page 19: Smartfence Information And Alerts
SMARTFENCE INFORMATION & ALERTS SMARTCOLLAR INFORMATION ™ Collar UID Identifies which collar you are viewing Training Level Shows the current correction level setting (pg 28) Frequency Level Shows the frequency setting (4 or 8 KHz) Pet Name Identifies the pet you have associated with this collar UID System Identifies which system is connected (home, lake house, etc.) - Page 20 SMARTFENCE INFORMATION & ALERTS ALERT MESSAGES (SmartCollar) You can choose to receive Alert Messages via Text Message or Email - or both. • To set your Alert Message preferences, click the button then select ALERTS. • To set your Text or Email preferences, click the button then select CONTACTS.
- Page 21 Shows the Range setting of the Transmitter (pg 25) Frequency Shows the Frequency setting of the Transmitter (4 or 8 KHz) Dealer Shows the name of your local DogWatch Dealer ALERT ALERT NOTIFICATIONS Red Boundary Loop + Red Alert Bar Transmitter status...
- Page 22 (There will also be an audible alarm from your Transmitter and the green Loop Monitor Display light will go out.) The alert will turn off when the wire is repaired. Call your DogWatch Dealer if you need assistance. NO COMMUNICATION...
-
Page 23: Hidden Fence Installation
HIDDEN FENCE INSTALLATION Installation Basics The fence is created by burying a wire in your yard. Your DogWatch Dealer will work with you to establish the best configuration for you, your dog and your yard. Containment Area: Full Yard Designated "Keep Out" Areas: Pool, Play Area, Garden... -
Page 24: Smartfence Transmitter
HIDDEN FENCE INSTALLATION Your SmartFence Transmitter is mounted on a wall near a power outlet. The Transmitter is connected to your boundary wire through a surge protector (as shown below) which prevents lightning power surges from damaging your system. SmartFence Transmitter... - Page 25 When the Transmitter is being powered by the battery back-up, the red power light will remain off. The PowerPak plugs into the Transmitter at “P-PAK”. After the SmartFence is installed and set up complete, the WebApp will alert you note if the PowerPak battery back-up has been activated.
- Page 26 Range Control on the transmitter. The recommended signal range (on each side of the wire) is 6-10 feet. Your DogWatch Dealer will adjust the range according to the personality and traits of your dog. Consult your DogWatch Dealer before making any adjustments yourself.
-
Page 27: Smartfence Collar
Training Level Adjustment Location (on top side) 1. 3.6 Volt Battery: The SmartFence battery life is usually about 1 year. 2. Battery Cap: Our waterproof battery cap protects your battery from the elements. Remove using the Battery Cap tool (#6). - Page 28 1/8 of a second (.125 sec). Automatic Shutdown: The DogWatch SmartFence is designed to protect your dog from an over-correction in the unlikely event that your dog gets caught in the signal field. If your dog does not exit the signal field, the receiver will automatically stop correcting after 15 seconds—protecting...
- Page 29 1 year. The Positive end of the battery must be inserted down. Battery Plans Ask your DogWatch Dealer about a battery plan. If your DogWatch Dealer does not offer a battery plan, call DogWatch at 800-793-3436 or join through the website at: www.dogwatch.com/customer-resources/outdoor/battery-plan-sign-up/...
- Page 30 SMARTFENCE FEATURES & SETTINGS ™ Status Light The status light on your SmartCollar provides these features. • Start-Up When you first insert the battery, Status Light the status light will flash and green. This indicates that the receiver has started properly.
- Page 31 Setting 2 or 3 and a Receiver Training Level 3, 4 or 5. Sensitive or small dogs that train easily respond best to lower rate settings and lower training levels. If your dog is not responding to training, your DogWatch Dealer will adjust your system to a higher training level.
-
Page 32: Troubleshooting Tips
Is your Communication Portal connected to Internet? o Try restarting your Portal by disconnecting power, waiting 30 seconds and reconnecting. I am not seeing my pet's activity on my SmartFence WebApp. • o Have you added the SmartFence collar UID to your WebApp? o Is your collar battery charged? o Is the collar working? Does it "beep"... -
Page 33: Faqs
The communication part of the system (notification alerts, system settings and activity tracking) will not work without an Internet connection. Can I use a SmartFence if I do not have a smartphone? Yes, you can still get text message and/or email alerts and you can access your SmartFence™... -
Page 34: Training Tips & Reminders
What if I do not have an extra Ethernet port on my router? The SmartFence™ requires the use of an Ethernet port. You may be able to add ports to your router by connecting it to an Ethernet switch. These... -
Page 35: Warranty
(c) Mail product, insurance and postage prepaid, to your authorized DogWatch Dealer. DogWatch Inc.’s sole liability under this Warranty will be to repair or replace, at its option, any product or part which DogWatch Inc. determines to be defective. In no event will DogWatch Inc. - Page 36 3. INSTALLATION AND MAINTENANCE: Dealer shall, for a non-refundable installation fee, install the Product. In no event shall Dealer or DogWatch Inc. be responsible for damage to underground pipes, wires, lines, or other items, nor shall Dealer or DogWatch Inc. be responsible for restoring Customer’s premises to its original condition.
- Page 37 (1) This device may not cause harmful interference, and (2) this device must accept any interference received, including interference that may cause undesired operation. Changes or modifications not expressly approved by DogWatch, Inc., could void the user’s authority to operate the equipment.
- Page 38 To maintain compliance, it must not be co-located or operated in conjunction with any other antenna or transmitter. These radio transmitters IC: 8187A-DWSFP (SmartFence Communication Portal) IC: 8187A-DWSFT (SmartFence Transmitter) IC: 8187A-DWSFC (SmartFence Collar) have been approved by Industry Canada to operate with the antenna types listed below with the maximum permissible gain indicated.
Need help?
Do you have a question about the SmartFence and is the answer not in the manual?
Questions and answers