
Related Manuals for Viavito setry


Summary of Contents for Viavito setry
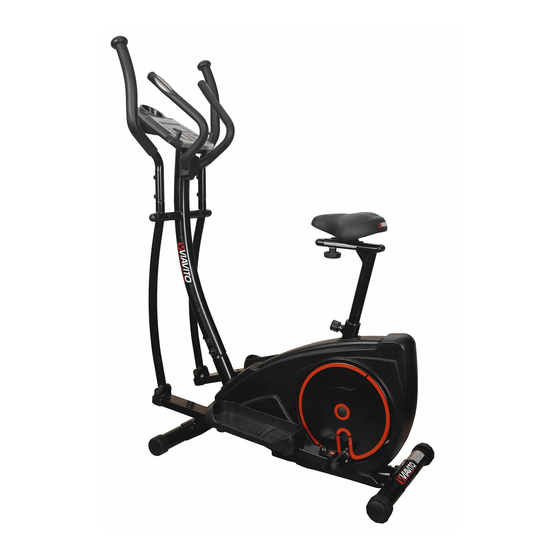
- Page 1 Owner’s Manual. SETRY 2-in-1 Elliptical Cross Trainer Exercise Bike www.viavito.com...
-
Page 2: Table Of Contents
Manual Contents. Congratulations on purchasing your Safety Information 03/04 very own SETRY Machine Assembly 05/12 2-in-1 Elliptical Cross Contents Checklist Trainer Exercise Bike. Assembly Instructions 06/12 You have chosen a high quality, safe and Console Instructions 13/19 innovative product, and we are certain it will keep you entertained for hours. -
Page 3: Safety Information
‘up’ resistance key. 06 DO NOT use aggressive cleaning products such as detergents to clean the machine, only use the supplied tools to assemble the machine. Remove drops of sweat from the machine immediately after finishing training. www.viavito.com... - Page 4 Penalties may be applicable for incorrect disposal of this waste, in accordance with your national legislation SAFETY STANDARDS This equipment meets the requirements of European safety directives such as: the Electromagnetic Compatibility (EMC) Directive and the Low Voltage Directive (LVD). www.viavito.com...
-
Page 5: Machine Assembly
Machine Assembly. Contents Checklist Make sure you have the following parts: www.viavito.com... -
Page 6: Assembly Instructions
02 Adjust the leg leveler height by turning rear stabiliser (G) onto the main frame the wheel on rear foot cap (D) by using the square neck bolt (N-1), Attention: Please follow these assembly instructions step by step to assemble this bike: www.viavito.com... - Page 7 Step Two. 01 Fix the seat (U) onto seat post (V) 02 Insert the seat post(V) into main frame using flat washer (U-3) and knob (U-4) and fix by knob www.viavito.com...
- Page 8 Step Three. on the pedal axle 01 Connect the upper computer cable 03 Fix the pedal axle onto main frame (C-3) to the lower computer (D-7), using bolt (N-17) then insert the handlebar post (C) on the main frame www.viavito.com...
- Page 9 (S) by using Waved washer 01 Connect the movable handlebar (N-10),Bolt(N-3),flat washer (N-13), support (E) to the handlebar support spring washer (N-3) and cap the (Q-1) by using the bolt (N-5), the flat bolt cover (N-11) washer (N-3) and the waved washer (N-4) www.viavito.com...
- Page 10 Allen bolt (N-5) 01 Assemble the fixed handlebar (B) and 02 Feed the upper computer cable and the cover (O) on the handlebar post hand pulse cable out from the (C) by using the curved washer (N-4), handlebar post www.viavito.com...
- Page 11 01 Fix the pedal (H) onto the pedal support support of main frame by using bolt tube (P) by using bolt (N-9), knob (N-7) (N-5), spring washer (N-3) and curved and flat washer (N-8) (Fig A) washer (N-4) and coned washer (N-6) (Fig B) www.viavito.com...
- Page 12 01 Connect the upper computer cable by using the screws(A-2) Connect the (C-3) and the handle pulse cable (B-4) adaptor (R) to hole of frame on the with the computer (A-1), then fix the rear of the bike computer (A-1) on the handlebar post www.viavito.com...
-
Page 13: Console Instructions
F1, F2... to F6. F1 is the best, F6 is the worst. User may keep exercising to improve the heart rate recovery status. (Press the RECOVERY button again to return the main display.) BODY FAT Press this button to start body fat measurement. www.viavito.com... -
Page 14: Display Functions
User may set up target pulse from 0 - 30 to 230; and computer PULSE buzzer will beep when actual heart rate is over the target value during workout. WATTS Display current workout watts. Display range 0~999. www.viavito.com... -
Page 15: Operation
The monitor will require you to input personal data of age, sex, height and weight step by step. Please use UP/ DOWN/ MODE buttons to set-up all data. After setting up, the monitor will skip to stand-by mode. Fig. 5 Fig. 6 www.viavito.com... - Page 16 04 ‘Manual’ is flashing in standby mode, (FIGURE 6). Press UP and DOWN to select training mode MANUAL / PROGRAM / USER PROGRAM / H.R.C. / WATT (FIGURE 6 ~10) and press MODE for confirmation. Fig. 7 Fig. 8 Fig. 9 Fig. 10 www.viavito.com...
-
Page 17: Training In Program Mode
(FIGURE 13-14) Load level can be adjusted during training. Training in Manual Mode 01 In MANUAL mode, press the UP and DOWN buttons to select load level from 1 to 16, the preset level is 1. (FIGURE 13). Fig. 13 Fig. 14 www.viavito.com... -
Page 18: Training In User Program Mode
UP, DOWN and MODE buttons for each flashing column. There are 20 segments, if you want to quit during setting, hold down the MODE button for 2 seconds to quit, the previous setting profile will be saved for unfinished segments. www.viavito.com... -
Page 19: Training In H.r.c Mode
4 minutes, the screen will switch to ‘off’ mode and display room temperature, clock, and calendar (FIGURE 20). Switch KM & Miles by button on the back of console: power off, switch KM or Miles, then power on. Fig. 20 www.viavito.com... -
Page 20: Conditioning Guidelines
• Relieve tension and stress • Boost self-image • Provide enjoyment and fun • Improve muscle tone and strength • Stimulate the mind • Improve flexibility • Help maintain stable weight • Lower blood pressure • Control appetite • Relieve insomnia www.viavito.com... -
Page 21: Target Heart Rate
132 - 166 130 - 164 129 - 162 127 - 161 125 - 159 124 - 156 122 - 155 121 - 153 119 - 151 118 - 150 117 - 147 115 - 146 114 - 144 www.viavito.com... -
Page 22: Beginners Guide To Exercise
• Start slowly and build up your time, speed and resistance gradually; doing too much too soon can lead to injuries • If you are sore or tired, give yourself a few extra days to recover. www.viavito.com... -
Page 23: How To Begin
When exercising, you should try to stay within your target heart rate (THR) zone. The table on the previous page will tell you the THR for your age. Always be aware of how you feel when you exercise. If you feel dizzy or light-headed, stop immediately and rest. www.viavito.com... -
Page 24: Tips For Stretching
10 seconds (working up to 20 to 30 seconds) and usually repeated about 2 or 3 times • Do not stretch until it hurts. If there’s any pain, ease off • Don’t bounce. Stretching should be gradual and relaxed www.viavito.com... -
Page 25: Warm-Up And Cool-Down
Stretching develops flexibility and reduces muscles soreness. Stretches should be held for 15 to 30 seconds. DO NOT BOUNCE OR OVER-STRETCH Take your time in each stretch. Gradually take each stretch a little deeper on every out breath to your personal maximum. www.viavito.com... - Page 26 The purpose of cooling down is to return the body to its normal or near normal, resting state at the end of each exercise session. A proper cool-down slowly lowers your heart rate, allows blood to return to the heart and helps prevent muscle soreness caused by the build-up of lactic acid in the muscles. www.viavito.com...
-
Page 27: Customer Support
• Precise description of the issue or defect. IMPORTANT!! - Please retain your sales receipt, viavito Customer Care may request proof of purchase to validate eligibility for warranty service. Warranty cover starts from the date shown on the proof of purchase. -
Page 28: Manufacturers Warranty
Repairs not provided by viavito ltd conditions, for a period of 12 months from the date of the original purchase. e) Accidents, lightning, water, fire,... -
Page 29: Space Required
Space Required. 0.6 Meter minimum radius of free space is required to use this machine. www.viavito.com... -
Page 30: Replacement Parts
900L Main Frame Set Main Frame Inner Tube D56*97 Motor Screw ST4.2*1.4*15L Sensor Cable L:100L W/sensor Bolt M5*0.8*12L Lower Computer Cable 1100L Tension Cable D1.2*230L Bearing #6003ZZ D-10 Electric Cable 150L D-11 Small Knob D38xM16*1.5xD8x23 D-12 Insert Plug D51*D39.2*160L www.viavito.com... - Page 31 Crank Anti-loosen Nut M10*1.25*10T 8.8grade Side Cap D36x14 Round Cover D346*25 Chain Cover Set Upper Decorative Cover Match tube of D50.8 Round Ring for Chain Cover 84*82.5*9T Left Chain Cover 800*75*520, D50.8 Right Chain Cover 800*75*520, D50.8 Screw ST4.2x1.4x20L www.viavito.com...
- Page 32 Fixing plate for idle wheel Spring D3*D17*59L Plastic Flat Washer D10*D24*0.4T Flat Washer D50*D10*3.0T Bolt M8*1.25*30L,8.8grade Flat Washer D30*D8.2*3.0T Nylon Nut M10*1.5*10T Idle Wheel D42xD38x24 M8*1.25*6T L-10 Nylon Nut M8*1.25*8T Belt Wheel Set Waved Washer D17*D22*0.3T Flat Washer D23*D17.2*1.5T www.viavito.com...
- Page 33 M6*1*45L N-10 Waved Washer D26*D19.5*0.3T N-11 Screw Cover D29*21(M8) N-12 Bolt M8x1.25x25 N-13 Flat Washer D25xD8.5x2T N-14 Screw Cover D28*17(M10) N-15 Screw Cover D30*17(M12) N-16 Pedal Axle Cover D30*11L N-17 Round Screw M8*1.25*16L Protective Cover 114*76*43 Pedal Assemble Set www.viavito.com...
- Page 34 Moveable support tube Bushing D19.15x(D25.6x32)xL(17+3) Front pedal axle D19x72L C-clip D21.5xD17.5x1.2T Waved washer D26*D19.5*0.3T Adaptor Output:9V,500mA Axle D19x334.5(M8x1.25) Fly Wheel Set Fly Wheel D260x77L Fly Wheel Axle D10x120L(3/8"-26UNF) Fixing Ring D13*D10*1.9T D9.5x4T(3/8"-26UNFx4T) Anti-loosen Nut 3/8"-26UNF*6.5T D9.5x5T(3/8"-26UNFx5T) Bearing #6000ZZ www.viavito.com...
- Page 35 DESCRIPTION SPECIFICATION Seat adjustable sets Seat LS-A16 Seat adjustable tube Flat washer D25xD8.5x2T Knob D60x32L(M8x1.25) Flat washer Nylon Nut Seat post sets Oval end cap 25*50*28L Seat welding set www.viavito.com...
-
Page 36: Exploded Diagram
Exploded Diagram www.viavito.com...
Need help?
Do you have a question about the setry and is the answer not in the manual?
Questions and answers