Advertisement
Available languages
Available languages
Quick Links
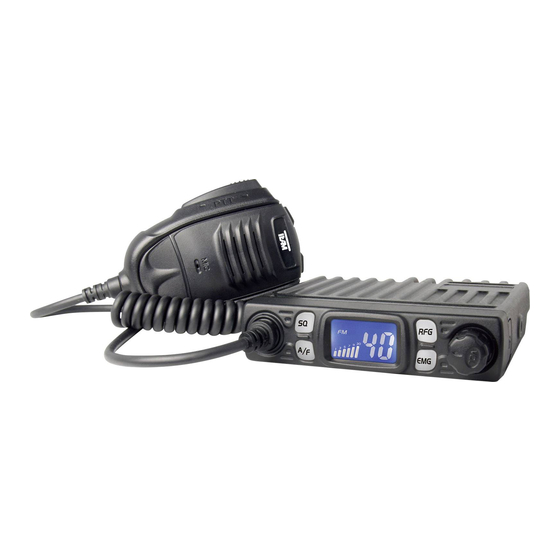
CB Mobile MiniCom
- Full Multi Norm
DE / PL / EC / EI / UK
- hp
CB-Mobilfunkgerät
CB Mobile Radio
Transmisor móvil CB
12 Volt
Cb émetteur récepteur
Ricetrasmettitori
CB mobile zender
Bedienungsanleitung
Operating Instruction
Manual de Instrucción
Manuale d'istruzioni
Mode d'emploi
Handleiding
Advertisement

Related Manuals for Team Electronic CB3208


Summary of Contents for Team Electronic CB3208
- Page 1 CB Mobile MiniCom - Full Multi Norm DE / PL / EC / EI / UK - hp CB-Mobilfunkgerät CB Mobile Radio Transmisor móvil CB Cb émetteur récepteur Ricetrasmettitori CB mobile zender Bedienungsanleitung Operating Instruction Manual de Instrucción Manuale d’istruzioni 12 Volt Mode d’emploi Handleiding...
- Page 2 Bedienelemente - elements - éléments - elementen - elementos - elementi...
- Page 3 INBETRIEBNAHME INHALTSVERZEICHNIS Montage einer CB-Funkantenne Elemente Die Wahl der Antenne und des Montageortes ist von großer Bedeu- tung für die maximale Reichweite Ihrer Funkanlage. Die folgenden Inbetriebnahme Kriterien sollten Sie bei der Wahl des Antennenstandortes und der Montage einer CB-Funkantenne Montage berücksichtigen.
- Page 4 Stromversorgung Ebenso ist auf eine ordentliche Verbindung des Antennenkabels mit Vor dem Anschluss der Stromversorgung schalten Sie das Gerät aus, dem Antennenfuß zu achten. Nicht einwandfreie Verbindungen kön- indem Sie den Lautstärkeregler (5) [VOL] bis zum Einrasten nach nen zu einem Defekt des Gerätes führen und die Funkreichweite er- links drehen.
- Page 5 Mikrofon zu ändern. Nach kurzer Zeit erscheint in der Anzeige der ak- Zum Einstellen bzw. Umschalten der Normen halten Sie bitte den Be- tuelle Kanal. Um den ASQ-Wert anzuzeigen genügt ein kurzes Drücken triebsarten-Umschalter (2) [A/F] während dem Einschalten des Gerä- der SQ-Taste (1).
- Page 6 Empfangsempfindlichkeit [RFG] HINWEISE Signale, die aus unmittelbarer Nähe empfangen werden, können unter Sicherheitshinweis Umständen zu stark sein - das Signal verzerrt. Bitte beachten Sie als KFZ-Fahrer beim Funkbetrieb auch die Bestim- Mit der RFG-Funktion [ RFG ] ( 3 ) wird die Empfangssignalstärke re- mungen der jeweils gültigen Straßenverkehrsordnung.
- Page 7 SETUP TABLE OF CONTENTS Installation of a CB antenna Elements The antenna is one of the most critical parts in the setup. The type of antenna and its location has a great effect on the range of opera- Setup tion. Please consider the following criteria for selection of the best Installation of a CB antenna location and installation of your antenna: Aerial Connection...
- Page 8 Aerial Connection Power source Before pressing the transmit key, a suitable aerial must be con- Before connecting the unit to a suitable power source via the fused nected. The PL259 plug of the aerial cable (coax) is connected to DC power cable, the device must be switched off by turning the vo- the SO239 socket (8) on the rear panel.
-
Page 9: Operation
OPERATION The selected modulation type is indicated by the AM/FM symbol. To toggle between the modes press the mode key (2) [A/F]. On/Off [ VOL ] With the norm UK of the Full Multi Norm, you toggle between the EC To turn on/off the radio, turn the volume switch (5) [VOL] band and the UK band by pressing the mode key (2) [A/F]. - Page 10 Transmitting To transmit, press and hold the PTT key at the microphone. The TX Additional information symbol appears in the LCD. Safety instruction For best quality, speak normally at a distance of 2 - 4 inches. Speaking too Drivers must obey traffic rules regarding the use of transceivers in a loudly will cause distortion and makes the signal difficult to understand.
- Page 11 Instalación ÍNDICE Instalación de una antena CB Elementos 2 - 3 La antena es una de las partes más importantes del equipo, siendo la clase de antena utilizada la que determina el alcance del funcio- Instalación namiento. Para seleccionar el lugar y la instalación apropiada de ésta Instalación de una antena CB le aconsejamos que sigan los siguientes criterios: Conexión aérea...
- Page 12 Una vez instalados equipo y antena, deberá medirse el R.O.E. BLACK (Negativo) conectar a - MINUS / tierra de la batería del coche. (SWR) para un correcto funcionamiento del conjunto. Una R.O.E. RED (Positivo) conectar a 12 voltios + PLUS de la batería del coche. (SWR) elevada disminuye la potencia radiada y podría causar daños Si la alimentación no está...
- Page 13 Selección de modulación [ A/F ] Transmisión El CB Mobile MiniCom puede funcionar en modulación AM o FM. Para transmisión pulsar y mantener el botón PTT del micrófono. Apa- Ésta se puede cambiar pulsando el botón (2) [ A/F ] entre los tipos de recerá...
- Page 14 Jack de altavoces externos Technische Daten / specifications / Caractéristiques / Características técnicas / Technische gegevens El radio está equipado con una toma jack de 3,5 mm (7) en el panel posterior para conectar un altavoz externo de impedancia de 4 - 8 GENERAL Modulation Mode AM/FM...
- Page 15 Installazione del Team CB Mobile MiniCom INDICE Installazione di un'antenna Cb L'Antenna è una delle parti più importanti dell'applicazione. Il tipo di Elementi 2 - 3 antenna e la sua posizione hanno una grande importanza sul funzio- namento del sistema. Per favore considerare i seguenti criteri di se- Installazione del Team CB Mobile MiniCom lezione della migliore posizione ed installazione della vostra antenna: Installazione di un'antenna Cb...
- Page 16 Connessione volante Microfono Prima di premere il tasto di trasmissione, dev'essere stabilita un'ade- Il microfono è costantemente collegato alla radio. Esso contiene il tasto guata connessione volante. La spina PL259 del cavo (coassiale) è PTT, così come i selettori di canale UP e DN. collegato alla presa SO239 (8) sul pannello posteriore.
- Page 17 Funzionamento dell'apparato TEAM CB Mobile MiniCom Scansione canali [ A/F ] Se questa funzione è attiva, l'unità ricerca i canali occupati. Premere Accensione [VOL] il tasto (2) [ A/F ] per circa un secondo per avviare la scansione dei L'apparato si accende, ruotando il tasto controllo del volume (5) [VOL] canali.
- Page 18 Priorità canale 9 / 19 [ EMG ] Informazioni supplementaria La CB Mobile MiniCom è dotata di un canale prioritario 9 e 19. Il ca- nale prioritario 9 è selezionato premendo il tasto (4) [ EMG ] una Istruzioni di sicurezza volta.
- Page 19 Mise en service du TEAM CB Mobile MiniCom CONTENU Montage d'une antenne CB Éléments 2 - 3 L'antenne est une partie très importante d'une station émettrice. Le type d'antenne et le lieu de placement sont d'une grande importance Mise en service du TEAM CB Mobile MiniCom pour la portée de votre émetteur récepteur.
- Page 20 Connexion de l'antenne Microphone Avant d'émettre il faut brancher une antenne à l'appareil. Le connecteur Le microphone est fermement connecté à l'appareil. Il est équipé d'un PL du type PL259 du câble d'antenne (coax) doit être raccordé à la bouton PTT et des boutons de sélection de canaux UP et DN. prise d'antenne (8) placé...
- Page 21 Réglage du squelch [ SQ ] Espèces de modèles La radio est équipée avec un squelch automatique (ASQ) et un L'appareil CB Mobile MiniCom Full Multi Norm peut être fourni en plu- squelch manuel (SQ). Les deux peuvent être réglés. sieurs types, qui se distinguent par les canaux disponibles, les modu- SQ (O.F.
- Page 22 Verrouillage du clavier [ EMG ] INHOUD Pressez la touche (2) EMG aproximativement pour une seconde. Le symbole LC apparaît brièvement à l'écran. Dans cet état l'appareil Elementen 2 - 3 ne réagit pas à la pression sauf la touche PTT et les touches UP et DN pour la sélection de canal.
- Page 23 deel van het zend vermogen in de antenne worden gereflecteerd. Dit Het opzetten van de TEAM CB Mobile MiniCom zorgt ook voor een gereduceerde afstand. De lengte van de antenne Installeren van een CB antenne moet worden aangepast, dit wordt gemeten met een SWR (Team De antenne is een van de meest belangrijke onderdelen van de in- SWR 1180P).
- Page 24 ZWART Sluit deze aan op de - MIN/ massa van de auto accu. Kanaalkeuze [UP] [ DN ] ROOD Sluit deze aan op de 12 volt + PLUS van de auto accu. De Kanalen kunnen door het drukken op de kanaal toetsen [UP] en [ DN ] op de microfoon.
- Page 25 Toetsen blokkering [EMG] Voor het instellen of het omschakelen van de normen houdt u de Druk op de toets (2) [ A/F ] voor ongeveer een seconde. Binnenkort modulatiesoorten schakelaar (2) [A/F] tijdens het inschakelen van het verschijnt het symbool LC in het display. In de actieve toestand rea- apparaat ingedrukt.
- Page 26 Toegevoegde informatie CEPT/EC/EI/DE 41 - 26.565 01 - 27.60125 01 - 26.960 01 - 26.965 Veiligheids instructies 42 - 26.575 02 - 27.61125 02 - 26.970 02 - 26.975 43 - 26.585 03 - 27.62125 03 - 26.980 03 - 26.985 Rijders moeten opletten op de verkeersregels bij het gebruik van de 44 - 26.595 04 - 27.63125...
- Page 27 √ -hp- Hersteller / Manufacturer TEAM Electronic Ges.m.b.H. Kleßheimer Allee 47 A-5020 Salzburg AUSTRIA Service: TEAM Electronic GmbH Bolongarostrasse 88 D-65929 Frankfurt am Main GERMANY Tel. ++49 - 69 - 300 9 500 Fax ++49 - 69 - 314382 team-electronic@t-online.de www.team-electronic.de...
Need help?
Do you have a question about the CB3208 and is the answer not in the manual?
Questions and answers