Table of Contents
Advertisement
Advertisement
Table of Contents

Subscribe to Our Youtube Channel
Related Manuals for TESTO 552


Summary of Contents for TESTO 552
- Page 1 Testo 552 - Digital Vacuum Gauge with Bluetooth Instruction manual...
-
Page 3: Table Of Contents
4.9 List, graphic diagram and table view ........... 21 4.10 Exporting readings ................21 4.10.1 Excel (CSV) Export ..............21 4.10.2 PDF Export ................21 4.10.3 Exporting a graph ..............22 4.11 Operating as a probe on the testo 570 ..........22... - Page 4 5 Maintenance ..................24 5.1 Changing batteries ................24 Cleaning the instrument ................24 6 Tips and assistance ................26 6.1 Questions and answers ............... 26 6.2 Accessories and spare parts ............... 26 7 EC Declaration of Conformity ............. 27...
-
Page 5: Safety And Waste Disposal
Only perform maintenance and repair work on this instrument that is described in this documentation. Follow the prescribed steps exactly. • Use only original spare parts from Testo. Batteries • Improper use of batteries may cause the batteries to be destroyed, or lead to injury due to current surges, fire or escaping chemicals. -
Page 6: Waste Disposal
• At the end of its useful life, dispose of the instrument via separate collection for electro- and electronic devices. Please observe local regulations concerning waste disposal. Or alternatively return the product to Testo for disposal. -
Page 7: General Technical Data
0.5 sec Sensor 1× Pirani sensor - 2× 7/16" UNF Connections - 1x MiniDIN (t570) Warranty 2 years Warranty terms: see website www.testo.com/warranty Setting values alarm treshold Unit Setting range Resolution mbar / hPa 0 - 7,5 0,05 micron 0 - 7500... -
Page 8: Bluetooth Module
2 General technical data 2.1 Bluetooth module The use of the wireless module is subject to the regulations and stipulations of the respective country of use, and the module may only be used in each case in countries for which a country certification has been granted. -
Page 9: Description Of The Instrument
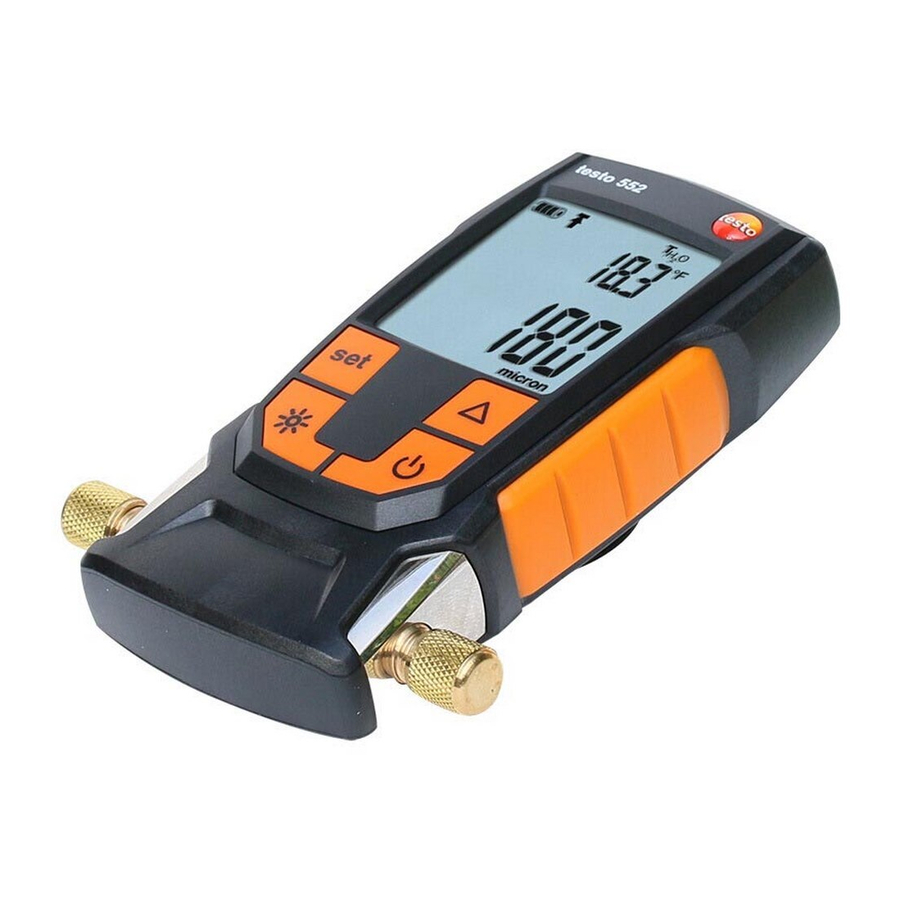
3 Description of the instrument 3.1 Use The testo 552 is a digital vacuum gauge for the precise measurement of extremely small pressures in the vacuum range. This allows you to monitor the evacuation (usually during commissioning) of refrigeration systems and heat pumps. -
Page 10: Displays Overview
Δt = temperature difference between evaporation temperature of water and ambient temperature - unit set (°C, °F) 5 Slave Mode Appears when the testo 552 is connected to the testo 570 via a connecting cable and the testo 570 is in Evacuation mode. -
Page 11: Control Keys Overview
3.5 Connection options overview In regard to the following connection options, the testo 570 is used to represent any manifold and can use the testo 552 as a probe via a MiniDIN connecting cable (see Option 2). Option 1 (recommended) The testo 552 is connected at the point that is furthest from the vacuum pump. - Page 12 3 Description of the instrument Option 2 Option 3 Option 4...
- Page 13 3 Description of the instrument Option 5...
-
Page 14: Operation
4 Operation 4.1 Connecting Always use refrigerant hoses that are specifically intended for evacuations. - Remove sealing caps. - Connect the testo 552 to the circuit. 4.2 Switching instrument on and off - Press The instrument switches on or off. -
Page 15: Switching Background Illumination On And Off
4 Operation 4.3 Switching background illumination on and off - Switch the instrument on. - Press The background illumination switches on or off. 4.4 Setting units and AutoOff The set-up menu must always be completely navigated through, even if only one parameter needs to be changed. - Switch the instrument on. - Page 16 4 Operation - Press to set the pressure unit required. - Press The unit is set. The display shows the temperature unit. - Press to set the temperature unit required. - Press The temperature unit is set. ...
- Page 17 4 Operation - Press to set the alarm threshold. - Press The alarm threshold is set. The display shows the AutoOff setting. If AutoOff is activated, the instrument switches off after 15 minutes when ambient pressure is applied to the sensor. - Press to switch AutoOff on or off.
-
Page 18: Displaying Temperature Values
°F for °F. 4.6 Establishing a Bluetooth® connection You need a tablet or smartphone with the Testo Smart Probes App already installed on it to be able to establish a Bluetooth connection. You can get the App for iOS instruments in the App Store or for Android instruments in the Play Store. -
Page 19: Overview Of Operating Controls
Bluetooth® is disabled. is not displayed 4.7 Overview of operating controls Choice of applications. Display of connected testo 552. 3. Switch between the views (list, graphic diagram, table). Restarts the measuring value recording in graph and table format. Export the readings. -
Page 20: Display Tutorial
4 Operation - Tap several times until the measurement view is displayed. The language has been changed. 4.8.2 Display Tutorial The Tutorial guides you through the first steps when operating the testo Smart Probes App. - Tap -> Tutorial ... -
Page 21: List, Graphic Diagram And Table View
The available readings can be displayed in different ways in the various views. • List view Displays the readings transmitted by the testo 552 in the form of a list. Readings from all connected testo 552 are displayed here. •... -
Page 22: Exporting A Graph
The testo 552 has no save or transmission function of its own. By connecting the testo 552 to the testo 570, the data is transferred to the testo 570. From there the data can be saved or managed via the EasyKool software. - Page 23 When used as a probe, the testo 552 cannot be operated, all keys are deactivated. In order to be able to use the readings from the testo 552 via the testo 570 in the EasyKool software, you need EasyKool software version 4.0 or later.
-
Page 24: Maintenance
5 Maintenance 5 Maintenance 5.1 Changing batteries - Switch the instrument off. - Flip hook up. - Open the battery compartment. - Remove batteries. - Insert new batteries, observing the indications inside the battery compartment. - Close the battery compartment. - Fold hook down. - Page 25 5 Maintenance - Shake the instrument briefly. - Remove all the alcohol from the instrument. - Repeat this process at least twice. - Leave the instrument to dry for at least 1 hour. To dry the sensor faster, you can connect the probe directly to a vacuum pump and draw vacuum.
-
Page 26: Tips And Assistance
(0 to 20,000 microns). If we have not been able to answer your question, please contact your dealer or Testo Customer Service. You will find contact details on the back of this document or on the website www.testo.com/service-contact 6.2 Accessories and spare parts... -
Page 27: Ec Declaration Of Conformity
7 EC Declaration of Conformity 7 EC Declaration of Conformity... - Page 28 7 EC Declaration of Conformity The use of the wireless module is subject to the regulations and stipulations of the respective country of use, and the module may only be used in countries for which a country certification has been granted. The user and every owner has the obligation to adhere to these regulations and prerequisites for use, and acknowledges that the re-sale, export, import etc.
- Page 29 7 EC Declaration of Conformity designed to provide reasonable protection against harmful interference in a residential installation. This equipment generates, uses and can radiate radio frequency energy and, if not installed and used in accordance with the instructions, may cause harmful interference to radio communications. However, there is no guarantee that interference will not occur in a particular installation.
- Page 30 0970 5522 en 01...
Need help?
Do you have a question about the 552 and is the answer not in the manual?
Questions and answers