Table of Contents
Advertisement
Advertisement
Table of Contents

Subscribe to Our Youtube Channel
Related Manuals for TESTO 552


Summary of Contents for TESTO 552
- Page 1 552 - Instruction manual...
-
Page 2: Table Of Contents
4.4 Setting units and AutoOff ..............9 4.5 Displaying temperature values ............12 ................ 13 4.7 Operating as a probe on the testo 570 ..........13 5 Maintenance ..................14 5.1 Changing batteries ................14 5.2 Cleaning the instrument ............... 14 6 Tips and assistance ................ -
Page 3: Safety And Waste Disposal
Only perform maintenance and repair work on this instrument that is described in this documentation. Follow the prescribed steps exactly. • Use only original spare parts from Testo. Batteries • Improper use of batteries may cause the batteries to be destroyed, or lead to injury due to current surges, fire or escaping chemicals. -
Page 4: Waste Disposal
• At the end of its useful life, dispose of the instrument via separate collection for electro- and electronic devices. Please observe local regulations concerning waste disposal. Or alternatively return the product to Testo for disposal. -
Page 5: Technical Data
Protection class IP 42 Parameter mmHg, Torr, mbar, hPa, micron, inH O, inHg. Measuring cycle 0.5 sec Sensor 1× absolute pressure sensor - 2× 7/16" UNF Connections - 1x MiniDIN (t570) Warranty 2 years Warranty terms: see website www.testo.com/warranty... -
Page 6: Description Of The Instrument
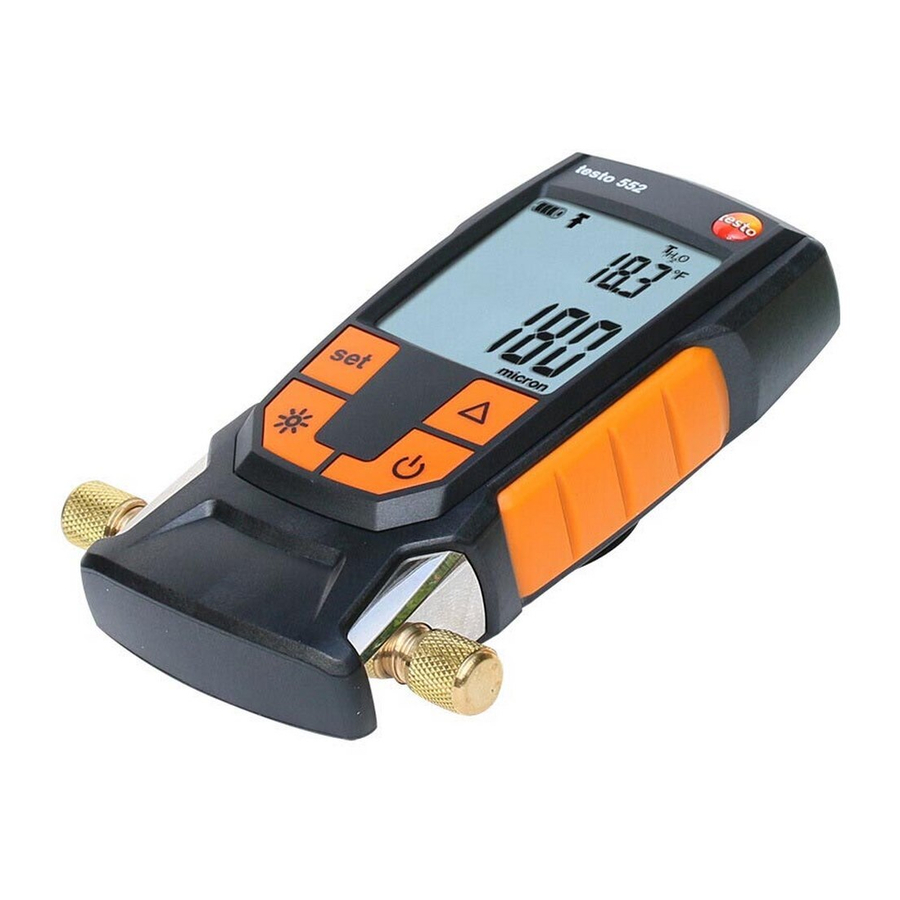
3 Description of the instrument 3.1 Use The testo 552 is a digital vacuum gauge for the precise measurement of extremely small pressures in the vacuum range. This allows you to monitor the evacuation (usually during commissioning) of refrigeration systems and heat pumps. -
Page 7: Displays Overview
3 Description of the instrument Element Function MiniDIN probe socket Cable connection for connecting to the testo 570. Display Displays instrument status icons, measuring units and measuring values. Control keys Instrument operation. Connections 7/16" Connection of refrigerant hoses, vacuum pump, UNF, brass manifolds, etc.. -
Page 8: Control Keys Overview
- unit set (°C, °F) Slave Mode Appears when the testo 552 is connected to the testo 570 via a connecting cable and the testo 570 is in Evacuation mode. Pressure display Displays the currently measured pressure, the measurement parameter and the unit set (mmH , Torr, mbar, hPa, micron, inH O, inHg). -
Page 9: Connection Options Overview
3.5 Connection options overview In regard to the following connection options, the testo 570 is used to represent any manifold and can use the testo 552 as a probe via a MiniDIN connecting cable (see Option 1). Option 1 (recommended) The testo 552 is connected at the point that is furthest from the vacuum pump. -
Page 10: Operation
4 Operation Option 4 Option 5 4 Operation 4.1 Connecting Always use refrigerant hoses that are specifically intended for evacuations. - Remove sealing caps. - Connect the testo 552 to the circuit. -
Page 11: Switching Instrument On And Off
4 Operation 4.2 Switching instrument on and off - Press The instrument switches on or off. 4.3 Switching background illumination on and off - Switch the instrument on. - Press The background illumination switches on or off. 4.4 Setting units and AutoOff The set-up menu must always be completely navigated through, even if only one parameter needs to be changed. - Page 12 4 Operation - Switch the instrument on. - Press to change settings. - Press to set the pressure unit required. - Press The unit is set. The display shows the temperature unit.
- Page 13 4 Operation - Press to set the temperature unit required. - Press The temperature unit is set. The display shows the setting for the alarm threshold. Adjusting the alarm threshold causes an alarm to be triggered when the set value is exceeded. - Press to set the alarm threshold.
-
Page 14: Displaying Temperature Values
4 Operation - Press to switch AutoOff on or off. - Press All settings are stored. The display changes to the measuring mode. The instrument can now be used. 4.5 Displaying temperature values - Press to change the temperature measurement parameter. -
Page 15: Operating As A Probe On The Testo 570
K for °C, and in °F for °F. alibration 4.7 Operating as a probe on the testo 570 - Switch the testo 552 on. - Connect the connecting cable to the MiniDIN probe socket of the testo 552. -
Page 16: Maintenance
5 Maintenance The testo 552 switches to Slave mode. The readings are transmitted to the testo 570. 5 Maintenance 5.1 Changing batteries - Switch the instrument off. - Flip hook up. - Open the battery compartment. - Remove batteries. - Insert new batteries, observing the indications inside the battery compartment. -
Page 17: Tips And Assistance
- Carry out the field calibration of testo 552. If we have not been able to answer your question, please contact your dealer or Testo Customer Service. You will find contact details on the back of this document or on the website www.testo.com/service-contact...
Need help?
Do you have a question about the 552 and is the answer not in the manual?
Questions and answers