TESTO 550 Quick Start Manual
Digital manifold
Hide thumbs
Also See for 550:
- Quick start manual ,
- Instruction manual (20 pages) ,
- Quick start manual (2 pages)
Advertisement
Quick Links
Download this manual
See also:
Instruction Manual
Pic. 14
Warranty
The testo 550 has a two year warranty
Troubleshoot,
evacuate, charge
Testo INC., 40 White Lake Road, Sparta, NJ 07871
(800) 227-0729, email: info@testo.com,
www.testoUSA.com/refrigeration
Vacuum Indication
Testo 550 is capable of gross vacuum indication. The
measurement is performed on the low-pressure side.
1.
Press the [Mode] button twice to get to the
vacuum indication menu (Pic. 14).
2.
Start the evacuation.
3.
The 550 will indicate the vacuum on the
low-pressure side.
Remember, vacuum indication is performed in inHg.
The testo 550 does not have the resolution to read mi-
crons and a separate vacuum gauge is recommended
for vacuum measurement.
1 inHg = 25,400 microns
Cool, heat pump or
Conduct leak test
auto mode
QSG550_June2012
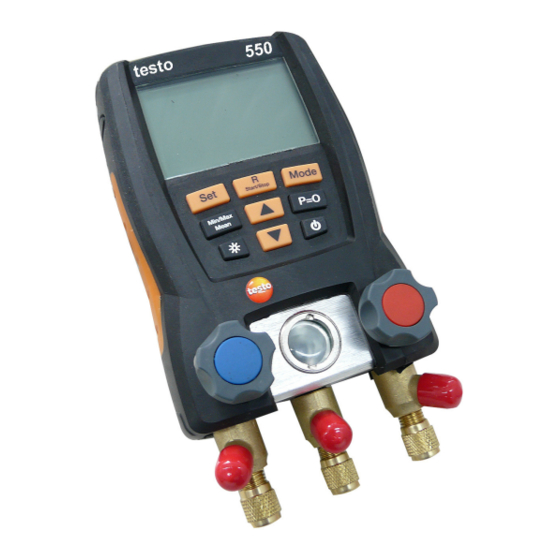
testo 550 Digital Manifold
2012 Quick Start Guide
Temperature port on each side
2 line, back lit LCD display
Control keys
Pressure zeroing
Power On/Off
Arrow keys
Backlight
Valve knobs
3 x 1/4" SAE connections
Show Min/Max/Mean values
Advertisement

Related Manuals for TESTO 550


Summary of Contents for TESTO 550
- Page 1 2012 Quick Start Guide low-pressure side. Remember, vacuum indication is performed in inHg. The testo 550 does not have the resolution to read mi- crons and a separate vacuum gauge is recommended for vacuum measurement. 1 inHg = 25,400 microns...
- Page 2 With the instrument off, simultaneously press the Set Pic. 4 Pic. 5 Choose the desired units with the arrow and Mode while turning on the 550. This will turn off the keys. surface compensation to provide an accurate ambient Press the [Set] button for the third time air temperature.
Need help?
Do you have a question about the 550 and is the answer not in the manual?
Questions and answers