Table of Contents
Advertisement
Quick Links
MASTER GUIDE
Thank you very much for purchasing this product.
To ensure correct and safe usage with a full understanding of this product's performance, please be sure to read through
this manual completely and store it in a safe location.
Unauthorized copying or transferral, in whole or in part, of this manual is prohibited.
The contents of this document and the specifications of this product are subject to change without notice.
The documentation and the product have been prepared and tested as much as possible. If you find any misprint or
error, please inform us.
Roland DG Corp. assumes no responsibility for any direct or indirect loss or damage which may occur through use of
this product, regardless of any failure to perform on the part of this product.
Roland DG Corp. assumes no responsibility for any direct or indirect loss or damage which may occur with respect to
any article made using this product.
Advertisement
Table of Contents

Related Manuals for Roland LEF-12


Summary of Contents for Roland LEF-12
- Page 1 The documentation and the product have been prepared and tested as much as possible. If you find any misprint or error, please inform us. Roland DG Corp. assumes no responsibility for any direct or indirect loss or damage which may occur through use of this product, regardless of any failure to perform on the part of this product.
- Page 2 GPL/LGPL software. You can obtain the GPL/LGPL source code used in this product by downloading it from the following website. URL: http://www.rolanddg.com/gpl/ Roland DG Corp. has licensed the MMP technology from the TPL Group.
-
Page 3: Table Of Contents
Contents Contents ......................1 Chapter 1 Basic Operation .................3 Part Names and Functions ................4 Printer Unit ............................4 Operation panel ..........................5 Menu List .......................6 Main Menu ............................6 Language and Unit Menu ......................8 Function Menu ..........................8 Basic Operation .....................9 Basic Operation Flow ........................ - Page 4 An Error Message Appears ......................87 Main Specifications ..................89 Dimensional Drawing ........................89 Locations of the Power Rating and Serial Number Labels..........90 Specifications Table ........................91 Company names and product names are trademarks or registered trademarks of their respective holders. Copyright © 2011-2012 Roland DG Corporation http://www.rolanddg.com/...
-
Page 5: Chapter 1 Basic Operation
Chapter 1 Basic Operation Part Names and Functions ............4 Printer Unit ...................4 Operation panel ................5 Menu List ..................6 Main Menu ...................6 Language and Unit Menu ............7 Function Menu ................8 Basic Operation ................9 Basic Operation Flow ..............9 Switching the Power On and Off ..........10 How to Secure the Media ............11 Set height position of media (automatic) ........13 Set height position of media (manual) ........15... -
Page 6: Part Names And Functions
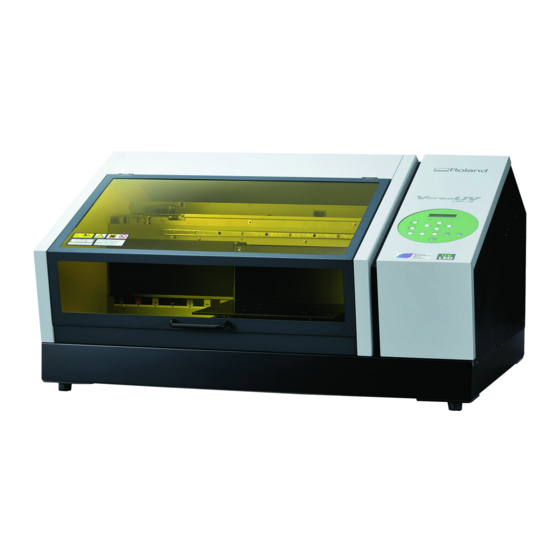
Part Names and Functions Printer Unit Front Carriage fan UV-LED device Front cover Spins while printing. Keep this cover closed except Ink cartridge cover when necessary, such as when Keep this cover closed ex- loading media. cept when necessary, such as when replacing the ink cartridges. -
Page 7: Operation Panel
Part Names and Functions Operation panel Display screen BUSY light This lamp lights up during output and other such operations. Cursor keys Used for various menu settings and when moving the flat table and print- head carriage. Moves 0.1 mm with one short press. Hold to move fast continuously. -
Page 8: Menu List
Menu List Main Menu Chapter 1 Basic Operation... - Page 9 Menu List Chapter 1 Basic Operation...
-
Page 10: Language And Unit Menu
Menu List Language and Unit Menu While holding down , switch on the sub power. MENU LANGUAGE ENGLISH LENGTH UNIT TEMP. UNIT Function Menu Press To the [UV SCANNING] menu To the [POWERFUL CL.] menu FUNCTION CLEANING CLEANING TEST PRINT CLEANING NORMAL CL. -
Page 11: Basic Operation
Basic Operation Basic Operation Flow 1. Power on P. 10, "Switching the Power On and Off" When Starting Daily Operations 2. Secure the media P. 11, "How to Secure the Media" 3. Set the height position of media ... -
Page 12: Switching The Power On And Off
Basic Operation Switching the Power On and Off Switch On Switch on the main power switch. Close the front cover. Rear Switch on the sub power switch. Switch Off Hold down sub power switch for one second or longer. The sub power switches off auto- matically. -
Page 13: How To Secure The Media
Basic Operation How to Secure the Media Conditions for Usable Media *In this manual, the printing material used for output is called “media”. Maximum size: width 335 mm (13.19 in) x depth 310 mm (12.2 in) x height 100 mm (3.94 in) Maximum weight: 5 Kg (11.02 lbs) ... -
Page 14: Printable Area
Basic Operation Printable area The maximum printable area is width 305 mm (12.01 in) x depth 280 mm (11.03 in) x height 100 mm (3.94 in). * The maximum printable area is inside the guide lines on the flat table. * The maximum size of the media and the printable area are different. -
Page 15: Set Height Position Of Media (Automatic)
Basic Operation Media Using an adhesive sheet This method secures the media in place using an adhesive sheet, which is included. Load the adhesive sheet on the flat table, and press the media on top of Adhesive sheet the sheet to set. It can be set anywhere as long as it does not protrude from the top of the flat table. - Page 16 Basic Operation Press Close the front cover when it is open. Note: Check the height of the media again. The following step moves the flat table rearward. Check again that the height of the media has been adjusted so that the media does not come in contact with the media gap sensor. If the media hits the media gap sensor, the media may be damaged or the head gap sensor may fail.
-
Page 17: Set Height Position Of Media (Manual)
Basic Operation Set height position of media (manual) Set the media’s height position manually to a position suitable for printing. Manual setup takes a little longer than the automatic setup because alignment is done by sight, but use it when you do not want to let the media gap sensor to touch the media. (The media gap sensor touches the media in automatic setup.) * If the print surface is uneven, there is a limit to the area of unevenness. - Page 18 Basic Operation Press to select "YES" or "NO." CHECK HEIGHT? If you want to check that the height of the media is correctly adjusted, select "YES." Otherwise, select "NO." Note: If you select "YES," check the height of the media again. If you select "YES,"...
-
Page 19: Choosing How To Specify The Print Area
Basic Operation Choosing How to Specify the Print Area There are two ways you can set the print area on this machine. It is best to decide on a method depending on the shape of the object you are printing on. Specify the print area Enter the "Print-Start Position (lower right of print area)", and the directly... - Page 20 Basic Operation Press SCAN : to move the laser pointer until it points to FEED : a position to the right foreground of the print area. Press to enable the setting. Print heads return to the standby position. CHECK TABLE When the media touches the media gap sensor, the screen shown HEIGHT in the figure appears and there will be no setup information in the...
-
Page 21: Specifying The Print Area From The Print Center Position
Basic Operation Specifying the Print Area from the Print Center Position When an approximate print area has been determined, specify the print area's width and length after specify- ing the center position of the print area. This method is appropriate when clear specification of the print area is difficult, or when the print site is curved or uneven. -
Page 22: Printing Test And Normal Cleaning
Basic Operation Press to enter the length of the area you WIDTH : LENGTH : want to print. Press to enter the width of the area you want to print. For a test print, set width to 80 mm or more, and length to 70 mm or more. - Page 23 Basic Operation Press CLEANING TEST PRINT A test pattern is printed. Dot drop-out When the test print results are difficult to make Check the results in a bright location, changing your line of vision. It is visible using the reflection of the light. Normal Cleaning Method Procedure ...
-
Page 24: Start Printing
Installed VersaWorks Connected VersaWorks and this machine Learned the basic operation of VersaWorks "Roland VersaWorks Quick Start Guide" (included) Setup of media on this machine P. 13, "Set height position of media (automatic)" P. 15, "Set height position of media (manual)"... - Page 25 Basic Operation Click "Get Media Width". Load the print area set on this machine into Versa- Works. Displays the width and length of print area retrieved. * When performing other settings, see Quick Start Guide and Help for VersaWorks, or the included "White & Gloss Ink Guide".
- Page 26 Basic Operation Output print data using VersaWorks. Click the [Queue A ] tab in the [Job List], and drag-and-drop the print data to the job list in A Input (if the print setting is done on B Input, this should be the job list in B Input). Details of the data appears in the preview window, and the layout on the media appears in the layout window.
- Page 27 Basic Operation The white part in the layout area is the print area that was loaded in STEP . The portion that is not in the print area will not be printed. Use this screen to fit the print data in the print area and adjust its position. Layout area Select [Fit to Media Size] checkbox to adjust the print...
- Page 28 Basic Operation When the printing position is adjusted, click [OK]. Click Start printing. Operation at the time of completion of printing differs depending on the setting in "PRT CONINUE." P. 44, "Continuously Outputting Print Data" * Make sure to check for dot drop-out by performing printing tests after daily operations. If dot drop-out is present, perform normal cleaning.
-
Page 29: Printing Tests And Normal Cleaning After Daily Operations
Basic Operation Pausing or Canceling Output You can pause and cancel printing before it finishes. However, we do not recommend resuming printing because colors may be uneven in the place where output stopped. Procedure Press while printing. This pauses printing operation. Press again if you want to resume printing. -
Page 31: Chapter 2 Fully Utilizing The Machine
Chapter 2 Fully Utilizing the Ma- chine IImportant points to check before printing ........30 Four important points (measures for ink mist and UV reflected light) ...................30 Fully Utilizing Preset Feature ............34 Saving Current Media Setup with a Different Name ....34 Load a Preset and Print/Fine-Tune and Print ......35 Fully Utilizing the Media Loading Feature ........37 Checking the Print Area (Preview Feature) .......37... -
Page 32: Important Points To Check Before Printing
Important points to check before printing Four important points (measures for ink mist and UV reflected light) On this machine, ink affixed on the surface of the print head might be cured by ink mist (ink splash upon printing) and reflection of the UV lamp light. If ink affixed on the surface of the print head is cured, it might cause dot drop-outs, and if you use the product without taking any measures, it might cause a failure which requires replacement of the print head. - Page 33 Important points to check before printing 3. A jig might be required according to the shape of the print object (media). The distance between the print head surface and the print object (media) surface becomes longer upon print according to the shape of the print object (media). If the distance becomes longer, ink mist is likely to occur, and the UV lamp light is also likely to be reflected.
- Page 34 Important points to check before printing When you make a borderless print on a print object (media) with a 2 mm or more height difference When you make a borderless print on a print object (media) with a 2 mm or more height difference, a jig ac- cording to the print area is required.
- Page 35 Important points to check before printing 4. Cover the margin areas of the flat table with black sponge when you make a print on a 3D object with a 10 mm or more height. If the distance between the highest position of the print object (media) and the flat table surface is 10 mm or more, the UV lamp light is likely to be reflected.
-
Page 36: Fully Utilizing Preset Feature
Fully Utilizing Preset Feature Saving Current Media Setup with a Different Name Procedure Set up the media (height position, print area) and make sure is lit. Press Press in this order to display the figure PRESET SAVE on the left. -
Page 37: Load A Preset And Print/Fine-Tune And Print
Fully Utilizing Preset Feature Load a Preset and Print/Fine-Tune and Print Procedure Press Press twice. MENU PRESET Press to select the name of the preset LOAD NAME1 you want to load. Press to enable the setting. SETUP MEDIA The screen shown in the figure appears. - Page 38 Fully Utilizing Preset Feature Description You can load a saved media preset setting and use it to print on media having the same size or print after mak- ing small changes in the setting. Select any one of eight types of presets (when no names have been assigned, select from among NAME1 through NAME8) or DEFAULT (DEFAULT is the factory defaults for each setting).
-
Page 39: Fully Utilizing The Media Loading Feature
Fully Utilizing the Media Loading Feature Checking the Print Area (Preview Feature) Procedure Specify the print area. P. 17, "Specify the print area directly" P. 19, "Specifying the Print Area from the Print Center Position" Press ... -
Page 40: You Can Fine Tune The Print Area That Is Set
Fully Utilizing the Media Loading Feature You can fine tune the print area that is set Procedure Specify the print area. P. 17, "Specify the print area directly" P. 19, "Specifying the Print Area from the Print Center Position" ... -
Page 41: Height Settings When The Print Surface Is Uneven
Fully Utilizing the Media Loading Feature Height Settings When the Print Surface is Uneven This machine can also print on uneven surfaces. However, remember the following points for the height set- ting. Automatically set the height for the highest position of the media. ... -
Page 42: Even When The Media Comes Into Contact With The Media Gap Sensor During Printing, Automatic Adjustment Is Performed To Continue Printing
Fully Utilizing the Media Loading Feature Even when the media comes into contact with the media gap sensor during printing, automatic adjustment is performed to continue printing. Procedure Press Press several times until the screen shown on MENU SUB MENU the left appears. -
Page 43: Fully Utilizing The Print Quality Adjustment Feature
Fully Utilizing the Print Quality Adjustment Feature Preventing Soiling of the Media and Dot Drop-out Procedure Press Press several times until the screen shown on MENU SUB MENU the left appears. Press Press several times until the screen shown on SUB MENU PERIODIC CL. -
Page 44: Reducing Print Quality Degradation From Ink Mist (Ink Spatter)
Fully Utilizing the Print Quality Adjustment Feature Reducing Print Quality Degradation from Ink Mist (Ink Spatter) Procedure Press Press several times until the screen shown on MENU SUB MENU the left appears. Press three times. Press to select an item. CARRIAGE FAN HIGH MIDDLE... -
Page 45: Re-Curing Ink
Fully Utilizing the Print Quality Adjustment Feature Re-curing Ink This feature cannot be used if media setup has been canceled. (When the media is being set up, flashes. If you hold for one second or longer, the setup will be canceled. When canceled, turns off.) Procedure ... -
Page 46: Fully Utilizing Convenient Print Features
Fully Utilizing Convenient Print Features Continuously Outputting Print Data Procedure Press Press several times until the screen shown on MENU SUB MENU the left appears. Press , and then Press SUB MENU PRT CONTINUE Press to select “ENABLE.” PRT CONTINUE ENABLE DISABLE... -
Page 47: Reducing Output Time
Fully Utilizing Convenient Print Features Reducing Output Time Procedure Press Press several times until the screen shown on MENU SUB MENU the left appears. Press Press several times until the screen shown on SUB MENU FULL WIDTH S the left appears. -
Page 48: Fully Utilizing The Administrative Features
Fully Utilizing the Administrative Features Setting the Menu Language and Units of Measurement This feature sets the language and units of measurement displayed on the display screen of the operation panel. Procedure Hold down and switch on the sub power. ... -
Page 49: Deactivating The Sleep Mode (Power Saving Function)
Fully Utilizing the Administrative Features Deactivating the Sleep Mode (Power Saving Function) Procedure Press Press several times until the screen shown on MENU SUB MENU the left appears. Press Press several times until the screen shown on SUB MENU SLEEP the left appears. -
Page 50: Determining What Happens When Ink Runs Out
Fully Utilizing the Administrative Features Determining What Happens When Ink Runs Out This menu lets you change, according to your purpose, the operation that takes place when an ink cartridge is empty. Procedure Press Press several times until the screen shown on MENU SUB MENU the left appears. -
Page 51: Viewing Information About The System Of This Machine
[INK]: Ink type [FIRMWARE]: Firmware version [Network]: Network configuration (IP address, etc.) Continue To the [NETWORK] menu MENU SYSTEM INFO. MODEL SYSTEM INFO. MODEL LEF-12 SYSTEM INFO. SERIAL NO . SERIAL NO. ZS00001 SYSTEM INFO. ECO-UV CMYKGlW SYSTEM INFO. FIRMWARE FIRMWARE Ver.1.00... -
Page 53: Chapter 3 Maintenance
Chapter 3 Maintenance Introduction: About Maintenance ..........52 Automatic Maintenance Feature and Notes ......52 Keep Performing Maintenance ..........52 Alarm Feature ................52 Important Note on Draining Ink..........52 Checking for Remaining Ink and Replacing Ink Cartridges ..53 Checking for Remaining Ink ............53 How to Replace the Ink Cartridge..........54 Maintenance that Should Be Performed Daily ......56 Maintenance of Ink Cartridges...........56 Cleaning ..................56... -
Page 54: Introduction: About Maintenance
Introduction: About Maintenance Automatic Maintenance Feature and Notes This machine has a feature that automatically performs maintenance periodically. Please observe the following because operations, such as preventing the print heads from drying out are performed. Always leave the main power on. ... -
Page 55: Checking For Remaining Ink And Replacing Ink Cartridges
Checking for Remaining Ink and Replacing Ink Cartridges Checking for Remaining Ink Procedure Press Press several times until the screen shown on MENU INK REMAINING the left appears. Press Indicates the amount of ink remaining. When there are more the amount of ink remaining is larger. -
Page 56: How To Replace The Ink Cartridge
Checking for Remaining Ink and Replacing Ink Cartridges How to Replace the Ink Cartridge When ink runs out, a warning beep sounds and printing pauses (unless the default settings have been changed). Pull out the empty cartridge and insert a new one. After replacing the cartridge, close the ink cartridge cover and front cover. - Page 57 Checking for Remaining Ink and Replacing Ink Cartridges Pull out the empty ink cartridge and imme- diately insert the new one. Keep the side with the arrow face up Insert and remove slowly, one at a time ...
-
Page 58: Maintenance That Should Be Performed Daily
Periodic Care and Maintenance P. 60, "Periodic Cleaning Maintenance" * The print heads are components that wear out. Periodic replacement is required, with the frequency of replacement depending on use. Purchase them from your authorized Roland DG Corp. dealer. Chapter 3 Maintenance... -
Page 59: Disposing Of Discharged Ink
Maintenance that Should Be Performed Daily Disposing of Discharged Ink CHECK The drain bottle collects discharged fluid. Dispose of collected material DRAIN BOTTLE before the bottle becomes full. The message shown in the figure appears when a certain amount of discharged fluid has collected in the bottle. Follow the procedure below to discard the discharged fluid. - Page 60 Maintenance that Should Be Performed Daily When the screen shown on the left appears, detach the EMPTY DRAIN BOTTLE bottle, and empty it to discard the discharged fluid. Upper limit Discard before it exceeds this level. CAUTION Before you detach the drain bottle, be sure to wait for the screen to display [EMPTY DRAIN BOTTLE].
- Page 61 Maintenance that Should Be Performed Daily Attach the emptied drain bottle and reset the discharged-fluid count. Re-attach the emptied drain bottle. EMPTY DRAIN BOTTLE Press Press RESET DRAIN COUNTER When the figure shown on the left appears, close the CLOSE PANEL COVER panel cover.
-
Page 62: Periodic Cleaning Maintenance
Periodic Cleaning Maintenance About Each Cleaning Method There are several cleaning menus on this machine. Perform cleaning periodically or as needed. Normal cleaning Perform normal cleaning when there is a nozzle drop-out in test prints. Be sure to do this in the following cases. ... - Page 63 Periodic Cleaning Maintenance Press to choose the group of heads that MEDIUM CL. is not to be cleaned. Press to get rid of the group display. Repeat this procedure to display the groups of only the heads that require cleaning. Printing-test results If the Printing-test Results Dot drop-out...
-
Page 64: Manual Cleaning
The frequency with which manual cleaning should be performed depends on the machine's use. For in- formation about frequency of cleaning needed for your conditions of use, contact your authorized Roland DG Corp. dealer. When the cleaning stick and cleaning liquid used for manual cleaning runs out, purchase them from your authorized Roland DG Corp. - Page 65 Never use any implement other than the included cleaning stick. Cotton swabs or other lint- producing items may damage the heads. If you use up the cleaning stick, purchase a new one from your authorized Roland DG Corp. dealer. Use one cleaning stick per cleaning session. Reusing cleaning sticks may reduce print quality.
- Page 66 Periodic Cleaning Maintenance Press MAINTENANCE CLEANING NOW PROCESSING. . OPEN FRONT The print-head carriage, and then the screen shown in the figure COVER appears. Open the front cover. Touch the location shown in the figure (un- der the ink cartridge cover) to discharge any static electricity.
- Page 67 Periodic Cleaning Maintenance Apply commercially available glass cleaner to the cleaning stick. Use a new cleaning stick. Clean the locations shown in the figure. Be especially careful to clean away any fibrous dust (lint). Area to clean While cleaning, be careful not to touch the head surfaces (nozzle surface) directly with the stick.
-
Page 68: When The White Ink Concentration Is Low
When the White Ink Concentration is Low. Restoring White Ink Concentration. Prolonged use of this machine may cause the concentration of the white ink to decrease. This is because white ingredients in white ink easily precipitate. The "CIRCULATING INK" feature circulates the ink to eliminate white ink precipitation. -
Page 69: When Dot Drop-Out Cannot Be Cleared Up
When Dot Drop-out Cannot be Cleared Up When Dot Drop-out of White or Gloss Ink Cannot be Cleared Up In this operation, all white and gloss inks within the printer are discharged, and the interior is cleaned. Ink is refilled after cleaning. This operation requires two SOL INK cleaning cartridges. White ink tends to settle, and may harden if allowed to stand for a lengthy time. -
Page 70: Cleaning All Print Heads
When Dot Drop-out Cannot be Cleared Up When the screen shown on the left appears, insert an ink SET CARTRIDGE 1 2 3 4 5 6 cartridge in slots 5 and 6. 5, 6 flashes RENEWING INK. . . >... - Page 71 When Dot Drop-out Cannot be Cleared Up Press several times until the screen shown on the SUB MENU INK CONTROL left appears. Press Press twice. Press INK CONTROL HEAD WASH Make sure the cleaning liquid is ready. CLEANING LIQUID IS REQUIRED Press...
- Page 72 This operation is an emergency measure. It may damage defect-free parts depending on the symptoms, worsening the symptoms. If you have any questions, contact your authorized Roland DG Corp. dealer. Procedure ...
-
Page 73: Replacing Consumable Parts
Replace with new items. For information about purchasing wipers, contact your authorized Roland DG Corp. dealer. When a warning beep sounds during wiper replacement A warning beep sounds 10 minutes after operation begins. Stop work and close the front cover. Press to quit the wiper replacement menu. - Page 74 Replacing Consumable Parts Touch the location shown in the figure (un- der the ink cartridge cover) to discharge any static electricity. Preparations are complete when this screen appears. FINISHED? Replace the wipers. Detach the old wipers. Detach the hook and pull up and out. Tweezers (included part) ...
- Page 75 Replacing Consumable Parts Attach the hook. Quit the wiper replacement menu. Close the front cover. Press FINISHED? CLEANING. . . > > > SETUP MEDIA After quitting the wiper replacement menu, the screen returns to the figure as shown. Chapter 3 Maintenance...
-
Page 76: Replacing The Filter
For information about purchasing filters, contact your authorized Roland DG Corp. dealer. When a warning beep sounds during filter replacement A warning beep sounds 10 minutes after operation begins. Stop work and close the front cover. Press to quit the filter replacement menu. - Page 77 Replacing Consumable Parts Replace filter. Replace rear mist fan's filter. When replacing, wipe away any buildup of ink around the fan module with a cloth. Filter Screw Filter cover Press NOW PROCESSING. . The print-head carriage, and then the screen shown in the figure appears.
- Page 78 Replacing Consumable Parts Quit the filter replacement menu. Close the front cover. Press CLEANING. . . > > > SETUP MEDIA After quitting the filter replacement menu, the screen returns to the figure as shown.. Chapter 3 Maintenance...
-
Page 79: When Moving The Unit
When Moving the Unit Procedures from Preparing to Move Through Reinstalling To move the machine, you must completely drain all ink inside the machine and secure the print heads in place with packing materials to protect them. Attempting to move the machine without first doing this may result in damage to internal components due to leaking ink or damage to the heads. - Page 80 When Moving the Unit Secure the print heads and the flat table. The machine is now ready to be moved. Move as soon as possible. Immediately reinstall the machine and fill with ink. See "First Step Guide" and promptly fill with ink. When filling with ink, you use (two) SOL INK cleaning cartridges again.
-
Page 81: Chapter 4 Appendix
Chapter 4 Appendix Read this chapter whenever you face a problem. (FAQ) .....80 Printer Does Not Run ..............80 Attractive Printing Is Not Possible ..........82 The Print Heads Do Not Move ...........84 Handling Messages and Error Messages ........85 A Message Appears ..............85 An Error Message Appears ............87 Main Specifications ..............89 Dimensional Drawing ..............89... -
Page 82: Read This Chapter Whenever You Face A Problem. (Faq)
Read this chapter whenever you face a problem. (FAQ) Printer Does Not Run The Printer Unit Does Not Run Is the power switched on? Switch on the printer's main power, then press the sub power switch and make sure the sub power switch lights up. - Page 83 Did the software RIP end abnormally? Make sure the software RIP is running correctly, then switch the sub power switch off and back on. “Roland VersaWorks Quick Start Guide” Is the temperature of the room too low? Use the machine in an environment where the temperature is 20 to 32°C (68 to 90°F).
-
Page 84: Attractive Printing Is Not Possible
Read this chapter whenever you face a problem. (FAQ) Attractive Printing Is Not Possible Printed Results Are Coarse or Contain Horizontal Stripes Do the print heads show dot drop-out? Carry out a printing test and make sure no dot drop-out occurs. If dot drop-out is present, perform head cleaning. - Page 85 Read this chapter whenever you face a problem. (FAQ) Are the operating parameters set to appropriate values? Depending on the settings for the [PERIODIC CL.] menu, uneven colors may occur. If the settings have been changed, try restoring them to their default values. ...
-
Page 86: The Print Heads Do Not Move
Try switching off the main power, then switching on the main power again, followed by the sub power. If the Heads Still Do Not Move If the heads still do not move, carry out the following emergency response measure, and then contact your authorized Roland DG Corp. dealer. Procedure ... -
Page 87: Handling Messages And Error Messages
Handling Messages and Error Messages A Message Appears These are the main messages that appear on the machine's display to prompt correct operation. They do not indicate any error. Follow the prompts and take action accordingly. 2 ■ 3 ■ 4 ■ 5 ■ 6 ■ ] Only a small amount of ink remains. - Page 88 Handling Messages and Error Messages [SETUP MEDIA] Reload the media and press . This message appears when an attempt to perform a printing test was made while no media was loaded. [INSTALL DRAIN BOTTLE] Check whether the drain bottle is installed. Install the drain bottle, then press [CHECK DRAIN BOTTLE] This message appears when a certain amount of discharged fluid collects in the drain bottle.
-
Page 89: An Error Message Appears
Note the number displayed on the display screen, and then switch off the sub power. After you switch off the power, inform your authorized Roland DG Corp. dealer of the number that appeared on the display screen. [TEMPERATURE IS TOO LOW **°C]... - Page 90 [WRONG HEAD IS INSTALLED] A print head that cannot be used is installed Turn off the sub power. After turning the power off, contact the your authorized Roland DG Corp. dealer. [AVOIDING DRY-UP TURN POWER OFF] The print heads were forced to standby position to prevent them from drying out Operation cannot be continued.
-
Page 91: Main Specifications
Main Specifications Dimensional Drawing Outer Dimensions Unit: mm Discharge duct for tubes with inner diameter of Φ38 Flat Table Dimensions Unit: mm Chapter 4 Appendix... -
Page 92: Locations Of The Power Rating And Serial Number Labels
Main Specifications Locations of the Power Rating and Serial Number Labels Serial Number This number is required when you seek maintenance, servicing, or support. Never remove the label. Power Rating Use an electrical outlet that meets the requirements for voltage, frequency, and amperage given here. Chapter 4 Appendix... -
Page 93: Specifications Table
Humidity: 35 to 80% RH (no condensation) Not operating Temperature: 5 to 40°C (41 to 104°F), Humidity: 20 to 80% RH (no condensation) Accessories Power cord, adhesive sheet, software RIP (Roland VersaWorks), user documentation, etc. (*1) Temperature: 25°C (77°F), humidity: 50% (*2) - Page 96 R4-121012...