Table of Contents
Advertisement
Operator's Manual
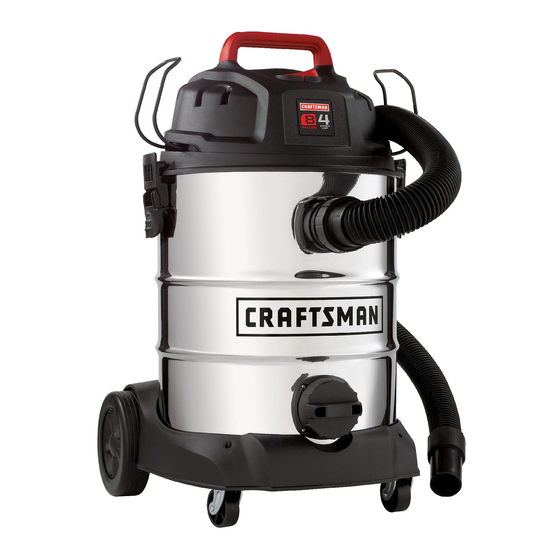
8 Gallon Wet/Dry Vacuum
Model No. 125.17608
CAUTION: Before using this
product, read this manual and
follow all its Safety Rules
and Operating Instructions.
Sears Brands Management Corporation, Hoffman Estates, IL 60179 U.S.A.
www.craftsman.com
•
Safety
•
Assembly
• Operation
• Maintenance
•
Parts
Español - página 16
•
Advertisement
Table of Contents

Related Manuals for Craftsman 125.17608


Summary of Contents for Craftsman 125.17608
- Page 1 Operator’s Manual 8 Gallon Wet/Dry Vacuum Model No. 125.17608 • Safety • Assembly CAUTION: Before using this • Operation product, read this manual and • Maintenance follow all its Safety Rules • Parts and Operating Instructions. Español - página 16 •...
-
Page 2: Warranty
Warranty CRAFTSMAN ONE YEAR LIMITED WARRANTY FOR ONE YEAR from the date of purchase, this product is warranted against any defects in material or workmanship. With proof of purchase, a defective product will be replaced free of charge. For warranty coverage details to obtain free replacement, visit the web site: www.craftsman.com... -
Page 3: Extension Cords
• Do not allow to be used as a toy. Close Observe the following warnings that attention is necessary when used by or appear on the motor housing of your Vac: near children. DOUBLE INSULATED • To reduce the risk of injury from GROUNDING NOT REQUIRED. -
Page 4: Table Of Contents
Introduction Read this operator's manual to familiarize This Wet/Dry Vac is intended for house- hold use. It may be used for vacuuming of yourself with the product features and to understand the specific usage of your new wet or dry media and may be used as a Wet/Dry Vac. -
Page 5: Assembly
Assembly Remove entire contents of carton. Check each item against the carton contents list. If any parts are missing or damaged, return the unit to the retailer of purchase, or call 1-800-469-4663 for part replacement. Handle On/Off Switch Blower Port Power Head Hose Storage Rack Latch... -
Page 6: Unpacking Your Wet/Dry Vacuum & General Assembly
Assembly (continued) A Philips head screw driver and pliers are required. with the screws provided. Do not over WARNING: Do not plug in power tighten the screws. (Fig. 7) cord to power outlet, make sure plug 8. For your conveniance the hose storage is disconnected before assembling rack comes pre-installed. -
Page 7: Operation
Operation Vacuuming Dry Materials WARNING: Be sure to read, understand and apply all the information in the Important Safety Instructions section at the beginning of this operator's manual. Do not vacuum in areas with flammable gases, vapors, or explosive dusts in the air. Flammable gases or vapors include but are not limited to; lighter fluid, solvent type cleaners, oil-base paints, gasoline, alcohol or aerosol sprays. -
Page 8: Vacuuming Liquids
Operation (continued) Vacuuming Liquids WARNING: Be sure to read, understand and apply all the information in the Important Safety Instructions section at the beginning of this operator's manual. Do not vacuum in areas with flammable gases, vapors, or explosive dusts in the air. -
Page 9: Blowing Feature
Operation (continued) Blowing Feature WARNING: Always wear safety goggles complying with ANSI Z87.1 (or in Canada, CSAZ94.3) before using blower. WARNING: Keep bystanders clear from blowing debris. WARNING: Wear a dust mask if blowing creates dust that might be inhaled. This Wet/Dry Vac has blowing capabilities. -
Page 10: Maintenance
Maintenance Emptying the Collection Tank 1. Verify that the power cord is NOTICE! The filter included is made of disconnected from the outlet. (Fig. 1) high quality material designed to stop small 2. Disconnect the hose from the vacuum. dust particles. The filter should be used for (Fig. -
Page 11: Installing A Replacement Cartridge Filter
Installing a Replacement Cartridge Filter This vacuum cleaner is designed to use Craftsman cartridge filters. 1. Carefully slide the Craftsman cartridge filter over the filter cage and press down on the outside edge of the filter until the rubber gasket on the bottom of the filter fits securely around the base of the filter cage and against the lid. -
Page 12: Installing & Cleaning Foam Sleeve Filter
Maintenance (continued) Installing & Cleaning Foam Sleeve Filter Installing Foam Sleeve Filter Cleaning Foam Sleeve Filter 1. Verify that the power cord is 1. With the removed power head in the disconnected from the outlet. (Fig. 1) upside down position, carefully 2. -
Page 13: Troubleshooting
Troubleshooting WARNING: TO REDUCE THE RISK OF ELECTRIC SHOCK-UNPLUG BEFORE TROUBLESHOOTING. Problem Possible Causes Corrective Action Vacuum will not operate 1) No power supply. 1) Check power supply – cord, breakers, fuses. 2) Unplug and check the power 2) Faulty power cord. cord. -
Page 14: Repair Parts
Repair Parts 125.17608 8 Gallon Wet/Dry Vac Always order by part number, not by key number. Always mention the model number when ordering parts. The model number is found on the serial plate located on the vacuum. To order parts, call 1-800-469-4663. - Page 15 Repair Parts (continued) 8 Gallon Wet/Dry Vac...
Need help?
Do you have a question about the 125.17608 and is the answer not in the manual?
Questions and answers
I would like to know oh my craftsman wet and dry vac model number 125–17608 what size is the horse
The horsepower of the Craftsman wet and dry vac model number 125.17608 is 4.0 peak horsepower.
This answer is automatically generated
@ROBERT SALAS
Trying to find out what size was the hose that fits the 125–17608 is it 1 7/8 is it 1 1/4
@ROBERT SALAS
@Chaplain DeRamus
@Chaplain DeRamus I measured 1 7/8". I cannot find an accessory package to fit that. Newer vacs are over 2". I am trying to set up a vacuum system for a woodworking shop and will need different sizes of fittings to connect to my equipment.
I NEED A NEW FOAM SLEEVE FILTER HOWTO GET ONE