
Related Manuals for DITEC DAS107


Summary of Contents for DITEC DAS107
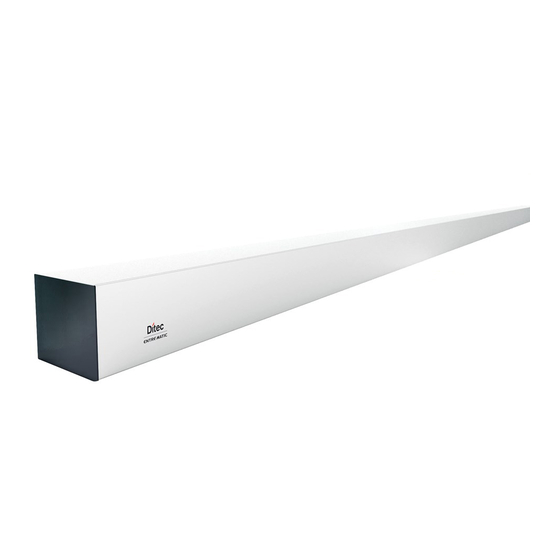
- Page 1 IP2239EN Ditec DAS107 Technical Manual Automation for sliding doors (Original instructions) www.entrematic.com...
-
Page 2: Table Of Contents
Contents Subject Page General safety precautions List of tools Contents of the kit Standard installation Technical specifications Assembling the automation Installing the automation Electrical connections Adjustments Start-up Example of a connection with radar and photocells Troubleshooting / Alarms Routine maintenance plan This symbol indicates instructions or notes regarding safety, to which special atten- tion must be paid. -
Page 3: General Safety Precautions
1. General safety precautions Failure to respect the information given in this manual may cause personal injury or damage to the device. Keep these instructions for future reference This assembly and installation manual is intended exclusively for the use of qualified personnel. Installation, electrical connections and adjustments must be performed by qualified person- nel, in accordance with Good Working Methods and in compliance with the current regulations. -
Page 4: List Of Tools
2. List of tools Tape measure Pencil 10mm open-end spanner 3mm Allen key 10mm embedded hexagon Allen key TORX T20 spanner Drill Scissors... -
Page 5: Contents Of The Kit
3. Contents of the kit TX RX 12 2... - Page 6 Batteries DAS901BAT1 Anti-panic block DAS801LOKA Standard block DAS801LOK complete with release cord The given operating and performance features can only be guaranteed with the use of DITEC Entrematic accessories and safety devices. Unless otherwise specified, all measurements are expressed in mm.
-
Page 7: Standard Installation
4. Standard installation Ref. Code Description Ditec DAS107 Automation for sliding doors COM500MKS Function selector switch Photocells Opening sensors Connect the power supply to an approved omnipolar switch with an opening distance of the contacts of at least 3mm (not supplied). The connection to the mains must be made via an independent channel,... -
Page 8: Technical Specifications
5. Technical specifications Ditec DAS107 Power 110V~ ÷ 220V~ ±10% ; 50/60 Hz Rated power max. 100W Max. load 1 door wing 120kg Max. load 2 door wings 80kg / door wing Temperature -20°C / +50°C Degree of protection IP20... - Page 9 Automation with two door wings The values shown here are calculated by considering an overlap of S=50 *2400 *2600 1040 1010 *2800 1140 1060 *3000 1240 1110 2800 1340 3000 1440 1010 3300 1590 1085 3600 1740 1160 4000 1940 1020 1260 4400...
- Page 10 Automation for a single door wing with right-hand opening The values shown here are calculated by considering an overlap of S=50 2000 1015 1250 2200 1015 1115 1350 2600 1215 1315 1010 1170 1550 3000 1415 1515 1210 1370 1750 3300 1565 1665...
- Page 11 Automation for a single door wing with left-hand opening The values shown here are calculated by considering an overlap of S=50 2000 1015 1780 1440 1280 2200 1015 1115 1880 1540 1380 1000 2600 1215 1315 2080 1740 1580 1200 3000 1415 1515...
- Page 12 6.3 Assembling the carriages Assemble the anti-derailing wheel [13] on the carriages, in the position shown in the figure. 6.4 Assembling the transmission Position the transmission as shown at page 11, 12, 13 in position [F].
- Page 13 6.5 Assembling the belt Insert the belt in the motor pulley (to make this operation easier, turn the pulley). Wrap the belt around the transmission. Join the belt ends in line with the belt connection brackets [9], and lock it in place with the belt restrainer hook [10].
- Page 14 6.6 Installing the door wing block (optional) The door wing blocking device can be fitted to keep the door closed. The automation automatically recognises the blocking device and acts properly. Fasten the door wing blocking device inside the box by means of the screws supplied. Place the door wing in the closure position.
- Page 15 6.8 Assembling the cover supports Insert the cover supports [19] in the cover profile and fix them in place (A) near the end plate, as shown in the figure. Use the screws supplied to fix the heads to the casing profile, as shown. Insert the cover restraints (20) along the cover profile.
-
Page 16: Installing The Automation
7. Installing the automation 7.1 Beam fastening • Establishing the fixing height from the highest point of the finished floor. • Measure the height, including the door wing connection. The installation height is equal to HM+40mm. • Fix the beam profile in the points indicated, using wall plugs and bolts. NB: the heads of the screws/bolts must not be more than 6.5mm. - Page 17 7.2 Installing and adjusting the door wings Fix the carriages to the door wings as shown in the figure. AUTOMATION WITH TWO DOOR WINGS O P E N O P E N AUTOMATION WITH ONE DOOR WING WITH RIGHT-HAND OPENING O P E N AUTOMATION WITH ONE DOOR WING WITH LEFT-HAND OPENING...
- Page 18 The vertical position of the door wing can be adjusted, as shown in the figure. Loosen the screws [A] and adjust the height with the screws [B]. Move the door wing manually to make sure the movement is free and without friction, and that all the wheels (including the anti-derailing wheel) are resting on the guide.
-
Page 19: Electrical Connections
8. Electrical connections Connect the automation to an efficient earthing system that complies with current safety standards. During installation, maintenance and repair operations, cut off the power supply before opening the cover to access the electrical parts. The automation protection casing must be removed by qualified personnel only. An omnipolar disconnection switch with a contact opening distance of at least 3 mm must be fitted on the mains supply. - Page 20 Make the connections indicated. Power supply DAS901BAT1 (12V) (optional) Control panel Motor COM500MKS Output Description Power supply unit connection Motor connection Encoder connection Function selector switch connection green LED For connecting COM500MKS selectors up to a 50m max distance. Connection of battery kit DAS901BAT1 (12V) To charge the batteries, connect the mains power and the battery kit at least 30 minutes before starting the system.
- Page 21 8.1 Control panel commands Jumper the unused NC contacts Ponticellare i contatti N.C. se non utilizzati DO NOT USE NON USARE Blocco Blocking device collegamento blocco blocking device connection (+) Blocco Blocking device (+) 24 V Apertura lato interno Opening - inner side (-) 0 V (+) 24 V DO NOT USE...
-
Page 22: Adjustments
POWER SUPPLY Power supply to the photocells. ACCESSORIES OPENING - Connect the internal sensor. N.O. INNER SIDE The closure of the contact activates the door opening operation. POWER SUPPLY Power supply to internal sensors. ACCESSORIES BLOCKING Output for connecting an electro-mechanical block (optional). DEVICE The blocking device is automatically selected during the CONNECTION... -
Page 23: Start-Up
10. Start-up Start-up must be carried out in the following order when the operator is installed To allow a correct learning of door weight, the “learning phase” must performed with door leaf installed. • Connect the accessories and jumper the N.C contact 8-9 and 8-11 if not used; •... - Page 24 10.4 Description of the parameters In the “INSTALLATION SETTINGS” column you can note the modified setting values. Installation Display Description Factory setting setting Opening speed selection (10÷70; 10= 10cm/s; 70= 50cm/s) Sets the maximum opening speed. Closing speed selection (10÷70; 10= 10cm/s; 70= 50cm/s) AUTO Sets the maximum closing speed.
- Page 25 Installation Display Description Factory setting setting Selection of the battery (00÷01) AUTO 00 = No battery 01 = 12V Adjustment of the opening delay with blocking device (00÷99 s x 0.1) Adjusts the opening delay time when a blocking device is in- stalled, if the selector is set on CLOSED DOOR or ONE-WAY.
- Page 26 11. Example of connection 11.1 Example of connection with opening radar and photocell INNER SENSOR OUTER SENSOR Photocells INSIDE INNER SENSOR SENSOR 24 V 15 16 17 +24V -24V +24V -24V OUTSIDE OUTER SENSOR SENSOR 24 V...
-
Page 27: Example Of A Connection With Radar And Photocells
11.2 Example of connection with opening + safety sensors PASAA2 PASAA2 PASAA2 INNER SENSOR White Brown Green Yellow Pink (+) Blue (-) not connected Red (+) not connected Black (-) PASAA2 OUTER SENSOR White Brown Green Yellow Pink (+) Blue (-) not connected Red (+) not connected... - Page 28 11.3 Example of connection with opening +safety sensors PAS024AS PAS024AS PAS024AS INNER SENSOR Green (+) Brown (-) Yellow White Pink Grey Red (+) Blue (-) PAS024AS OUTER SENSOR Green (+) Brown (-) Yellow White Pink Grey Red (+) Blue (-) If used also photocell in combination with sensors: •...
-
Page 29: Troubleshooting / Alarms
12. Troubleshooting / alarms Problem Solution The automation doesn't open and Check and change the functions selector switch settings. the motor doesn't start up Make sure there are no objects on the sensor's detection path. Check the power supply switch inside the building. The motor starts up but the auto- Check any locks, releasing them if necessary. - Page 30 E3 - Control panel error Error Cause Solution 24V output overcurrent error. Make a RESET. If the problem persists, check the sensors and accessories connected to the 24V output. Make a RESET. If the problem persists, replace the control panel. The green LED flashes or is switched off.
-
Page 31: Routine Maintenance Plan
13. Routine maintenance plan Perform the following operations and checks every 6 months, according to the intensity of use of the automation. Without any power supply from the mains or from batteries: - Clean and lubricate the mobile parts (the carriage slide guides and the floor guides). - Check the belt tension. - Page 32 Entrematic Group AB Lodjursgatan 10 SE-261 44, Landskrona Sweden www.entrematic.com...
Need help?
Do you have a question about the DAS107 and is the answer not in the manual?
Questions and answers