Advertisement
Advertisement
Table of Contents

Related Manuals for Lamona LAM2603


Summary of Contents for Lamona LAM2603
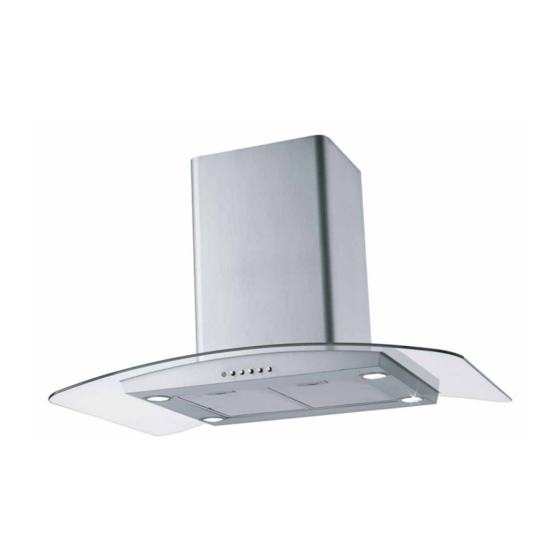
- Page 1 LAM2603 Glass Island Extractor User & Installation Guide...
- Page 2 LAMONA Appliances Dear Customer, Congratulations on your choice of a LAMONA domestic appliance which has been designed to give you excellent service. The user manual will help you use your product quickly and safely. Please read this user manual before installing and using the product.
-
Page 3: Table Of Contents
User manual LAM2603 Index Before using the extractor Safety General Safety for children Safety when working with electricity General information and operation Care and maintenance General Cleaning Grease Filters Carbon Filters Replacing the Lamps Installation Methods of extraction Extraction Via Ducting... -
Page 4: Before Using The Extractor
LAMONA Appliances Before using the Extractor Make sure that you have removed all packaging, wrappings, stickers and from the Extractor It is recommended that you clean the extractor’s surface before using for the time. Safety Keep all ventilation slots clear of obstructions,... -
Page 5: General Information And Operation
User manual LAM2603 General Information & Operation On opening your box you will the extractor body complete with glass canopy, a two-piece telescopic frame, a two-piece decorative chimney, a bag of and a ducting connector. Upper Frame Lower Frame Upper Chimney Section... -
Page 6: Care And Maintenance
LAMONA Appliances Care and Maintenance Before cleaning or attempting any type of maintenance, always make sure that the electricity supply is disconnected. The manufacturer declines all liability in cases where the instructions for the appropriate installation, maintenance and use of the extractor hood are not observed. -
Page 7: Replacing The Lamps
User manual LAM2603 Replacing the Lamps halogen lamps that may need to be replaced periodically. To do this, ensure that the power is switched off and the lamps have had time to cool. open the glass cover and trim that sits over the bulb. -
Page 8: Installation
LAMONA Appliances Installation Methods of Extraction The very best method of clearing the kitchen of unwanted odours is by connecting the appliance to an exhaust duct and venting to the outside atmosphere via the ceiling or an exterior wall. Suitable Ducting kits part ref: APL2807 may be purchased from the depot where you bought the extractor. - Page 9 User manual LAM2603 Installing Your Extractor This instruction must be strictly adhered to. Failure to comply could result in overheating and serious damage to your appliance. It is recommended that the installation is carried out by two people. Ensure the ceiling to whith this extractor it to be installed is strong enough to support the weight of the extractor.
-
Page 10: Installing Your Extractor
LAMONA Appliances Installing Your Extractor Position the hole template on the ceiling paying attention that the arrow is positioned on the same side as the appliance controls (Fig.3) Drill 4, Ø8 holes in the ceiling and drive in 3 screws without completely tightening them. Pay attention not to insert the screw into the hole marked with an X on the hole template (the Fig.3... - Page 11 User manual LAM2603 Installing Your Extractor Take the lower part of the telescopic structure C and insert it into the upper structure B (Fig.5a). Adjust the height of the frame assembly X by referring to the dimensions indicated in (Fig.6) and secure it using the 8 screws G that are supplied (Fig.5b).
- Page 12 LAMONA Appliances Installing Your Extractor Recirculation installation: Ducting out installation: evacuation hole (Fig 7). (Fig.8), the suction unit positioned inside the hood (Fig.9). Fig.8 Fig.7 suction assembly using the 2 screws E (Fig. 9) Fig.9 Page _ 12 www.howdens.com...
- Page 13 User manual LAM2603 Installing Your Extractor Fit the upper chimney piece to the frame using the 2 screws A (Fig.10). Fig.10 (Fig.11a). Partially unscrew the 2 screws O a maximum of 3 mm (Fig.11a). Insert the extractor body into the frame paying attention that the previously unscrewed screws O, hook into the slots in the lower part as indicated in (Fig.11b).
-
Page 14: Installing Your Extractor
LAMONA Appliances Installing Your Extractor Fix the air evacuation pipe H (not supplied Fig.13 Fig.12 Remove adhesive tape L and rest the lower chimney piece above the cooker hood (Fig.13). Page _ 14 www.howdens.com... - Page 15 User manual LAM2603 Electrical Connections with at least 3mm contact separation, The isolation switch must be accessible after installation. (See technical data for fuse rating). The terminology DOUBLE POLE -/+ means that both the live and neutral supplies are switched and disconnected at the same time.
-
Page 16: Troubleshooting
LAMONA Appliances TROUBLESHOOTING GUIDE Symptoms Possible Cause Solutions Lamps fail to A replacement lamp is Disconnect the mains electricity supply operate? probably necessary, but before adjusting or replacing the lamps. holder. (Remember that The extractor lamps may become hot; the lamps are not therefore ensure the bulb has cooled covered by the guarantee.) -
Page 17: Your Guarantee
User manual LAM2603 Your Guarantee Product Guarantee Details (UK only) breakdown repairs. (Details of which are shown on your Proof of Purchase Document). Any claim during the period of the guarantee (MUST BE ACCOMPANIED BY THE PROOF OF PURCHASE) The product must be correctly installed and operated in accordance with the manufacturer’s instructions and used for normal domestic purposes. - Page 18 LAMONA Appliances Page _ 18 www.howdens.com...
- Page 19 User manual LAM2603 Exclusive to Howdens Joinery.co Page _ 19...
- Page 20 Issue: 12/2014 If supplied, please stick your self adhesive product rating plate here, or make a note of the product serial number below in the box below for future reference. Serial Number : ...................
Need help?
Do you have a question about the LAM2603 and is the answer not in the manual?
Questions and answers