Tunstall THE VIBBY Installation Manual
Hide thumbs
Also See for THE VIBBY:
- User and installation manual (13 pages) ,
- Installation manual (24 pages)
Table of Contents
Advertisement
Advertisement
Table of Contents

Related Manuals for Tunstall THE VIBBY


Summary of Contents for Tunstall THE VIBBY
- Page 1 The Vibby Installation Guide...
-
Page 2: Table Of Contents
Removing the Wrist Strap ................19 Fitting a replacement Wrist Strap ..............20 Ensuring the Wrist Strap is Correctly Installed ..........21 Fitting a neck cord to the Vibby ..............22 Spares and Accessories .................. 23 Low Battery Calls ....................24 Technical Details .................... -
Page 3: Introduction
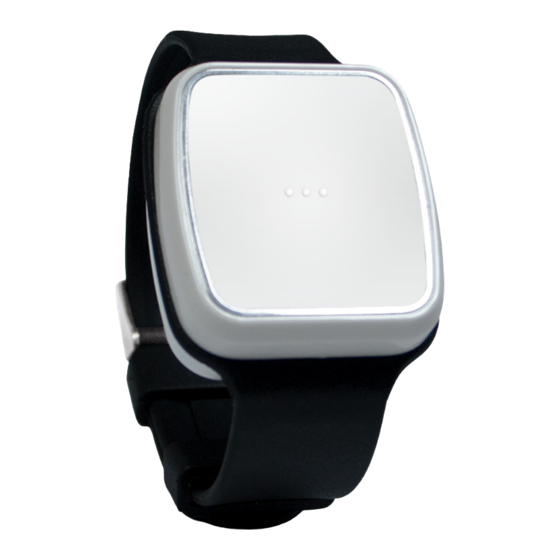
The Vibby is also IP67 (dust and water resistance) and IK4 & IEC 62599-1 2010 Class2 (shock and impact). The Vibby is supplied in Storage Mode to preserve battery life, to exit storage mode and start using the Vibby see page 4. The Vibby is pre-configured to be worn on the wrist. -
Page 4: Exiting From Storage Mode
Exiting from Storage Mode The Vibby is shipped in Storage Mode, it is important to exit Storage Mode by following the instructions below. Press and hold the button. Release the help button when the red LED starts flashing. The Vibby will vibrate and the LED will be off. -
Page 5: Entering Program Mode
Entering Program mode The Vibby must be in Storage Mode before entering Program Mode. To check the Vibby is in Storage Mode briefly press the button for 0.5 second. If the red LED illuminates the Vibby is not in Storage mode. -
Page 6: Configuration Selection
Once in Program Mode follow the steps below. Press and hold the button. Keep pushing the button until the green LED lights steadily and then turns off. When the Vibby Radio Protocol vibrates release selection page for Radio Protocol selection. When the red LED Wearing Mode... -
Page 7: Radio Protocol Selection
This step is only needed if the protocol selection has been changed. The Vibby comes pre-programmed with the Tunstall Radio Protocol, which enables it to work with the Tunstall Lifeline (400, 4000+, Connect/Connect+ Vi/Vi+, Lifeline GSM and Telecare enabled schemes). -
Page 8: Wearing Mode Selection
Neckcord mode. The LED will illuminate Green and the Vibby will vibrate. Release the button on the green LED for Neckcord mode. Once the wearing mode has been set the Vibby will return to storage mode. Page 8 of 24 V3.6... -
Page 9: Checking Wearing Mode Configuration
Checking Wearing Mode Configuration It is possible to check the wearing mode the Vibby is configured to, follow the steps: Quickly press the button twice The red LED will illuminate and the Vibby will vibrate. This indicates the Vibby is configured for a Wrist strap. -
Page 10: Demo Mode
60cm above the ground. Hold in this position for at least 30 seconds. Drop the Vibby avoiding it twisting so that it lands on its face on the floor. Leave it on the floor for at least 20 seconds whilst it analyses the fall. -
Page 11: Simulating A Fall In Active Mode
60cm above the ground. 2. Hold in this position for at least 30 seconds. 3. Drop the Vibby avoiding it twisting so that it lands on its face on the floor. 4. Leave it on the floor for at least 20 seconds whilst it analyses the fall. - Page 12 Alarm Modes The Vibby can raise alarms in two ways; manual calls - when the user presses the help button, and automatic calls - which are generated if the Vibby detects a heavy fall. To raise a manual alarm call; press the Vibby’s help button.
- Page 13 *The fall detection technology in the Vibby does not allow analysis and interpretation of all fall situations. Soft falls, slumping falls, descent controlled falls against a wall or a chair, etc…are not be detected by the Vibby. Considering the technology used and the target to minimise false alarms, all falls even dangerous-heavy falls cannot be detected, for this reason whenever the user needs assistance they should always press the help button on the Vibby.
-
Page 14: Alarm Cancellation
LED. If during step 3, the user does not remove their hand after the first burst of vibrations, the Vibby will vibrate three times to indicate that the alarm has not been cancelled. This is an in built safety feature that is designed to ensure the alarm is not cancelled if a user covers the Vibby during the fall. -
Page 15: Putting Vibby Into Storage Mode
Press the button until the red LED turns on. When the LED is red release the push button. Quickly press the push button 5 times. The Vibby will vibrate confirming it is now in storage mode. Page 15 of 24 V3.6... -
Page 16: Battery Replacement
Battery Replacement To replace the battery in the Vibby; use the battery change tool (Part No D6656001A) and follow the steps below: Ensure the Vibby is in Storage Mode before removing the battery. Place the Vibby face down.. Using the battery replacement tool;... - Page 17 Warning: Risk of explosion if the battery is replaced incorrectly. Recycle or dispose of batteries in line with local legislation. Use only CR2477/LIMnO2* batteries. Available from Tunstall. *To ensure performance only use batteries manufactured by Sony. Page 17 of 24...
- Page 18 Press the green cancel key on the Lifeline to exit programming mode. Test the Vibby by pressing the help button on the unit and ensure a call is raised on the Lifeline. Test the fall detector part of the Vibby by utilising Demo Mode (page Page 18 of 24 V3.6...
-
Page 19: Removing The Wrist Strap
Follow the below steps to remove the wrist strap: Holding onto the existing wrist strap and the Vibby gently pull until the retention features click out of place. Repeat this process for the remaining side of the strap. -
Page 20: Fitting A Replacement Wrist Strap
Fitting a replacement Wrist Strap Take the Vibby and place it within the wrist strap. Pull the top of the wrist strap onto the Vibby. Ensuring the retention features line up with their holes and the edges fall within the enclosure. -
Page 21: Ensuring The Wrist Strap Is Correctly Installed
Retention features. The above diagram shows that the retention features are not installed correctly. Incorrect installation of the Vibby into the wrist strap may cause the Vibby to detach from the wrist/neck cord. When correctly installed the retention features are within the housing of Vibby and are not visible. -
Page 22: Fitting A Neck Cord To The Vibby
Fitting a neck cord to the Vibby Pull the bottom of the neck cord onto the Vibby; ensuring the retention features line up with the holes and the edges fall into the enclosure. Pull the top of the neck cord onto the Vibby. -
Page 23: Spares And Accessories
Vibby back on again as soon as you have finished cleaning it. Warnings and cautions It is important to test the Vibby in all areas of the home, including the bathroom, basement and garage. Environmental conditions such as furnishings, building structure, submersion in liquid etc may affect the range of the Vibby. -
Page 24: Low Battery Calls
Our policy of continual development means that product specifications and appearance may change without notice. Tunstall does not accept any responsibility for any errors and omissions contained within this document. © 2016 Tunstall Group Ltd. ®Tunstall and Lifeline are registered trade marks V3.6...
Need help?
Do you have a question about the THE VIBBY and is the answer not in the manual?
Questions and answers