Haaga 475 Operating Instructions Manual
Hide thumbs
Also See for 475:
- Operating instructions manual (136 pages) ,
- Operating intstructions (20 pages)

Related Manuals for Haaga 475


Summary of Contents for Haaga 475
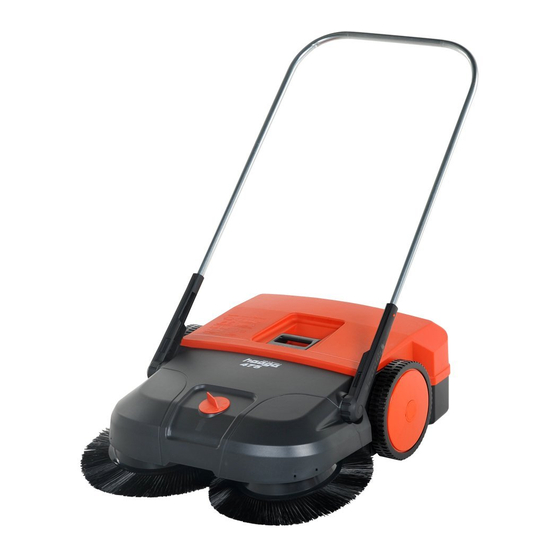
- Page 1 JanitorialEquipmentSupply.com 1-877-977-3339 haaga 475 / 477 / 497 • Operating instructions...
- Page 2 Publisher's notice Dear customer, thank you for purchasing These instructions will allow you to use a quality product from Haaga. This prod- the sweeper safely and efficiently. uct has been manufactured using modern Before using the sweeper for the first production processes with comprehensive time, please carefully read the "Safety...
-
Page 3: About These Instructions
1.1 Symbols used • Please enclose a copy of the invoice in the event of a warranty claim. Warning! • Only genuine Haaga spare parts must A warning informs you about possible be used. health risks or risks of fatal injury to yourself and other persons that may •... -
Page 4: Safety Instructions
• Minors must not operate the sweeper – • Persons who are prohibited from stren- except for juveniles over the age of 16 uous physical activity for health rea- who are trained under supervision. sons should ask a doctor for advice on whether working with the sweeper is •... -
Page 5: Instructions For Transport
• the chapter "Technical data" in these • Always wear a dust protection mask in instructions. dusty conditions. • compliance with the operating, main- • Wear sturdy gloves. tenance and storage conditions pre- Use the machine only in technically per- scribed by the manufacturer. -
Page 6: Instructions For Operation
• In vehicles: Secure the sweeper to pre- larly children, when working with the vent it from tipping, slipping or being machine. damaged. • Take care in slippery, wet or snowy conditions. There is a risk of slipping on 2.4 Instructions for work slopes or uneven ground. -
Page 7: Instructions For Cleaning
• Never operate the sweeper in the • Pushing against or over obstacles, vicinity of combustible fluids (vapours), e.g. kerbs, can lead to damage to the gases or dust. sweeper. • If the cleaning performance deterio- Danger of injury! rates, check whether the waste bin is •... -
Page 8: Instructions For Storage
• Secure the sweeper to prevent it from CAUTION! falling over and so that the push Damage to the sweeper due to improper handle cannot fold down in an uncon- cleaning. trolled manner. • Do not use grease removers for clean- NOTE ing. -
Page 9: Design And Function
2. Waste bin 3. Waste bin handle 4. Disc brush height adjustment 5. Carrying handle 6. Disc brush 7. Side guide roller (not 475) 8. Running wheel 9. Fine dirt sweeping roller 10. Holding-down device (not 475) 11. Dust filter (not 475) 12. -
Page 10: Putting Into Operation
4 Putting into operation Fitting the push handle: 475 Fitting the push handle: 477 / 497 Danger of injury! Danger of injury! • Avoid injury due to push handle acci- • Avoid injury due to push handle acci- dentally falling over. -
Page 11: Using The Sweeper
5 Using the sweeper 5.1 Manual operation 1. Adjust to the required level (1): • Level 1 – 2: for all flat, hard surfaces 1. Check the sweeper (e.g. asphalt, concrete, slabs…) (see Maintenance and care). • Level 3 – 4: for damp leaves, sand, 2. -
Page 12: Emptying The Waste Bin
• Sweeping edges and corners: 1. Fold the push handle forwards so that Press the handle of the brush hold- it is in flat position. ing-down device down. 2. Pull the handle of the waste bin • Operation on surfaces: Pull the handle upwards. - Page 13 3. 477 / 497: clean the dust filter (3). ing. Recommendation: apply a thin coating • Do not use aggressive detergents. of Haaga genuine lubricant spray to the • Do not clean with a high-pressure brush drives. cleaner. • Protect bearings against moisture.
-
Page 14: Putting Out Of Operation And Storage
• Secure the sweeper with a suitable lashing strap to prevent it from slip- ping. 1. Remove the push handle (see Removing the push handle). 2. Position the sweeper in the vehicle. 3. Secure the sweeper by means of a lash- 6.2 Transporting the sweeper in ing strap. - Page 15 Removing the push handle: 7.2 Storing the sweeper 477 / 497 CAUTION! Danger of injury! Damage to the sweeper due to improper storage. • Avoid injury due to push handle acci- dentally falling over. • Position the sweeper so that the bris- tles are not kinked or bent.
-
Page 16: Maintenance And Care
• Have all other work performed by a Check the height adjustment qualified specialist dealer. (see Height adjustment). • Use only genuine Haaga spare parts. Otherwise there is a risk of accidents or 8.1.2 After the end of work damage to the sweeper. - Page 17 1. Position the sweeper so that it is vertical. 7. Insert both filter elements in the guides. 2. 475: apply a thin coating of Haaga genuine lubricant spray to the gearing 8. Fit the waste bin. of the brush drives (1).
-
Page 18: Technical Data
9 REACH REACH is the European chemicals regulation for registration, evaluation, authorisation and restriction of chemicals. Information on compliance with the REACH regulation (EU) No. 1907/2006 can be found at www.haaga-gmbh.de 10 Technical data Technical data haaga 475 haaga 477 haaga 497 Sweeping width approx. -
Page 19: Troubleshooting
JanitorialEquipmentSupply.com 1-877-977-3339 11 Troubleshooting Problem Cause Remedy Clean the sweeper Sweeper dirty (see Cleaning the sweeper) Eliminate blockage Brushes blocked (see Eliminating blockages) Clean the brush drives Sweeper moves (see Cleaning the sweeper) Brush drives dirty sluggishly Lubricate brush drives with lubri- or does not run cant spray smoothly...
Need help?
Do you have a question about the 475 and is the answer not in the manual?
Questions and answers