Table of Contents
Advertisement
Advertisement
Table of Contents

Related Manuals for Onwa KP-6299


Summary of Contents for Onwa KP-6299
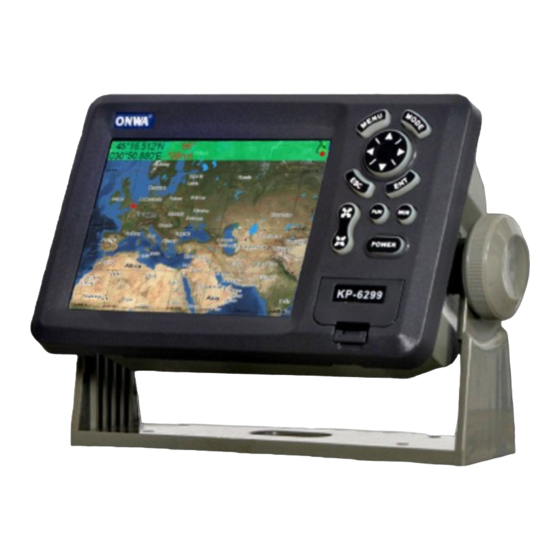
- Page 1 KP-6299 KP-6299 OPERATOR'S MANUAL MARINE GPS PLOTTER...
-
Page 3: Table Of Contents
CONTENTS FOREWORD OPERATION OVERVIEW 1.1 Keypad instruction Turning ON and OFF Power Adjusting Brilliance and DIM Display Modes PLOTTER DISPLAY OVERVIEW Choosing the Display Range Shifting the Cursor Shifting the Display Centering Own Ship's Position Coordinates Map data Heading Line Range Circle Palette 2.10... - Page 4 WAYPOINT/MOB Entering Waypoints Entering the MOB Mark Displaying Waypoint Name Operation on the Waypoint Editing Erasing Waypoints 5 ROUTES Creating Routes Editing Routes Erasing Routes DESTINATION Setting Destination by Cursor Setting Destination by Waypoint Setting Route as Destination Setting Track Data as Destination Canceling Destination ALARM Anchor Drag Alarm...
- Page 5 DRAWING Drawing Marks Drawing Lines 8.3 Place name 8.4 Editing Drawing Marks Editing Drawing Lines Editing Drawing Place Name Erasing Drawing Marks 8.8 Erasing Drawing Lines 8.9 Erasing Drawing Place Name 9 OTHER SETTING 9.1 Map Scale 9.2 Unit of Measurement 9.3 Bearing Reference 9.4 Magnetic Variation 9.5 Deviation...
- Page 6 11 MAIN PERFORMANCE AND SPECIFICATIONS 11.1 Plotter Characteristics 11.2 GPS Receiver Characteristics 11.3 AIS interface 11.4 Physical 11.5 Equipment List 12 INSTALLATION 12.1 Verifying the contents 12.2 Installing the unit 12.3 Table of connecting 12.4 Display unit size MEMU TREE...
-
Page 7: Foreword
FOREWORD The KP-6299 ONWA GPS PLOTTER aid are specially designed for the vessel traffic management, ONWA is a professional brand of the domestic and foreign navigation products. The products are designed to be all-sealed and waterproof, can be rapid position-fixing and resistant to poor environment. The software is powerful by using the advanced ARM9 processors can be capable to display faster, and the design for operation is professional and reasonable, can be easy to use. -
Page 8: Operation Overview
1. OPERATION OVERVIEW 1.1 Keypad instruction (Figure 1-1) Pressing it displays the menu of the current page, MENU pressing twice enters the main-menu. Display the five main screens circularly, turn over the MODE listed interfaces. Withdraw from the optional operation, or display the previous page in reverse-cycle order. -
Page 9: Turning On And Off Power
1.2 Turning ON and OFF Power Turning on the power Press the [ON/OFF] key. The unit beeps and display ONWA " " logo. After a few seconds starts up with the last-used display mode. Turning off the power Press and hold down the [ON/OFF] key unit the screen goes blank (about four seconds). -
Page 10: Display Modes
1.4 Display Modes Your unit has five display modes: PLOTTER SCREEN, NAVIGATOR SCREEN, POSITION SCREEN, SATELATE SCREEN and AIS SCREEN. Press the [MODE] key to choose a display mode. Each time the key is pressed, the display mode changes in the sequence shown below. NAVIGATOR PLOTTER POSITION... -
Page 11: Plotter Display Overview
2. PLOTTER DISPLAY OVERVIEW 2.1 Choosing the Display Range You may press to choose display range on plotter and highway displays. 2.2 Shifting the Cursor Use the cursor pad to shift the cursor. The cursor moves in the direction of the arrow or diagonal pressed on the cursor pad. -
Page 12: Shifting The Display
2.3 Shifting the Display The display can be shifted on the plotter display. Operate the cursor pad to place the cursor at an edge of the screen. The display shifts in the direction opposite to cursor pad operation. 2.4 Centering Own Ship's Position Press the [ESC] key for centering own Ship's position. -
Page 13: Map Data
2.6 Map data 1. Press [MENU] key in PLOTTER screen. 2. Choose MAP and then press [ ] key. 3. Choose the layer ON or OFF as appropriate and then press [ENT] key to " " " " finish. (K-Chart) (C-MAP) 2.7 Heading Line 1. -
Page 14: Range Circle
2.8 Range Circle 1. Press [MENU] key in PLOTTER screen. 2. Choose RANGE CIRCLE and then press [ENT] key. 3. Choose ON (if choose ON you need input the circle radius manually) or " " " " " OFF as appropriate and then press [ENT] key to finish. "... -
Page 15: Map Orientation
2.10 Map Orientation 1. Press [MENU] key in PLOTTER screen. 2. Choose MAP DIRECTION and then press [ENT] key. 3. Choose Normal , NORTH Upward , WPT Upward or BOW Upward " " " " " " " " as appropriate and then press [ENT] key to finish. 2.11 Perspective View 1. - Page 16 3. Choose the layer ON as appropriate and then press [ENT] key to finish. 4. Choose the layer OFF as appropriate and then press [ENT] key to finish.
-
Page 17: Track
3. TRACK 3.1 Changing Track Plotting Interval, Stopping Plotting When the track memory becomes full, the oldest track is erased to make room for the latest. 1. Press the [MENU] key twice to main menu. 2. Choose TRACK RECORD and then press [ ] key. 3. -
Page 18: Displaying The Track
3.2 Displaying the Track 1. Press [MENU] key in PLOTTER screen. 2. Choose TRACK and then press [ ] key. 3. Choose the color and Choose turn it ON or OFF. 4. Press [MENU] key to finish. 3.3 Creating Track Data 1. -
Page 19: Erasing Track
3.4 Erasing Track 1. Press [MENU] twice to main menu. 2. Choose [ERASE] and then press [ ] key. 3. For saved track then press [ ] key to choose Current track or Saved track. 4. Choose the color that you want to erase or choose ALL if you want to erase all. and then Press [ENT] key. -
Page 20: Waypoint/Mob
4. WAYPOINT/MOB 4.1 Entering Waypoints Waypoints can be entered on the plotter display three ways: at cursor position, at own ship's position, and from the waypoint edit. Entering a waypoint with the cursor 1. Use the cursor pad to place the cursor on the location desired for a waypoint. 2. - Page 21 Entering a waypoint from the waypoint list 1. Press the [MENU] key twice to main menu. 2. Choose EDIT and then press [ ] key. 3. Choose WAYPOINT and then press [ENT] key. The following window will appear 4. Choose NEW then press [ENT] key. The following window appears.
-
Page 22: Entering The Mob Mark
4.2 Entering the MOB Mark Only one MOB mark may be entered. Each time the MOB mark is entered the previous MOB mark and its position data are written over. 1. Long Press the [MOB] key on any display unit. The following display appears. -
Page 23: Operation On The Waypoint Editing
4.4 Operation on the Waypoint Editing Waypoint position, waypoint name, mark shape, mark color and comment can be edited from the Waypoint Edit. 1. Press the [MENU] key twice to main menu. 2. Choose EDIT and then press [ ] key. 3. -
Page 24: Erasing Waypoints
4.5 Erasing Waypoints 1. Press the [MENU] key twice to main menu. 2. Choose EDIT and then press [ ] key. 3. Choose WAYPOINT and then press the [ENT] key. 4. Select a WPT and press [ENT] key. 5. The confirm window will appear, choose ERASE and then press [ENT] 6. -
Page 25: Routes
5. ROUTES 5.1 Creating Routes 1. Press [MENU] key twice to main menu. 2. Choose EDIT and then press [ ] key. 3. Choose ROUTE and then press [ENT] key. The following window will appear. 4. Choose NEW and then press [ENT] key. "... - Page 26 5. Use enter the route name and then press [ENT] key. The following will appear. 6. Choose location (e.g. 01) and then press [ENT] key. Will open a new window let you choose waypoint. 7. Choose the waypoint name and then press [ENT] key. (In example, 001) You can also create a new waypoint if needed.
-
Page 27: Editing Routes
5.2 Editing Routes Replacing waypoints in a route 1. Press the [MENU] key twice to main menu. 2. Choose EDIT and then press [ ] key. 3. Choose ROUTE and then press [ENT] key. 4. Choose the route to edit and then press [ENT] key. 5. -
Page 28: Erasing Routes
Permanently deleting a waypoint from a route 1. Press the [MENU] key twice to main menu. 2. Choose EDIT and then press the [ ] Key. 3. Choose ROUTE and then press [ENT] key. 4. Choose the route desired and then press [ENT] key. 5. - Page 29 4. Select a Route then press [ENT]. 5. The confirm window will appear, choose ERASE and then press [ENT]. 6. Choose YES and then press [ENT] to finish. Erase All Routes 1. Press the [MENU] key twice to main menu. 2.
-
Page 30: Destination
6. DESTINATION 6.1 Setting Destination by Cursor 1. Press [FUN] key. 2. Choose [GOTO CURSOR] and then press [ENT] key. " " 3. The cursor appears with ? . 4. Use the cursor pad to place the cursor on the location desired for destination. 5. -
Page 31: Setting Destination By Waypoint
6.2 Setting Destination by Waypoint 1. Press the [FUN] key. 2. Choose GOTO WPT and then press [ENT] key. 3. The SELECT GOTO WPT list appears. 4. Choose a Waypoint and then press [ENT] key. 6.3 Setting Route as Destination 1. - Page 32 2. Select GOTO ROUTE. 3. The SELECT GOTO ROUTE list appears. 4. Choose a route and then press [ENT] key. The following window appears. 5. Choose Forward or Reverese in order in which to traverse the route waypoints, and then press [ENT] key. Intermediate Point 2 [ROUTE 01] (WPT SW)
-
Page 33: Setting Track Data As Destination
6.4 Setting Track Data as Destination Track Data can use for navigation. 1. Press the [FUN] key to display the GOTO options window. " " 2. Choose GOTO TRACK . 3. Press the [ENT] key. 4. Choose Track Log to display the following menu. 5. -
Page 34: Canceling Destination
Once a GOTO TRACK has been activated, the track will divides it into segments. Up to 200 temporary waypoint are created (named T1,T2, T3, etc. and END) to mark the most significant features of the track, duplicating your exact path as closely as possible. To get the most out of the GOTO TRACK feature, remember the following tips: Always clear the track log at the point that you want to go back to. -
Page 35: Alarm
7. ALARM There are SIX alarm conditions which generate both audio and visual alarms: Arrival alarm, Anchor drag alarm, XTE (Cross-Track Error) alarm, Speed alarm, Buzzer alarm, Voltage alarm and Time alarm. When the alarm setting is violated, the buzzer sounds and the name of offending alarm and the alarm icon appear on the display. -
Page 36: Arrival Alarm
3. Choose ANCHOR and then press [ENT] key. The alarm options appear. 4. Choose item 3 and then press [ENT] to setup the alarm value. 5. Choose ON and then press [ENT] key to enable the alarm. 7.2 Arrival Alarm 1. -
Page 37: Xte (Cross-Track Error) Alarm 3
7.3 XTE (Cross-Track Error) Alarm 1. Press [MENU] key twice to main menu. 2. Choose ALARM and then press [ ] key to display alarm menu. 3. Choose XTE and then press [ENT] key. The alarm options appear. 4. Choose item 3 and then press [ENT] to setup alarm value. 5. -
Page 38: Voltage Alarm
7.5 Voltage Alarm 1. Press [MENU] key to main menu. 2. Choose ALARM and then press [ ] key to display alarm menu. 3. Choose VOLTAGE and then press [ENT] key. The alarm options appear. 4. Choose item 3 and then press [ENT] to setup alarm value. 5. -
Page 39: Buzzer Type Selection
7.7 Buzzer Type Selection The buzzer sounds whenever an alarm setting is violated. 1. Press the [MENU] twice to main menu. 2. Choose ALARM and then press [ ] key. 3. Choose BUZZER and then press [ ] key. 4. Choose buzzer type desired and then Press [ENT] key. SHORT: Two short beeps LONG: Three long beeps CONSTANT: Continuous beeps... -
Page 40: Drawing
8. DRAWING 8.1 Drawing Marks 1. Press [FUN] key. 2. Choose [DRAWING] and then press [ ] key. 3. Choose [MARK] and then press [ENT] key . " " The cursor appears with On the PLOTTER SCREEN. 4. Use the cursor pad place the cursor on the location desired add a mark and then press [ENT] key. -
Page 41: Drawing Lines
8.2 Drawing Lines 1. Press [FUN] key. 2. Choose [DRAWING] and then press [ ] key. 3. Choose [LINE] and then press [ENT]. The cursor appears with "+?" On the PLOTTER SCREEN. 4. The cursor appear with a ? . "... -
Page 42: Editing Drawing Marks
8.4 Editing Drawing Marks 1. Press [MENU] key twice to main menu. 2. Choose EDIT and then press [ ] key. 3. Choose Drawing marks and then press [ENT] key. The following window appears. 4. Select a mark for edit then press [ENT]. 5. -
Page 43: Editing Drawing Lines
8.5 Editing Drawing Lines 1. Press [MENU] key twice to main menu. 2. Choose EDIT and then press [ ] key. 3. Choose DRAWING LINES and then press [ENT] key. The following window appears. 4. Choose the line that you want to edit and then press [ENT] key. The following window appears. -
Page 44: Editing Drawing Place Name
8.6 Editing Drawing Place Name 1. Press [MENU] key twice to main menu. 2. Choose EDIT and then press [ ] key. 3. Choose DRAWING PALCENAME and then press [ENT] key. The following window appears. 5. Choose the place name that you want to edit and then press [ENT] key. The following window appears. -
Page 45: Erasing Drawing Marks
8.7 Erasing Drawing Marks 1. Press [MENU] key twice to main menu. 2. Choose EDIT and then press [ ] Key. 3. Choose DRAWING MARKS and the press [ENT] Key. 4. Choose the mark that you want to clear, and then press [ENT] key. The confirmation window will appears. -
Page 46: Erasing Drawing Lines
8.8 Erasing Drawing Lines 1. Press [MENU] key twice to main menu. 2. Choose EDIT and then press [ ] key. 3. Choose DRAWING LINES and the press [ENT] Key. 4. Choose the line that you want to erase, and then press [ENT] key. The confirmation window appears. -
Page 47: Erasing Drawing Place Name
8.9 Erasing Drawing Place Name 1. Press [MENU] key twice to main menu. 2. Choose EDIT and then press [ ] key. 3. Choose DRAWING PALCENAME and then press [ENT] key. 4. Choose the place name that you want to erase, and then press [ENT] key. The confirmation window appears. -
Page 48: Other Setting
9. OTHER SETTING 9.1 Map Scale You can change the map scale display format. 1. Press [MENU] key twice to main menu. 2. Choose SETUP and then press [ ] key. 3. Choose MAP SCALE and then press [ENT] key. 4. -
Page 49: Unit Of Measurement
9.2 Unit of Measurement Distance/speed can be displayed in nautical miles/knots, kilometers/kilometers per hour, or statute miles/miles per hour. 1. Press [MENU] key twice to main menu. 2. Choose SETUP and then press [ ] key. 3. Choose SPEED UNIT and then press [ENT] key. 4. -
Page 50: Bearing Reference
9.3 Bearing Reference Ship's course and bearing to a waypoint may be displayed in true or magnetic bearing. Magnetic bearing is true bearing plus (or minus) earth's magnetic deviation. Use the bearing reference in accordance with the compass interfaced: magnetic for magnetic compass, true for gyrocompass. 1. -
Page 51: Deviation
3. Choose MAG. VAR. and then press [ ] key. 4. Choose AUTO or MAN (for choose MAN you need input the value " " " " manually) as appropriate and then press [ENT] key to finish. 9.5 Deviation You can input the deviation of ship or map manually to correct the position error from GPS error or map error. -
Page 52: Time
9.6 Time GPS uses UTC time. If you would rather use local time, enter the Time difference (range: -13:30 to +13:30) between it and UTC time. You may display the time in 12 or 24 hour format. 1. Press [MENU] key twice to main menu. 2. -
Page 53: Gps Setting
9.8 GPS setting 9.8.1 Choosing GPS output data The unit default using GPS module single for position fixing. On the other hand, you can use external GPS data for position fixing. 1. Press [MENU] key on the SATELATE SCREEN. 2. Choose and then press [ENT] key. - Page 54 9.8.2 Datum setting You can choose 6 types data output at the same time. 1. Press [MENU] on the SATELATE SCREEN. 2. Choose DATUM and press [ENT] key. 3. Choose your desired datum and press [ENT] to confirm. 9.8.3 Smoothing You can setup position smoothing, speed smoothing and course smoothing.
-
Page 55: The Ais Funtion
10. THE AIS FUNTION 10. THE AIS FUNTION 10.1 Vessels list 1. Press [MENU] on the AIS SCREEN. 2. Choose AIS Detail LIST and then press [ENT] key. 10.2 The collision alarm 1 Press [MENU] on the AIS SCREEN. 2. Select CPA Limit or TCPA limit enter value. 3. -
Page 56: Own Ship's Information
10.3 Own ship's information There are tow way to display "Own Ship Info" *Enter the "vessels list", and press the MENU key, and then select the " Ship Info " to check all the information of own ship *On the AIS Screen, press [ENT] key. The own ship's information is also displayed on the upper right of the radar screen. -
Page 57: View Ais Vessels' Information On Chart Screen
10.5 View AIS vessels' information on chart screen There're two ways to view AIS vessels' information: one is to move the cursor to select AIS vessel on the charts screen, and press the ENT key. The other is to select the AIS vessel from the AIS vessels list, and press the ENT key. -
Page 58: Emergency Alarm
10.7 Emergency alarm The information of the emergency alarm received is displayed on the bottom right corner. The emergency alarm is always available and can not be deleted, if the emergency alarm information is not read, after exiting the alarm menu, the "emergency alarm"... -
Page 59: Main Performance And Specifications
NOAA paper chart colors Tides: Tide data Projection: Mercator projection Position format: Lat/Lon Basemap: Built-in Onwa K-Chart External Map: SD Cards slot for C-Map MAX User data storage: Internal backup of user settings, or e xternal SD-card Plot Interval: 1s to 99h or 0.01nm to 9.99nm... -
Page 60: Gps Receiver Characteristics
11.2 GPS RECEIVER CHARACTERISTICS Receiver: 12 parallel channel GPS receiver continuously Tracks and uses up to 12 satellites to compute and update your position Acquisition times: Cold start: 60 seconds average Warm start: 45 seconds average Hot start: 15 seconds average Update rate: 1/second,continuous Position: <15 meters(95%) without S/A... -
Page 61: Installation
12. INSTALLATION 12. INSTALLATION 12.1 Verifying the contents When opening the box,please verify that all items in the following drawing are present. ONWA Control/Display Unit Mounting Bracket GPS Antenna Operation Manual Spare Fuses... -
Page 62: Installing The Unit
12.2 Installing the unit Notice: The unit should be mounted on a flat, solid surface for maximum stability. Be sure to fix the mounting bracket with screws. Otherwise, the display unit may fall down by the boat s pitching and rolling to the lead to the fire or the injury. (1) The mounting bracket should be fixed with 6mm screws. -
Page 63: Table Of Connecting
12.3 Table of connecting DATA INPUT/OUTPUT 0183IN + Brown 0183IN - 0 Red RS-422OUT A Orange RS-422OUT B Yellow RS-232OUT Green Temp urple GND Gray Antenna Antenna ONWA OPTION FUSE Power Supply Receptacle Dc input(-) Dc input(+), 11 to 40V... -
Page 64: Display Unit Size
12.4 Display unit size... -
Page 65: Memu Tree
13. MENU TREE 13. MENU TREE MAIN TRACK TIME: TRACK RECORD MODE (TIME/DISTANCE/AUTO/OFF) MENU RECORD 10S/30S/1min/ 5min/10min/ SAVED TRACK(... 30min/60min SAVE CURRENT TRACK( SAVE/EXIT) DISTANCE: SET UP MAP SCALE (MILES/RATIO) SPEED UNIT(NM,KT/KM,KMH/SM,KPH) DEPTH UNIT( FEET/FATHOM/METER) BRG REF.(TRUE/MAGNETIC) MAG REF. ( AUTO/MANUAL) DEVIATION( LAT: +00.000, LON: + 00.000 TIME(24H/+00) - Page 66 MAIN ALARM ANCHOR MODE: (ON/ OFF) MENU DISTANCE: 0.50 CONTINUE ARRIVAL MODE: (ON/ OFF) DISTANCE: 0.50 MODE: (ON/ OFF) DISTANCE: 0.50 SPEED MODE: (HI/LO/OFF) SPEED: 20.0 VOLTAGE MODE: (ON/OFF VOLT: 8.50 TIMER MODE: (ON/OFF TIME: BUZZER MODE: (SHORT/LONG/CONST) WARNING MESSAGE EDIT WAYPOINT( WAYPOINT EDIT...
- Page 67 FUNCTION GOTO CURSOR(GOTO CURSOR FUNCTION GOTO WPT(GOTO WPT FUNCTION GOTO ROUTE(GOTO ROUTE FUNCTION GOTO TRACK(GOTO TRACK FUNCTION STOP GOTO(TURN OFF GOTO) DRAWING(MARK,NAME,LINE) TIDE TABLE (TIDE TABLE FUNTION) SEARCH(SEARCH FUNCTION CALENDAR PLOTTER NAVIGATOR POSITION SATELATE SCREEN SCREEN SCREEN SCREEN SCREEN...
- Page 68 MENU- TRACK COLOR 1 (ON/OFF) COORDIMATE (N/E/UTM) PLOTTER COLOR 2 (ON/OFF) PLACE NAME ( ON/OFF) COLOR 3 (ON/OFF) NAME TAGS ( ON/OFF) COLOR 4 (ON/OFF) NAV AIDS/LIGHTS (ON/OFF) COLOR 5 (ON/OFF) ATTENTION AREA (ON/OFF) COLOR 6 (ON/OFF) TIDES/CURRENTS (ON/OFF) COLOR 7 (ON/OFF) SEABED TYPE (ON/OFF) COLOR 8 (ON/OFF) PORTS &...
- Page 69 POSITION MENU-POS DATA FIELD HDOP BEARING RANGE TIME VOLTAGE DESTINATION DATE LUNAR DATE NORTH UP/ WPT UP/BOW UP MENU-NAV POSITION HDOP SETUP DATA FIELD BEARING RANGE TIME VOLTAGE DESTINATION DATE LUNAR DATE...
- Page 70 MENU-AIS ACTIVATION RING (05.00NM) CPA LIMIT (05.00NM) TCPA LIMIT (10MIN) CPA/ TCPA ALARM (ON/OFF) STATUS AIS SHIP LIST MENU-SAT INPUT( INTERNAL/EXTERNAL) OUTPUT(OFF GGA,GLL,RMC BUAD RATE(4800/9600/19200/38400) DATUM (WGS84 /LISTING) GPS SBAS (OFF/ON) POS SMOOTH (010) SOG SMOOTH(060) COG SMOOTH(005) DATA FIELD SETUP...
Need help?
Do you have a question about the KP-6299 and is the answer not in the manual?
Questions and answers