Table of Contents
Advertisement
Quick Links
Download this manual
See also:
User Manual
Advertisement
Table of Contents

Subscribe to Our Youtube Channel
Related Manuals for Abus TVIP91 series


Summary of Contents for Abus TVIP91 series
- Page 1 TVIP91XXX / TVIP92XXX TVIP91XXX TVIP92XXX Version 04/2015 English translation of the original German user manual. Retain for future reference.
- Page 2 This user manual has been produced with the greatest of care. Should you discover any missing information or inaccuracies, please let us know about them. ABUS Security-Center GmbH & Co. KG does not accept any liability for technical and typographical errors, and reserves the right to make changes to the product and user manuals at any time and without prior warning.
- Page 3 Important safety information All guarantee claims are invalid in the event of damage caused by non-compliance with this user manual. We cannot be held liable for resulting damage. In the event of material or personal damage caused by improper operation or non- compliance with the safety information, we cannot be held liable.
-
Page 4: Table Of Contents
) ........................81 OMEPAGE LOGIN PAGE 7.5 U ......................82 SER ACCOUNTS AND PASSWORDS 7.6 L ABUS VMS/ABUS VMS E ............83 INKING UP THE CAMERA WITH XPRESS 7.6 L ABUS NVR/ABUS H DVR ............. 83 INKING UP THE CAMERA WITH YBRID 7.8 L... - Page 5 10.4.2.3 DDNS ............................97 10.4.2.4 HTTPS ............................98 10.4.2.5 SMTP/E ..........................98 MAIL 10.4.3 O ..........................98 VERLAY TEXT 10.4.4 D ............................98 TIME 10.4.5 S ............................99 YSTEM 10.4.5.1 G ............................99 ENERAL 10.4.5.2 F ......................... 99 IRMWARE ESET 10.4.5.3 L .............................
-
Page 6: Intended Use
√ √ (without pin) Hexagonal socket key √ √ (with pin) Reset tool √ √ √ √ √ Software CD (ABUS, IP installer, VMS √ √ √ √ √ Express) Clamp for cable √ √ attachment Cable gland M25 √... -
Page 7: Features And Functions
4. Features and functions TVIP91XXX HD 720p resolution: 1280 x 720 @ 25 fps 3.6 mm fixed lens Day/night switching with electromechanical IR blocking filter (ICR) WDR function (46 dB) to compensate for image contrasts IR LEDs for night vision (TVIP91100 and TVIP91600 only) ... -
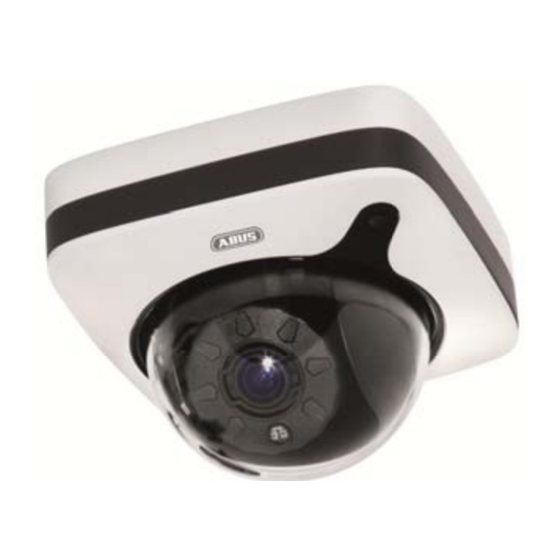
Page 8: Device Description
5. Device description Overview – Model numbers Model number TVIP91100 TVIP91300 TVIP91600 TVIP91700 Resolution 720p 720p 720p 720p DWDR/WDR DWDR, DWDR, DWDR, DWDR, 46 dB 46 dB 46 dB 46 dB 2D DNR/3D DNR √ √ √ √ Lens Fixed-lens, Fixed-lens, Fixed-lens, Fixed-lens,... -
Page 9: Overview Of Connections, Control Elements, Front/Back
Overview of connections, control elements, front/back TVIP91100... - Page 10 TVIP91300...
- Page 11 TVIP91600...
- Page 12 TVIP91700...
- Page 13 TVIP92100...
- Page 14 TVIP92300...
- Page 15 TVIP92500...
- Page 16 TVIP926X0...
- Page 17 TVIP92700...
-
Page 18: Installation
6. Installation Instructions for how to mount the camera are described in the quickstart guide for the relevant IP camera TVIP9XXXX. When mounting the dome cameras TVIP91700 and TVIP92700 please make sure that the desiccant bag supplied is placed inside the camera before placing on the dome. -
Page 19: Power Supply
TVIP91700/TVIP92700 For this type of camera, the cable is intended to be laid at the side or concealed. There are openings at the side and on the base for this. The unused opening is sealed using a blind plug. For installation the supplied cable gland must be used (for the side and base) in accordance with protection class IP66. -
Page 20: Attaching The Network Cable
6.4 Attaching the network cable The maximum network cable (CAT7) length from the camera to the nearest active network point (e.g. network switch) should not exceed 100 metres. 6.5 Aligning the camera Instructions for how to align the camera are given in the quickstart guide for the relevant IP camera TVIP9XXXX. -
Page 21: Attaching The Optional Connecting Cable For Tvip9X300 And Tvip9X700
6.7 Attaching the optional connecting cable for TVIP9X300 and TVIP9X700 Using the optional connecting cables TVAC40700, TVAC40710, TVAC40720 and TVAC40730, suitable dome cameras can gain the following additional interfaces: TVAC40700 TVAC40710 TVAC40720 TVAC40730 Suitable for TVIP91300 TVIP91700 TVIP92300 TVIP92700 Audio input, 3.5 mm stereo √... -
Page 22: Status Indicators
6.9 Status indicators TVIP91100/TVIP91300/TVIP91600/TVIP91700 The only status indicator available is the supply voltage display. TVIP92100/TVIP92300/TVIP92500/TVIP92600/TVIP92610/TVIP92700 Display LED Function LED to display supply voltage If the LED is active and uninterrupted, the supply voltage is (green) correct and available. Status LED (blue) a) LED flashes 1/s ->... -
Page 23: Restoring Factory Settings (Reset)
6.12 Changing the dome TVIP91300/TVIP92300/TVIP91700/TVIP92700 If required, there is a tinted dome available for the IP dome cameras specified (ABUS item number TVAC31065). The dome is installed as follows: 1. -
Page 24: Initial Start-Up
7. Initial start-up 7.1 Using the ABUS IP Installer for camera search Install and start up the ABUS IP Installer using the enclosed software CD (or alternatively using the ABUS website www.abus.com, available for each respective product). The IP camera should now appear in the selection list without the relevant IP address for the target network, where appropriate. -
Page 25: Accessing The Network Camera Using A Web Browser
7.2 Accessing the network camera using a web browser Enter the camera IP address into the address bar in the browser (if a different HTTP Port is used in Internet Explorer you must also enter "http://“ before the IP address.) 7.2.1 General instructions for using the settings pages Functional element Description... - Page 26 Google Chrome A plugin is used for displaying videos in the Google Chrome browser. You will be asked to confirm the installation directly after entering your username and password (default: master/master or installer/installer). Google Chrome users please note: the video plugin is only supported by the Windows version of the Google Chrome browser.
-
Page 27: Homepage (Login Page)
7.4 Homepage (login page) After entering the IP address in the browser's address bar and opening up the page, the home page will appear in the language set in the Internet Explorer options (Windows setting). Each respective user account (installer, master or user) can set their language individually. For example, the settings pages can be set to English for the "installer"... -
Page 28: User Accounts And Passwords
7.5 User accounts and passwords Overview of the types of user with the username descriptions, the default passwords and corresponding privileges. User types Username Default password Privileges Installer Installer installer Video display on web browser Instant image Local video recording on PC <can be modified by <can be modified by installer>... -
Page 29: Linking Up The Camera With Abus Vms/Abus Vms Express
7.6 Linking up the camera with ABUS VMS/ABUS VMS Express The following information is required to link up the camera with ABUS VMS/ABUS VMS Express: IP address/domain name http port (default 80) rtsp port (default 554, can be changed, is detected automatically) ... -
Page 30: User Menu "User
8. User menu "user" Button/display on screen Function Information bar Live display Help page Log out as user Button/display Function on screen Instant image function This function saves an instant image from the current video stream in JPEG format. The picture is stored in the following folder: C:/Benutzer/<Benutzer>/Eigene Bilder... - Page 31 Video function This function saves a video from the current video stream in AVI format. The video is stored in the following folder: C:/Benutzer/<Benutzer>/Eigene Videos Activate switching output This button can be used to manually activate or deactivate the switching output (e.g.
-
Page 32: View And Configuration Menu User "Master
9. View and configuration menu user "master" (example image of TVIP92700) Button/display Function on screen Instant image function This function saves an instant image from the current video stream in JPEG format. The picture is stored in the following folder: C:/Benutzer/<Benutzer>/Eigene Bilder Video function This function saves a video from the current video stream in AVI format. - Page 33 Muting the microphone (if available) This button can be used to deactivate the microphone in the camera (TVIP91100) or the microphone in the optional audio input (TVIP92xxx). Muting the speaker (if available) This button can be used to deactivate the speaker in the optional audio output (TVIP92xxx).
-
Page 34: Adding Users
9.1 Adding users User management: Username: display registered username Type: the registered user's user account type There may only be one "master" user account type. Up to 10 users can be assigned the "user" account type. Language: display the language set for the users. Available languages are: English, German, French, Dutch, Danish, Polish, Italian, Spanish, Russian and Swedish Add:... -
Page 35: Video Stream Settings
9.2 Video stream settings 9.2 Deactivate/activate installer access Block user "installer": ticking the box will block access for the user "installer". Only the "master" user can unblock access again. If the "master" user has forgotten their login information, it is possible to perform a factory reset for the "master"... -
Page 36: Displaying/Downloading Video From The Internal Memory
9.3 Displaying/downloading video from the internal memory File list: all the video data recorded by the camera during a network failure is displayed here. The maximum file size is 150 MB. If the file size is exceeded due to the length of recording, a new file is opened. -
Page 37: View And Configuration Menus User "Installer
10. View and configuration menus user "installer" 10.1 Live view The live view display for the installer user is similar to that of the master user. However, the installer user has extended options for settings such as the set up wizard or extended configuration. - Page 38 In the area to the upper left, the general status of the system is represented by a symbol. System is running correctly All parameters such as system temperature and processor usage are fine. All functions in use are working correctly. System is faulty Errors have occurred in the system.
-
Page 39: Setup Wizard
10.3 Setup wizard The setup wizard navigates you through the most important menu options the camera has. The setup wizard deals with the following menu options: Network ► DDNS ► Text ► Date/time ► Installer ► Service ► Storage/Restart For more information on each settings option see the section "Advanced camera settings". -
Page 40: Day/Night Switching
Sharpness: see option "Day profile" Hue: see option "Day profile" Noise reduction: ticking the checkbox activates the corresponding noise reduction function. 2D-DNR level: noise reduction for static images 3D-DNR level: noise reduction for dynamic images Colour image: see option "Day profile" IR LEDs off: this function is only available for models TVIP92100 and TVIP92600. -
Page 41: Video Stream Settings
10.4.1.6 Video stream settings These setting options allow the "installer" user to define the quality settings for displaying in an internet browser and recording using the device (settings Video Stream 1). TV output: activating or deactivating the analogue video output on the camera (only available for 1080p models) Video codec: select the video codec. -
Page 42: Network Loss Recording
10.4.1.7 Network loss recording This function allows you to record video data to your internal camera memory in case of IP network failure. Despite the recording device losing its connection to the network, the video data remains available in the camera for this period. As the function tests the existence of a certain IP address or domain address in the network, it can also be considered "recording when the network device fails". -
Page 43: Network
DDNS service provider Password: account password with the DDNS service provider Host name: registered host name with the DDNS service provider Further information on the "ABUS SERVER" can be found on the help page at the following address: https://www.abus-server.com/faq.html... -
Page 44: Https
10.4.2.4 HTTPS Activate HTTPS: ticking the checkbox activates the HTTPS function (fixed, self-signed certificate). The HTTP interface is largely active. HTTPS port: the default port for HTTPS transmission is 443. If several IP cameras are located on one subnet, each camera should have its own unique HTTPS port. -
Page 45: System
Firmware online check: this function checks whether a new firmware version is available on the ABUS website. If there is, the camera offers to download the firmware on to the PC (download link). Then the firmware must be manually installed using the firmware update function. -
Page 46: Log File
10.4.5.3 Log file Log file: data relevant to the system is recorded in the log file. This can help with troubleshooting, for example. Export: exporting the log file into another file 10.4.6 Motion detection List of ranges: displays all the ranges of movement set Display all: tick the checkbox to display a preview of all ranges at the same time. -
Page 47: Audio
Switching input: all cameras in the TVIP9XXXX series have a switching input (an optional cable in dome cameras). On standby, you can select N.O. (normally open) or N.C. (normally closed). Motion detection: select the camera's internal motion detection. This will analyse all configured masks. - Page 48 Send data: with approval from the "installer" user, the camera settings data and log file can be sent to ABUS Support. This is dependent on the previous setting in your country of service. Service user: if service is required, this function can create a username and password.
-
Page 49: Maintenance And Cleaning
Maintenance and cleaning 11.1 Function test Regularly check the technical safety of the product, e.g. check the housing for damage. If it seems that it may no longer be possible to operate the device safely, stop using the product and secure it to prevent unintentional use. It is likely that safe operation is no longer possible in the event that: ... -
Page 50: Technical Data
Technical data TVIP91100 TVIP91300 TVIP91600 TVIP91700 1/4 inch progressive scan CMOS Image sensor Compact Indoor dome Outdoor tube Outdoor dome Camera type 720p Resolution 1280 x 800 Pixels (total) 1280 x 720 Pixels (effective) Fixed lens Lens 3.6 mm Focal length 78°... - Page 51 TVIP92100 TVIP92300 TVIP92500 TVIP92600 TVIP92700 1/2.8 inch Progressive Scan Sony Exmore CMOS Image sensor Sony XARINA Compact Indoor dome Outdoor tube Outdoor dome Camera type 1080p Resolution 1952 x 1116 Pixels (total) 1920 x 1080 Pixels (effective) Motor zoom Motor zoom Lens 3–9 mm 3–9 mm...
- Page 52 TVIP92610 1/2,8” Progressive Scan Sony Exmore CMOS Image sensor Sony XARINA Outdoor Tube Camera type 1080p Resolution 1952 x 1116 Pixels (total) 1920 x 1080 Pixels (effective) Motor-Zoom Lens 3,0 – 9,0 mm Focal length 35° – 90° Horizontal angle of view Auto Iris Lens control IR cut filter (ICR), Color / B/W...
- Page 53 We reserve the right to change the technical or physical specifications. Note de l’éditeur Cette notice est une publication de la société ABUS Security-Center GmbH & Co. KG, Linker Kreuthweg 5, 86444 Affing, Germany. Tour droits réservés, y compris traduction. Toute reproduction, quel que soit le type, par exemple photocopies, microfilms ou saisie dans des traitements de texte electronique est soumise à...
- Page 54 Nota redakcyjna Niniejsza instrukcja obsługi jest publikacją ABUS Security-Center GmbH & Co. KG, Linker Kreuthweg 5, 86444 Affing. Wszystkie prawa, także do tłumaczenia, zastrzeżone. Reprodukcje wszelkiego rodzaju, np. fotokopia mikrofilm oraz zapis w elektronicznych systemach przetwarzania danych wymagają pisemnej zgody wydawcy.
Need help?
Do you have a question about the TVIP91 series and is the answer not in the manual?
Questions and answers