Table of Contents
Advertisement
Quick Links
Download this manual
See also:
User Manual
Advertisement
Table of Contents

Subscribe to Our Youtube Channel
Related Manuals for Abus TVIP52501


Summary of Contents for Abus TVIP52501
-
Page 1: User Manual
TVIP52501 User Manual Version 02/2011 Original English user manual. Keep for future use. - Page 2 The ABUS Security-Center GmbH assumes no liability for technical and typographical faults and reserves the right to make at any time modifications to the product or user manual without a previous announcement.
- Page 3 The warranty will expire for damage due to non-compliance with these operating instructions. ABUS will not be liable for any consequential loss! ABUS will not accept liability for damage to property or personal injury caused by incorrect handling or non-compliance with the safety-instructions.
- Page 4 English Safety advice 1. Mains supply: Power supply 110 - 250VAC, 50/60Hz / 12VDC, 1,5A (included in package content) Operate this product only from the type of power supply indicated on the marking label. If you are not sure of the type of power supplied to your home, consult your local power company. Disconnect the product from the mains before you start any maintenance or installation procedures.
-
Page 5: Table Of Contents
English Inhaltsverzeichnis Intended use ..............................65 Scope of delivery..........................65 Installation............................. 66 2.1 Power supply ............................66 2.2 Mounting the lens..........................66 2.3 Installing the camera..........................66 Camera description ..........................67 3.1 Front view/Rear view..........................67 3.2 Alarm inputs and digital outputs ......................67 3.3 Video output and DIP switches...................... - Page 6 English Access list............................. 88 Audio and Video ........................... 90 9.1 Image Settings ............................91 9.2 Privacy masking zones........................91 9.3 Exposure Settings ..........................92 9.4 Basic setting: ............................93 9.5 Adjust image and viewing window ..................... 94 9.6 Audio settings............................95 10.
-
Page 7: Intended Use
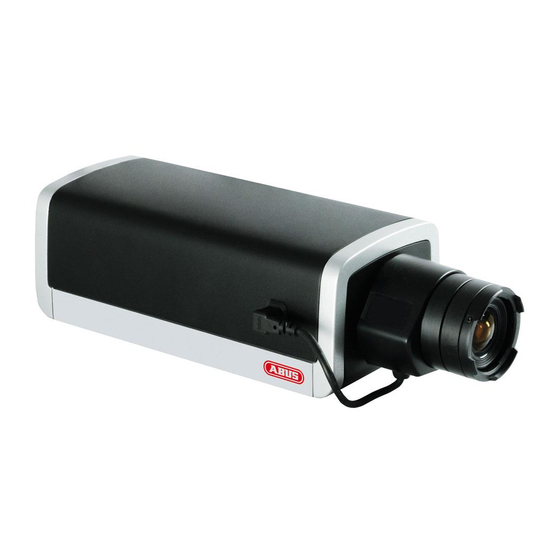
Please read through the entire manual carefully before putting this product into operation. This operating manual contains guidelines that are important for correct mounting and operating. 1. Scope of delivery ABUS HD Network Camera TVIP52501 Power supply Mounting bracket... -
Page 8: Installation
English 2. Installation Make sure that all previous listed accessories were included in scope of delivery. In order to operate the camera an Ethernet network cable is necessary. The cable has to comply with specifications of UTP categories 5 (CAT 5) and must not exceed 100 meters of length. 2.1 Power supply Before you start the installation make sure that the mains voltage and the nominal voltage of the camera correspond. -
Page 9: Camera Description
English 3. Camera description 3.1 Front view/Rear view 3.2 Alarm inputs and digital outputs Descritption +12V Output Power supply P owe wer su Digital output Digital input Ground 24V AC input Microphone switch crop ne s 24V AC input internal/external rn rnal xter RS-485 +... -
Page 10: Video Output And Dip Switches
English 3.3 Video output and DIP switches Analogue video output (NTSC/PAL): Connect the RCA connector from the video/audio cable with an analogue video input from a monitor. (e.g.: TVAC10100) To set the correct video norm (PAL/NTSC) please use the DIP switch on the back panel of the camera. -
Page 11: Initial Start-Up
English 4. Initial start-up Direct connection between camera and PC / laptop 1. Make sure to use a crossover network cable 2. Connect the cable with the Ethernet port of the PC / Laptop and the camera 3. Connect the power supply to the camera 4. -
Page 12: First Camera Access
English 4.1 First camera access The first camera access takes place by using the program „Installation Wizard 2“. After starting the wizard it will automatically search the network for all connected EyeseoIP network cameras and video servers. You can find the program on the on the CD at CD-ROM\Tools\EyseoIP Tools\ Install the program on your PC and start it. -
Page 13: Installing The Active-X Plug-In
English 4.3 Installing the Active-X plug-in For Mozilla Firefox or Netscape users, your browser will use Quick Time to stream the live video. If you don’t have Quick Time on your computer, please download it first, then launch the web browser. 4.4 Adjusting the security settings NOTICE! The security settings of the Internet Explorer can prevent displaying the video stream. -
Page 14: Connecting To The Camera By Using A Rtsp Player
English In order to access the camera enter username “root” and the before defined password. -> After successful authentication you will connect to the camera and a video stream will be displayed. 4.6 Connecting to the camera by using a RTSP player You can display the MPEG-4 video streams by connecting to the camera with a RTSP capable media player. -
Page 15: Connecting To The Camera By Using Eytron Vms Express
English Please notice that limited access can occur, due to low mobile network bandwidth. We recommend following settings to optimize the video stream: Video compression MPEG-4 Resolution 176x144 I Frame 1 Second Video quality (constant bit rate) 40 Kbit / Second Audio Compression (GSM-AMR) 12.2 Kbit / Second If the media player does not support the RTSP authentication, then deactivate this option in the RTSP settings... -
Page 16: User Functions
English 5. User functions Open the main menu on the network camera. The interface is divided into the following main areas: Control Live image Audio / video control Live image Change the zoom level by pressing the mouse scroll button. Click in the live picture to take over control of an analogue pan/tilt camera directly. -
Page 17: Audio / Video Control
English Language Set the interface language. Pan/tilt/zoom control Use the control buttons to control the digital and mechanical pan/tilt/zoom function. Variable view sizes Using these buttons, you can choose from three different zoom levels for the live picture (100%, 50% and 25%). -
Page 18: Client Settings
English Local recording A recording on the local hard disk can be started or stopped here. You can configure the recording path under “Client Settings”. Adjust the volume Press to manually set the audio output level. Audio On / Off Talk As long as this button is pressed, the audio signals from the PC are transmitted to the audio output of the network camera. -
Page 19: Administrator Settings
English The recorded data can be played back using an MP4-compatible video player (e.g. VLC Media Player). 6. Administrator Settings 6.1 System Only the administrator has access to the system configuration. The following sections explain each of the elements in the left-hand column. Specific tasks on the Options page are printed in bold. The administrator can enter the URL under the picture to go directly to the pictures page of the configuration. -
Page 20: Security
English “Turn off the LED indicator” Select this option to switch off the LED display on the network camera. This prevents other persons knowing that the network camera is in operation. “Time Zone” Adjusts the time according to the selected time zone. “Enable Daylight Saving Time”... -
Page 21: Https
English User administration Administrator: Complete unrestricted access to the network camera. Operator: No access to the configuration page. Can also execute URL commands (e.g. PTZ). User: Access is restricted to the main page (live view). Digital Output: The user group can control the alarm input and output. PTZ control: The user group has access to the PTZ control. -
Page 22: Snmp
English Creating and installing a certificate “Create self-signed certificate automatically” The pre-defined certificate in the network camera is used. With this option, no settings can be made by users. “Create self-signed certificate manually” A new certificate is generated. Specific data must be entered. “Create certificate request and install”... - Page 23 English “Use fixed IP address” The network data is fixed here, e.g. the IP address. “IP address” This is required for network identification. “Subnet mask” This defines whether the destination is in the same subnet. The default value is “255.255.255.0”. “Standard-Router”...
-
Page 24: Ieee 802.1X
English Please note that your network and hardware must support IPv6. If IPv6 is enabled, the network camera always waits until it is assigned an IPv6 address via DHCP. If no DHCP server is available, set up the IP address manually. To do this, enable “Manually setup the IP address”... -
Page 25: Http
English Please note that your network components and the RADIUS server must support the standard IEEE 802.1x. 6.5.3 HTTP “HTTP port” This port can be different from the standard port 80 (80, or 1025 – 65535). If this port is changed, users must be informed to ensure a successful connection. -
Page 26: Https
English 6.5.5 HTTPS “HTTPS port” This is the port setting for the internal HTTPS port. It can be a different port to the standard port 443 (443, or 1025 – 65535). You can find further configuration options for HTTPS in section 5.5.3. 6.5.6 Two-way audio “Two-way audio”... -
Page 27: Rtsp Transmission
English Live stream functions: Start the audio data transmission. Control the sensitivity of the network camera audio input. Switch off the microphone/audio input. Click the button again to stop the audio transmission. 6.5.7 RTSP transmission “RTSP authentication” The authentication options are: disable (standard), basic (simple) or an expanded mode (digest). -
Page 28: Multicast Transmission
English 6.5.8 Multicast transmission Multicast is the message transmission from a single point to a group (also known as a multiple-point connection). The advantage of multicast is that messages can be transmitted simultaneously to several recipients or a closed user group without the bandwidth of the sender increasing according to the number of recipients. -
Page 29: Setting Up A Ddns Account
English “Enable DDNS” Enables the DDNS function. “Service providers” The provider list contains the hosts that provide DDNS services. Connect to the service provider’s website to make sure that the service is available. “Host name” This field must be completed if you want to use the DDNS service. Enter the host name registered with the DDNS server. -
Page 30: Ddns Access Via A Router
If your network network camera is positioned behind a router, then access via DynDNS must be configured in the router. A description of the DynDNS router configuration for common router models can be found on the ABUS Security-Center website: www.abus-sc.com. The following diagram offers an overview of accessing a network camera behind a router via DynDNS.org. - Page 31 English Rule: Single, Range, Network: Single: a specific IP address is added Range: IP address ranges from - to can be defined Network: IP addresses with a specific subnet mask can be defined Example: The IP address range from 192.168.0.1 to 192.255.255.255 should be permitted. The following IP addresses should be blocked 192.168.1.0 to 192.168.255.255.
-
Page 32: Audio And Video
English 9. Audio and Video “Video title” The text appears in the black bar above the video window with a timestamp. This timestamp (date and time) is provided by the integrated realtime clock of the network camera. “Colour” Choose between colour and black and white display. “Modulation”... -
Page 33: Image Settings
English 9.1 Image Settings „White Balance“: Here you can set manually the colour temperature for the white balance: Auto: The camera automatically selects the ideal colour temperature depending on the light conditions. This setting is recommended for most situations. “Keep current value” The white balance values of the current live picture are used „Brightness, Contrast, Saturation,... -
Page 34: Exposure Settings
English This function should not be enabled if the PTZ/ePTZ function of the camera is being used. This function can only be configured if MS Internet Explorer is used as a browser (ActiveX mode). 9.3 Exposure Settings With this function you can set specified exposure settings from the CMOS-Sensor of the camera. -
Page 35: Basic Setting
English Usage of Sensor profiles: The network camera supports different sensor profiles, depending on situation or time. Next to the standard profile following can be configured: Day: Use this profile if the network camera is installed at a location with permanent daylight conditions. -
Page 36: Adjust Image And Viewing Window
English Compression H.264 MPEG-4 MJPEG Recording duration 1 minute video sequence Approx. 30 MB Approx. 55 MB Approx. 220 MB in Full HD resolution with “good” quality Storage capacity 32 GB SD card Approx. 18 hours Approx. 10 hours Approx. 2,5 hours At the end of the manual you can find a detailed table with every quality setting combined with every resolution. -
Page 37: Audio Settings
English 3. Adjust the image area to the ROI. 4. Save the settings. Folgende maximale Einstellungen können gesetzt werden: Image area Image size Stream1 176x144 – 1920x1080 176x144 – 1920x1080 Stream2 176x144 – 1920x1080 176x144 – 1920x1080 Stream3 176x144 – 1468x1200 176x144 (fix) Stream4 1920x1080 (fix) -
Page 38: Motion Detection
English 10. Motion detection You can activate up to three motion zones in the network camera. Select “Enable motion detection”, to configure the function. The motion detection function is only active once you have defined an action under the “Application” menu item. “Window Name”... -
Page 39: Camera Tampering Detection
English Functionality of motion detection: Two parameters are available for configuring motion detection: Sensitivity and percentage. The figure shows how these two parameters influence motion detection. A motion occurs, shown in the progression from figure A to figure B. The resulting pixel changes (depending on the sensitivity setting) are shown in figure C (grey). -
Page 40: Camera Control
English 12. Camera control There are two different options to control PTZ network cameras: Mechanical: Connect the Network Camera to a PTZ driver or scanner via RS485 interface. Digital: Digital PTZ (e-PTZ) within a certain image area. RS485 Settings „Disabled“: Function is deactivated. „PTZ camera“: This setting is required when connecting a motorized pan/tilt driver via RS485. -
Page 41: Trigger Settings
English 13.1 Trigger settings “Video motion detection” Activate the desired motion window. “Periodically” The event is triggered periodically. Maximum setting is 999 minutes. “Digital input” Triggered if a signal is present at the alarm input (e.g.: door contact). “System boot” Event is triggered when the system is rebooted (after a power failure). “Recording notify”... -
Page 42: Server Configuration
“SD” is pre-configured and defines the SD card unit as the destination for saving data. You can configure the following server types: Email: enter the access data here FTP: enter the access data here. Address convention: ftp.abus-sc.com HTTP: enter the access data here. Address convention: http://abus-sc.com/cgi-bin/upload.cgi Network storage: Address convention: \\192.160.0.5\NAS... -
Page 43: Media Settings
English 13.3 Media settings You can save up to 5 media settings in the network camera. “Media name” Unique name for the medium. There are 4 different media types: Snapshot (JPEG file) Video clip (MP4 format) System log (TXT log) Custom message (TXT format) Each medium that you create can only be linked with one event. - Page 44 English “File name prefix” Enter a name that will prefix the snapshot file name. “Add date and time suffix to file name” Adds the date and time to the snapshot so that you can more easily distinguish between the file names of snapshots either in sequential or event-controlled operation. Example: “video@20030102_030405.jpg”...
-
Page 45: Action
English 13.4 Action Here, you can configure the action that is to be executed if an alarm has been triggered. “Trigger digital output for” When this option is enabled, the relay output for the network camera is activated. “Move to preset location” A preset location is activated when the alarm is triggered. “Server”... -
Page 46: Application Overview
English 13.5 Application overview Here, you can view all the “Events”, “Media types” and “Servers” that are configured in the network camera. You can check, delete and add the different settings here. You can also check the different parameters such as name, status, trigger, address. 14. - Page 47 English Destination: “Network drive” “Recording name” A unique name for a recording entry. “Enable this recording” Select this option to activate the recording entry. “Priority” Recordings with a higher priority are executed first. “Source” The recording can be made from video streams 1-4. “Schedule”...
-
Page 48: Local Memory
English 15. Local memory This section explains how you can manage the local memory (SD card) of the network camera. Cards of type SD/SDHC Class 6 of up to 32 GByte are supported. SD card management Use the “Format” function if you are using the card in the network camera for the first time. Select the “Enable cyclic storage”... -
Page 49: Log File
English “Trigger type” Select one or more characteristics which apply to a recording that was made on the SD card. “Trigger time” Select the desired period. Click “Search”. All the recordings that meet your criteria are displayed in the list of results. List of results Number of entries on one page Search... -
Page 50: Management
English 18. Management Reboot Press the “Reboot Now” button to restart the network camera. You can also configure an automated device reboot. This may be helpful if network problems occur. We recommend rebooting the network camera on a weekly basis if you experience problems. Restore Click to restore the factory settings. -
Page 51: Maintenance And Cleaning
Like an update with the installation wizard, you can update the firmware of the network camera here. You can download the latest firmware from www.abus-sc.com. Select the firmware file (*.pkg) and press “Upgrade”. The update takes a short time. When you restart the network camera, it is started with the new firmware. -
Page 52: Technical Data
English 21. Technical data Model number TVIP52501 Camera type Network camera Image Sensor 1/2.7" CMOS Progressive Scan Sensor Resolution 176 x 144 – 1920x1080 (intermediate levels can be freely selected) Pixels (total) 1920x1080 Pixels (effective) 1920x1080 Lens CS mount for lens, DC connector... -
Page 53: License Information
English 23. License information We point at the fact that thenetwork cameras TVIP52501 among other things include Linux software source codes that are licensed under the GNU General Public Licence (GPL). To assure a GPL compliant usage of the used source codes we point at the licence terms of GPL. - Page 54 English 0516621; FR PAT. 0516621; GB PAT. 0516621; GR PAT. 0516621; IT PAT. 0516621; LI PAT. 0516621; LU PAT. 0516621; NL PAT. 0516621; SE PAT 0516621; US PAT 5444816; AT PAT. 819303/AT E 198805T1; AU PAT. 697256; BE PAT. 819303; BR PAT. 9604838-7; CA PAT. 2216315; CH PAT. 819303; CN PAT. ZL96193827.7;...
Need help?
Do you have a question about the TVIP52501 and is the answer not in the manual?
Questions and answers