Advertisement
Warranty Registration Card
To register for your 12 month warranty, complete this warranty card and return it within
7 days of purchase to:
CNP Brands
PO Box 8
Deer Park, VIC, 3023
(or)
The Baby Factory (NZ) Ltd
PO Box 58245
Greenmount Auckland
Email: customerservices@babyfactory.co.nz
Name
Address
Postcode
Phone ( )
Email
Product Name / Model No.
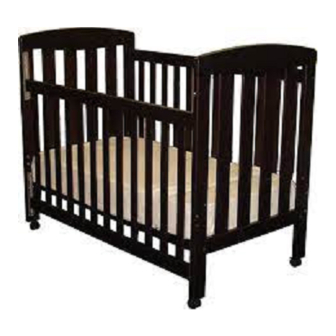
Sussex Cot- 091115
Colour
Place of Purchase
Date of Purchase
Warranty
Warranty Terms and Conditions
Subject to the following, C.O. White Pty Ltd ACN 004 169 233 of 20 Calarco Drive, Derrimut,
Victoria, 3030, trading as CNP Brands ('CNP Brands') warrants that:
1
This product complies with all safety requirements, and where applicable, those specified
in the Australian and New Zealand Safety Standards as at the date of purchase; and
2
This product is free from defects in workmanship and material under normal use for 12
months from the date of purchase, as recorded on the invoice ('warranty period').
However, where the product has been purchased or is used for commercial purposes, the
warranty period is three months from the date of purchase, as recorded on the invoice.
In the event of a defect during the warranty period, you are requested to contact your
retailer or place of purchase.
Subject to the following, the warranties do not apply in the following circumstances:
1.
Where the product is not supplied to CNP Brands or an authorised repair agent with the
original sales receipt.
2.
The defect is the result of use of the product not in accordance with the instructions given
in any manual or instructions supplied with this product (including, but not limited to,
where the maximum weight allowance specified for the product has been exceeded), or
maintenance that is contrary to the instructions given in any manual or instructions
supplied with this product.
3.
Damage caused directly or indirectly by repairs that have been carried out by you and
any third party (excluding authorised repair agents).
4.
Where the defect is discolouration, damage to the fabric or watermarks due to washing
that has not been in accordance with the instructions given in any manual or instructions
supplied with this product, exposure to rainwater, or exposure to sunlight.
5.
The defect is as a result of accidental damage.
6.
The defect is as a result of damage caused to the product by negligent transportation of
the product other than by CNP Brands.
7.
Where the product has been damaged through the use of accessories that have not been
approved for use by CNP Brands in relation to the product.
The warranties are non-transferable and may only be invoked by the first owner.
Any undertakings implied by the Goods Act 1958 (Vic) in respect of the product are expressly
negatived.
None of the above is intended nor should be interpreted as restricting, modifying, excluding,
or having the effect of restricting, modifying or excluding the rights of the consumer under
the Trade Practices Act 1974 (Cth), in relation to the supply of the product to the consumer,
including merchantable quality of the product, fitness for purpose, supply by description and/or
supply by sample (subject to the limitations on such rights as set out in that Act).
The above is to be interpreted in accordance with the law of the State of Victoria and the
Courts of the State of Victoria have exclusive jurisdiction over any dispute arising out of the
effect or interpretation of the above.
Instructions for Use and Warranty
Sussex Cot
091115
Advertisement
Table of Contents

Related Manuals for Childcare Sussex Cot


Summary of Contents for Childcare Sussex Cot
- Page 1 Where the product has been damaged through the use of accessories that have not been approved for use by CNP Brands in relation to the product. Product Name / Model No. Sussex Cot- 091115 The warranties are non-transferable and may only be invoked by the first owner. Colour Any undertakings implied by the Goods Act 1958 (Vic) in respect of the product are expressly negatived.
- Page 2 Customer Feedback Safety Precautions Sussex Features WARNING Please take a few moments to complete the customer feedback survey so that we can continue to make improvements on our product development. • TO PREVENT FALLS, THE MAXIMUM MATTRESS THICKNESS Product Features SHOULD NOT EXCEED 150MM. •...
- Page 3 Sussex Cot Congratulations on your purchase of the Childcare Sussex Cot. This product has been designed and developed with safety, comfort and functionality in mind. Please take the time to read this manual carefully before the use of this product and keep it in a safe place for future reference. To ensure that you receive the best service and warranty from CNP Brands, please remember to complete and return the warranty card as soon as possible.
- Page 4 Contents A ssembly Contents List A ssembly Instructions Care and Maintenance Sussex Cot Features...
- Page 5 Assembly Contents List A. End Panel (x2) I. Filling Screws (short) and Plugs B. Fixed Side Panel (x1) (12 sets preassembled on End Board Panels) for the Mattress Base Holes C. Drop Side Panel (x1) & Bed Rail Holes E. Drop Side Plate (Preassembled) (x4) J. Castors (x4) F. Mattress Base (x1) K. Allen Key (x1) G. Cot Assembly Screws (x8) A. End Panel B. Fixed Side Panel A. End Panel C. Drop Side Panel E. Upper and Lower I. Filling Screws Drop Side Plate F. Mattress Base (Preassembled) G. Cot Assembly Screws B. Fixed Side Panel I. Filling Screws Drop Side Pins J. Castors C. Drop Side Panel K. Allen Key...
- Page 6 Assembly Instructions It is preferable that two people assemble the cot in the room in which the cot is to be used. As small parts are involved in assembly, children should be kept clear of the assembly area. Dispose of all packaging material immediatey after the cot is assembled. This cot has an adjustable height base for a high or low position. With base in high position- this is for use when your baby is young and cannot sit up unaided. With base in low position- this is the normal position for an active baby which can sit up unaided. Filling Screws for the Adjustable Mattress Base The cot comes with Filling Screws (x4) already located in the upper holes of the End Panels. If changing the Mattress Base from the lower to the higher position, you must swap over the Filling Screws. It is important that the Filling Screws are replaced into the open holes. Ensure they are secured tightly with the Allen Key and check regularly that they do not loosen. NOTE: For safe transit, the Drop Side Panel is fitted with rubber caps over each protruding pin. Please remove the rubber caps prior to assembly, and dispose of immediately to avoid them becoming a swallowing/choking hazard.
- Page 7 To Attach the Drop Side Panel With one End Panel standing upright, attach one side of the Drop Side Panel by guiding the pin on its upper corner into the hole located at the top of the upper Drop Side Plate. Next, guide the pin on the bottom of the rail into the hole located at the top of the lower Drop Side Plate. Repeat this step for the other side of the Drop Side Panel. To Attach the Mattress Base Attach each side of the Mattress Base to one End Panel using two Screws and the Allen Key. Do not tighten Screws completely. Repeat for other end of Mattress Base. Do not screw in completely...
- Page 8 Attaching the Fixed Side Panel With the cot still standing, slide the Fixed Side Panel between the two End Panels and attach using all remaining four Screws in the same manner as above. Now pull the cot together and tighten all screws with the Allen Key provided. WARNING: DO NOT OVERTIGHTEN SCREWS. Insert the four Castors into the end of the cot legs where the sockets are pre-fitted. Ensure they are attached securely. Screw for Fixed Side Screw for Screw for Mattress Base Mattress Base...
- Page 9 To Operate the Drop Side Panel To raise the Drop Side Panel, lift it to the highest position. The Drop Side Panel will lock into position automatically. To lower the Drop Side Panel, lift it and then press both silver pins simultaneously on the left and right of the Drop Side Panel and it will slide down freely. For safety, do not force the Drop Side Panel to go any lower as shown below.
- Page 10 How to Care for your Cot Cleaning For cleaning, wipe with damp cloth and use a mild soap solution if necessary. Do not use detergent or abrasives on cot surfaces. Always store product in a clean dry place. Maintenance Always check parts regularly for tightness of screws, nuts and other fasteners, and tighten or replace if required. To maintain the safety of your nursery product, seek prompt repairs for bent, torn, worn or broken parts. Use only those parts and accessories approved by CNP Brands. If the Drop Side Panel does not slide down smoothly, use a silicone based spray, ensuring it penetrates the mechanism sufficiently. If you have any difficulties in assembling the cot, please contact our Service Department on 1300 667 137.
Need help?
Do you have a question about the Sussex Cot and is the answer not in the manual?
Questions and answers