
Related Manuals for Childcare Snuggle Time Storm Cloud


Summary of Contents for Childcare Snuggle Time Storm Cloud
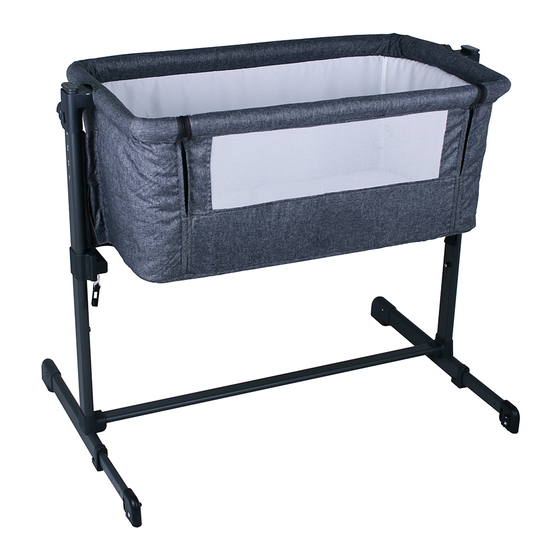
- Page 1 Snuggle Time BEDSIDE SLEEPER “STORM CLOUD” #036310-356 IMPORTANT: RETAIN FOR FUTURE REFERENCE, READ CAREFULLY...
- Page 2 SAFETY PRECAUTIONS Read all instructions before assembly and use of the bedside sleeper. Keep instructions for future use. WARNING NEVER LEAVE THE CHILD UNATTENDED IN THE SNUGGLE TIME BEDSIDE SLEEPER. IT IS DANGEROUS TO PLACE THE PRODUCT ON A RAISED SURFACE SUCH AS A TABLE. DO NOT USE THE PRODUCT IF ANY PART IS BROKEN, TORN, OR MISSING.
- Page 3 SAFETY PRECAUTIONS WARNING SUFFOCATION HAZARD - INFANTS HAVE SUFFOCATED IN GAPS BETWEEN EXTRA PADDING AND SIDE OF BASSINET/CRADLE AND ON SOFT BEDDING. USE ONLY THE PAD PROVIDED BY MANUFACTURER. NEVER ADD A PILLOW, COMFORTER OR ANOTHER MATTRESS FOR PADDING. If a sheet is used with the pad, use only the one provided by CNP Brands. To reduce the risk of SIDS, paediatricians recommend healthy infants be placed on their backs to sleep, unless otherwise advised by your physician.
- Page 4 SAFETY PRECAUTIONS NEVER leave your infant in the product without the TOP HORIZONTAL RAIL installed in the upper most position, unless securely attached to the adult bed. Failure to use this securing system will allow the bedside sleeper to move away from the adult bed and could result in the infant falling out of the bedside sleeper bedside bassinet.
- Page 5 CONGRATULATIONS Congratulations on your purchase of the Snuggle Time Bedside Sleeper. This product has been designed and developed with safety, comfort and functionality in mind. Please take the time to read this manual carefully before using this product and keep it in a safe place for future reference.
- Page 6 Lower crossbar legs + caps Top frame, liner with support and Mattress with fixing belts with removable cover anchor plates Middle support Outer travel bag frame There are no accessories recommended for use with this Childcare Snuggle Time Bedside Sleeper.
- Page 7 ASSEMBLY CONTENTS Fully assembled product: A: Side Support Frames B: Middle Support Frame C: Mattress with removable cover D: Top Frame & Liner...
- Page 8 ASSEMBLY / OPERATING INSTRUCTIONS To assemble Frame and Bassinet Liner... Lay support frame leg with numbers facing down. Insert the lower support bar into frame, with push pins facing down. Push in to secure. Repeat for other side. Lay bassinet face down and lift hinged arms vertical. Remove side support frame caps by pushing pins and lifting.
- Page 9 ASSEMBLY / OPERATING INSTRUCTIONS To assemble Frame and Bassinet Liner (continued)... Insert the Middle support frame in to the mounting on each side frame. Push frame in until secure, check for locking. Feed the Liner flap from the rear, between the hinged arm of the Top frame and the side support frame.
- Page 10 ASSEMBLY / OPERATING INSTRUCTIONS To adjust height of Bedside Sleeper... The sleeper can be adjusted to different height positions. Adjust the height by pressing the adjuster button then raise or lower to desired position. Repeat this operation on the opposite side. ANTI REFLUX FEATURE! To help with any reflux issues, you can raise the head end of the bedside sleeper to be 1 or 2 settings higher than the foot end.
- Page 11 ASSEMBLY / OPERATING INSTRUCTIONS To fix to bed in Bedside Sleeper mode (continued)... Repeat for other side. Roll down the unzipped side and secure with elastic tabs. Clip the female fixing belts into the male buckle located on the underside of the sleeper as per image. Make sure both buckles on either sides are clicked into place.
- Page 12 ASSEMBLY / OPERATING INSTRUCTIONS To fix to bed in Bedside Sleeper mode (continued)... Move the sleeper close to the parent’s bed and check the height of the sleeper compared with the mattress on the bed. The side support of the sleeper should always be placed close to the parent’s mattress and the mattress should always be aligned with the height of the side support for restraint of the sleeper.
- Page 13 ASSEMBLY / OPERATING INSTRUCTIONS To fix to bed in Bedside Sleeper mode (continued)... Before every use always check to make sure there is no space between the parent’s mattress and the side of the sleeper. If there is, pull the belts firmly to tighten until there’s no space and the permitted condition of use has been restored.
- Page 14 ASSEMBLY / OPERATING INSTRUCTIONS To assemble free standing Bassinet... Release the rolled up side by unhooking the elastic tabs and zip up both sides of sleeper. Line up the bar of the support frame as shown in the image. Locate the slots on the bar end and slide the bar into position while sliding the lock button away from the bar.
- Page 15 ASSEMBLY / OPERATING INSTRUCTIONS To remove Lining (continued)... Gently remove the lining from the top frame by sliding it off the top frame tubes on both sides. To disassemble Bedside Sleeper... Follow the steps ‘To remove Lining... ’ on page 14 to remove the sleeper lining from the structure.
- Page 16 HOW TO CARE FOR YOUR CHILDCARE BEDSIDE SLEEPER Cleaning This product has been designed and developed with safety, comfort and functionality in mind. Please take the time to read this manual carefully before using this product and keep it in a safe place for future reference.
- Page 17 These include distribution lines for 4moms, Cybex, Evenflo, Good Baby, Lascal, Maclaren, Motorola, OiOi and Summer Infant. Our own brands, including Childcare, have gone from strength to strength in recent years. Childcare, and our premium brand bebe care, demonstrate our commitment to quality and continuing...
- Page 18 Distributed in Australia by CNP Brands Distributed in New Zealand by Wainhouse 20 Calarco Drive, Distribution Derrimut, VIC, 3030 2-6 Argyle St, Morningside, Customer Service 1300 667 137 PO Box 41-014, St Lukes, Auckland, New Zealand W: www.cnpbrands.com.au Customer Service: 0800 567 5000 E: info@cnpbrands.com.au F: www.facebook.com/CNPBrands E: helpline@wainhousedist.co.nz...
Need help?
Do you have a question about the Snuggle Time Storm Cloud and is the answer not in the manual?
Questions and answers