Table of Contents
Advertisement
Advertisement
Table of Contents

Subscribe to Our Youtube Channel
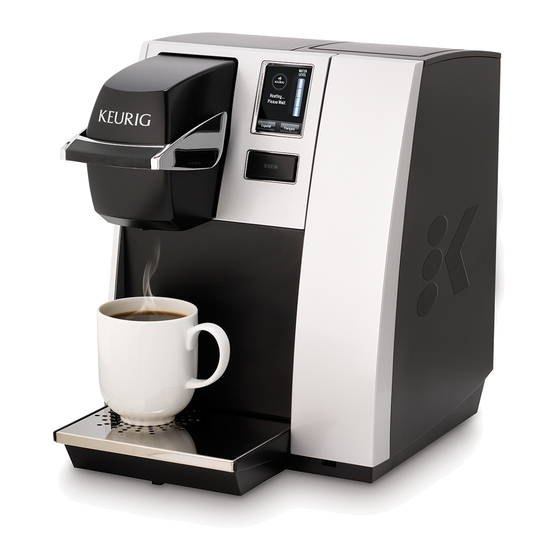
Summary of Contents for Keurig K150C
- Page 1 K150C Plumbed Brewer | Owner’s Manual...
- Page 2 (item L on page 5) safety precautions should be followed, any way. Contact your Keurig Authorised installed. Failure to do so will result including the following: Distributor to report any malfunction of or in a failure to properly brew.
-
Page 3: Table Of Contents
SINGLE CUP BREWING SYSTEM ® K-Cup Pod Assembly Housing. ® KEURIG K150C Plumbed — U sing Your Plumbed Brewer ® CAUTION: There is extremely hot water in the K-Cup Pod Holder during ® BREWER OVERVIEW the brewing process. To avoid risk of injury, do not lift the handle or open Helpful Hints &... -
Page 4: Helpful Hints & Unpacking
5 brew sizes (120 ml, 180 We recommend you save all packing surface (such as a table or worktop) or on ml, 240 ml, 300 ml and 350 ml) your Keurig materials in case future shipping of the ®... -
Page 5: Features
Features K150C Plumbed Brewer K150C Plumbed Brewer Funnel Drip Tray Handle Removable Puncture Inlet Plumbing Port Plate K-Cup Pod Holder Drip Tray Base ® Drain Hatch and Knob (E and F are the K-Cup Power Switch ® Housing LCD Screen... -
Page 6: Plumbing & Set-Up
Filter and Plumbing Instructions IMPORTANT: fig. until it has been set-up for its first use. Your K150C Plumbed brewing system requires If the brewer has been exposed to NOTE: the use of an external water filter. Valid temperatures below freezing, allow the brewer... -
Page 7: Setting Up Your Brewer
Remove the clear fig. plastic film from the LCD Screen. Unwrap The LCD Screen will be in its idle state (fig. 6). Welcome To The Keurig 150 Brewing System the power cord and plug the brewer into Designed For Lift the handle. -
Page 8: Stopping The Brew Process
Your brewer is able to produce hot water will be hot. fig. for use in cooking, making soups, porridge, Enjoy your first cup of Keurig Brewed ® etc. Simply lift and lower the handle on the gourmet coffee, tea or hot chocolate! brewer without adding a K-Cup pod. -
Page 9: Menu Controls & Indicators
Five brew sizes are available: 120 ml, 180 ml, 240 ml, 300 ml and 350 ml. To program the brew sizes refer to page 10. If you are experiencing any problems with your brewer, please contact your Keurig Descale The brewer should be descaled every 3-6 months to ensure optimal Authorised Distributor. -
Page 10: Programming Brew Temperature
SECTION 3 Menu Controls & Indicators Programming Your Brew Size fig. All brew sizes are enabled in the default Programming Brew fig. fig. setting. If you want to disable any brew size, Temperature (86° – 9 2° C) just press on the appropriate icon(s). Please follow instructions outlined below. -
Page 11: Programming Auto-Off
To enable the “ AUTO OFF” feature, press From the Menu Mode, press “CONTACT”. “ON”. “ENABLED” will appear on the screen The LCD Screen will display the Keurig and press “OK”. To disable the “AUTO OFF” default contact information (fig. 17). -
Page 12: Cleaning & Maintenance
SECTION 4 SECTION 3 Menu Controls & Indicators Cleaning & Maintenance Cleaning External Parts Press the Middle (Phone Number) Box. fig. The Numeral Keypad Mode will appear Regular cleaning of the brewer’s external components is recommended. along with the current information The following section provides instruction for standard cleaning procedures. - Page 13 After cleaning, align the K-Cup pod holder ® fig. with the opening using the two front ribs as a guide, and snap them into place from the top. T he funnel can be 2. Cleaning the Funnel — removed from the K-Cup pod holder by ®...
-
Page 14: Descaling
STEP 1: FILL AND CLEAN • Discard any residual vinegar from both the hot water tank and • Pour approximately 1.2 L of the vinegar or Keurig Descale Solution cold water tank. into the cold water tank. Do not exceed this amount or the cold water tank will overflow. -
Page 15: Draining & Storage
Plate and select Large Mug (300 ml If you need assistance with your brewer, please contact your Keurig serving) brew size from the Select Authorised Distributor. -
Page 16: Troubleshooting
The exit needle may be clogged (refer to page 13). Authorised Distributor. • LCD Messages If any problems persist, contact your Keurig Authorised Distributor. • If the water flow has been interrupted, LCD Screen will state “WATER FLOW INTERRUPTED, TO RESET, PLEASE PRESS BREW BUTTON”. Press BREW Button to resolve this issue. -
Page 17: Warranty
Keurig will either repair or replace the brewer without charge upon its loss or damage which arises from the brewer proving defective receipt of proof of the date of purchase from Keurig and the brewer in iii. while in consumer use and results from the negligence of a person accordance with the terms of this warranty. - Page 18 However, should the need arise for warranty servicing during the warranty period, simply call your Keurig Authorised Distributor. Please do not return your brewer to the address below for servicing without first speaking to Keurig Customer Service to obtain an Authorisation to Return number (“ATR”).
- Page 20 To learn more about Keurig, visit www.Keurig.co.uk l www.Keurig.ie or contact your Keurig Authorised Distributor © 2016, Keurig Green Mountain, Inc. All rights reserved Keurig UK Limited One Kingdom Street, Paddington Central, P/N DC0000000614 Rev A London, W2 6BD, United Kingdom Pat.


Need help?
Do you have a question about the K150C and is the answer not in the manual?
Questions and answers