Table of Contents
Advertisement
Available languages
Available languages
Quick Links
Advertisement
Chapters
Table of Contents

Related Manuals for Qviart UNIC


Summary of Contents for Qviart UNIC
-
Page 2: Table Of Contents
Safety Precaution.......................2 Content 1. Reference..........................2 1. Accessories.........................2 2. Product Overview......................3 2.1 Front Panel........................3 2.2 Rear Panel........................ 3 2.3 Remote Control Unit (RCU)...................3 3. Connection with Other Device..................4 3.1 Connecting to TV.....................4 3.2 Connecting the Antenna..................5 4. Installation..........................5 4.1 Antenna Settings.....................5 4.2 Factory Default......................8 4.3 USALS Setup...................... -
Page 3: Reference
Safety Precaution This STB has been designed and manufactured to satisfy the international safety standards. Please read the following safety precautions carefully before operating this receiver. Before operating, please check the units operating voltage is 90~250V AC 50/60Hz. Main Supply: Do not overload a wall outlet, extension cord or adapter, neither use damaged power cord or touch it with wet Overload: hand as this may result in electric shock. -
Page 4: Product Overview
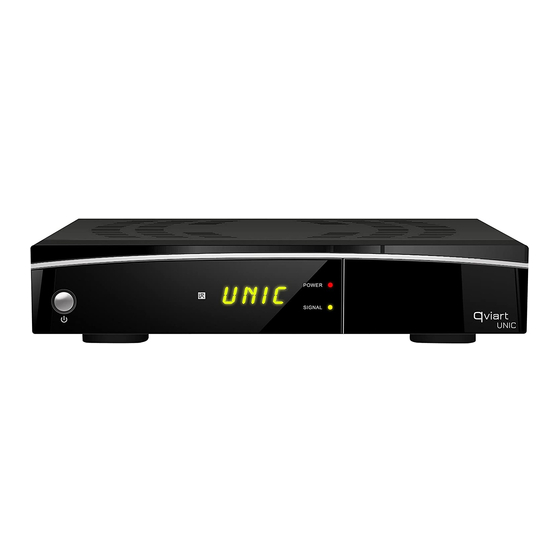
2. Product Overview 2.1 Front Panel 1. Power button Switch between operation and standby modes. Figure 2. Front Panel 2. Display It displays channel information. In standby mode it displays local time. 2.2 Rear Panel 1. LNB IN Connect the satellite antenna cable. Figure 3. -
Page 5: Connection With Other Device
14. I I: Pause 15. TV/R: Switch between TV and RADIO. 16. TXT: Display the teletext. 17. SUB: Display the subtitle language list. 18.USB: Enter USB menu. 19. MENU: Activate main menu. 20. EXIT: Exit current menu step by step. 21. -
Page 6: Connecting The Antenna
You can connect one fixed dish LNB directly to the LNB IN, or connect at least two dishes LNB by DiSEqC Switch. Figure6. Connecting to Dish Figure7. Connecting to Dish LNB 4. Installation You should install the receiver when powering on your product for the first time after purchase. Tip: The default password is 0000. - Page 7 7. DiSEqC 1.1: Press the button to select the required DiSEqC1.1 input. 8. Motor: Press the button to select DiSEqC1.2 or USALS. 9. Scan Mode: Press the button to select the scan mode you want to implement. 10. Start search: Press the button to select Satellite &...
- Page 8 2. Complete the antenna settings of this satellite. 3. Highlight the Start Search and select Blind Search then press the OK button to confirm. 1. Highlight the Satellite and press the OK button to enter satellite list. D: TP Search 2.
-
Page 9: Factory Default
1. Menu->INSTALLTION -> Factory Default 4.2 Factory Default 2. Highlight the option you want and press the OK button to execute it. 4.3 USALS Setup If you set the Motor Mode to USALS, you need set the Menu-> INSTALLTION ->USALS Setup longitude and the latitude in USALS Setup. -
Page 10: Favorites / Radio Favorites
5.2 Favorites / Radio Favorites 1. Press the color button directly to add or remove the highlighted channels to or out of the corresponding Menu->EDIT CHANNEL-> Favorites/Radio Favorites favorite group. 2 Press the EXIT button to exit the menu and save it. 5.3 Sort Channels Highlight the option you want and press the OK button to sort the channel list. -
Page 11: Parental Control
information. 6.3 Parental control Parental Control allows you to set limits for each program or change your previous password. You can also Menu-> SETTINGS ->-Parental Control lock the changes you have made using Installation Lock, Edit Channel Lock and System Lock. And you can change Age Rating and change PIN. -
Page 12: Ca Menu
3. Press the OK button to save. You can view the information about CA card. 6.6 CA Menu 6.7 Color Settings Color Settings can set the Brightness, Contrast and Saturation. Menu-> SETTINGS ->Color Settings 6.8 About STB can get the information about the STB. Menu->... -
Page 13: Play Mode
2. Upload 1) Press the YELLOW button and highlight the Upload Data to USB. Upload Data to USB Press the OK button can upload the data and setting to usb disk. Press the YELLOW button and highlight the Upload Channel to USB. Press the OK button can upload the Channel and setting to usb disk. -
Page 14: Wireless Setting
8.2 Wireless Setting Plug in the wireless USB dongle to the USB port. Search Access Point Select the network name of your Wi-Fi access point from Menu->EXPANSION->Wireless Setting->Search Access Point the list. Press the OK button, then input the right password. RED: refresh the Wi-Fi access point Change connection disable or enable. -
Page 15: Basic Operation
8.4.5Stock View You can know the Stock View. Stock View Menu-> EXPANSION ->Network Apps-> 8.4.6 Youtube You can visit the Youtube videos. Menu-> EXPANSION ->Network Apps->Youtube You can visit the Prayer Times to choose a city to see it five times a day of worship 8.4.7 Prayer Times Menu->... -
Page 16: Subtitle
1) Press the button to change program. Weekly EPG: 2) Press the / button to change the date, and it displays the EPG list in one day of the selected channel. 3) Press OK button, then press button to highlight the EPG event which you want, and the current EPG detail information will display on the bottom of screen. -
Page 17: Channel List
Press the INFO button twice to view detailed EPG information, press the to switch current and next and 2. EPG Information press the INFO button once more to hide the detailed EPG information. 10. Channel List 1) Press the OK button to enter the channel list while watching a program. 10.1 OK List 2) Press the RED button to sort channel by Alphabet, Transponder, FTA To CAS, Default, Favor, FTA To CAS+ Alphabet, Provider and Service ID. - Page 18 Manual ESPAÑOL 1. Referencia............................2 2. Descripción del producto......................... 3 1.1 Accesorios..........................2 2.1 Panel Frontal.......................... 3 2.2 Panel trasero.......................... 3 2.3 Mando (RCU)..........................4 3. Conexión con otros dispositivos......................4 3.1 Conexión a la TV........................4 3.2 Conexión de la antena........................5 4.
-
Page 19: Referencia
Precauciones de seguridad Este receptor ha sido diseñado y fabricado para satisfacer las normas de seguridad internacionales. Por favor, lea las siguientes precauciones de seguridad antes de utilizar este receptor. Antes del encendido, por favor verifique que el voltaje de funcionamiento es de 90 ~ 250V AC 50/60Hz. ... -
Page 20: Descripción Del Producto
2. Descripción del producto 2.1 Panel Frontal Figura 2. Panel frontal Cambiar entre el funcionamiento y modo “standby”. 1. Botón de encendido Muestra la información del canal. En el modo “standby” se muestra la hora local. 2. Display 2.2 Panel trasero Figura 3. -
Page 21: Mando (Rcu)
2.3 Mando (RCU) Puede controlar todas las funciones de este receptor mediante este mando a distancia. 2. SILENCIAR: Desactivar audio. 1. ENCENDIDO: 3. AUDIO: Muestra la lista de audio. 4. PAUSA: Congela la imagen. 5. ZOOM: Función de zoom. 6. INFO: Muestra la información del programa. :Rebobinado rápido. -
Page 22: Conexión De La Antena
Puede conectar un LNB desde la antena parabólica directamente al LNB IN, o conectar un mínimo de dos LNB 3.2 Conexión de la antena mediante un ”switch” DiSEqC. Figura6. Conexión a antena parabólica Figura7. Conexión a ”switch” DiSEqC Debe instalar el receptor al encenderlo por primera vez después de la compra. 4. - Page 23 búsqueda. 4.1.1 Ajustes de antena parabólica Pulse las teclas / para elegir el satélite que desea utilizar. Seleccionar Pulse el botón ROJO para añadir un nuevo satélite. Añadir Puede seleccionar el satélite que desea pasar de la lista de satélites, pulse el botón AZUL, luego ingrese el ...
-
Page 24: Configuración Usals
3. Resalte el TP y presione el botón OK para entrar en la lista de TP. 4. Resalte el Iniciar búsqueda y seleccione TP y pulse el botón OK para confirmar. 1. Resalte el satélite y pulse el botón OK para entrar en la lista de satélites. E: Buscar Multi TP 2. -
Page 25: Editar Canal
longitud y la latitud en la configuración USALS. Configuración Por país: Pulse el botón ROJO, puede elegir el país, pulse el botón OK. Consejo: Introduzca la contraseña predeterminada. Puede pulsar el botón Sat elegir diferentes satélites según 5. Editar canal la información de ayuda, pulse OK para confirmar, entonces todos los canales de este sat serán mostrados. -
Page 26: Lista De Canales Del Usuario
Lista de canales del usuario le permite guardar o cargar todos los datos y configuraciones. 5.4 Lista de canales del usuario 1. Menú-> EDITAR CANALES -> Lista de canales de -> Guardar datos usuario 2. Menú-> EDITAR CANALES -> Canal de datos de usuario de lista-> Cargar datos usuario Consejo: Introduzca la contraseña predeterminada. -
Page 27: Calendario
Control parental permite establecer límites para cada programa o cambiar la contraseña anterior. También puede bloquear los cambios que ha hecho uso de bloqueo de Instalación, Editar canal de bloqueo y bloqueo del sistema. Y usted puede cambiar la clasificación por edad y cambiar el PIN. 6.4 Calendario El Calendario puede obtener información más actualizada. -
Page 28: Juegos
En ACERCA DEL RECEPTOR puede obtener la información sobre el receptor. Menú-> Configuración -> Acerca de receptor 7. Juegos En el menú Juegos hay 9 juegos divertidos a los que puedes jugar. Menú -> JUEGOS 8. expansión USB 8.1 Menú-> EXPANSION-> USB o pulse el botón USB directamente 8.1.1 Operaciones básicas 1. - Page 29 1) Pulse el botón AMARILLO y destaca el subir todo a USB. Subir Todo a USB 2) Pulse el botón OK para cargar todo el disco USB. 1) Pulse el botón AMARILLO y destaca la subir al FTP. Subir a FTP 2) Pulse el botón OK para cargar el archivo o carpeta resaltado al FTP.
-
Page 30: Configuración Inalámbrica
Conecte el “stick” USB inalámbrico al puerto USB. 8.2 Configuración inalámbrica 1) Búsqueda del punto de acceso Menú-> EXPANSION-> Configuración-> Buscar Punto de 1. Seleccione el nombre de red del punto de acceso Wi-Fi de la acceso Wireless lista. 2. Pulse el botón OK, luego ingrese la contraseña correcta. ROJO: actualizar el punto de acceso Wi-Fi AMARILLO: Cambiar conexión desactivar o activar. -
Page 31: Funcionamiento Básico
ROJO: Cambie la ciudad y la unidad de temperatura. 8.4.3 RSS Menú-> EXPANSION -> Aplicaciones de red-> RSS Puede pulsar el botón ROJO para añadir los sitios web RSS y entonces podrá leer el contenido de los sitios web. También puede pulsar el botón AMARILLO para borrar los sitios web de RSS. -
Page 32: Epg
Usted puede ver la información EPG de todos los canales en tiempo y orden de fecha. 9.4 EPG 1. Pulse el botón EPG. 2. Pulse el botón VERDE para cambiar el modo EPG entre EPG semanal y EPG Díario. 1) Pulse el botón / para cambiar el programa. -
Page 33: Lista De Canales
Pulse el botón INFO dos veces para ver información detallada EPG, pulse el para cambiar curso y el 2. Información EPG siguiente y pulse el botón INFO otra vez para ocultar la información detallada EPG. 10. Lista de canales 1) Pulse el botón OK para entrar en la lista de canales mientras se ve un programa. 10.1 Lista OK 2) Pulse el botón ROJO para ordenar canal alfabéticamente, “Transponder”, FTA Para CAS, por defecto, Favoritos, FTA Para CAS + Alfabético, Proveedor y ID del Servicio. - Page 34 Precauzioni di sicurezza....................2 1. Riferimento.........................2 Manuale italiano 1.1 Accessori........................2 2. Descrizione del prodotto....................3 2.1 Pannello frontale.....................3 2.2 Pannello posteriore....................3 2.3 Comando (RCU).......................4 3. Collegamento ad altri dispositivi..................4 3.1 Collegamento alla TV....................4 3.2 Collegamento antenna................... 5 4. Installazione........................5 4.1 Configurazione d'antenna..................
-
Page 35: Precauzioni Di Sicurezza
Precauzioni di sicurezza Questa unità è stata progettata e realizzata per soddisfare gli standard di sicurezza internazionali. Si prega di leggere le seguenti precauzioni di sicurezza prima di utilizzare questo ricevitore. Prima di iniziare, vi preghiamo di verificare che la tensione di funzionamento è di 90 ~ 250V AC 50/60Hz. ... -
Page 36: Descrizione Del Prodotto
2. Descrizione del prodotto 2.1 Pannello frontale Figura 2. pannello frontale Commutazione tra modalità e “standby”. 1. Pulsante di alimentazione Visualizza le informazioni del canale. Nella "Standby" spettacoli locali. 2. Display 2.2 Pannello posteriore. Figura 3. Pannello posteriore Collegare l'antenna satellitare. 1. -
Page 37: Comando (Rcu)
2.3 Comando (RCU) È possibile controllare tutte le funzioni di questo ricevitore con questo telecomando. 2. SILENCE: Disattiva audio. 1. Power: 3. AUDIO: Visualizza l'elenco audio. 4. PAUSE: Congelare l'immagine. 5. ZOOM: Funzione di zoom. 6. INFO: Informazioni sul programma Display. : Riavvolgimento veloce. -
Page 38: Collegamento Antenna
È possibile collegare un LNB dal piatto direttamente al LNB IN, o collegare almeno due LNB da”switch” DiSEqC. 3.2 Collegamento antenna Figura 6. Collegamento Parabola Figure7. Collegamento a DiSEqC "switch" È necessario installare il ricevitore acceso per la prima volta dopo l'acquisto. 4. - Page 39 Premere il tasto ROSSO per aggiungere un nuovo satellite. È possibile selezionare il satellite che si vuole spostare, premere il tasto BLU, quindi inserire il numero di Spostare destinazione e premere OK. Selezionare il satellite che si desidera eliminare dalla lista dei ...
-
Page 40: Defaults
4. Evidenziare lista TP, Premere il pulsante OK per contrassegnarli. 5. Premere Exit per avviare la ricerca dei programmi che hanno segnato i transponder. 4.1.4 Configurazione Antenna per il motore Menu-> Installazione -> Impostazioni antenna -> Motore Selezionare DiSEqC 1.2 o USALS utilizzando il pulsante 1. -
Page 41: Canali Tv / Radio
5.1 Canali TV / Radio Menu-> MODIFICA CANALI-> Canali TV / Radio 1) Premere il tasto ROSSO per attivare la modalità di 1. Sposta Canali movimento. 2) Selezionare il canale che si desidera spostare e premere il tasto OK per selezionare il canale. 3) Premere per la destinazione l nella lista dei canali e premere il pulsante OK. -
Page 42: Configurazione Di Sistema
Suggerimento: Inserire la password di default. 6.1 Configurazione di sistema Menu-> Impostazioni-> Impostazioni di sistema 1. Menu Lingua: impostare la lingua del menu. 2. Audio1: Impostare la lingua audio preferita. 3. Audio2: Impostare la lingua audio secondaria. 4. Lingua sottotitoli: Imposta la lingua dei sottotitoli. 5. -
Page 43: Tempo
6.5 Tempo 6.5.1 Impostazione dell'ora Menu-> Impostazioni -> TEMPO-> Impostazioni ora È possibile cambiare la modalità di tempo per Auto o Manuale premendo 1. Modo di ora Impostare il fuso orario in base alla tua città. 2. Differenza di fuso orario Se la vostra regione richiede DST per correggere l'ora corrente, premere il pulsante 3. - Page 44 Menu-> ESPANSIONE-> USB o direttamente premere il pulsante USB 8.1.1 Operazioni di base 1. Strumenti 1) Selezionare il file o la cartella Rinominare i file 2) Premere il tasto ROSSO e mettere in evidenza Rinomina. 3) Premere il pulsante OK può rinominare il file o la cartella. 1) Selezionare il file o la cartella.
-
Page 45: Configurazione Senza Fili
2x2 o 2x3 thumbnail thumbnail. 8.1.2 Ascolta i file 1) premere per selezionare la musica. 1. Musica 2)Premere ø / ‹ per cambiare la cartella o il file e premere il tasto OK per aprire la cartella o riprodurre il file musicale. -
Page 46: Applicazioni Di Rete
2) Configurazione IP Se il cavo Ethernet sia collegato bene, mostrerà in "Collegato". Menu-> ESPANSIONE-> Impostazioni LAN -> IP In questo menu, è possibile configurare l'indirizzo IP manualmente, è possibile anche ottenere l'indirizzo IP automaticamente. ROSSO: ottenere automaticamente l'indirizzo IP. VERDE: Test per vedere se la rete è... -
Page 47: Funzionamento Di Base
È possibile guardare i video di Youtube. 8.4.7 Momenti di preghiera È possibile visitare momenti di preghiera per scegliere una città per vedere il culto cinque volte al giorno. Menu-> espansione -> Rete-> Applicazioni momenti di preghiera 8.4.8 Google Maps È... -
Page 48: Sottotitolo
1. Premere il tasto SUB. 9.5 Sottotitolo 2. Selezionare la lingua dei sottotitoli desiderata e premere il pulsante OK. Il sottotitolo della lingua selezionata verrà visualizzato nella parte inferiore dello schermo. 1. Premere il tasto TEXT. 9.6 Televideo 2. Premere / per aumentare o diminuire la pagina. -
Page 49: Controllo Usb
3) Premere il pulsante blu per accedere al menu rapido. 4) Premere il pulsante verde può aiutare a modificare il canale. 5) Premere il tasto GIALLO può aiutarti a trovare il canale veloce per il primo carattere. Nota: Se è stato selezionato un elenco di preferiti, premere è... - Page 50 Manual Portugués 1. Referência............................2 2. Descrição do produto........................2 1.1 Acessórios..........................2 2.1 Painel frontal..........................3 2.2 Painel Traseiro........................3 2.3 Comando remoto (RCU)......................4 3. Ligar a outros dispositivos....................... 4 3.1 Ligar a TV..........................4 3.2 Conexão da antena..........................5 4. Instalação............................5 4.1 Configuración de la antena......................5 4.3 Configuração USALS........................
-
Page 51: Referência
Precauções de segurança Este aparelho foi projetado e fabricado para atender aos padrões internacionais de segurança. Por favor, leia as seguintes precauções de segurança antes de utilizar este receptor. Antes de iniciar, verifique se a tensão de operação é de 90 ~ 250V AC 50/60Hz. ... -
Page 52: Descrição Do Produto
2. Descrição do produto 2.1 Painel Frontal Figura 2. O painel frontal Alternando entre e modo "standby". 1. Botão de alimentação Exibe a informação do canal. No modo "standby" exibe a hora local. 2. Exibição 2.2 Painel Traseiro Figura 3. Panel trasero Ligue a antena de satélite. -
Page 53: Ligar A Outros Dispositivos
2.3 Controlo remoto (RCU) Você pode controlar todas as funções do receptor usando este controle remoto. 2. SILÊNCIO: Desativa o áudio. 1.Power: 3. AUDIO: Exibe a lista de áudio. 4. PAUSA: Para a emissão 5. ZOOM: A função de zoom. 6. -
Page 54: Conexão Da Antena
Você pode conectar um LNB da antena diretamente para o LNB IN, ou ligar pelo menos dois LNB usando um DiSEqC "switch". 3.2 Conexão da antena Figura 6. Conexão Antena parabólica Figura 7. Conectando-se a DiSEqC "switch" Você deve instalar o receptor ligado pela primeira vez após a compra. 4. - Page 55 4.1.1 Ajustes da antena Pressione o para escolher o satélite que pretende utilizar. Selecionar Pressione o botão VERMELHO para adicionar um novo satélite. Adicionar Você pode selecionar o satélite que você quer, a partir da lista de satelites, pressionando o botão azul, de ...
-
Page 56: Configuração Usals
1. Destaque a TV e pressione o botão OK para entrar no satélite. E: Pesquisar multi TP 2. Conclua a configuração da antena satélite. 3. Realce o Start Search e selecione "TP Search" (Busca TP) e pressione o botão OK para confirmar. 4. -
Page 57: Canais De Tv / Rádio
botão para escolher diferentes satélites SAT de acordo com as informações de ajuda, pressione OK para confirmar e, em seguida todos os canais deste satélite serão mostrados. 5.1 Canais de TV / Rádio Menu-> CHANNEL EDIT-> Canais de TV / Rádio 1) Pressione o botão VERMELHO para entrar no modo de 1. -
Page 58: Configuração Do Sistema
Dica: Insira a senha padrão. 6.1 Configuração do Sistema Menu-> Configurações-> Configurações do sistema 1. Idioma do menu: Define o idioma do menu. 2. Audio1: Defina o idioma de áudio preferido. 3. Audio2: Defina o idioma de áudio secundário. 4. Idioma Legenda: Defina o idioma das legendas. 5. -
Page 59: Menu De Ca
Você pode mudar o modo de tempo para Automático ou manual, pressionando Defina o fuso horário de acordo com a sua cidade. 2. Fuso Horário Se a sua região requer DST para acertar a hora actual, prima o botão 3. Horário de verão O temporizador de evento pode definir temporizador 8 eventos. - Page 60 1) Selecione o arquivo ou pasta. 2) Pressione o botão vermelho e destaques Renomear. 3) Pressione o botão OK pode renomear o arquivo ou pasta. 1) Selecione o arquivo ou pasta. Excluir arquivos 2) Pressione o botão vermelho e excluir notas. 3) Pressione o botão OK para excluir o arquivo ou pasta.
-
Page 61: Configuração Sem Fio
8.1.2 Reproduzir arquivos 1) pressione o para selecionar a música. 1. Música 2) Imprensa ø / ‹ para alterar a pasta ou arquivo e pressione o botão OK para abrir a pasta ou executar o arquivo de música. 1) pressione o para selecionar a imagem. -
Page 62: Configuração Ip
2) Configuração IP Se o cabo Ethernet está bem conectado, ele vai mostrar em "Connected". Neste menu, você pode configurar o Menu-> EXPANSÃO-> Configurações da LAN -> IP endereço IP manualmente, você também pode obter o endereço IP automaticamente. VERMELHO: obter o endereço IP automaticamente. VERDE: Teste para ver se a rede está... -
Page 63: Operação Básica
Você pode visitar momentos de oração para escolher uma cidade para ver a adoração cinco vezes por dia 8.4.8 Google Maps Você pode visitar o Google Maps para as informações em torno Menu-> EXPANSÃO -> Rede Applications-> Google Maps 8.4.9 IPTV Você... -
Page 64: Teletexto
2. Selecione o idioma de legenda desejado e pressione o botão OK. A legenda do idioma seleccionado é apresentada na parte inferior da tela. 1. Imprensa TEXT. 9.6 Teletexto 2. Imprensa para aumentar ou diminuir a página. 3. Pressione as teclas numéricas (0-9) para ir diretamente para a página designada. Você... -
Page 65: Controle Usb
você só pode mudar de canal em uma lista de favoritos e pressione o botão OK só pode exibir canais em uma lista de favoritos. Nota: Se você selecionou uma lista de favoritos, pressione 11. Controle USB 11.1 Gravação Você pode assistir outro canal no mesmo TP durante a gravação. Ao mesmo tempo, você pode gravar dois 11.1.1 Gravação canais no mesmo TP. - Page 66 1. Referenz..........................2 Deutsch Handbuch 2. Produktbeschreibung....................... 3 2.1 Front Panel......................3 2.2 Rückseite........................3 2.3 Fernbedienung (RCU)....................4 3. Verbinden mit anderen Geräten..................4 3.1 Anschluss an TV...................... 4 3.2 Antennenanschluss....................5 4. Installation..........................5 4.1 Antennen-Konfiguration..................5 4.2 Defaults........................8 4.3 Einstellung USALS....................8 5.
-
Page 67: Referenz
Sicherheitshinweise Dieses Gerät wurde so konzipiert und hergestellt, um die internationalen Sicherheitsstandards zu erfüllen. Bitte lesen Sie die folgenden Sicherheitshinweise, bevor Sie diesen Receiver in Betrieb nehmen. Bevor Sie beginnen, überprüfen Sie bitte, dass die Betriebsspannung 90 ~ 250V AC ; 50/60Hz beträgt. Hauptquelle: Überlasten Sie nicht die Steckdose mit einem zusätzlichen Verlängerungskabel oder einem Adapter. -
Page 68: Produktbeschreibung
2. Produktbeschreibung 2.1 Front Panel Abbildung 2. Frontplatte Umschalten zum "Standby"-Modus. 1. Power Button Zeigt die Kanalinformationen Im "Standby"-Modus und auch die lokale Zeit. 2. Anzeige 2.2 Rückseite Abbildung 3. Rückseite Anschluss Satellitenantenne. 1. LNB IN Anschluss eines anderen Rezeptors. 2. -
Page 69: Fernbedienung (Rcu)
2.3 Fernbedienung (RCU) Sie können alle Funktionen des Receivers mit dieser Fernbedienung steuern. 1. Power: An 2. MUTE: Ton aus. 3. AUDIO: Zeigt die Liste der Audiofunktionen. 4. PAUSE: Standbild. 5. ZOOM: Zoom-Funktion. 6. INFO: Zeigt Programminformationen. : Rücklauf. : Vorlauf. : Schneller Rücklauf. -
Page 70: Antennenanschluss
Sie können einen LNB von der Schüssel direkt mit dem LNB IN verbinden, oder schließen Sie mindestens zwei 3.2 Antennenanschluss LNB mit einem "Schalter" DiSEqC. Abbildung 6. Satellitenschüssel-Verbindung Abbildung 7. Anschluss an "Schalter" DiSEqC Bei der Erstinstallation muss der Empfänger eingeschaltet werden. 4. - Page 71 10. Suche starten: Drücken Sie Cable & Multi-Sat & "Blind Scan" (blinde Suche) oder Multi-Transponder bzw. Transponder um auszuwählen und die Suche zu starten. 4.1.1 Einstellungen Drücken Sie die Taste um den Satelliten, den Sie wählen verwenden möchten auszuwählen. Drücken Sie die ROTE-Taste, um einen neuen Satelliten hinzufügen hinzuzufügen.
-
Page 72: Defaults
1. Markieren Sie im Fernsehgerät den Satelliten und drücken Sie die OK-Taste. D: Suche TP 2. Schließen Sie die Konfiguration der Satellitenantenne ab. 3. Markieren Sie die TP und drücken Sie die OK-Taste, um die Liste der TP einzugeben. 4. Markieren Sie die Suche starten; Select ;TP und drücken Sie die OK-Taste zur Bestätigung. 1. -
Page 73: Einstellung Usals
4.3 Einstellung USALS Menü-> Einstellungen -> Einstellungen USALS Wenn der Modus USALS Motor eingestellt ist, stellen Sie die Länge und Breite in der USALS-Einstellung ein. Für die Ländereinstellung : Drücken Sie die ROTE-Taste, um so das Land auszuwählen, drücken Sie die OK- Taste. -
Page 74: Kanäle Sortieren
1. Durch drücken des farbigen Knopfes ist ein direktes hinzufügen oder entfernen der markierten Kanäle innerhalb oder außerhalb der Favoritengruppe möglich. 2 Drücken Sie die Taste EXIT, um das Menü zu verlassen, oder um zu speichern. 5.3 Kanäle sortieren Wählen Sie die gewünschte Option aus und drücken Sie die OK-Taste um die Kanalliste zu sortieren. Diese Menü->... -
Page 75: Parental Control
6. OSD Timeout: Stellen Sie die Zeitanzeige der Programminformationen ein. 6.3 Parental Control Mit Parental Control können Sie Grenzen für jedes Programm festlegen oder ändern das alte Passwort. Sie Menü-> Einstellungen -> Kindersicherung können auch die bearbeiteten Änderungen einsehen die Sie im Bereich der Installation Lock, Edit Channel Lock, System Lock vorgenommen und gespeichert haben. -
Page 76: Rezeptor Auf
Im Menü Farbeinstellungen können Sie die Helligkeit, den Kontrast und Sättigung anpassen. Menü-> Einstellungen -> Farbeinstellungen 6.8 Rezeptor auf In dem Menü ÜBER DEN EMPFÄNGER können Sie die Informationen über die Empfänger erhalten. Menü-> Einstellungen -> Über Rezeptor 7. Spiele Im Menü... - Page 77 2) Drücken Sie die OK-Taste zum bestätigen. 1) Drücken Sie die GELBE Taste um den Kanal auf den USB-Datenträger zu laden. Kanal zu USB 2) Drücken Sie die OK-Taste zum bestätigen. 1) Drücken Sie die GELBE Taste zur Markierung. Alles Auf USB Galerie 2) Drücken Sie die OK-Taste, um die gesamte Festplatte auf den USB-Datenträger zu laden.
-
Page 78: Wireless-Konfiguration
Verbinden Sie den "Stick" Wireless, USB zu USB-Anschluss. 8.2 Wireless-Konfiguration 1) Suche nach Access Point Menü-> EXPANSION-> Einstellungen-> Suche Wireless 1. Wählen Sie den Netzwerknamen des Access Point in der Wi- Access Point Fi-Liste. 2. Drücken Sie die OK-Taste, und geben Sie das richtige Passwort ein. -
Page 79: Grundlagen Der Bedienung
8.4.4 Währungsrechner Suchen Sie nach der Währung, die Sie errechnen möchten. Menü-> EXPANSION -> Netzwerk-Anwendungen-> Währungsrechner 8.4.5 Stock View Sie können nun den Status einsehen. Menü-> EXPANSION -> Netzwerk-Anwendungen-> Bag 8.4.6 Youtube Youtube-Videos können angesehen werden. Menü-> EXPANSION -> Netzwerk-Anwendungen-> Youtube 8.4.7 Gebetszeiten Sie können eine Stadt auswählen und den Gottesdienst bis zu fünf Mal am Tag einsehen. -
Page 80: Untertitel
1) Drücken Sie um das Programm zu ändern. Wöchentliche EPG: 2) Drücken Sie um das Datum zu ändern. Die EPG Liste der ausgewählten Kanäle für den Tag werden geändert. 3) Drücken Sie die OK-Taste, und drücken Sie dann die Taste EPG um das Ereignis zu markieren. -
Page 81: Kanalliste
Drücken Sie die INFO-Taste zweimal für detaillierte EPG Informationen. Drücken Sie die t / u um die 2. EPG-Informationen aktuellen Informationen zu ändern. Drücken Sie die INFO-Taste erneut, werden die EPG Informationen gelöscht. 10. Kanalliste 1) Drücken Sie die OK-Taste, um die Programmliste einzublenden, während Sie in einem Programm sind. 10.1 Liste OK 2) Drücken Sie die ROTE Taste, um Kanäle alphabetisch zu ordnen, "Transponder"... - Page 82 Manuel FRANÇAIS 1. Référence............................2 2. Description du produit........................2 1.1 Accessoires...........................2 2.1 Panneau avant........................3 2.2 Panneau arrière........................3 2.3 Commandement (RCU)......................3 3. Connexion à d'autres appareils....................... 4 3.1 Connexion à TV........................4 3.2 Raccordement de l'antenne......................5 4. Installation............................5 4.1 Configuration d'antenne........................
-
Page 83: Référence
Consignes de sécurité Cet appareil a été conçu et fabriqué pour répondre aux normes de sécurité internationales. Merci de lire les consignes de sécurité suivantes avant d'utiliser cet appareil. Avant de commencer, merci de vérifier que la tension de fonctionnement est de 90 ~ 250V AC 50/60Hz. ... -
Page 84: Description Du Produit
2. Description du produit 2.1 Panneau avant Figure 2. panneau avant 1. Bouton d'alimentation 2. Display 2.2 Panneau arrière Figure 3. Panneau arrière Connexion à l'antenne satellite. 1. LNB IN Branchement d’un autre récepteur. 2. LOOP OUT Connexion USB. 3. USB2.0 Connexion à... -
Page 85: Connexion À D'autres Appareils
Vous pouvez contrôler toutes les fonctions de ce récepteur à l'aide de cette télécommande. 2. MUTE: Désactiver le son. 1. Power: 3. AUDIO: Affiche la liste des audio. 4. PAUSE: Gèle l'image. 5. ZOOM: Fonction zoom. 6. INFO: Informations sur le programme Affiche. : Retour rapide. -
Page 86: Raccordement De L'antenne
Vous pouvez connecter un LNB de l'antenne directement à la LNB IN, ou relier au moins deux LNB en utilisant 3.2 Raccordement de l'antenne un "switch" DiSEqC. Figure6. Connexion câble ou satellite Figure 7. Connexion à "switch" DiSEqC Vous devez installer l’appareil. 4. - Page 87 Vous pouvez sélectionner le satellite que vous voulez utiliser : appuyez sur le bouton BLEU, puis entrez le Déménagement numéro du destinataire et appuyez sur OK. Sélectionnez le satellite que vous souhaitez supprimer de la Effacer liste des satellites. Ensuite, appuyez sur la touche VERTE. Vous pouvez appuyer sur le bouton JAUNE pour renommer le Rebaptiser satellite.
-
Page 88: Configuration Usals
3. Mettez en surbrillance le menu « Démarrer » et sélectionnez « TP Search» et appuyez sur le bouton OK pour confirmer. 4. Appuyez sur le bouton OK pour sélectionner. 5. Appuyez sur Exit pour commencer à chercher des programmes qui ont sélectionnés les transpondeurs. 4.1.4 Configuration de l'antenne pour moteur Menu->... -
Page 89: Filières Tv / Radio
Astuce: Entrez le mot de passe par défaut. Vous pouvez appuyer sur le bouton pour choisir différents satellites selon les informations de l'aide, appuyez sur OK pour confirmer, puis tous les canaux de ce satellite seront affichés. 5.1 Filières TV / Radio Menu->... -
Page 90: Configuration
Astuce: Entrez le mot de passe par défaut. 6. Configuration 6.1 Configuration du système Menu-> Paramètres-> Paramètres système 1. Menu Langue: Choisissez la langue des menus. 2. Audio1: Régler la première langue audio. 3. Audio2: Régler la seconde langue audio. 4. -
Page 91: Ca Menu
6.5.1 Réglage de l'heure Menu-> Paramètres -> TEMPS-> Temps Paramètres Vous pouvez modifier le mode de temps à Auto ou Manuel en 1. Mode Temps appuyant sur Régler le fuseau horaire en fonction de votre ville. 2. Décalage horaire Si votre région nécessite DST, pour corriger l'heure, il suffit 3. - Page 92 Menu-> EXPANSION-> USB ou directement sur le bouton USB 8.1.1 opérations de base 1. outils 1) Sélectionner le fichier ou le dossier. Renommer des fichiers 2) Appuyer sur le bouton ROUGE et met en évidence Renommer. 3) Appuyer sur le bouton OK pour renommer le fichier ou le dossier. 1) Sélectionner le fichier ou le dossier.
-
Page 93: Configuration Sans Fil
Afficher les photos en mode plein écran, 2x2 miniature ou 2x3 miniatures. 8.1.2 Lecture des fichiers 1) appuyer sur la pour sélectionner la musique. 1. Musique 2) Appuyer sur ø / ‹ pour changer le dossier ou le fichier et appuyer sur le bouton OK pour ouvrir le dossier ou lire le fichier de musique. -
Page 94: Configuration Ip
1. Connecter une extrémité du câble Internet à l'appareil et 8.3 Configuration IP l'autre extrémité au routeur LAN. ROUGE: obtenir une adresse IP automatiquement. 2. Menu-> EXPANSION-> Paramètres IP GREEN: un test pour voir si le réseau est correctement connecté. -
Page 95: Fonctionnement De Base
9. Fonctionnement de base 1. Appuyer sur la touche AUDIO. 9.1 Acoustique 2. Appuyer sur le bouton OK pour sélectionner la langue audio préférée. 3. Sélectionner « direction audio » (gauche, droite, stéréo) à l'aide du bouton 4. Appuyer sur le bouton EXIT pour fermer. 1. -
Page 96: Information Sur Le Programme
Vous pouvez afficher les informations de programme en appuyant sur la touche INFO pendant que vous 9.8 Information sur le programme regardez un programme. 1. Informations générales : Il s'agit d'un programme ALE. : Il s'agit d'un programme crypté. : Le programme actuel a des informations télétexte. : Le programme actuel a des informations télétexte. -
Page 97: Usb Control
11. USB Control 11.1 Enregistrement Vous pouvez regarder une autre chaîne dans le même TP pendant l'enregistrement. Et vous pouvez enregistrer 11.1.1 Enregistrement deux canaux sur le même TP. 1. Démarrer l'enregistrement 1) Vous pouvez appuyer sur la pour lancer l'enregistrement tout en regardant le programme. 2) Vous pouvez passer à... - Page 98 Spis treści Środki bezpieczeństwa 1. Prezentacja..........................1. Akcesoria ..........................2. Opis produktu ..........................2.1. Panel przedni..........................2.2. Panel tylni ..........................2.3. Pilot .......................... 3. Instalacja ..........................3.1. Ustawienia anteny ..........................3.2. Ustawienia fabryczne ..........................4. Edycja kanałów ....................
-
Page 99: Środki Bezpieczeństwa
Środki bezpieczeństwa Urządzenie zostało zaprojektowane i wyprodukowane z spełnieniem wszystkich międzynarodowych norm bezpieczeństwa. Proszę zapoznać się z poniższymi zaleceniami, oraz dokładnie przeczytać instrukcję obsługi. Zasilanie Przed rozpoczęciem pracy należy sprawdzić napięcie robocze, które wynosi 90~250 V AC 50/60 Hz. Przeciążenie Nie należy przeciążać... -
Page 100: Prezentacja
1. Prezentacja 1. Akcesoria Instrukcja obsługi Baterie Pilot 2. Opis produktu 2.1. Panel przedni 1. Przycisk zasilania: włącz/wyłącz odbiornik 2. Wyświetlacz: Wyświetla informacje o kanale. W trybie czuwania wyświetla zegar. 2.2. Panel tylni 1. LNB IN: wejście kabla anteny satelitarnej 2. -
Page 101: Instalacja
4. RS232: podłączenie do komputera za pomocą wejścia szeregowego 5. COAXIAL: cyfrowe wyjście audio 6. HDMI: wejście podłączające telewizor do odbiornika za pomocą kablem HDMI 7. CA: interfejs CA 8. Scart TV: podłączenie do telewizora za pomocą kabla SCART 9. LAN: podłączenie do sieci za pomocą kabla sieciowego LAN 10. -
Page 102: Ustawienia Fabryczne
Możliwość konfigurowania parametrów anteny. Menu → Instalacja → Ustawienia anteny 1. Satelita: możliwość zaznaczenia satelity, który chcesz wyszukać. 2. Transponder (TP): naciśnij aby zmienić transponder. 3. Typ LNB: naciśnij aby zmienić częstotliwość LNB. 4. Zasilanie LNB: naciśnij aby wybrać wymagane zasilanie. 5. -
Page 103: Ustawienia
1) Naciśnij aby podświetlić kanał, który chcesz usunąć,a następnie naciśnij przycisk 3. Usuń kanał GREEN (zielony). 2) Naciśnij przycisk EXIT (wyjście), wyświetli się komunikat i po wybraniu Tak spowoduje usunięcie wybranego kanału. 1) Zaznacz kanał, który chcesz zablokować, naciśnij przycisk YELLOW (żółty), aby potwierdzić. 4. -
Page 104: Kalendarz
4. Typ TV: ustawienia typu TV na: PAL / NTSC / AUTO. 5. Typ wyświetlacza: ustawienie formatu wyświetlacza zgodnego z ekranem. 6. Czas wyświetlania OSD: ustawienie czasu wyświetlania menu infomacyjengo na kanałach. 5.3. Kontrola rodzicielska Menu → Ustawienia → Kontrola rodzicielska Kontrola rodzicielska pozwala na ustalenie limitów dla każdego programu lub blokadę... -
Page 105: Gry
Wyświetlane są informacje o odbiorniku. Menu → Ustawienia → O STB 6. Gry Znajdziemy tu 9 zabawnych gier. Menu → Gry 7. Rozbudowa 7.1. USB Menu → Rozbudowa → USB 7.1.1. Podstawowe operacje 1. Narzędzia 1) Zaznacz plik lub folder. Zmiana nazwy pliku 2) Naciśnij przycisk RED (czerwony) i zaznacz polecenie Zmień... - Page 106 2) Naciśnij przycisk OK, aby przesłać kanały na USB. 1) Naciśnij przycisk YELLOW (żółty) i zaznacz Kopiuj wszystko na USB Przesyłanie/kopiowanie wszystkich plików na USB 2) Naciśnij przycisk OK, aby skopiować. 1) Naciśnij przycisk YELLOW (żółty) i zaznacz Kopiuj wszystko na FTP Przesyłanie/kopiowanie na FTP 2) Naciśnij przycisk OK, aby skopiować...
-
Page 107: Ustawienia Sieci Bezprzewodowej
7.2. Ustawienia sieci bezprzewodowej Podłącz bezprzewodowy adapter USB WiFi do portu USB. 1) Wyszukiwane punktu dostępu do sieci Menu → Rozbudowa → Ustawienia sieci bezprzewodowej 1. Wybierz nazwę sieci Wi-Fi dostępowych z listy. → Wyszukaj punktu dostępu 2. Naciśnij przycisk OK, a następnie wpisz hasło dostępu jeżeli sieć... - Page 108 7.4.2. Prognoza pogody Menu → Rozbudowa → Aplikacje sieciowe → Pogoda Przycisk BLUE (niebieski): tutaj można wpisać nazwę miasta i przeglądnąć pogodę w terminie od 5 dni do 10 dni. Przycisk GREEN (zielony): Zmiana trybu wyświetlania. Przycisk RED (czerwony): Zmień miasto i jednostkę temperatury. 7.4.3.
-
Page 109: Podstawowe Operacje
8. Podstawowe operacje 8.1. Audio 1. Naciśnij przycisk AUDIO. 2. Naciśnij przycisk OK, aby wybrać język dźwięku. 3. Wybierz kierunek dźwięku (lewy, prawy, stereo) za pomocą przycisku 4. Naciśnij przycisk EXIT, aby zamknąć. 8.2. Przybliżanie 1. Naciśnij przycisk ZOOM. 2. Naciśnij przycisk aby przenieść... -
Page 110: Wyszukiwanie Kanałów
8.7. Wyszukiwanie kanałów Możliwość szybkiego wyszukania kanałów. Naciśnij przycisk FIND (Szukaj) lub przycisk BLUE (niebieski) na liście ulubionych. 8.8. Informacje o programie Naciskając przycisk INFO podczas oglądania programu, wyświetlą się informacje o programie. Informacje EPG Naciśnij dwa razy przycisk INFO, aby wyświetlić szczegółowe informacje EPG. Naciśnij aby przełączyć... - Page 111 3) Jeżeli ustawisz timer i czas nagrywania, nastąpi rozpoczęcie nagrywania automatycznie w zależności od czasu rozpoczęcia timera. 1) Możesz nacisnąć przycisk aby zatrzymać nagrywanie. Jeśli nie naciśnij, to nagranie 2. Zatrzymywanie nagrywania zakończy się po ustawieniu timera. 2) Jeśli ustawisz timer, nagrywanie zatrzyma automatycznie. 3) Jeśli ilość...
- Page 112 Warranty period : 2years...
Need help?
Do you have a question about the UNIC and is the answer not in the manual?
Questions and answers