Table of Contents
Advertisement
Advertisement
Table of Contents

Related Manuals for Duraflame 48HF201CGT


Summary of Contents for Duraflame 48HF201CGT
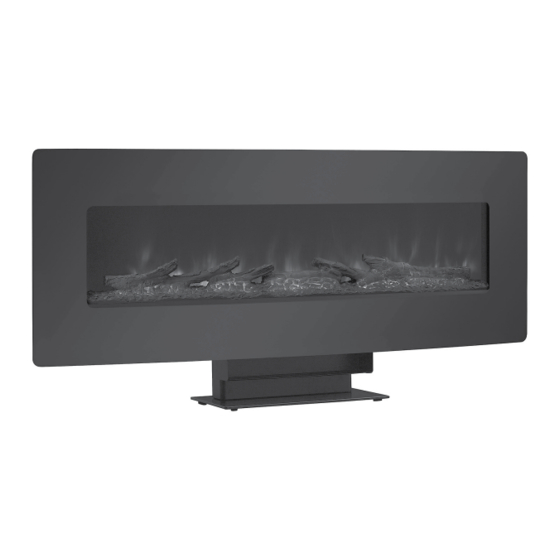
- Page 1 MODEL : 48HF201CGT www.tsicustomerservice.com 1-888-674-7517 Twin-Star International, Inc; Delray Beach, FL 33445 Made in China • Printed in China • Fabricado en China • Impreso en China • Fabriqué en China • Imprimé en Chine A353 www.tsicustomerservice.com...
-
Page 2: Table Of Contents
Table of Contents Installation Options ........... 8 Safety Information ............. 3 Wall Mounting ............9 Warranty ..............4 Pedestal Base ..............13 Pre-Operation ............5 Fuel Bed Setup Instructions..........15 Pre-Assembly ............. 6 Operation ..............16 Hardware Included ........... 6 FCC/IC Information ............19 Product Specifications ............ -
Page 3: Safety Information
IMPORTANT INSTRUCTIONS When using electrical appliances, basic precautions should always be followed to reduce the risk of fire, electrical shock, and injury to persons including the following: 1. Read all instructions before using this appliance. 2. This appliance is hot when in use. To avoid burns, do not let bare skin touch hot surfaces. If provided, use handles when moving this appliance. -
Page 4: Warranty
Warranty Warranty The manufacturer warrants this product to be free from manufacturing and material defects for a period of one year from date of purchase, subject to the following conditions and limitations: Install and operate this Electric Fireplace in accordance with the installation and operating instructions furnished with the product at all times. -
Page 5: Pre-Operation
Pre-Operation 1. Remove the product identification sticker from the front of the fireplace. Product Identification Sticker 2. Attach the Product Identification Sticker to this Manual below for future reference. This information is used for product registration and also is necessary for customer service. Attach Product Identification Sticker Here 3. -
Page 6: Pre-Assembly
Pre-Assembly HARDWARE INCLUDED Part Description Part Number Quantity Anchor Screw 36II200-AA Wall Anchor 36II200-BB Screw 4mm x 8mm (2 Pre-Attached) 36II200-CC Screw 4mm x 6mm 36II200-DD Screw 6mm x 14mm 36II200-EE Washer 36II200-FF NOTE: Hardware not shown to actual size. PRODUCT SPECIFICATIONS Voltage 120 VAC, 60 Hz... -
Page 7: Package Contents
Pre-Assembly (continued) PACKAGE CONTENTS Part Description Quantity Mounting Bracket (Pre-Attached) Fireplace Front Frame Base Bracket Base Lower Air Outlet Baffle Logset Glass Baffle Upper Air Outlet Baffle Back Air Outlet Baffle Remote Control Decorative Rocks Varies Fireglass Varies A353 www.tsicustomerservice.com... -
Page 8: Installation Options
Installation Options Operation The fireplace can be installed with 2 options: 1. Hanging on a wall with provided mounting bracket. 2. Freestanding using the pedestal base. Follow installation instructions below based on installation preference. Option 1 Option 2 Pedestal Base..page 13 Wall Hanging..page 9 A353 www.tsicustomerservice.com... -
Page 9: Wall Mounting
Installation - Wall Mounting Operation Hanging on a wall Your new electric fireplace may be installed virtually anywhere in your home. However, when choosing a location be sure to follow the general instructions included. For best results install out of direct sunlight. Power supply service must be either completed or placed within the electric fireplace prior to finishing to avoid reconstruction. - Page 10 Installation - Wall Mounting Operation Removing the Mounting Bracket Choosing a Wall Location Choose a wall location to attach the Mounting Remove the Mounting Bracket (A) from the back of the Bracket (A). Position the Mounting Bracket (A) Fireplace (B) by removing the two pre-attached Screws in the desired location.
- Page 11 Installation - Wall Mounting (continued) Operation Operation Attaching the Mounting Bracket Attaching Lower Air Outlet Baffle Attach the Mounting Bracket (A) to the wall by fastening Attach Glass Baffle (H) to the fireplace by fastening the the six Anchor Screws (AA) into the wall anchors. Screws (CC).
- Page 12 Installation - Wall Mounting (continued) Operation Operation Hanging the Front Frame Mount the Front Frame (C) to the Fireplace (B) using the mounting hooks to hang the front frame. Mounting Hooks Mounting Hooks Securing the Front Frame Secure the top frame hooks with the two retaining Screws (DD).
-
Page 13: Pedestal Base
Installation - Pedestal Base Operation Fastening the Base Bracket Attaching the Small Base Bracket Use four Screws (EE) and four Washers (FF) to fasten the Use two Screws (CC) to fasten the lower Air Outlet Baffle Base (E) to the Base Bracket (D). (F) to the Base Bracket (D). - Page 14 Installation - Pedestal Base Operation Attaching the Base Bracket Fasten the Base Bracket (D) to the Fireplace (B) with the provided Screws (EE). Securing the Top Frame Mount the Front Frame (C) to the Fireplace (B) using the mounting hooks to hang the front frame. Mounting Hooks Mounting Hooks...
-
Page 15: Fuel Bed Setup Instructions
Fuel Bed Setup Instructions Operation Removing the Logset The fireplace has the option of either using the pre-installed logset or the included transparent tray assembly. To change the logset to the tray remove the emberbed with logset. Placing the Fireglass/ Rocks Place the Fireglass (M) or the Rocks (L) as desired. -
Page 16: Operation
Operation Operation Control Panel The fireplace can be operated by either the remote control or the control panel. A353 www.tsicustomerservice.com... - Page 17 Operation (continued) Operation ICON FUNCTION DESCRIPTION To set the thermostat use the Heater button on the control panel to select HEATER ▲ ▼ the desired temperature. The thermostat setting range is 62 °F - 82 °F or 17 °C - 27 °C or continously ON and OFF (00).
- Page 18 Operation (continued) Operation Replacing the Remote Control Battery Disposing of Used Batteries The battery may contain hazardous substances that When the remote control stops operating or its range could endanger the enviroment and human health. seems reduced, it is time to replace the battery with new ones.
-
Page 19: Fcc/Ic Information
FCC/IC Information Warning: Changes or modifications to this unit not expressly approved by the party responsible for compliance could void user’s authority to operate the equipment. NOTE: This equipment has been tested and found to comply with the limits for Class B digital device, pursuant to part 15 of the FCC Rules. These limits are designed to provide reasonable protection against harmful interference in a residential installation. -
Page 20: Troubleshooting
Troubleshooting PROBLEM POSSIBLE CAUSE CORRECTIVE ACTION Unplug the fireplace, remove the back panel of the fireplace and check Display shows “ ”. The thermostat sensor is broken that the thermostat is plugged into the main circuit board. If this does not or disconnected. -
Page 21: Replacement Parts
Replacement Parts Part Description Part Number Qty. Remote Control 9 Buttons P127 BASE and STAND assembly Y15-S162-BS Flame Generator Drive Motor P10-6 Control Panel Circuit Board Y15-S162-P32 Right backlight PCBA Y15-S162-P49R Clear Tray 48HF201-H Logsets 48HF201-F Emberbed Circuit Board Y15-S162-P44E Flame Circuit Board Y15-S162-P40 Blue backlight PCBA... - Page 22 www.tsicustomerservice.com A353 www.tsicustomerservice.com...
Need help?
Do you have a question about the 48HF201CGT and is the answer not in the manual?
Questions and answers