Table of Contents
Advertisement
Advertisement
Table of Contents

Subscribe to Our Youtube Channel
Related Manuals for Duraflame DFI-550-22


Summary of Contents for Duraflame DFI-550-22
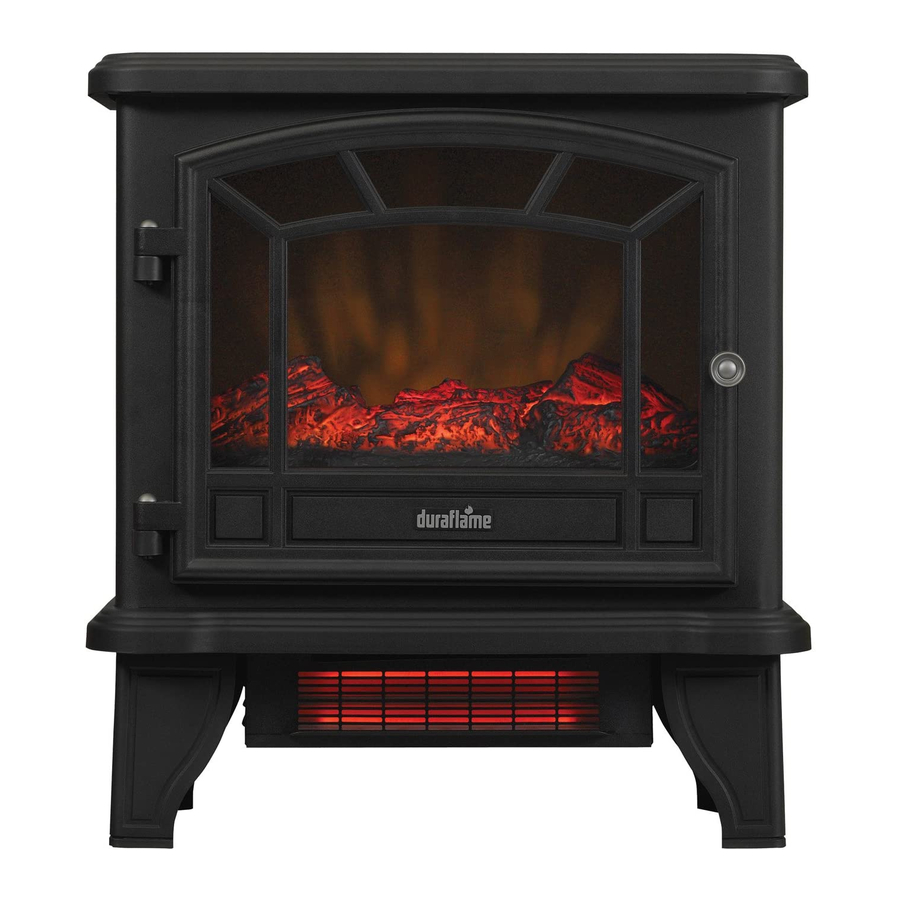
- Page 1 DFI-550-22...
- Page 2 CAUTION: MODEL / MODÈLE / MODELO HIGH TEMPERATURE, KEEP ELECTRICAL CORDS, DRAPERY, AND OTHER FURNISHINGS AT LEAST 3 FEET (0.9 M) FROM THE FRONT OF THE HEATER DFI-550-22 AND AWAY FROM THE SIDE AND REAR. VOLTS WATTS/VATIOS Numéro de modèle...
- Page 3 REGISTER YOUR NEW PURCHASE online! I NSCRIRE VOTRE NOUVEL ACHAT • REGISTRAR SU NUEVA COMPRA Thank you for purchasing our product. Please take a moment to visit tsicustomerservice.com to register your new purchase: Merci d’avoir acheté ce produit. Veuillez prendre un court instant pour vous rendre sur tsicustomerservice.com et enregistrer votre nouvel achat : Gracias por adquirir nuestro producto.
- Page 4 IMPORTANT INSTRUCCIONES INSTRUCCIONES INSTRUCTIONS IMPORTANTE IMPORTANTE When using electrical Cuando utilice Lors de l’utilisation appliances, basic electrodomésticos, d’appareils électriques, precautions should siempre tome medidas de pour éviter les always be followed precaución básicas para risques d’incendie, to reduce the risk of evitar incendios, descargas d’électrocution et de fire, electrical shock,...
- Page 5 given supervision or sin supervisión cerca. personnes atteintes instruction. d’une défaillance 4. Este electrodoméstico physique, sensorielle 5. Always unplug this no debe ser usado ou intellectuelle, ou appliance when not in por personas o niños les personnes n’ayant use. con capacidades pas l’expérience et físicas, sensoriales o 6.
- Page 6 10. No coloque el cable 10. Évitez de placer le See Fig.1.This heater debajo de una cordon sous un tapis. Ne is for use on 120 volts. alfombra. No cubra el couvrez pas le cordon Do not use a 2 prong avec une carpette, un cable con alfombras, adapters.
- Page 7 fire, do not block air electrodoméstico. d’incendie. intakes or exhaust in any 14. Para evitar incendios, 14. Afin de prévenir les manner. Do not use on no bloquee las entradas risques d’incendie, soft surfaces, like a bed, ni salidas de aire de ne bloquez jamais les where opening may ninguna manera.
- Page 8 INSTALLATION INSTRUCTIONS INSTRUCCIONES DE INSTALACIÓN / INSTRUCTIONS POUR L’INSTALLATION Tools Required for Assembly/Herramientas requeridas para el ensamblado/Outils requis pour l’assemblage Phillips Head Screwdriver/Destornillador de cabezal Phillips/Tournevis phillips Leg Assembly/Leg Asamblea/Assemblée jambe 3. Fasten the legs to the 1. Align the 2 mounting 2.
- Page 9 OPERATION INSTRUCTIONS INSTRUCCIONES DE OPERACIÓN / INSTRUCTIONS D’OPÉRATION Control Panel location Localización del panel de control Emplacement du panneau de commande Control Panel Panel de Control Panneau de contrôle NOTE: Please operate the remote transmitter at a slow measured pace. Press the remote control buttons with an even motion and gentle pressure.
- Page 10 FUNCTION ICON DESCRIPTION FUNCIÓN / FONCTION ICONO / ICÔNE DESCRIPCIÓN / DESCRIPTION POWER The Power button supplies power to all of the functions of the stove and will illuminate the flame effect. This switch must be lit for any of the functions to work. El interruptor de alimentación suministra ENERGÍA...
- Page 11 Our stove consists of an infrared type heater. The HEATER HEATER button turns the heater ON and OFF. This button will be lit when the heater function is activated. La chimenea consiste en un calentador tipo elemento CALENTADOR de alambre con ventilador. El interruptor CALENTADOR enciende (ON) y apaga (OFF) el calentador.
- Page 12 BULB REPLACEMENT CUIDADO Y MANTENIMIENTO / CUIDADO Y MANTENIMIENTO Tools Required for Assembly / Herramientas requeridas para el ensamblado / instructions pour l’installation Phillips Head Screwdriver Clear, 40 Watt, E12 socket base light bulb (candelabra base, B bulb). Destornillador de cabezal Phillips transparentes, 40-watt, socket E12 base de la Tournevis phillips bombilla de luz (candelabros de base, bombilla B).
- Page 13 Pinch the spring clip to loosen the spindle, and gently turn and pull the rubber gromet out of the spinner motor shaft. Remove the spindle and set aside. Ajuste la abrazadera de resorte para aflojar el husillo y jale de la arandela de goma para quitarla del eje del motor del rotador.
- Page 14 TROUBLESHOOTING SOLUCIÓN DE PROBLEMAS / DÉPANNAGE PROBLEM ROOT CAUSE CORRECTIVE ACTION PROBLEMA / PROBLÈME ORIGEN DE LA CAUSA / CAUSE PROBABLE MEDIDAS CORRECTIVAS / ACTION CORRECTIVE No power, switches do not Power cord was not plugged Check that the unit is light up.
- Page 15 Flames are not moving. Defective flame generator Replace flame generator drive drive motor. motor. Reemplace el Motor de El motor del disco giratorio accionamiento de generador de está defectuoso. llama. Las llamas no se mueven Le moteur à pivot est Remplacer le moteur à...
- Page 16 Replace Thermostat. Heater is not turning off. Defective Thermostat. Reemplace el Termostato. El calentador no se apaga Interruptor Termostato. Remplacer l’interrupteur. Le chauffage ne s’éteint pas. Interrupteur défectueux Heater is not turning on. Improper operation. Manually press main power button on front of unit. Pulse manualmente el botón de El calentador no se Funcionamiento...
- Page 17 Unit blows cool or cold Defective heater blower Replace heater/blower assembly. air. motor. Reemplace el Conjunto del La unidad sopla aire Motor del ventilador del Calentador / Soplador. fresco o frío calentador defectuoso L’unité souffle de l’air Le moteur de soufflante est Remplacer le moteur de frais ou froid défectueux...
- Page 18 Warped spinner shaft. Refer to TSI customer service. Eje del disco giratorio Consulte al servicio de atención al deformado. cliente de TSI. L’arbre du pivot est Référez-vous au service à clientèle tordu. de TSI. Power cord gets warm. Normal operation. Check your heater cord and plug connections.
- Page 19 surchauffe de la prise de courant murale peut survenir même si elle ne s’est pas produite avec l’utilisation d’autres appareils. Pendant l’utilisation vérifier fréquemment afin de déterminer si votre prise de courant murale ou votre façade est CHAUDE ! Si c’est le cas, cesser l’utilisation du chauffage et faites vérifier et/ou remplacer...
- Page 20 Heater doesn’t work, but The thermal protector has Turn all switches to the “OFF” Power and Heater switches tripped. position and unplug the unit are in the “ON” position from the wall outlet for 5 and thermostat is set on the minutes.
- Page 21 Main PCBA PCBA Principal Y15-S165-P15 Carte du Circuit Principal Remote control Control remoto P129 Télécommande EXPLODED VIEW VISTA DESPLEGADA / VUE EXPLOSIVE B206...
- Page 22 CARE AND MAINTENANCE CUIDADO Y MANTENIMIENTO / CUIDADO Y MANTENIMIENTO • Clean the trim using a soft cloth, slightly dampened with citrus oil based product and buff with a clean soft cloth. Limpie la moldura metálica con un paño suave humedecido con un producto a base de aceite cítrico y púlalo con un paño suave y limpio.
- Page 23 FCC/IC INFORMATION INFORMACIÓN DE FCC/IC / INFORMATION CONCERNANT FCC/IC Warning: Changes or Advertencia: Los cambios Avertissement: Des modifications to this unit o modificaciones en esta changements ou not expressly approved by unidad, que no sean modifications effectués the party responsible for aprobados directamente sur cet appareil, non compliance could void...
- Page 24 different from that to • Aumentar la separación • réorienter ou déplacer which the receiver is entre el equipo y el l’antenne réceptrice; connected. receptor. • accroître la distance • Consult the dealer or an • Conectar el equipo a entre l’appareil et le experienced radio/TV un tomacorriente de un...
- Page 25 BATTERY REPLACEMENT REEMPLAZO DE BATERÍA / REMPLACEMENT DES PILES NOTE: Do not mix old NOTA: No mezclar baterías NOTE: Ne pas mélanger les and new batteries. viejas piles usagées et Do not mix alkaline, con nuevas. neuves. standard (carbon No mezclar baterías Ne pas mélanger zinc), or rechargeable alcalinas, baterías...
- Page 26 1-YEAR LIMITED WARRANTY GARANTÍA LIMITADA DE 1 AÑO / GARANTIE LIMITÉE DE 1 AN The manufacturer El fabricante garantiza que Le fabricant garantit que votre warrants that your new su nueva estufa eléctrica nouveau foyer électrique Electric Fireplace is free no presentará...
- Page 27 related costs/expenses de instalación, mano responsabilité à cet arising from defective de obra, fabricación, égard. part(s), transporte o de otro tipo 6. Le propriétaire ou repair, replacement, or que surja de la pieza l’utilisateur assume otherwise of same, will defectuosa, su reparación, tous les risques, le cas not be covered by this reemplazo u otra situación,...
- Page 28 Fabriqué et distribué par Twin-Star International, Inc., s’effectue sous licence. duraflame et le logo de flamme de duraflame sont des marques déposées de Duraflame, Inc. Elaborado y distribuido por Twin-Star International, Inc., utilizada con licencia. El duraflame y la insignia de la llama del duraflame son marcas registradas de Duraflame, Inc.
Need help?
Do you have a question about the DFI-550-22 and is the answer not in the manual?
Questions and answers
how to replace candelabra bulb
To replace the candelabra bulb in a Duraflame DFI-550-22:
1. Unplug the stove.
2. Use a Phillips head screwdriver to remove the screws holding the back panel.
3. Remove the back panel to access the bulb.
4. Pinch the spring clip to loosen the spindle, then gently turn and pull the rubber grommet out of the spinner motor shaft. Set the spindle aside.
5. Remove the old bulb and replace it with a clear, 40-watt, E12 base (candelabra base, B bulb).
6. Reinstall the spindle and rubber grommet.
7. Reattach the back panel and tighten screws carefully without overtightening.
This answer is automatically generated
Where does the red wire go on the heater **** unit