Table of Contents
Advertisement
Quick Links
BLOOMFIELD INDUSTRIES
10 SUNNEN DRIVE
St. Louis, MO 63143
telephone: 314-781-2777
fax: 314-781-2714
www.wellsbloomfield.com
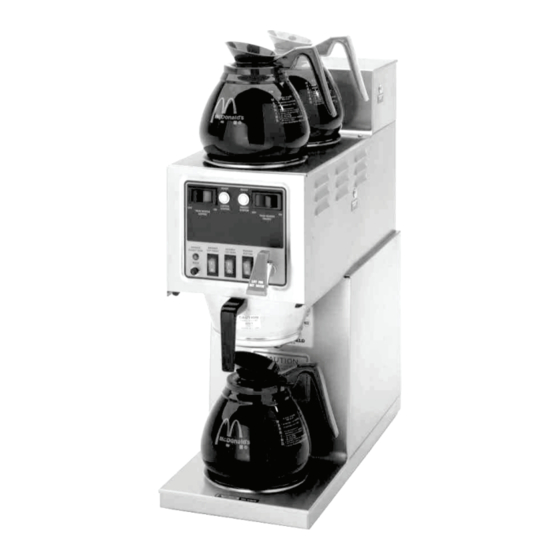
Model 8783MCD Brewer
with optional
8900-Series Decanters
76294
p/n
Rev. F ECN-13380
Place this chapter in the Beverage
Section of the Equipment Manual
OWNERS MANUAL
for
3-WARMER
DECANTER
COFFEE BREWERS
WITH INDEPENDENT
HOT WATER DRAW FAUCET
MODEL:
8783MCD
Includes:
Installation
Operation
Use & Care
Servicing Instructions
This instruction is for the
exclusive use of licensees
and employees of
McDonalds Systems, Inc.
M915
915
07
1105 cps
Advertisement
Table of Contents

Related Manuals for Bloomfield 8783MCD


Summary of Contents for Bloomfield 8783MCD
- Page 1 HOT WATER DRAW FAUCET MODEL: 8783MCD Includes: Installation Operation Use & Care Servicing Instructions This instruction is for the exclusive use of licensees and employees of McDonalds Systems, Inc. Model 8783MCD Brewer with optional 8900-Series Decanters 76294 Rev. F ECN-13380 M915 1105 cps...
-
Page 2: Warranty Statement
The prices charged by Bloomfield Industries for its products original installation or eighteen (18) months from the date of are based upon the limitations in this warranty. -
Page 3: Table Of Contents
WIRING DIAGRAMS appliance in a manner which will ensure its optimum performance. SPECIFICATIONS MODEL VOLTS WATTS AMPS POWER SUPPLY 1ø REQUIREMENTS 8783MCD 220-240 3900 16.2 2 WIRE +GND Not provided APPLICABILITY This manual applies to the following Bloomfield product: 8783MCD... -
Page 4: Features & Operating Controls
FEATURES AND OPERATING CONTROLS Fig. 1 Features & Operating Controls... -
Page 5: Precautions & General Information
PRECAUTIONS AND GENERAL INFORMATION WARNING: ELECTRIC SHOCK HAZARD All servicing requiring access to non-insulated components must be performed by qualified service personnel. Do not open any access panels which require the use of tools. Failure to heed this warning can result in electrical shock. WARNING: INJURY HAZARD All installation procedures must be performed by qualified personnel with full knowledge of all... - Page 6 Install with FLOW operation of the brewer. arrow marking on strainer body pointing toward brewer. Bloomfield recommends 1/4" copper tubing for installation of less than 12 feet and 3/8" for more than 12 feet from a 1/2"...
-
Page 7: Installation Instructions
IMPORTANT: Do not connect brewer to electrical power until Model 8783MCD requires a dedicated 220 to 240 volt 20 amp you are ready to fill the tanks. circuit (L1, L2) plus ground. -
Page 8: Operation
OPERATION TANK VENTS BASIN HOT WATER FAUCET WATER LEVEL PROBE TIMER BREW HEAD FAUCET WATER TANK COFFEE BREW COFFEE WATER TANK CHAMBER SOLENOID - FAUCET SIDE SOLENOID - COFFEE SIDE INLET FITTING Fig. 4 Brewer Operation Diagram A. START-UP IMPORTANT: Tanks must be full of For initial start-up, or if the brewer has not been used for an water before pressing... -
Page 9: Water Heater
OPERATION (continued) WATER HEATER Separate coffee brew water and faucet water heater systems are identical. Each heating element is protected from over-temperature by a manual reset hi-limit safety thermostat. Water temperature is sensed by a thermobulb inserted into each water tank. This temperature signal is fed to the corresponding thermostat, which controls line power to that tank's heating element. -
Page 10: Brewing Coffee
BREWING COFFEE A. PREPARATION CAUTION: BURN HAZARD Place one (1) genuine Bloomfield paper filter in the brew chamber. Exposed surfaces of the Add a pre-measured amount of brewer, brew chamber and fresh coffee grounds. decanter may be HOT to Gently shake the brew chamber to the touch, and can cause level the bed of grounds. -
Page 11: Cleaning Instructions
CLEANING INSTRUCTIONS PROCEDURE: Clean Coffee Brewer CAUTION: BURN HAZARD PRECAUTIONS: Disconnect brewer from electric power. Allow brewer to cool. Brewing and serving temperatures of coffee are FREQUENCY: Daily extremely hot. Hot coffee will cause TOOLS: Mild Detergent, Clean Soft Cloth or Sponge serious skin burns. -
Page 12: Troubleshooting Suggestions
Repair/replace as needed Coffee level too high or low Timer out of adjustment Adjust timer Brew chamber overflows Too many filter papers or wrong Use one (1) genuine Bloomfield filter paper filter per brew Brew chamber dispense hole Thoroughly clean brew plugged... -
Page 13: Servicing Instructions
SERVICING INSTRUCTIONS ACCESS PANELS CAUTION SHOCK HAZARD TOP PANEL: Opening access panels or Remove top panel to access hot water tanks, thermostats, removing warmer plates on this thermo probe, heating elements and main power switch. brew may expose uninsulated Top panel is held by a retaining lip at the front and two screws electrical components. - Page 14 SERVICING INSTRUCTIONS (continued) TEMPERATURE ADJUSTMENT CAUTION: SHOCK HAZARD Thermostat control may be accessed by removing either of the two button plugs on the right side of the brewer. Front control is These procedures involve COFFEE BREW temperature; rear control is FAUCET WATER exposed electrical circuits.
- Page 15 SERVICING INSTRUCTIONS (continued) IMPORTANT: Water pressure BREW TIME ADJUSTMENT must be between 20 p.s.i and Remove brew chamber and button plug. Adjust TIMER shaft; 90 p.s.i. flowing pressure. clockwise increases time. Brewer should dispense one full If water pressure exceeds this decanter of water.
- Page 16 Should deliming then reinstall lid clamps. hoses become necessary, 8. Reinstall wiring to heating element and thermostat. Bloomfield recommends Verify that all internal components are dry, then reinstall the replacing the hoses. top panel. 10. Reconnect brewer to electrical supply and reconnect water supply.
- Page 17 Should deliming 8. Reinstall wiring to heating element and thermostat. hoses become necessary, Verify that all internal components are dry, then reinstall the Bloomfield recommends top panel. replacing the hoses. 10. Reconnect brewer to electrical supply and reconnect water supply.
-
Page 18: Exploded View & Parts List
EXPLODED VIEW & PARTS LIST... - Page 19 EXPLODED VIEW & PARTS LIST (continued) ITEM PART NO. DESCRIPTION ITEM PART NO. DESCRIPTION 8543-52 SCREW PHL SS 8-32x3/8 8043-8 ELBOW INLET 8533-32 ELEMENT, WARMER 100W 240V 82959 TANK COVER (COFFEE) 8700-16 COVER PLATE, WARMER 8053-1 B ELEMENT 240V 1800W 8783-5 BASIN COVER SUB ASSEMBLY 8783-21...
-
Page 20: Service Kits
SERVICE KITS SERVICE KITS SOLENOID REPAIR KITS 86107 Solenoid Complete, Dual 85218 Inlet Fitting Kit (includes cap, inlet fitting, washer and screen) 85219 Inlet Strainer (includes screen only) -
Page 21: Wiring Diagrams
I T E I N A L I M H I - ( F A I T E I T E T I M ( S H L I M H I - WIRING DIAGRAM I T E 8783MCD (Franke Build) - Page 24 Prepared for 10 SUNNEN DRIVE, P.O. BOX 430129, St. Louis, MO 63143 telephone: 314-781-2777 fax: 314-781-2714 www.wellsbloomfield.com...
Need help?
Do you have a question about the 8783MCD and is the answer not in the manual?
Questions and answers