Table of Contents
Advertisement
Quick Links
Advertisement
Table of Contents

Related Manuals for Ozone Fazer 3


Summary of Contents for Ozone Fazer 3
- Page 1 Pilots Manual...
-
Page 3: Table Of Contents
CONTENTS THANK YOU Thank you for choosing to fly Ozone. As a team of free flying enthusiasts, competitors and adventurers, Thank You Caring and Maintenance Ozone’s mission is to build agile paragliders of the highest quality with cutting edge designs, performance Warning Caring Tips and maximum security. Team Ozone Storage and transport Your Fazer 3 Cleaning Confidence and belief in your wing is a far greater asset than any small gains in performance - ask any of Backpack Repairs Attack Harness Packing the Ozone pilots on your local hills, or those who have taken our gliders on ground-breaking adventures Brake lines Maintenance checks or stood on podiums around the world. All of our research and development is concentrated on creating Risers Modifications Trimmers Ozone Quality the best handling/performance characteristics possible with optimum security. Our development team is Total weight in flight Technical Specifications based in the south of France. This area, which includes the sites of Gourdon, Monaco and Col de Bleyne, Speed Wing Flying Line diagram guarantees us more than 300 flyable days per year. This is a great asset in the development of the Ozone... -
Page 4: Warning
WARNING TEAM OZONE Everyone at Ozone continues to be driven by our passion for flying, our love of adventure and our quest to Paragliding is dangerous. You could suffer serious injury or death as a result of using this equipment. see Ozone’s paraglider development create better, safer and higher performing paragliders. Using this equipment improperly greatly increases the risks involved. Never use this equipment without proper and thorough instruction from a qualified instructor. The paraglider design team is led by David Dagault. Dav has a wealth of experience both in competition, adventure flying and paraglider design. Also on the design team are Luc Armant, Fred Pieri and Russell By using your Ozone paraglider, you accept all risks involved with the use of such equipment. The design- Ogden. Luc is a top competition pilot and XC addict. With a background in naval architecture, he brings a er, manufacturer, distributor, and retailer cannot and will not guarantee your safety when using this equip- wealth of knowledge and ideas to the design team. Fred is a mathematian, mechanical engineer and vol ment. You agree to not hold Ozone Gliders Ltd, nor Ozone Power Ltd liable for any injuries to yourself or Biv specialist. Fred and Luc work closely with Dav in the design process. Russ is a top competitor and test to third parties resulting from the use of this equipment. It is essential that you understand the proper use pilot. He can usually be found putting the latest creations through a series of test manoeuvres. of this equipment before attempting to use it in any way. The User MUST: The Ozone speed flying specialists offer a wealth of experience and talent with the likes of Rob Whittall, Matt Gerdes and Cade Palmer who ensure that each new model has a thorough test and development • Be an experienced and licensed paraglider pilot. -
Page 5: Your Fazer 3
YOUR FAZER 3 The Pack The mission of the Fazer series is to offer the most versatile speed wing possible with performance and The Mountain Pack is large enough to carry a standard harness and speed wing. It is also equipped with ease of use for both foot launch and ski launch flying. The Fazer 3’s quick and precise launch characteristics are ideal for summer foot launching. The redesigned trimmer system offers a new mode of steep flight with external straps that can be used to carry skis or snowboards and other equipment. We recommend always using appropriate safety and rescue equipment when traveling in the backcountry in snow conditions. reduced efficiency and increased stability for winter speed-riding. At average wingloadings foot launching is attainable even for intermediate level pilots, and with trimmers released the wing’s glide performance is The Atak Harness (Optional) reduced to the point that carving terrain on skis or slowing the wing down for fully-unweighted ski turns IMPORTANT The Atak is a special harness developed for speed wing flying. The hang-points, structure, and pilot becomes manageable. In the unlikely positioning are all specifically engineered for speed-flying pilots. Your Atak harness is adjustable for... -
Page 6: Speed Wing Flying
SPEED WING FLYING PREPARATION Speed Wing flying is still a relatively new sport. Because of this, you are an ambassador and representative To prepare the wing, lay it out on the top surface and perform a thorough daily check. You should inspect and we ask that you please set a positive example to ensure the successful future of the sport. Please the top and bottom surfaces for any rips and tears or any other obvious signs of damage. Lay out the lines be responsible, and practice safe conduct. Never practice flying on populated ski slopes or pistes! It one side at a time, hold up the risers and starting with the brake lines, the stabilo, C, B and A lines pull all is expressly forbidden to fly in populated areas. When on snow, always carry with you all necessary the lines clear. Make sure there are no knots or tangles and lay the checked lines on top of the previous avalanche safety and rescue equipment. -
Page 7: Basic Flight Techniques
BASIC FLIGHT TECHNIQUES Launching Active Flying After your daily inspection and pre-flight check, your wing may be launched with either the forward or To minimize the likelihood of suffering collapses in very turbulent conditions, it is essential to use active reverse techniques. flying. These are skills that are best learnt by playing with the glider on the ground. Flying with a small NOTE amount of brake applied (approx. 20cm) will allow you to feel the feedback from the wing. In turbulent The Fazer 3 will launch Forward Launch Nil to Light winds conditions the internal pressure of the wing is constantly changing and only by using a small amount of and inflate easily with When the wind is favourable, whilst gently holding the A risers, move forward positively. Your lines should brake will you feel these changes. The aim of active flying is to maintain a constant pressure through the or without A riser IMPORTANT become tight within one or two steps and the wing will immediately start to inflate. You should maintain brakes, If you feel a reduction or loss of pressure apply the brakes until you feel normal pressure again. input if you pull it Always keep hold of a constant pressure on the risers until the wing is overhead. Do not pull down or push the risers forward... -
Page 8: Rapid Descent
Use opposite Always release your Deflations It is unlikely to happen on any Ozone glider, but should it, your first reaction should be to fully raise both weight shift and apply wraps if you have hands. This normally allows the glider to return to normal flight. If nothing happens after a few seconds, Ozone Speed wings are very stable and are resistant to deflations or collapses. enough outside brake taken them! reach up and push the A-risers forwards or apply the speed bar to encourage the wing to regain normal to stop the wing from flight. Ensure the glider has returned to normal flight (check your airspeed) before you use the brakes... - Page 9 Wing Repairs sitting in the sun. Always let a registered dealer, professional repair centre or the manufacturer carry out any major or • If you fly with a wrap, you should regularly undo the twisting that appears on the main brake lines. When complex repairs, especially those near seam margins. the line is twisted it becomes shorter, which may apply constant tension on the trailing edge (which can If you damage the sail: lead to problem on launch, spinning, stalling, glider not flying symmetrically etc. If the rip is small and in the middle of a panel however you can fix it yourself. You’ll find all the materials • Change your main brake lines if they are damaged. in the repair kit you need. The fabric can be simply mended with the sticky rip stop/spinnaker tape. When • Be Careful when groundhandling to not saw the brake lines against the risers or main lines. The abrasion cutting out the patches allow ample overlap of the tear and make sure both sides are different sizes. Make caused by a sawing motion can damage the main lines and lead to premature ageing of the risers. If you sure to round off each corner of the patches. notice any signs of abrasion, especially to the lines, make sure you get the wing professionally serviced and importantly modify your groundhandling technique to stop any further damage. You can find more information about repairing your wing on the Ozone website, including step by step • It is recommended that you regularly CHECK your wing, especially after a heavy period of use, after an instructions with pictures. incident or after a long period of storage.
- Page 10 It is important that replacement lines are made from the correct materials and diameters. You should contact your dealer/distributor. They will be able to decide the most appropriate action. If you are unable check lengths against their counterpart on the other side of the wing to make ensure symmetry. Once the to contact your dealer, then you can contact us directly at info@flyozone.com. line has been replaced, inflate and check the glider before flying. Packing To prolong the life of your wing and to keep it in the best possible condition, it is very important to pack the wing carefully. Ozone recommends to use the concertina packing method so that all of the cells rest alongside each other. This helps to ensure the leading edge reinforcements are not unnecessarily bent. Using an Ozone Saucisse or Saucisse light pack will help preserve the life of the wing and aid with the speed and ease of packing. Alternatively, you can simply fold the wing using the traditional method - in half and then half again. Maintenance Checks It is vitally important that your wing be checked regularly. Your wing should be checked by a qualified professional for the first time after 1 year or 80 hours, whichever comes first and thereafter annually. You IMPORTANT are responsible for your flying equipment and your safety depends on it. Take care of it and regularly...
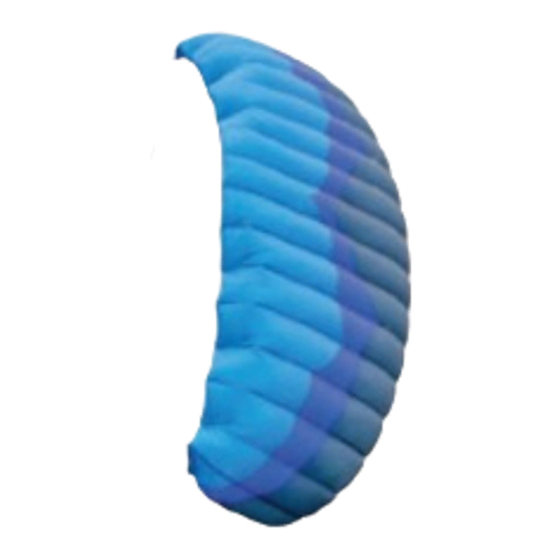
- Page 11 TECHNICAL SPECIFICATIONS LINE DIAGRAM Fazer 3 Rigging Diagram Individual and linked line lengths can be found online. A Riser B Riser No. of Cells Projected Area (m 7.07 8.84 10.63 12.42 Flat Area (m 7.96 9.96 11.97 13.99 Projected Span (m) 4.33 4.84 5.73 Flat Span (m) 5.23 5.85...
- Page 12 1258 Route de Grasse Le Bar sur Loup 06620 France...
Need help?
Do you have a question about the Fazer 3 and is the answer not in the manual?
Questions and answers