Table of Contents

Subscribe to Our Youtube Channel
Related Manuals for Petainer PET803


Summary of Contents for Petainer PET803
- Page 1 Electronic Pet Fence System Please read this entire guide before beginning Boundary/ 110-240V Metal Probels & &Nails Training Flags Adapter Test Light Tool Pet Fence System will make sure your dog stays safely in the yard. Operating Guide...
-
Page 2: Table Of Contents
Table of Contents Main Features Package Contents: Other items you may need: CAUTION IMPORTANT NOTE Operating Guide SECTION 1 INSTRUCTIONS FOR SETTING UP THIS FENCING SYSTEM SECTION 2 HOW THE CORRECTION WORKS SECTION 3 TRAINING YOUR DOG SECTION 4 SYSTEM MAINTENANCE TIPS SECTION 5 TROUBLESHOOTING GUIDELINES Common size of different dogs... -
Page 3: Main Features
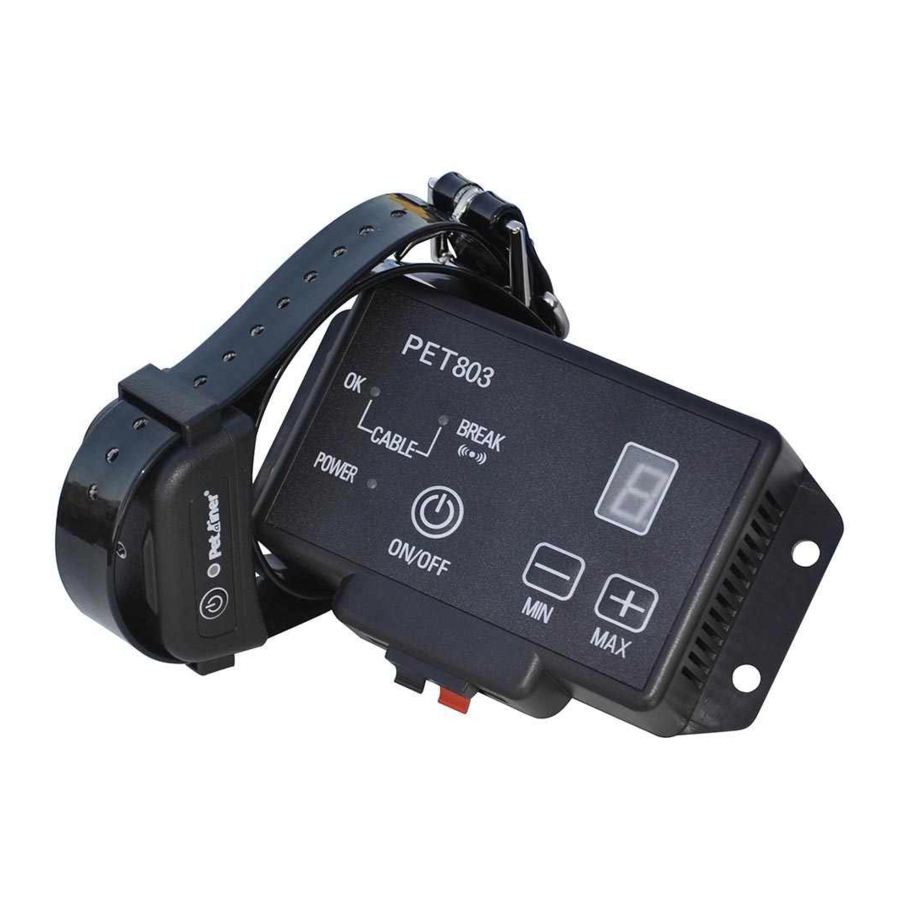
Electronic Pet Fencing System PET803 T h i s e l e c t r o n i c p e t f e n c i n g s y s t e m P E T 8 0 3 i s o n e o f t h e m o s t r e l i a b l e , cost-efficient pet containment systems available today. -
Page 4: Package Contents
Package Contents: 1 x Indoor wall-mounted Transmitter; 1 x Rechargeable and Waterproof Collar Receiver; 1 x Power plug; 2 x Extra Metal Contact Points; 1 x Adjustable Collar 20 x Boundary/Training Flags; 1 x AC Adaptor 1 x Test Light Tool 2 x USB Charging Cable 4 x Screws;... -
Page 5: Important Note
NEVER perform set-up procedures when the collar is on your dog. An electronic collar should only be used under close supervision by the dog's owner. KEEP OUT OF THE REACH OF CHILDREN. Read all instructions before using this product. IMPORTANT NOTE Realize that because individual dogs have unique temperaments, there is no way of knowing how your dog will react to its introduction to this product. - Page 6 make sure the wire is not cut off or pinched by a window, door or garage door. When drilling holes, make sure there are no electrical wires, nails or screws inside the area you are drilling. D. Determine the Exit Route of Your Boundary Wire from the Transmitter to the Outside Containment Area Since your transmitter must be mounted in an enclosed area to protect it from the weather, give careful consideration on where the wire exits to the...
- Page 7 Dual Zones Open Back Zone Keep pets separated, or to prevent This lets your pet have access to the run-thru. lake or other rear area. Single loop - Back Yard Zone Single Loop - Front Yard Zone Your pet has run of the house and Your pet has run of the house and back yard.
- Page 8 Step ESTIMATE THE AMOUNT OF WIRE NEEDED PET803 model includes 200 metres of boundary wire. It can enclose an area of over 0.8 acres. The amount of wire needed is determined by several factors: (a)Total area to be contained;...
- Page 9 (c)Size of the signal field. The signal field is the distance from the wire to the place where the collar receiver first activates. A 3 to 4 meters wide field is preferred. Step INSTALL THE WALL TRANSMITTER Install the wall transmitter close to a standard 110/240-Volt household outlet.
- Page 10 system, the wire connections must be waterproof to provide a sealed connection between the wires. Do not use electrical tape or twisted wire nuts. This will cause an intermittent signal or disarm the system. 3. Continue around your perimeter until you return to the start of the loop. 4.
- Page 11 connected, and the wire forms an unbroken, continuous loop. If the Break light turns red, it means that one or both wires are not properly connected or both wires are connected but the wire is broken. Correct the problem and retest. Step SET UP YOUR COLLAR RECEIVER Before using our Rechargeable and Waterproof Collar Receiver, for the...
- Page 12 Test in a number of different areas until you are satisfied there are no wire breaks and the system is functioning properly. Next walk all around the "safe" part of the yard to ensure there are no stray signals, particularly near the twisted wire coming from the transmitter. Test collar in and around the inside of the house as well.
- Page 13 Driveways / Sidewalks When crossing an asphalt driveway make a 2cm deep cut acro s s the driveway using a circular saw and masonry blade. Place the wire in the crack and seal with asphalt sealant. On driveways and sidewalks, if an expansion joint is available, simply place the wire in the joint and seal with an outdoor caulk.
-
Page 14: Section 2 How The Correction Works
B. Collar Strap To prevent accidental correction inside the home, remove the collar from the dog's neck when it comes inside. Place the collar around the dog's neck with the receiver box under the chin. The collar must be on relatively tight to keep the probes making skin contact without restricting breathing. - Page 15 Always make sure the collar is functioning properly BEFORE putting it on the dog. Verify the system is operating properly and the field width is appropriate as described in Section 1, Step 11. Adjust the Signal Field Width. Stay positive and playful during the training session. Keep training sessions brief.
-
Page 16: Section 4 System Maintenance Tips
7. Reward your dog when it avoids the flags, even if a correction is issued. 8. Play in the safe zone with your dog before ending this training session. Step ON-LEASH PROOFING 1. With the collar on your dog and the wall transmitter "on"... -
Page 17: Troubleshooting Guidelines
The wall transmitter is not waterproof and must be protected from the weather. A close lightning strike may damage the unit. Unplug the transmitter and disconnect the wires during storms. Do not attempt to dismantle or repair any of the system components; this will void the manufacturer's warranty. - Page 18 Results of System Test Procedures: If there is no red POWER light on the wall transmitter with the test loop wire in place, the wall transmitter is malfunctioning. If the red POWER and green OK lights are solid on the wall transmitter, but the collar does not activate on the test loop wire, the collar receiver is not working.
-
Page 19: Common Size Of Different Dogs
Common size of different dogs Chest Back Neck Measurement Length Type Size (cm) (cm) (cm) Chihuahua, Yorkshire 20-22 25-30 Mini Temier Chihuahua, Yorkshire Small 20-24 29-36 Temier, Poodle, Pomeranian 23-28 35-42 Medium Maltese Dog, Shih Tzu Miniature Schnauzer, Large 27-31 41-47 Pekingese Schnauzer, English Cocker...
Need help?
Do you have a question about the PET803 and is the answer not in the manual?
Questions and answers