Table of Contents
Advertisement
Quick Links
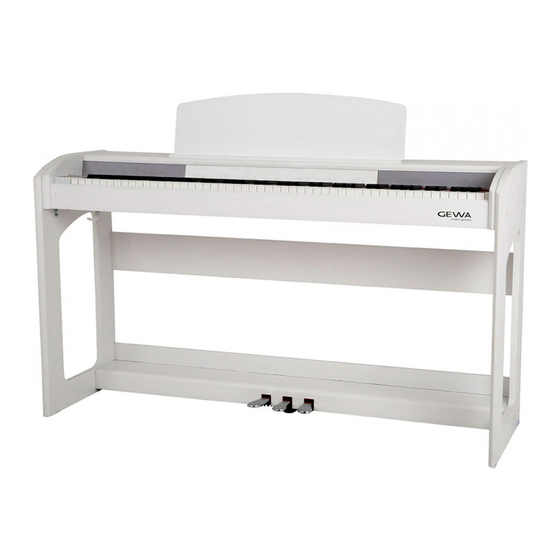
OWNERS MANUAL
GEWA Digital Piano DP 220 G
Bedienungsanleitung | Owners manual | Mode d'emploi | Manual de instrucciones
Please read this user manual carefully before operating the
instrument and take note of the safety information!
Please keep the user manual for reference purposes.
www.gewapiano.com
Advertisement
Table of Contents

Related Manuals for Gewa DP 220 G


Summary of Contents for Gewa DP 220 G
-
Page 1: Owners Manual
OWNERS MANUAL GEWA Digital Piano DP 220 G Bedienungsanleitung | Owners manual | Mode d’emploi | Manual de instrucciones www.gewapiano.com Please read this user manual carefully before operating the instrument and take note of the safety information! Please keep the user manual for reference purposes. - Page 2 Manufacturer: GEWA music GmbH Werkstraße 1 08626 Adorf GERMANY www.gewamusic.com Version 1.0 Last update 01.09.2016...
-
Page 3: Table Of Contents
CONTENTS SAFETY INFORMATION ......................... 5 General Information ........................ 5 How to use/play the Piano ...................... 6 Improper Use ........................6 Safety Precautions ......................... 7 CE label ..........................8 Recycling ..........................8 PARTS SUPPLIED WITH THE PIANO .................... 9 ASSEMBLY INSTRUCTIONS ....................... 10 GETTING STARTED ........................ - Page 4 CONTENTS CONNECTING ACCESSORIES ....................26 Connecting Headphones ....................26 Connecting a Playback Device ................... 26 8.3 Connecting an external Amplifier ..................26 Connecting a PC ......................... 26 ADDITIONAL INFORMATION ...................... 27 Glossary ..........................27 Warranty ..........................28 10 TROUBLESHOOTING ........................29 11 TECHNICAL INFORMATION ......................30...
-
Page 5: Safety Information
Thank you for purchasing our GEWA DP 220 digital piano! With the GEWA DP 220 you have selected a top quality digital digital piano, giving you a highly impressive sound and playing experience with a huge extra set of additional and easy-to-use sounds and functions. -
Page 6: How To Use/Play The Piano
• Exposing the digital piano to an open air or moist/rainy environment • Setting up the piano in damp rooms • Using power supplies not authorized by GEWA music, or connecting the piano to an electrical outlet in spite of mismatching local voltage specifications • Playing the piano close to electrical or electronic devices, such as stereo systems, TV sets, radios or mobile phones. -
Page 7: Safety Precautions
- there is a sudden loss of sound while the piano is in use, - the digital piano emits an unusual smell or smoke. • It is essential to have the digital piano checked by your GEWA customer service. WARNING Fire prevention • Open flames such as from candles or oil lamps can tip over and cause a fire. -
Page 8: Ce Label
• During thunderstorms, or if you will not use your digital piano for a while, we suggest you to unplug your digital piano completely form the electrical system. CE LABEL Your GEWA digital piano complies with the requirements of the EU directives: 2004/108/EC on the approximation of the laws of the Member States relating electromagnetic... -
Page 9: Parts Supplied With The Piano
ITEMS SUPPLIED PARTS SUPPLIED WITH THE PIANO Check the content of the package for completeness before starting with the assembly. Pos. Description Console with keyboard Music rest Rear panel Pedalboard bracing Pedal board with connector cable Left side panel Right side panel Power supply and cable Recessed head screw M6 Recessed head wood screw... -
Page 10: Assembly Instructions
ASSEMBLY INSTRUCTIONS ASSEMBLY INSTRUCTIONS In this section we will show you how to easily set up your GEWA digital piano. For the assembly you need: • size 2 Phillips screwdriver • second assisting person NOTE Do not firmly tighten the recessed head screws until all parts of your digital piano are aligned. - Page 11 ASSEMBLY INSTRUCTIONS 8. Now take your digital piano to its final position in the room and unscrew the support underneath the pedal board until it reaches the floor 9. Plug in the pedal board cable in the right way (it should slide on easily without the use of force) to the socket on the bottom side of the console (1) and plug the power supply (8) into the power socket on the rear of the piano (without image).
-
Page 12: Getting Started
6,3mm jack socket on the rear panel. GETTING STARTED Now let‘s have a look on to the controls of your GEWA digital piano THE CONTROLS OF YOUR DIGITAL PIANO Your GEWA digital piano has the following controls:... -
Page 13: Function Keys And Pedals
GETTING STARTED FUNCTION KEYS AND PEDALS FUNCTION KEYS AND PEDALS View A 1 Display provides settings information. 2 Cursor keys Navigate through the functions and edit settings. 3 Volume Set the volume. 4 Voice (only function access) Select the various sounds of your digital piano (see Page 17). - Page 14 GETTING TO KNOW YOUR INSTRUMENT THE CONTROL KEYS AND PEDALS View B Una corda pedal (left) The una corda pedal (soft pedal) simulates moving the pianos key mechanics closer to the stringboard, resulting in a more quiet and softer sound. Sostenuto pedal (center) The sostenuto pedal function is similar to the damper pedal function.
-
Page 15: Connector Panel
GETTING TO KNOW YOUR INSTRUMENT CONNECTORS CONNECTORS (REAR SIDE OF THE CONSOLE) Speakers THE CONSOLE - REAR SIDE CONNECTORS (C) View A 2 headphone outputs (6.3 mm jack) Connect your headphones here. View B Pedal cord jack Connect the pedal cord here. Connect MIDI devices here to utilize the MIDI functions of View C 1 MIDI-connector... - Page 16 GETTING TO KNOW YOUR INSTRUMENT CONNECTORS Connect these outputs with a receiving audio device (e.g. View C 4 LINE OUT R/L amplifier or recording device) to e.g. record your playing on an audio recording/playback device. Connect your digital piano with the supplied power 5 Mains Power Supply adapter. 6 SUSTAIN 6.3 jack socket for the connection of any standard sustain pedal OR the supplied pedal.
-
Page 17: Operation
LED lights up. 3. Your GEWA digital piano is now ready to play. DEMO FUNCTION The DEMO function provides an overview of the various sounds of your digital GEWA digita piano. This is how to activate the DEMO song function: 1. -
Page 18: Switching On
SWITCHING ON REVERB AND CHORUS SOUND COMBINATIONS 5.3.1 You can set your digital piano to a mode so that two different sounds can be played simultaneously during your performance. This is how you can combine two sounds : 1. Choose a sound (as already described). 2. -
Page 19: Split Keyboard Mode
SWITCHING ON METRONOME CHORUS AND OTHER EFFECTS 5.4.2 The chorus-function contains the following effects: Display reading Name Description Chorus1 Adds an ensemble effect to the sound Chorus2 Like (1), but more intense Similar to a chorus effect with a slight pitch Flanger modulation Similar to a chorus effect with a slight frequency... -
Page 20: Changing The Metronome Tempo
SWITCHING ON FUNCTION MENU CHANGING METRONOME SPEED 5.5.2 1. Switch on the metronome. 2. Press the upper or lower cursor keys to increase or decrease the speed in steps of 10 or push the left or right cursor key, to increase or reduce the speed in single steps. The selected beat and/or speed shows in the display. -
Page 21: Settings Menu
6 half tone steps. This is how you to transpose your GEWA digital piano: 1. Enter the function menu (Page 20). The display will the following blinking and alternating readings “trA“... -
Page 22: Fine-Tune
SWITCHING ON FINE TUNING OF SOUNDS FINE TUNING OF SOUNDS The sounds of your digital piano can be fine tuned in the following way: 1. Enter the Function-Menu (-> Page 20). 2. Press the left or right cursor button until “tun“ appears in the display. 3. Press the upper or lower cursor button to change the tuning of your digital piano. 4. -
Page 23: Brilliance Settings
SWITCHING ON BRILLIANCE-SETTINGS BRILLIANCE-SETTINGS To reach an even brighter sound, please follow these steps: 1. Enter the Function menu (Page 20). 2. Press the left or right cursor keys until “bri“ appears in the display. 3. Set the required brilliance with the upper or lower cursor buttons. 4. -
Page 24: Changing Temperaments
4. Press the Reverb button to leave the Function menu. SETTING THE STRING RESONANCE 6.12 Your GEWA digital piano simulates the resonance behavior of strings in relation to the keys being hit on an acoustic piano. You can set the resonance behavior as follows: 1. -
Page 25: Record And Playback Function
SWITCHING ON RECORD AND PLAYBACK FUNCTION RECORD AND PLAYBACK FUNCTION Your GEWA digital piano can record your playing. It can store up to three pieces of music. CHOOSE THE RECORDING MODE To activate the recording mode please follow these steps: 1. -
Page 26: Connecting Accessories
CONNECTING PERIPHERALS CONNECTING HEADPHONES CONNECTING PERIPHERALS Here you can learn more about the connection options for your GEWA digital piano. CONNECTING HEADPHONES Connect one or two headphones to the two 6.3 mm jack connectors under the console. If headphones are connected to either one of the headphone output connectors, the speakers... -
Page 27: Additional Information
USEFUL INFORMATION EXPLANATION OF TERMS USEFUL INFORMATION At this point we would like to explain a few terms that are used in our user manual. Additionally we explain the special features of your digital piano. EXPLANATION OF TERMS Term Definition MIDI Musical Instrument Digital Interface is a data transfer protocol. -
Page 28: Warranty
If you suspect to have a claim covered by the warranty terms regarding your GEWA digital piano, please contact your dealer during regular business hours. -
Page 29: Troubleshooting
TROUBLESHOOTING AND SOLUTION TROUBLESHOOTING AND POSSIBLE SOLUTIONS With the tips listed here you can possibly fix occurring faulty behavior of your digital piano on your own. Should your efforts still not be successful please contact your next specialized dealership. POSSIBLE CAUSE AND SOLUTION Defect Possible cause Possible solution... -
Page 30: Technical Information
88 keys, weighted, Fatar Grand Touch System Attack dynamic 4 levels (light, standard, artist and off) Pedals Soft-, Sostenuto- and Piano-Pedal Sound source GEWA music Samples 6-Layer Polyphonie Max. 256 tones Number of internal sounds Amplifier output RMS 2 x 20 Watt... - Page 31 NOTES...
- Page 32 Manufacturer: GEWA music GmbH Werkstraße 1 08626 Adorf GERMANY www.gewamusic.com Version 1.0 changes and errors excepted...
Need help?
Do you have a question about the DP 220 G and is the answer not in the manual?
Questions and answers