Table of Contents
Advertisement
Advertisement
Table of Contents

Related Manuals for ALDI ViSage


Summary of Contents for ALDI ViSage
- Page 1 User Manual Spend a little Live a lot. ELECTRIC SHAVER (CORD/CORDLESS) ID: #05007...
- Page 2 This type of software can be downloaded for free from your app store. Try it out now Just scan the QR code with your smartphone and find out more about the Aldi product you have purchased.* Your Aldi Service Portal All details mentioned above can also be found in the Aldi Service Portal at www.aldi.co.uk.
-
Page 3: Table Of Contents
Contents Overview ................ 4 Use ................... 5 Product contents/device parts ........6 General information ............7 Reading and storing the user manual ......7 Explanation of symbols ........... 8 Safety ................10 Proper use .................10 Safety notes ..............10 First use .................15 Checking the shaver and product contents ....15 Displaying the status ............16 Charging the rechargeable battery ...... -
Page 6: Product Contents/Device Parts
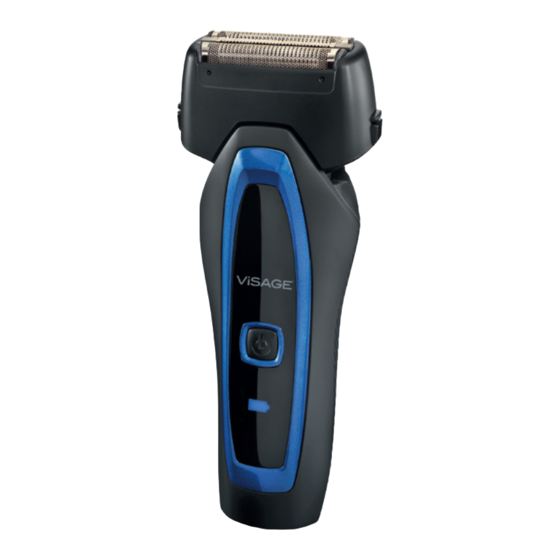
Product contents/device parts Protective cap Shaver head (shaver head frame with shaving foil unit consisting of two shaving foils and an integrated trimmer) Shaver blades, 2× Release button, 2× On/Off switch Socket for charging Cleaning brush 5 V plug AC adapter plug Storage bag Battery symbol Mains symbol... -
Page 7: General Information
General information General information Reading and storing the user manual This user manual accompanies this electric shaver (cord/cordless). It contains important information on start-up and handling. For improved readability, the electric shaver (cord/cord- less) will be referred to only as the “shaver” below. Before using the shaver, read the user manual carefully. -
Page 8: Explanation Of Symbols
General information Explanation of symbols The following symbols and signal words are used in this user manual, on the shaver or on the packaging. WARNING! This symbol/signal word designates a hazard with moderate risk, which may result in death or severe injury if not avoided. - Page 9 General information This symbol identifies electrical devices that belong to the protection class 2 (mains adapter). This symbol identifies electrical devices that belong to the protection class 3 (shaver). This symbol indicates the polarity of the current on the 5 V plug. Devices marked with this symbol are only suitable for household use (dry indoor rooms).
-
Page 10: Safety
Safety Safety Proper use The shaver is designed exclusively for dry and wet shaving of the face, but also for trimming beards. The shaver is only intended for private use and not suitable for commercial purposes. Only use the shaver as described in this user manual. Any other use is considered improper and may result in damage to property. - Page 11 Safety safety extra-low voltage (SELV) with the values specified in the chapter “Technical data”. − Only connect the mains adapter to an easily accessible socket so that you can quickly disconnect it from the mains in case of a failure. −...
- Page 12 Safety against sources of danger, are located in this device. − Do not immerse the shaver, the mains adapter or mains cord in water or other liquids. − Never touch the mains plug with damp hands. − Never use the mains cord as a carrying strap.
- Page 13 Safety − Always switch the shaver off and pull the mains adapter out of the socket when you are not using it, when you intend to clean it or in the event of a fault. WARNING! Danger for children and persons with impaired physical, sensory or mental capacities (e.g.
- Page 14 Safety − Do not leave the shaver unattended while in operation. − Do not allow children to play with the packaging wrapper. They may get caught in it and suffocate. CAUTION! Risk of injury due to sharp edges and blades! If you use the shaver with a damaged shaver head, without a shaver head or if you push down on the shaving foils, you could cut...
-
Page 15: First Use
First use − Only transport and store the shaver with the protective cap in place. − Only transport the shaver with the transport guard engaged. − Do not drop the shaver. First use Checking the shaver and product contents NOTICE! Risk of damage! If you are not cautious when opening the packaging with a sharp knife or other pointy... -
Page 16: Displaying The Status
First use do not use the shaver. Contact the manufacturer at the service address specified on the warranty card. Displaying the status The shaver has two indicators that supply information about the power supply or the rechargeable battery charge level (see fig. B): •... -
Page 17: Charging The Rechargeable Battery
Handling Charging the rechargeable battery The rechargeable battery takes approx. 8 hours to charge fully. However, you can also use the shaver in mains operation without charging the rechargeable battery. 1. Insert the 5 V plug in the socket for charging on the bottom of the shaver. -
Page 18: Wet Shave
Handling 3. Use your free hand to stretch the part of your face you intend to shave. 4. Apply gentle pressure to move the shaver head perpendicular to the direction of hair growth. 5. After a few strokes, use your free hand to check the results and repeat step 4 if necessary. -
Page 19: Using The Trimmer
Handling 8. Switch the shaver off once you have finished shaving. 9. Clean the shaver as described in the chapter “Daily cleaning after a wet shave”. Using the trimmer Keep in mind that the trimmer always generates a straight cutting edge. If you do not want a straight cutting edge, you must hold the shaver at an angle. -
Page 20: Cleaning And Maintenance
Cleaning and maintenance Activating the travel guard − Hold the On/Off switch down for approx. 4 seconds. The shaver will automatically deactivate and the battery symbol will flash four times in green. The travel guard is now active. Deactivating the travel guard Connecting the shaver with the mains adapter and inserting the mains adapter in a socket will automatically deactivate the... -
Page 21: Daily Cleaning After A Dry Shave
Cleaning and maintenance NOTICE! Risk due to improper operation! Improper handling of the shaver may result in damage. − Do not use any aggressive cleaners, brushes with metal or nylon bristles, sharp or metallic cleaning utensils such as knives, hard scrapers and similar items. -
Page 22: Daily Cleaning After A Wet Shave
Cleaning and maintenance 8. Firmly mount the shaver head on the shaver until the locking mechanism audibly engages (see fig. E). 9. Place the protective cap on the shaver. The shaver is now ready for use again. Daily cleaning after a wet shave 1. -
Page 23: Weekly Cleaning
Cleaning and maintenance 11. Firmly mount the shaver head on the shaver until the locking mechanism audibly engages (see fig. E). 12. Place the protective cap on the shaver. The shaver is now ready for use again. Weekly cleaning It is recommended that you thoroughly clean the sha- ver once a week. -
Page 24: User Maintenance For The Shaving Foils
Cleaning and maintenance 11. Use the cleaning brush to completely remove all hair from the shaver blades and the entire top part of the shaver (see fig. H). 12. Thoroughly rinse off the top part of the shaver and the shaver blades under warm running water (see fig. G). -
Page 25: Replacing Wearable Parts
Cleaning and maintenance Replacing wearable parts Ordering wearable parts You can order a new shaving foil unit and shaver blades to replace worn ones. To place your order, contact the address provided on the order form. Replacing the shaving foil unit If the shaving foil unit is damaged, it must be promptly replaced. - Page 26 Cleaning and maintenance 7. Place two fingers on the rear side of the integrated trimmer. 8. Push the shaving foil unit into the shaver head frame until the hooks audibly lock into the shaver head frame. 9. Firmly mount the shaver head on the shaver until the locking mechanism audibly locks into place (see fig. E).
-
Page 27: Storage
Storage 3. Pull the shaver blades straight up and out of their brackets (see fig. I). 4. Dispose of the used shaver blades as described in the chapter “Disposal”. 5. Mount the new shaver blades on the brackets. 6. Firmly mount the shaver head on the shaver until the locking mechanism audibly locks into place (see fig. E). -
Page 28: Technical Data
Technical data Technical data Model: 16113904/16113905 Product code: 93376 Power supply: Mains adapter Input 100–240 V/AC, 50–60 Hz, max. 0.2 A Output 5 V/DC, 800 mA Rechargeable battery: 1× Li-Ion 14430 500 mAh Protected against overloading and deep discharge Charging time: Operating time: max. -
Page 29: Declaration Of Conformity
Declaration of conformity Declaration of conformity The EU declaration of conformity can be requested from the address specified on the warranty card (at the end of this instruction manual). Disposal Disposing of the packaging Dispose of the packaging separated into single type materials. Dispose of cardboard and carton as waste paper and foils via the recyclable material collection service. -
Page 30: Disposing Of Old Devices
Disposal Disposing of old devices (Applicable in the European Union and other European states with systems for the separate collection of reusable waste materials) Old devices must not be disposed of with household waste! If the shaver is no longer operational, every consumer is required by law to dispose of used devices separately from household waste, e.g. -
Page 31: Warranty Card
WARRANTY CARD ELECTRIC SHAVER (CORD/CORDLESS) Your details: Name Address E-mail Date of purchase*: * We recommend you keep the receipt with this warranty card. Location of purchase Description of malfunction: AFTER SALES SUPPORT If after contacting the man- ufacturer you are requested www.aquarius-service.com 00800 - 36 46 36 00 to return the faulty product... -
Page 32: Warranty Conditions
Warranty conditions Dear Customer, The ALDI warranty offers you extensive benefits: Warranty period: 3 years from date of purchase. Costs: Free repair/exchange. No transport costs. Hotline: Free hotline. ADVICE: Please contact our service hotline by phone, e-mail or fax before sending in the device. - Page 33 After the expiry of the warranty period, you still have the possibility to have your product repaired at your own expense. If the repair or the estimate of costs is not free of charge you will be informed accordingly in advance. This warranty does not affect your statutory rights.
- Page 34 PRODUCED IN CHINA FOR: ALDI STORES LTD. PO BOX 26, ATHERSTONE WARWICKSHIRE, CV9 2SH ALDI STORES (IRELAND) LTD.
Need help?
Do you have a question about the ViSage and is the answer not in the manual?
Questions and answers
where will i get the charging cable for visagepro-seriesrotary shaver
The ALDI ViSage Pro Series rotary shaver can be charged using an AC adapter plug. The shaver can be charged either by placing it on the base or by plugging the cord directly into the shaver. Therefore, the charging cable is included with the shaver as either the AC adapter or the cord used for direct charging.
This answer is automatically generated
looking for charging cable
The compatible charging cable for the ALDI ViSage is a 5 V plug that connects to the socket on the bottom of the shaver.
This answer is automatically generated
there was no usb charger included in my kit seriously can you please send one 128 botany rd alexandria nsw 2015