Table of Contents
Advertisement
Advertisement
Table of Contents

Related Manuals for ALDI 15113902


Summary of Contents for ALDI 15113902
- Page 1 User Manual Spend a little Live a lot. MEN’S SHAVER BATTERY/MAINS ID: #05007...
- Page 2 Try it out now Just scan the QR code with your smartphone and find out more about the Aldi product you have purchased.* Your Aldi Service Portal All details mentioned above can also be found in the Aldi Service Portal at www.aldi.co.uk.
-
Page 3: Table Of Contents
Contents Overview ................4 Use ..................5 Scope of delivery/device parts ........6 General information ............7 Reading and storing the instruction manual ....7 Explanation of symbols ............7 Safety ................10 Proper use ................10 Safety notes ................10 First use ................16 Checking the shaver and product contents ....16 Charging the shaver for the first time ......16 Displaying the status ............ -
Page 6: Scope Of Delivery/Device Parts
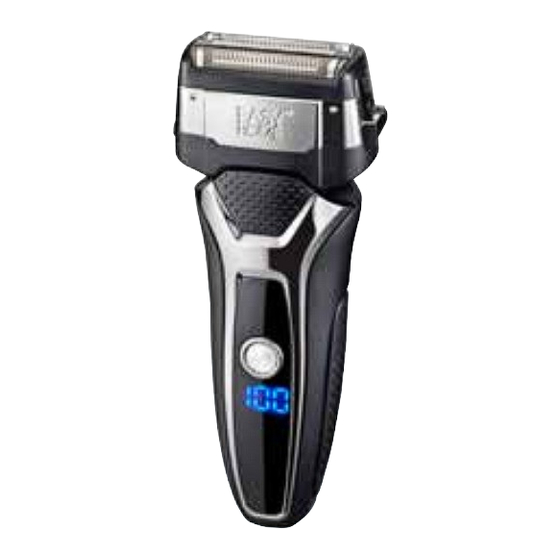
cope of delivery device partS Storage bag Protective cap with 3-day beard Mains cord trimming function Shaving foil unit AC adapter plug Shaver blades, 2x 5 V plug Small release button, 2x Turbo symbol Electronic On/Off switch Mains symbol (with built-in travel lock and turbo function) Lock symbol Female plug... -
Page 7: General Information
General information General information Reading and storing the instruction manual This instruction manual accompanies this men’s shaver battery/mains. It contains important in- formation on start-up and handling. For improved readability, the men’s shaver battery/ mains will be referred to only as the “shaver” below. Before using the shaver, read the instruction manual carefully. - Page 8 General information CAUTION! CAUTION! This signal word designates a hazard with low risk that, if not avoided, may result in minor or moderate injury. NOTICE! NOTICE! This signal word warns against potential dam- ages to property. This symbol provides you with useful additional information on use.
- Page 9 General information This symbol identifies electrical devices that belong to the protection class III (shaver). This symbol indicates the polarity of the current on the 5 V plug. Devices marked with this symbol are only suitable for household use (dry indoor rooms).
-
Page 10: Safety
Safety Safety Proper use The shaver is designed exclusively for dry and wet shaving of the face, but also for trimming beards. The shaver is only suitable for private use and not suitable for commercial purposes. The shaver may only be used in indoor spaces. - Page 11 Safety − Only use the shaver with the enclosed mains adapter. The shaver requires safety extra-low voltage (SELV) with the values specified in the chapter “Technical data”. − Only connect the mains adapter to an easily accessible socket so that you can quickly disconnect it from the mains in case of a failure.
- Page 12 Safety − Keep the shaver, the mains cord and mains plug away from water and other liquids, open flames and hot surfaces. − Never touch the mains plug with damp hands. − Never pull the mains plug out of the socket by the mains cord;...
- Page 13 Safety − Always turn the shaver off and pull the mains plug out of the socket • when you are not using the shaver, • when you are cleaning the shaver, • in the event of a fault or • in the event of a storm. WARNING! Risk of explosion and fire! Handling the rechargeable battery...
- Page 14 Safety WARNING! Danger for children and persons with impaired physical, sensory or mental ca- pacities (e.g. partially disabled persons, older persons with reduced physical and mental capacities) or lack of experience and knowledge (e.g. older children). − This shaver may be used by persons with impaired physical, sensory or mental capacities or those lacking expe- rience and knowledge if they are super-...
- Page 15 Safety CAUTION! Risk of injury due to sharp edges and blades! If you use the shaver with a damaged shav- er head, without a shaver head or if you push down on the shaving foils, you could cut yourself on the sharp edges or blades. −...
-
Page 16: First Use
First use First use Checking the shaver and product contents NOTICE! Risk of damage! If you are not cautious when opening the packaging with a sharp knife or other pointy object, you may damage the shaver. − Be careful when opening. 1. -
Page 17: Displaying The Status
First use Displaying the status The shaver has an indicator – the mains symbol – that supplies information about the power supply or the charge level of the rechargeable battery (see fig. C): Symbol Meaning Battery, illuminated in Indicates the battery charge blue (00 –... -
Page 18: Charging The Rechargeable Battery
Handling Charging the rechargeable battery NOTICE! The rechargeable battery takes approx. 90 minutes to charge fully. However, you can also use the shaver in mains operation without charging the rechargeable battery. 1. Insert the 5 V plug in the female plug on the bottom of the shaver (see fig. -
Page 19: Wet Shave
Handling For a dry shave, follow the steps below: 1. Take the protective cap off of the shaver (see fig. A). 2. Use the electronic On/Off switch to switch the shaver on. 3. Use your free hand to stretch the part of your face you intend to shave. -
Page 20: Using The 3-Day Beard Trimmer Function
Handling 4. While applying gentle pressure, move the shaver head perpendicular to the direction of hair growth. 5. After a few strokes, use your free hand to check the results and repeat step 4 if necessary. 6. Shave as described in steps 2 – 4. 7. -
Page 21: Using The Trimmer
Handling Using the trimmer NOTICE! Keep in mind that the trimmer always gen- erates a straight cutting edge. If you do not want a straight cutting edge, you must hold the shaver at an angle. For hard-to-reach areas or for very precise cuts, use a comb to check the hair you in- tend to trim with the trimmer and the cut length. -
Page 22: Using The Turbo Function
Handling Using the turbo function NOTICE! Risk of damage! Using the turbo function for prolonged peri- ods accelerates the wear of the shaving foils. − Only use the turbo function for short pe- riods and not for the entire shave. −... -
Page 23: Using The Travel Guard
Handling 4. Push and hold the electronic On/Off switch again for ap- prox. 1.5 seconds to deactivate the turbo function again. The shaver will also be switched off when deactivating the turbo function. Using the travel guard The shaver is equipped with a travel guard that pre- vents the shaver from accidentally activating. -
Page 24: Cleaning And Care
Cleaning and care Cleaning and care NOTICE! Risk of short circuit! Water that has penetrated the mains cord or the mains adapter may cause a short circuit. − Never immerse the mains adapter or the 5 V plug in water. NOTICE! Risk of damage! Improperly cleaning the shaver may dam-... -
Page 25: Daily Cleaning After A Wet Shave
Cleaning and care 4. Push the small release buttons to release the shaving foil unit 5. Pull the shaving foil unit up and off (see fig. K). 6. Knock the shaving foil unit out gently over a sink to remove stubble. 7. -
Page 26: Shaving Foil Unit
Cleaning and care 4. Push the small release buttons to release the shaving foil unit 5. Pull the shaving foil unit up and off (see fig. K). 6. Wash the shaving foil unit thoroughly under warm running water on the inside and outside (see fig. G). 7. -
Page 27: Weekly Cleaning
Cleaning and care Weekly cleaning It is recommended that you perform a more thorough cleaning once a week, both for dry and wet shaving. To do so, proceed as follows: 1. Use the electronic On/Off switch to switch the shaver off (see fig. A). 2. -
Page 28: Shaver Head
Cleaning and care 12. Thoroughly wash the shaver head under warm run- ning water from the inside and outside (see fig. G). 13. Depress the large release button to open the (see fig. A and E). shaver head 14. Thoroughly rinse off the shaver blades under warm running water (see fig. H). -
Page 29: User Maintenance For The Shaving Foils
Cleaning and care User maintenance for the shaving foils To maintain the performance of your shaver and in- crease the service life of the shaving foils, you should perform user maintenance on the shaving foils every week, but no less than once a month as follows: 1. -
Page 30: Technical Data
5. Close the shaver head until the locking mechanism audibly locks into place (see fig. F). 6. Place the protective cap on the shaver (see fig. A). Your shaver is now ready for use again. Technical data Model: 15113902 Article number: 92739 AFTER SALES SUPPORT 00800 36463600 www.aquarius-service.com... - Page 31 Technical data Power supply: Mains adapter Input 100 – 240 V/AC, 50 – 60 Hz, max. 0.2 A Output 5 V/DC, 900 mA Rechargeable battery: 1 x Li-Ion 800 mAh Protected against overload- ing and deep discharge Charging time: 90 min. Operating time: max.
-
Page 32: Declaration Of Conformity
Declaration of conformity Declaration of conformity The EU declaration of conformity can be re- quested from the address specified on the warranty card (at the end of this instruc- tion manual). Disposal Disposing of the packaging Dispose of the packaging separated into single type materials. -
Page 33: Disposing Of Old Devices
Disposal Disposing of old devices (Applicable in the European Union and other European states with systems for the separate collection of reusa- ble waste materials) Old devices must not be disposed of with household waste! If the shaver is no longer operational, every consumer is required by law to dispose of used devices separately from household waste, e.g. - Page 34 AFTER SALES SUPPORT 00800 36463600 www.aquarius-service.com...
-
Page 35: Warranty Card
Docdata Fashion Services Model: Product Code: 11/2015 15113902 92739 GmbH Retourenannahme Aquarius Free Hotline. Call charges from a Amshamerstr. 2 mobile phone may be incurred. D- 84385 Egglham... -
Page 36: Warranty Conditions
Warranty conditions Dear Customer, The ALDI warranty offers you extensive benefits. Warranty period: 3 years from date of purchase. 6 months for wear parts and con- sumables under normal and proper conditions of use (e.g. rechargeable batteries). Costs: Free repair/exchange. - Page 37 • Accident or unanticipated events (e.g. light- ning, water, fire). • Improper use or transport. • Disregard of the safety and maintenance instructions. • Other improper treatment or modification. After the expiry of the warranty period, you still have the possibility to have your product repaired at your own ex- pense.
- Page 40 PRODUCED IN CHINA FOR: ALDI STORES LTD. PO BOX 26, ATHERSTONE WARWICKSHIRE, CV9 2SH ALDI STORES (IRELAND) LTD. PO BOX 726, NAAS, CO. KILDARE.
Need help?
Do you have a question about the 15113902 and is the answer not in the manual?
Questions and answers