DSC PC585 Installation Manual
Hide thumbs
Also See for PC585:
- Installation manual (52 pages) ,
- User manual (24 pages) ,
- Instruction manual (21 pages)
Table of Contents
Advertisement
Advertisement
Table of Contents

Related Manuals for DSC PC585


Summary of Contents for DSC PC585
- Page 1 • W A R N I N G • This manual contains information on limitations regarding product use and function and information on the limitations as to liability of the manufacturer. The entire manual should be carefully read. Installation Manual Software Version 2.1 DLS-1 v6.5 and up...
-
Page 2: Out Of Warranty Repairs
Installer’s Lockout Telephone Lines Any products returned to DSC which have the Installer’s Lockout option enabled and If telephone lines are used to transmit alarms, they may be out of service or busy for certain periods of time. Also an intruder may cut the telephone line or defeat its operation by more sophisticated means exhibit no other problems will be subject to a service charge. -
Page 3: Table Of Contents
Table of Contents PC585 Control Panel Wiring Diagram Communicator – Reporting Codes ........17 Communicator – Reporting Formats ......... 18 Section 1: System Introduction 5.10 Downloading ..............19 Specifications ..............1 5.11 PGM Output Options ............20 Additional Devices .............. 2 5.12 Telephone Line Monitor (TLM) .......... -
Page 4: Pc585 Control Panel Wiring Diagram
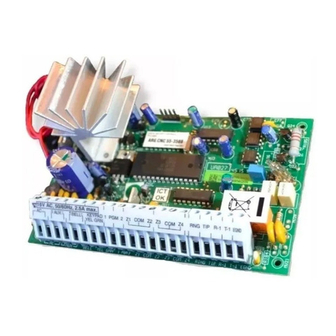
PC585 Control Panel Wiring Diagram PC585 Control Panel Wiring Diagram Incorrect connections may result in fuse failure or improper operation. Inspect wiring and ensure connections are correct before applying power. Do not route any wiring over circuit boards. Maintain at least 1”... -
Page 5: Section 1: System Introduction
• Eight wireless zones available using the PC5132 Wireless number Receiver System Supervision Features Audible Alarm Output The PC585 continuously monitors a number of possible trouble • 700mA Supervised Bell Output (current limited at 3 amps), conditions including: • AC power failure • Steady or Pulsed Output •... -
Page 6: Additional Devices
DSC module compatibility table. Cabinets PC5132 Wireless Receiver Several different cabinets are available for the PC585 modules. The PC5132 Wireless Receiver can be used to connect up to 8 They are as follows: wireless devices to the system. All devices are spread spectrum, 900 MHz, fully supervised devices which use standard ‘AAA’... -
Page 7: Section 2: Getting Started
Do not connect the battery until all other wiring is mounting studs into the cabinet from the back. After you have complete. Connect the battery before connecting attached the cabinet to the wall, stick the provided DSC logo the AC. sticker on the front of the cabinet. -
Page 8: Keybus Operation And Wiring
Accessories Zone Input Terminals – Z1 to Z4 In order for the PC585 system to operate properly, the power output Each detection device must be connected to a zone on the capabilities of the main control and the expansion devices must not control panel. -
Page 9: Supervision
After assigning all keypads, perform a supervisory reset by If you change the zone supervision options from entering section [902] in installer’s programming. The panel will DEOL to EOL or from NC to DEOL (section [013], now supervise all assigned keypads and enrolled modules on options [1] or [2]), you should power down the the system. -
Page 10: Fire Zone Wiring
LINKS Supervision (24 Hour Supervisory) When using the LINKS1000 cellular communicator, any main board zone may be configured for LINKS Supervision. Program this zone as zone type [09], 24 Hour Supervisory in section [001]. With a LINKS Supervisory zone, This option can only be selected if Normally if the LINKS1000 experiences a Closed (NC) detection devices or contacts are being used. - Page 11 Keypad zones do not support DEOL resistors. Assigning Keypad Zones When using keypad zone inputs, each input used must be assigned a zone number in Installer’s Programming. First, ensure that you have enrolled all installed keypads into the desired slots. (See Section 2.5 “Keypad Enrollment.”) Next, enter programming section [020] to assign the zones.
-
Page 12: Section 3: Keypad Commands
Use any system keypad to enter commands and/or program the Time of Day. For programming the clock and auto-arm times, PC585 security system. The LED keypad uses function and zone see Section 3.4 (“[ ] [6] User Functions”). indicator lights to represent alarm functions and status. If you When the system’s internal clock matches the Auto-Arm Time,... - Page 13 [ ] [2] Trouble Display an alarm to the panel if required to do so (if a fire zone is open, The panel constantly monitors itself for several different trouble or there is a short on a DEOL zone, or a supervisory fault on conditions.
- Page 14 For a description of how to program access codes from LCD or • [4] – System Test LED keypads, see the PC585 Instruction Manual. When [4] is pressed the panel will test the bell output, keypad Master Code – Access Code (40) lights and the communicator for two seconds.
-
Page 15: Function Keys
resetting smoke detectors. Smoke detectors should now be “Exit” – (16) Activate Quick Exit programmed as output [03] “Sensor Reset”. If using output option The panel will activate the Quick Exit feature (See Section 3.4 – [03], do not program [20] Command Output Option #2. Please “[ ] [0] Quick Exit”). -
Page 16: Section 4: How To Program
How to Program The following section of the manual describes the Installer’s Programming Decimal Data Programming function and how to program the various sections. A set number of programming boxes are allotted for each section requiring decimal data (e.g.: codes, telephone numbers). You must read the following section of the manual If a digit is entered for each program box, the panel will very carefully before you begin programming. -
Page 17: Programming Toggle Option Sections
Programming Toggle Option Sections The keypad displays the information using a binary format, according to the following chart: Some programming sections contain several toggle options. The panel will use zone lights 1 through 8 to indicate if the Hex Data Entry* different options are enabled or disabled. -
Page 18: Section 5: Program Descriptions
Program Descriptions The following section explains the operation of all programmable [03] Instant Zone This zone type will cause an instant alarm if it is violated when features and options and provides a summary of all the panel is armed. Typically, this zone is used for windows, corresponding programming locations. -
Page 19: Zone Attributes
A violated Fire zone will be displayed on all keypads and can be [24] LINKS Answer Zone delayed at any keypad. Typically this zone is used for latching Downloading can be performed via the LINKS1000 Cellular smoke detectors. Communicator (if used) when the conventional telephone line is disconnected. -
Page 20: Assigning Keypad Zones
There are two account numbers programmable b) if no dial tone is found, the panel will hang up and wait for for the PC585. 20 seconds ○ ○ ○ ○ ○ ○ ○ ○ ○ ○ ○ ○ ○ ○ ○ ○ ○ ○ ○ ○ ○ ○ ○ ○ ○ ○ ○ ○ ○ ○ ○ ○... -
Page 21: Communicator - Reporting Codes
to call the central station. If the option is disabled, the panel will option is not selected, the panel will immediately send the Zone only attempt to call the Third telephone number after failing to Restoral Reporting Code when the zone is secured, regardless communicate with the first telephone number. -
Page 22: Communicator - Reporting Formats
armed within the number of days programmed for the 2. When programming account numbers, enter four digits. Delinquency Transmission Cycle. When programming a three digit account number, the fourth digit must be programmed as ‘0’. If the Delinquency Transmission Cycle is set for one •... -
Page 23: Downloading
Do not use the digit C in a reporting code when SIA is a specialized format that will communicate information using Pager Format. In most cases, the digit C quickly using Frequency Shift Keying (FSK) rather than pulses. will be interpreted as a [#], which will terminate The SIA format will automatically generate the type of signal being the page before it has finished. -
Page 24: Pgm Output Options
a downloading call. If the One Time 1-hour User Enabled DLS [01] Burglary and Fire Bell Output Window option is enabled, when the user opens the DLS The output will activate when the alarm output is active and will window with [ ][6][Master code][5], the DLS window will stay deactivate when the alarm output is silenced. -
Page 25: Pgm Output Attributes
[10] System Event (Strobe Output) [13] Kissoff Output The output will activate for two seconds after the control panel The output activates when any of the selected system events (alarms) occur on the system. receives the kissoff transmission from the central station. [14] Ground Start Pulse This output will activate for silent and audible The PGM Output will activate for two seconds to obtain a dial tone... -
Page 26: Telephone Line Monitor (Tlm)
[5] ... Access Code Req. No code Req. by beeping the keypad twice every 10 seconds to alert the Attribute ON: the output requires a code for owner of the problem. The panel can send a Bell Circuit activation. Trouble and Trouble Restoral reporting codes to indicate the Attribute OFF: no code required. -
Page 27: Fire, Auxiliary And Panic Keys
○ ○ ○ ○ ○ ○ ○ ○ ○ ○ ○ ○ ○ ○ ○ ○ ○ ○ ○ ○ ○ ○ ○ ○ ○ ○ ○ ○ ○ ○ ○ ○ Closing Confirmation, if enabled, will cause the keypad to Transmission Delay Time ........ -
Page 28: Swinger Shutdown
will pulse the keypad sounder during the last 10 seconds to panel will lock out all keypads for the Lockout Duration and log warn the user the system is about to go into alarm. If there was the event to the Event Buffer. For the duration of the Lockout, the an alarm during the armed period, the keypad will pulse for the panel will sound an error tone when any key is pressed. -
Page 29: Links1000 Cellular Communicator
Example: [Special Preamble][Regular Preamble][Telephone The Auto Arm cancellation code is not transmit- Number] ted when a reset is required because a User has not cancelled the Auto Arming sequence. If this Special Preamble is programmed, it will be ○ ○ ○ ○ ○ ○ ○ ○ ○ ○ ○ ○ ○ ○ ○ ○ ○ ○ ○ ○ ○ ○ ○ ○ ○ ○ ○ ○ ○ ○ ○ ○ inserted before the Regular Preamble of ALL Keypad Tamper Enable ...... -
Page 30: Timebase
○ ○ ○ ○ ○ ○ ○ ○ ○ ○ ○ ○ ○ ○ ○ ○ ○ ○ ○ ○ ○ ○ ○ ○ ○ ○ ○ ○ ○ ○ ○ ○ To enable or disable Installer’s Lockout, perform the Clock Adjust ............ -
Page 31: Programming Worksheets
Telephone: ____________________________________________ Installation Date: _______________________________________ Installer’s Code: ________________________________________________________________________________________________ Module Name Description Location PC585 Main Panel I _ __ ___ ___ ___ ___ ___ ___ ___ ___ ___ ___ __ _________________________________________________ _ _ _ _ _ _ _ _ _ I PC5132 Wireless Receiver... -
Page 32: Keypad Programming
Keypad Programming [000] Keypad Enrollment (Section 2.5 “Keypad Enrollment”) NOTE: This must be done at each keypad requiring programming. [0] Slot [Valid entries are 11-18; ie. enter [11] for slot 1, [12] for slot 2, etc.] [1] Function Key 1 Assignment (Valid entries are 00-17) [2] Function Key 2 Assignment (Valid entries are 00-17) [3] Function Key 3 Assignment (Valid entries are 00-17) [4] Function Key 4 Assignment (Valid entries are 00-17) - Page 33 [005] System Times Default [001-255] Entry Delay 1 (in seconds) (Section 5.18 “Entry/Exit Delay Options”) I _ ______I _ ______I _ ______I Entry Delay 2 (in seconds) (Section 5.18 “Entry/Exit Delay Options”) I _ ______I _ ______I _ ______I Exit Delay (in seconds) (Section 5.18 “Entry/Exit Delay Options”) I _ ______I _ ______I _ ______I Bell Cut-off (in minutes)
- Page 34 [014] Second System Option Code Default Option Section Arm / Disarm Bell Squawk enabled Arm / Disarm Bell Squawk disabled 5.17 I _ _ ______I Bell Squawk During Auto Arm No Bell Squawk During Auto Arm 5.18 I _ _ ______I Bell Squawk On Exit Delay No Bell Squawk On Exit Delay 5.18...
-
Page 35: Advanced System Programming
[030] Zone Loop Response Options Default Option Section Zone 1 is Fast Loop Response Zone 1 is Normal Loop Response 5.24 I _ _ ______I Zone 2 is Fast Loop Response Zone 2 is Normal Loop Response 5.24 I _ _ ____ __I Zone 3 is Fast Loop Response Zone 3 is Normal Loop Response 5.24... - Page 36 PGM Output Attributes (Section 5.11 “PGM Output Options”) Program only the following attributes for the PGM Options listed. All others will be ignored. PGM Options are programmed in section [009]. PGM Attribute Defaults (Y = Attribute ON; N = Attribute OFF): Attribute: Output enabled —...
-
Page 37: Communicator Programming
[202] Zone Assignments (Section 5.2 “Zone Programming”) Program Zone Definitions in section [001] and Zone Attributes in sections [101] - [108]. Program Keypad Zone Assignments in section [020]. Any zones not used on the system should be disabled in this section. Disabled wireless zones should have a blank serial number (ie. - Page 38 [329] Priority Alarm and Restoral (Section 5.8 “Communicator – Reporting Codes” and Appendix A) Keypad Fire Alarm Keypad Fire Restoral I _ _ _____I _ _ _____I I _ _ _____I _ _ _____I Keypad Auxiliary Alarm Keypad Auxiliary Restoral I _ _ _____I _ _ _____I I _ _ _____I _ _ _____I Keypad Panic Alarm...
- Page 39 [343] Miscellaneous Closing (Arming) Reporting Codes (Section 5.8 “Communicator – Reporting Codes” and Appendix A) Closing by Duress Code 33 Closing by Supervisory Code 42 I _ _ _____I _ _ _____I I _ _ _____I _ _ _____I Closing by Duress Code 34 Partial Closing I _ _ _____I _ _ _____I I _ _ _____I _ _ _____I...
- Page 40 [351] Miscellaneous Maintenance Reporting Codes (Section 5.8 “Communicator – Reporting Codes” and Appendix A) Telephone Number 1 Failure to Communicate Restore I _ _ _____I _ _ _____I Telephone Number 2 Failure to Communicate Restore I _ _ _____I _ _ _____I Event Buffer is 75% Full Since Last Upload I _ _ _____I _ _ _____I DLS Lead IN...
- Page 41 [367] System Maintenance Alarm/Restore Communicator Call Directions (Section 5.5 “Communicator – Dialing”) Default Option 1st Telephone Number Disabled I _ _______I 2nd Telephone Number Disabled I _ _______I 1st Telephone Number (via LINKS) Disabled I _ _______I 2nd Telephone Number (via LINKS) Disabled I _ _______I For Future Use...
-
Page 42: Downloading Options
[381] Second Communicator Option Code Default Option Section Open After Alarm Kypd Ringback enabled Open After Alrm Kypd Ringback disabled 5.17 I _ ______I Open After Alarm Bell Ringback enabled Open After Alrm Bell Ringback disabled 5.17 I _ ______I SIA Sends Programmed Rep. -
Page 43: International Programming
[993] Restore LINKS2X50 Factory Default Programming (Section 5.30 “Resetting Factory Defaults”) [996] Restore PC5132 Factory Default Programming (Section 5.30 “Resetting Factory Defaults”) [997] Restore PC5400 Factory Default Programming (Section 5.30 “Resetting Factory Defaults”) [999] Restore PC585 Factory Default Programming (Section 5.30 “Resetting Factory Defaults”) -
Page 44: Appendix A: Reporting Codes
Reporting Codes The following tables contain Contact ID and Automatic SIA format SIA Format - Level 2 (Hardcoded) reporting codes. The SIA communication format used in this product follows the level 2 specifications of the SIA Digital Communication Contact ID Standard - January 1996. - Page 45 Section Reporting Code Code Sent When... Dialer Contact SIA** Direction* [349-350] AC Line Trouble/Rest. AC power to control panel is disconnected or interrupted/AC MA/R (3) A1 AT-00/AR-00 power restored (Both codes follow AC Failure Comm. Delay.) [349-350] Main Bell Trouble/Rest. open circuit detected across bell terminals/bell circuit closed MA/R (3) 21...
-
Page 46: Appendix B: Programming Lcd Keypads
Programming LCD Keypads If you have an LCD5500Z Keypad, additional programming is required for proper operation. The following is a description of the available programming options and their accompanying programming sections: How to Enter LCD Programming Follow the programming procedure as outlined in Section 4 by pressing [ ] [8] [Installer’s Code]. Press the [ ] key. Enter the two digit Section number to be programmed. - Page 47 [61] Second User Display Mask Default Option Installer Programming prompt ON Installer Programming prompt OFF I _ _ _____I Stay Arm prompt ON Stay Arm prompt OFF I _ _ _____I Quick Arm prompt ON Quick Arm prompt OFF I _ _ _____I Interior Arm prompt ON Interior Arm prompt OFF I _ _ _____I...
-
Page 48: Pc585 V2.1 Module Compatibility
PC585 v2.1 Module Compatibility The following chart indicates which DSC modules are compatible with this control panel. e r i i t n e i f e r i ; t r n i t © 1998 Digital Security Controls Ltd.
Need help?
Do you have a question about the PC585 and is the answer not in the manual?
Questions and answers