Table of Contents
Advertisement
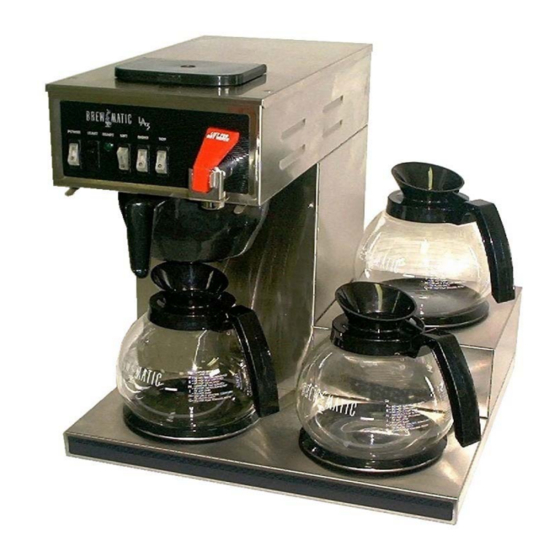
COMK211
Installation & Operating
Instructions
LA-3
Automatic Coffee Brewer With Faucet
Models: 1034505 & 1034506
1034516
Brewmatic
20333 S. Normandie Ave., Torrance, CA 90502
310-787-5444 · 800-421-6860 · Fax 310-787-5412
U.S.A. E-mail: brew@brewmaticusa.com
Int'l E-mail: brew_equip@brewmaticusa.com
Instruction Number: 9600107
3/03
Advertisement
Table of Contents

Related Manuals for Brewmatic LA-3


Summary of Contents for Brewmatic LA-3
- Page 1 COMK211 Installation & Operating Instructions LA-3 Automatic Coffee Brewer With Faucet Models: 1034505 & 1034506 1034516 Brewmatic 20333 S. Normandie Ave., Torrance, CA 90502 310-787-5444 · 800-421-6860 · Fax 310-787-5412 U.S.A. E-mail: brew@brewmaticusa.com Int’l E-mail: brew_equip@brewmaticusa.com Instruction Number: 9600107 3/03...
- Page 2 Do Not By-Pass Any Safety Mechanisms Or Operate This Appliance Without Covers In Place. Brewmatic requires that all safety devices and covers be in place and functioning at all times to guard against a fire hazard and the risk of personal injury.
-
Page 3: Appliance Information
COMK211 Appliance Information Appliance Specifications: Model Numbers: 1034505, 1034506, 1034516, Description: LA-3 Automatic Coffee Brewer With Faucet Dimensions: 16-1/8"w x 17"h X 15-3/4"d Volts: Watts: 1700 Amps: 14.2 Hertz: Phase: Power Supply Cord: 6 Ft., 2 wire + ground, 15 amp, 14 awg. - Page 4 COMK211 Control Locations And Descriptions Water Inlet Fitting. The incoming water supply connects here. Power Supply Cord. Connect this cord to an appropriate wall receptacle. Pour-In Opening. (Except CCP models 1034525 & 1034526) Pour water in here during installation to fill the water tank. Hot Water Faucet.
-
Page 5: Installation Instructions
Set Up: 1. Check the contents of the package carefully. In addition to the coffee brewer and these instructions, the following items should be present. If any item is missing, contact Brewmatic to arrange for a replacement. Brew cone. (Installed on Coffee Brewer.) Clean out spring. -
Page 6: Filling The Water Tank
COMK211 4. Form three coils of 1/4" OD copper tubing (not supplied). The coils will allow the coffee brewer to be moved easily for cleaning or servicing. Fig. 3. Typical water line connection. 5. After installing the desired components onto the incoming water line, flush the water line to remove any impurities which may be present in the line, and to flush an inline water filter, if installed. -
Page 7: Electrical Connection
COMK211 12. To fill the water tank, pour three decanters of water into the pour-in opening (Fig. 6), waiting approximately 1 minute between each decanter. Note: (For CCP models 1034525 & 1034526 only.) Remove the top cover and pour the water directly in to the reservoir. - Page 8 COMK211 19. Empty the water from the decanter, and put the decanter back on the warmer under the brew cone. Testing The Brewing Temperature And Volume: Fig. 11. Ready light. 20. Wait for the "Ready" light (Fig. 11) to come on again. This will occur in approximately 5 minutes.
-
Page 9: Operating Instructions
COMK211 Operating Instructions Caution: Read these instructions completely before operating this coffee brewer. Caution: Make sure the installation instructions have been followed before attempting to operate this coffee brewer. Incorrect installation or operating procedures will void the warranty and may cause damage to this coffee brewer. -
Page 10: Making Coffee
COMK211 Making Coffee: 6. Press the “Start” switch (Fig. 18) momentarily, and release it. In approximately a minute, fresh hot coffee will begin to flow from the brew cone into the decanter. WARNING: Hot coffee can cause serious burns. Handle hot Fig. - Page 11 Under no circumstance should the operator attempt to open or service this unit. If this coffee brewer should fail to function properly, unplug it and contact your nearest Brewmatic Representative or you can contact Brewmatic direct at 800-421-6860.
-
Page 12: Maintenance And Cleaning
COMK211 Maintenance And Cleaning Caution: Only those persons trained and qualified in equipment repair should attempt to open and clean the inside of this coffee brewer. Caution: Turn the power switch off, unplug the power supply cord and allow the coffee brewer to cool before cleaning. Note: Do not use abrasive or harsh cleaners as they may damage the finish of this coffee brewer. - Page 13 COMK211 Adjustments Warning: Make sure installation instructions have been followed before attempting to adjust this equipment. Warning: Turn off the "Power" switch, unplug the power supply cord and allow the coffee brewer to cool before servicing unless electrical testing is required. Note: Allow the coffee brewer to heat up to brewing temperature before testing this equipment.
-
Page 14: Adjusting The Timer
COMK211 Adjusting The Timer: (See fig. 29) Remove the front access panel. (Fig. 26, item 2). Turn the timer adjustment knob clockwise to increase the time (water volume) and counterclockwise to decrease the time (water volume). Turn the adjustment knob 1/2 reference mark maximum per adjustment. -
Page 15: Troubleshooting
COMK211 Troubleshooting Service should be performed by qualified service personnel only. Warning: Turn off the "Power" switch, unplug the power supply cord and allow the coffee brewer to cool before servicing unless electrical testing is required. Warning: Make sure installation instructions have been followed before attempting to test this coffee brewer. - Page 16 COMK211 Symptom Possible Causes Remedies Water deposits may be plugging the Clean the spray head and use the 5. Incorrect or inconsistent spray head or internal tubing. clean out spring. See the Maintenance And Cleaning section. beverage level. The brew volume may not be Adjust the timer.
- Page 17 If the steps in this trouble shooting guide should fail to solve your problem, unplug the coffee brewer and contact your nearest Brewmatic Representative or you can contact Brewmatic direct at 800-421- 6860. This trouble shooting guide is for the installers use only.
-
Page 18: Limited Warranty
Brewmatic warrants this product to be free of defects in material and workmanship for a period of one (1) year from the original date of purchase. Within this warranty period, Brewmatic will repair or replace, at its option, any part providing it's defective in material or workmanship. Labor is included within this warranty only during the first ninety (90) days of the warranty period. - Page 19 COMK211 20333 S. Normandie Ave., Torrance, CA 90502 310-787-5444 · 800-421-6860 · Fax 310-787-5412 U.S.A. E-mail: brew@brewmaticusa.com Int’l E-mail: brew_equip@brewmaticusa.com...
Need help?
Do you have a question about the LA-3 and is the answer not in the manual?
Questions and answers