
Related Manuals for Motorola CL1I series


Summary of Contents for Motorola CL1I series
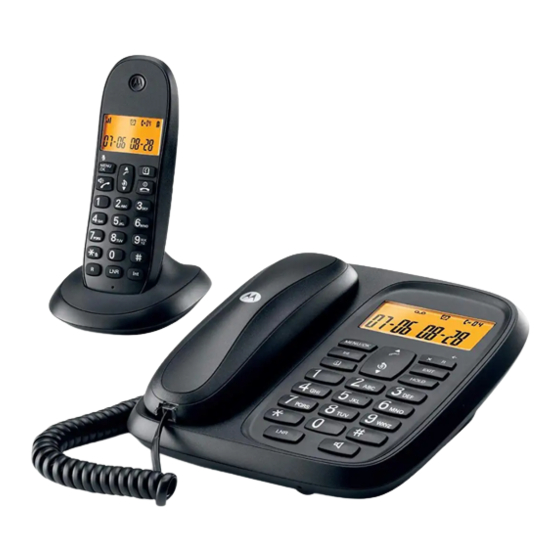
- Page 1 Corded Telephone with Digital Cordless Handset Motorola CL1I Models: CL101I, CL102I, CL103I and CL104I Warning: Charge the handset for 24 hours before use.
- Page 2 Welcome... to your new Motorola CL1I Corded Telephone with Digital Cordless Handset! • Dial on the corded base or cordless handset. • Emergency mode to make calls on the corded base without AC power. • Bright backlit display on the corded base and cordless handset.
- Page 3 This user guide provides you with all the information you need to get the most from your phone. To set up your phone, follow the simple instructions in ‘Getting Started’, on the next few pages. IMPORTANT • Only use the telephone line cord supplied. •...
-
Page 4: Table Of Contents
1. Getting started ..............7 2. Getting to know your phone ..........11 Using your corded base ............17 3. Using the phone ..............17 Calls .......................17 3.1.1 Make a call ...................17 3.1.2 Preparatory dialling ................17 3.1.3 End a call .....................17 3.1.4 Receive a call ..................17 Adjust the earpiece volume................17 Hold ........................17 Intercom......................18... - Page 5 Dial mode.......................24 Flash time .......................24 PABX access code ..................24 Area code .......................24 6.10 Restore default settings .................25 6.11 Default settings ....................26 7. Registration .................27 Register an additional handset ..............27 De-register a handset ..................27 Using your cordless handset .............28 8. Using the phone ..............28 Switch the cordless handset on / off .............28 Calls .......................28 8.2.1...
- Page 6 10. Caller ID and the Calls list ..........33 10.1 Caller ID ......................33 10.2 Calls list ......................33 10.2.1 View the Calls list ................33 10.2.2 Dial a number in the Calls list ............33 10.2.3 Copy a number to the phonebook ..........33 10.2.4 Delete an entry ..................33 10.2.5 Delete the entire Calls list ..............34...
-
Page 7: Getting Started
1. Getting started IMPORTANT Do not place your CL1I in the bathroom or other humid areas. Location You need to place your CL1I base within 2 metres of the mains power and telephone wall sockets so that the cables will reach. The socket-outlet shall be installed near the equipment and shall be easily accessible. - Page 8 1. Plug the telephone line cord into the socket marked on the rear of the base. 2. Plug the power adaptor into the socket marked on the rear of the base and plug the other end into the mains power wall socket. Switch on the mains power. 3.
- Page 9 IMPORTANT Warning! Use only the approved rechargeable Ni-MH battery cells supplied with your CL1I. BATTERY LOW WARNING If flashes on the display and you hear a warning beep every minute during a call, you will need to recharge the handset before you can use it again. When charging, will scroll on the display.
-
Page 10: Date And Time
Date and time If you have subscribed to a Caller ID service and it is FSK mode, the date and time is set automatically when you receive your first call. If you do not have Caller ID service, you can set the date and time manually. Set the date and time on the handset 1. -
Page 11: Getting To Know Your Phone
2. Getting to know your phone Overview of your cordless handset A Earpiece Display See page 12 for an overview of the display icons. C Menu / OK / Mute Press to open the Menu. Press to select menu options and to confirm a displayed option. Press to switch mute on / off during a call. - Page 12 E Volume down / Scroll down / Redial list During a call, press to decrease the volume of the caller. Press to scroll through the menu options, redial list, calls list and phonebook entries. In standby mode, press to open the redial list. * / Keypad lock Press and hold to lock / unlock the keypad.
- Page 13 Cordless handset display Indicates signal strength. Indicates the phone is in use. Indicates hands-free is activated. Indicates the mute is switch on. Alarm is on. Indicates the phonebook is open. Indicates the redial list is open. Indicates there is a missed call. Indicates the incoming calls list is open.
- Page 14 Overview of your corded handset Earpiece To listen to your caller. Microphone To speak to your caller. Curly cord socket Where you plug in your curly cord. Corded base display On to indicate new voicemail messages. Off when you have no voicemail messages. Local code mode.
-
Page 15: Overview Of The Corded Base
Overview of the corded base A Menu / OK Press to select or confirm a displayed option. Intercom Used to make internal calls and transfer calls to handsets. C Phonebook Press to enter the phonebook. Dial a *. E Redial / Pause Press to redial the last number dialled. - Page 16 Exit Press to return to standby. J Hold During a call press to put the caller on hold. K Volume Down / Scroll down / Redial list Press to decrease the volume of the caller. In standby mode, press to open the redial list. Scroll down through the redial list and calls list.
-
Page 17: Using Your Corded Base
Using your corded base 3. Using the phone NOTE Your corded base will automatically time the duration of all external calls. The call timer will immediately display once you take the call. When the call ends, the total duration of your talk time is shown for 6 seconds. -
Page 18: Intercom
NOTE The hold feature does not mute the call, if you speak very loudly you may still be heard. If you are using the handset and place a caller on hold, you can place the handset on the base and the call remains on hold. When you lift the handset again the call will resume automatically. -
Page 19: Copy A Redial List Number To The Phonebook
2. Scroll to the entry you want. 3. Either lift the corded handset or press to automatically dial the selected number. If you are on hands-free dialling and monitoring once the call is answered lift the handset to talk. NOTE To call the last number dialled lift the handset or press and then press . -
Page 20: Phonebook
4. Phonebook You can store up to 40 numbers in the corded base. Numbers can be up to 24 digits long. Store a number 1. Dial the number using the keypad. 2. Press . The display shows 3. Press to confirm. View or dial an entry 1. -
Page 21: Caller Id And The Calls List
5. Caller ID and the Calls list IMPORTANT To use Caller ID, you must first subscribe to the service from your network provider. A subscription fee may be payable. Caller ID If you have subscribed to a Caller ID Service, you will be able to see your caller’s number on your base (provided it is not withheld) prior to answering the call. -
Page 22: Delete The Entire Calls List
3. Press 4. Press to return to standby. 5.2.5 Delete the entire Calls list 1. Press to open the Calls list. 2. Press and hold for 3 seconds. 3. The display shows CALL. Caller ID and the Calls list... -
Page 23: Base Settings
6. Base settings Set the ringer melody You can set different ringer melodies for your calls. Choose from 18 different ringer melodies. You will hear a sample ring as you scroll to each ring melody. 1. Press . The display shows 2. -
Page 24: Contrast
5. Scroll to the correct minute and press to confirm. NOTE Once the alarm is set it will go off daily until it is set to off. Contrast You can change the contrast of your base display. There are 5 levels to choose from. 1. -
Page 25: Restore Default Settings
2. Scroll and press 3. Scroll / OFF. 4. If you select using the keypad enter the area code and press to confirm. NOTE If you want to change the area code use to delete the old number and then use the keypad to type the new code. -
Page 26: Default Settings
6.11 Default settings Base speaker volume Ringer melody Melody 15 Ringer volume Ear volume Calls list Empty Redial list Empty Alarm Dial mode Tone Flash time 300 ms Base settings... -
Page 27: Registration
7. Registration You can register up to 4 cordless handsets to your CL1I corded base to extend your phone system without having to install extension sockets for each new phone. The CL1I cordless handset comes pre-registered to the base. If you have purchased an additional handset separately, you must register it to your CL1I base before it can be used. -
Page 28: Using Your Cordless Handset
Using your cordless handset 8. Using the phone NOTE Your cordless handset will automatically time the duration of all external calls. The call timer will display after the first 6 seconds of your call. When the call ends, the total duration of your talk time is shown for 3 seconds. -
Page 29: Intercom
Intercom 8.5.1 Make an internal call You can make internal calls between the base and handset, or if you have more than one handset registered to the base, you can make internal calls between two handsets. 1. Press on the handset. 2. -
Page 30: Hands-Free Speakerphone
Hands-free speakerphone Hands-free lets you talk to your caller without holding the handset. It also enables other people in the room to listen to the conversation over the loudspeaker. 8.6.1 Make a hands-free call 1. Dial the number and then press twice. -
Page 31: Delete An Entry
8.7.3 Delete an entry 1. Press to open the Redial list. 2. Scroll to the entry you want to delete. 3. Press 4. Press to return to standby. 8.7.4 Delete the entire Redial list 1. Press to open the Redial list. 2. -
Page 32: Phonebook
9. Phonebook You can store up to 40 numbers in the cordless handset. Numbers can be up to 24 digits long. Store a number 1. Dial the number using the keypad. 2. Press . The display shows 3. Press to confirm. View or dial an entry 1. -
Page 33: Caller Id And The Calls List
10. Caller ID and the Calls list IMPORTANT To use Caller ID, you must first subscribe to the service from your network provider. A subscription fee may be payable. 10.1 Caller ID If you have subscribed to a Caller ID Service, you will be able to see your caller’s number on your handset (provided it is not withheld) prior to answering the call. -
Page 34: Delete The Entire Calls List
10.2.5 Delete the entire Calls list 1. Press to open the Calls list. 2. Press and hold for 3 seconds. 3. The display shows CALL. Caller ID and the Calls list... -
Page 35: Handset Settings
11. Handset settings 11.1 Set the ringer melody You can set different ringer melodies for your calls. Choose from 18 different ringer melodies. You will hear a sample ring as you scroll to each ring melody. 1. Press . The display shows 2. -
Page 36: Contrast
4. If you select scroll to the correct hour and press 5. Scroll to the correct minute and press to confirm. NOTE Once the alarm is set it will go off daily until it is set to off. 11.5 Contrast You can change the contrast of your handset display. -
Page 37: Default Settings
11.8 Default settings Key beep Ringer melody Melody 15 Ringer volume Hands-free volume Ear volume Calls list Empty Redial list Empty Alarm Keypad lock Handset settings... -
Page 38: Registration
12. Registration You can register up to 4 cordless handsets to your CL1I corded base to extend your phone system without having to install extension sockets for each new phone. The CL1I cordless handset comes pre-registered to the base. If you have purchased an additional handset separately, you must register it to your CL1I base before it can be used. -
Page 39: Help
13. Help No dial tone • Use only the telephone line cord supplied. • Check that the telephone line cord is connected properly. • Check that the mains power is connected properly and switched on. No display on the corded base •... - Page 40 Handset does not ring • The handset ringer volume may be set to Off, see page 35. Base unit does not ring • The base ringer volume may be set to Off, see page 23. Noise interference on my phone or on other electrical equipment nearby •...
-
Page 41: General Information
14. General information IMPORTANT This product is intended for connection to analogue public switched telephone networks and private switchboards in India. Important safety instructions Follow these safety precautions when using your phone to reduce the risk of fire, electric shock, and injury to persons or property: 1. -
Page 42: Installation Guidelines
Installation guidelines 1. Read and understand all instructions and save them for future reference. 2. Follow all warnings and instructions marked on the product. 3. Do not install this product near a bath tub, sink, or shower. 4. Operate this phone using only the power source that is indicated on the marking label. If you are unsure of the power supply to your home, consult with your dealer or local power company. -
Page 43: Product Disposal Instructions
Consumer Products and Accessories Warranty Thank you for purchasing this Motorola branded product manufactured under license by Suncorp Technologies Limited, 3001-3005 China Resources Building, 26 Harbour Road, Wan Chai, Hong Kong. (“SUNCORP”) - Page 44 WARRANTY IS THE EXCLUSIVE REMEDY OF THE CONSUMER, AND IS PROVIDED IN LIEU OF ALL OTHER WARRANTIES, EXPRESS OF IMPLIED. IN NO EVENT SHALL MOTOROLA OR SUNCORP BE LIABLE, WHETHER IN CONTRACT OR TORT (INCLUDING NEGLIGENCE) FOR DAMAGES IN EXCESS OF THE PURCHASE...
-
Page 45: Connecting To A Switchboard
Use of Non-Motorola Branded Products and Accessories. Defects or damage that result from the use of Non-Motorola branded or certified Products or Accessories or other peripheral equipment are excluded from coverage. Unauthorized Service or Modification. Defects or damages resulting from service,... - Page 46 Manufactured, distributed or sold by Suncorp Technologies Ltd., official licensee for this product. MOTOROLA and the Stylized M Logo are trademarks or registered trademarks of Motorola Trademark Holdings, LLC. and are used under license. All other trademarks are the property of their respective owners.
Need help?
Do you have a question about the CL1I series and is the answer not in the manual?
Questions and answers