Table of Contents
Advertisement
TM
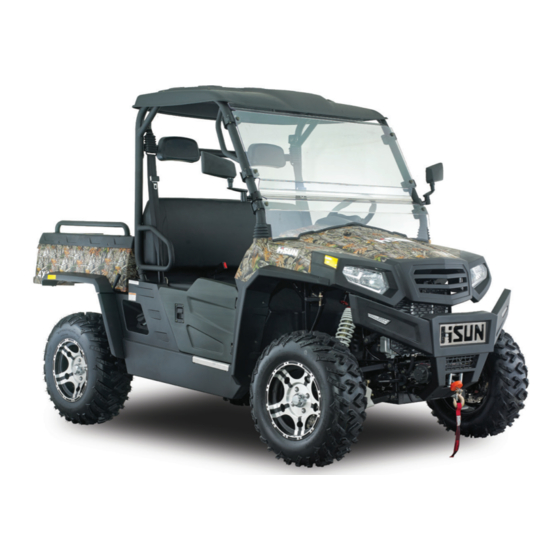
GRAB SOME SUN
Published by Chongqing
Huansong Industries
(Group) Co., Ltd and
Hisun Motors Corp USA.
Chongqing Huansong
Industries (Group) Co., Ltd
and Hisun Motors Corp USA
holds the copy right.
No publishing and reprinting
without permission.
READ THIS
MANUAL CAREFULLY
For questions regarding this
UTV, please contact HISUN at:
(972)446-0760
hisunmotors.com
Rev. 08071501
No one under the age of 16
should operate this vehicle.
Provincial / Municipal
governments have different
regulations pertaining to
owning and operating an
off-road vehicle; learn the
regulations in your area.
SECTOR 550/750
OWNER'S MANUAL
Advertisement
Table of Contents
Troubleshooting

Related Manuals for Hisun HS 500UTV-5/HS


Summary of Contents for Hisun HS 500UTV-5/HS
- Page 1 Published by Chongqing Huansong Industries (Group) Co., Ltd and Hisun Motors Corp USA. Chongqing Huansong Industries (Group) Co., Ltd and Hisun Motors Corp USA holds the copy right. No publishing and reprinting without permission. READ THIS MANUAL CAREFULLY For questions regarding this...
-
Page 2: Introduction
Introduction HS 550/750UTV INTRODUCTION Congratulations on your purchase of the HS 500UTV-5/HS 550UTV/HS 600UTV-3/HS 700UTV-7/HS 750UTV. This Owner’s / Operator’s manual will provide you information regarding safe operation, operational instructions, maintenance and care. Fully understanding this manual and following all of the instructions herein will provide the knowledge needed to have safe and enjoyable UTV operation. -
Page 3: Important Manual Information
Introduction HS 550/750UTV IMPORTANT MANUAL INFORMATION FAILURE TO FOLLOW THE WARNINGS CONTAINED IN THIS MANUAL CAN RESULT IN SERIOUS Particularly important information is distinguished in this manual by the INJURY OR DEATH. following notations: The Safety Alert Symbol means ATTENTION! YOUR SAFETY IS INVOLVED! Failure to follow WARNING instructions could result in severe injury or death to the machine operator, bystander or a person inspecting or repairing the... -
Page 4: Important Notice
Introduction HS 550/750UTV IMPORTANT NOTICE This UTV is designed and manufactured for OFF - ROAD use only. It is illegal and unsafe to operate this UTV on any public street, road or highway. This UTV complies with all applicable OFF - ROAD noise level and spark arrester laws and regulations in effect at the time of manufacture. -
Page 5: Universal Symbols
Introduction HS 550/750UTV NIVERSAL SYMBOLS As a guide to the operation of your vehicle, various universal symbols have been utilized on the instruments and controls. The symbols are shown below with an indication of their meaning. Safety Alert Symbol Lift Cylinder-Retract Diesel Fuel Lift Cylinder-Extend Engine coolant-Temperature... -
Page 6: Table Of Contents
Introduction HS 550/750UTV Table of Contents Subject Page Subject Page Introduction Starting Important manual information Seat belt Important notice Head light switch Universal symbols Emergency light switch Location of parts Turn signal light switch 1-11 Illustrated contents Brake pedal Safe operation Range gear shift lever Safety instructions 4WD lever... - Page 7 Introduction HS 550/750UTV Changing brake fluid 10-16 Checking seat belt and ROPS 10-5 Flushing Cooling system and changing 10-16 Checking joint boot 10-5 coolant Checking tire inflation pressure 10-6 Anti-freeze 10-16 10-6 Every 50 hours Replacing radiator hose (water pipes) 10-18 10-6 Greasing...
-
Page 8: Location Of Parts
Introduction HS 550/750UTV LOCATION OF PARTS Bench seat... - Page 9 Introduction HS 550/750UTV Bucket seat...
-
Page 10: Illustrated Contents
Introduction HS 550/750UTV ILLUSTRATED CONTENTS Bench seat... - Page 11 Introduction HS 550/750UTV Bucket seat 1-10...
- Page 12 Introduction HS 550/750UTV Bench seat 1-11...
- Page 13 Introduction HS 550/750UTV Bucket seat 1-12...
-
Page 14: Safe Operation
Safe Operation Bucket seat All operators, including experienced UTV drivers or passengers, should carefully read and fully understand this Users Manual, and operate strictly as the manual states in order to achieve the best performance and avoid accidents. Others who will use you UTV should be trained how to operate the UTV and be required to read this manual before operation. -
Page 15: Operation
Safe Operation the surroundings. 5) Check and keep vehicle clean. Sludge, grease and debris can cause a fire and severe injury. Passenger quantity and loading: 1) Only the driver and one passenger inside cab. It is suggested that children under age of 5 not be allowed as a passenger. -
Page 16: Children Safety Instructions
Safe Operation 3. Children safety instructions coast down the hill. If do not believe you can operate the UTV Always watch children when they are around the safely in reverse do not attempt to ascend vehicle. Children like to imitate adults and this the slope any further. -
Page 17: Instructions For Carrier
Safe Operation speed. Otherwise, this may cause vehicle stopping on a slope make sure the vehicle is loss of control. stationary before exiting. When driving at high speed, suddenly turning 9. Transportation the steering wheel will reduce vehicle stability. Never sharply turn the steering wheel at high speeds. - Page 18 Safe Operation ① Battery Do not open radiator cap before coolant has cooled down. When the coolant is cold, open slowly and let the coolant pressure reduced, and then open water cooler cap. Check for the coolant level in the coolant reservoir. If necessary, add coolant.
-
Page 19: Warning And Caution Labels
Warning Labels Warning and caution labels (1) (2) (3) (4) (5) (6) (7) (8) (9)... - Page 20 Warning Labels (10) (11) (12) (13) (14) (15) (16)
-
Page 21: Servicing Of Vehicle
Vehicle Identification Number SERVICING OF VEHICLE Your dealer is interested in your new vehicle and has the desire to help you get the most value from it. After reading this manual thoroughly, you will find you can do some of the regular maintenance by yourself. -
Page 22: Specifications Table
Specifications SPECIFICATION TABLE Make Specification 1 cylinder, 4-cycle, gasoline, SOHC, liquid Type cooled 471CC for HS500UTV-5 546CC for HS550UTV Displacement 608CC for HS600UTV-3 686CC for HS700UTV-7 735CC for HS750UTV 17(22.80)for HS500UTV-5 Engine 22.5(30.17)for HS550UTV Horsepower Kw(HP) 20.4(27.36)for HS600UTV-3 22.1(29.64)for HS700UTV-7 28.5(38.22)for HS750UTV 5000 for HS500UTV-5 6000 for HS550UTV... -
Page 23: Specifications
Specifications Make Specification Front Independent, Dual A-arm type Suspension Rear Independent, Dual A-arm type Max. rolling weight (Towing Capacity) kg (lbs.) 544(1200) Payload capacity kg (lbs.) 159(350) 590(1301)for HS500UTV-5 590(1301)for HS550UTV Weight kg (lbs.) 621(1369)for HS600UTV-3 621(1369)for HS700UTV-7 710(1565)for HS750UTV Model Specification Width... - Page 24 Specifications TRAVELING SPEEDS For HS500UTV-5 Range gear shift lever km/h (mph) 61(37.9) High 65(40.4) Reverse 40(24.8) For HS550UTV Range gear shift lever km/h (mph) 61(37.9) High 72(44.7) Reverse 40(24.8) For HS600UTV-3 Range gear shift lever km/h (mph) 62(38.5) High 73(45.4) Reverse 40(24.8)...
-
Page 25: Vehicle Limitations
Specifications VEHICLE LIMITATIONS The Vehicle has been thoroughly tested for proper performance with implements sold or approved by manufacturer. Use with implements which are not sold or approved and which exceed the maximum specifications listed below, or which are otherwise unfit for use, vehicle may result in vehicle malfunction or failures with a possibility of the vehicle damage, property damage and injury to the operator or others. -
Page 26: Pre-Operation
Pre-Operation DAILY CHECK To better prevent troubles, it is important to know condition of the vehicle well. Check it before starting. CAUTION: To avoid personal injury: Be sure to check and service the vehicle on a level surface with the engine shut off and the parking brake “ON”... -
Page 27: Operating The Engine
Operating the Engine NOTE: CAUTION: The parking brake warning lamp (P) comes To avoid personal injury: on while parking brake is applied and goes Read "SAFE OPERATION" in front of this off when it is released. manual. Read the danger, warning and caution ... -
Page 28: Cold Starting
Operating the Engine 1. Insert the key into the key switch and turn it “START”. (Stop the Engine) (Engine runs or headlights on) START (Start the Engine) IMPORTANT : It is not sufficient to do daily checks on dash board only. Always conduct daily checks carefully by referring to “DAILY CHECK“... -
Page 29: Warm-Up Transmission Oil In The Low
Operating the Engine “NEUTRAL” position during warm-up. For 5 minutes after engine start-up, allow the engine to warm up without applying any load. This is to allow oil to reach every engine part. If load applied to the engine without warming-up, engine damage may occur. -
Page 30: Operating The Vehicle
Operating the Vehicle OPERATING NEW VEHICLE The lubricating oil is especially important How a new vehicle is handled and maintained for a new vehicle. Various parts need time determines the life of vehicle. to wear and polish themselves to the A new vehicle just off the factory production correct operating clearances. -
Page 31: Head Light Switch
Operating the Vehicle ① Head light switch ② Head lights “OFF” ③ High beam lights "ON" ④ Low beam lights "ON" ⑤ 4WD button ⑥ 2WD button ⑦ Front axle differential lock ⑧ Front axle differential unlock ⑨ Emergency light "ON" ⑩... -
Page 32: Brake Pedal
Operating the Vehicle the turn toggle switch. ③ Tail turn signal lamp To indicate a left turn, push on the upper half Bucket seat of the turn toggle switch. When the left or right signal is activated, the indicated turning light will flash and the other will stay on. -
Page 33: Range Gear Shift Lever
Operating the Vehicle ① Range gear shift lever ① Brake pedal (L) LOW Range (H) HIGH Range 4. Selecting the travel speed. (N) NEUTRAL” POSITION ■ Range Gear Shift Lever (R) “REVEREE” Bucket seat CAUTION: To avoid personal injury: Avoid changing gears when ascending ... -
Page 34: 4Wd Lever
Operating the Vehicle operation. ■ Accelerator Pedal Damage may occur with wrong shifting The accelerator pedal is used to increase the operation. engine and vehicle speed. Push down on it for higher speed. ■ 4WD Lever CAUTION: To avoid personal injury: when traveling at road speed. -
Page 35: Fuel Gauge
Operating the Vehicle ① Coolant temperature gauge ② Fuel gauge ■ Fuel Gauge Park the vehicle on a flat place. When the key switch is “START”, the fuel gauge indicates the fuel level. Be careful not to fully empty the fuel tank. Otherwise air may enter the fuel system. -
Page 36: Winch Mount Plate
Maintenance and Adjustment WINCH MOUNT PLATE Always read and follow the instructions in the winch owner’s manual before attempting to install or use a winch. ① Winch mount plate ■ Transporting Vehicle Pay attention to the following points when transporting the vehicle. Use a suitable truck or trailer. -
Page 37: Service Intervals
Maintenance and Adjustment CAUTION: To avoid personal injury and vehicle damage: Be sure you have sufficient knowledge, experience, the proper replacement parts and tools before you attempt any vehicle maintenance task. If you don’t have the knowledge and equipment which are necessary to perform the ... -
Page 38: Maintenance And Adjustment
Maintenance and Adjustment Indication of After Items 700 hrs 50 100 150 200 250 300 350 400 450 500 550 600 650 700 Every Check ○ ○ ○ ○ ○ ○ ○ 100 hrs Fuel filter element Every Replace ○ 100 hrs Every Check... - Page 39 Maintenance and Adjustment Indication of After Items 700 hrs 50 100 150 200 250 300 350 400 450 500 550 600 650 700 Every 2 Coolant Change years Service as Fuel system Bleed required Fuse Replace Light bulb Replace NOTE: ◆...
-
Page 40: Periodic Service
Periodic Service ① Turn switch ② Front hood cover CAUTION: To avoid personal injury: ■ Operator’s Seat To open the seat, raise the seat to the forward HOW TO OPEN THE FRONT position. HOOD COVER AND SEAT CAUTION To avoid personal injury from contact with moving parts: Never open operator’s seat while the ... -
Page 41: Jack-Up Point
Periodic Service bed with the gas spring elasticity. Rear frame tube ① Jack ② ① Cargo bed handle ■ Rear End ② Jack the rear only after placing a wooden block DOWN ③ under the right and left frame tubes for securing the engine and then supporting it. -
Page 42: Walk Around Inspection
Periodic Service ■ Walk Around Inspection to the prescribed level on the dipstick. Look around and under the vehicle for such items as loose bolts, trash build-up, oil or coolant leaks, broken or worn parts. ■ Checking and Refueling CAUTION To avoid personal injury: Do not smoke while refueling. -
Page 43: Cleaning Radiator Screen
Periodic Service ① Recovery tank ① Radiator screen ② FULL IMPORTANT ③ LOW Radiator screen must be cleaned from debris to prevent engine from overheating IMPORTANT If the radiator cap has to be removed, ■ Checking brake fluid level follow the cautions above and securely CAUTION re tighten the cap. -
Page 44: Checking Brake Pedal
Periodic Service Make sure the parking brake warning lamp on the display goes off when parking brake is applied. ① OIL CUP ② LOWER ■ Checking brake pedal CAUTION ① Parking brake TO avoid personal injury: Checking gauges meter easy ■... -
Page 45: Checking Tire Inflation Pressure
Periodic Service extremely wet and muddy conditions lubricate grease fittings more often. ① joint boot ② Drive shaft ① Joint boot ② Drive shaft ■ Checking tire inflation pressure ① Parking brake Though the tire pressure is factory-set to the ②... -
Page 46: Checking Engine Start System
Periodic Service ① Range gear shift lever pivot (spray type grease ) ① Range gear shift lever Bucket seat ■ Checking engine start system CAUTION TO avoid personal injury Do not allow anyone near the vehicle while testing. If the vehicle does not pass the test, ... -
Page 47: Cleaning Air Cleaner Primary Element
Periodic Service ① Air filter element ② Locating pad ① Torque wheel bolts to 75to 90 N.m ■ Cleaning air cleaner primary element Remove the air cleaner cover and primary element. Remove the sponge material from its frame. Wash the sponge material gently but thoroughly in solvent. -
Page 48: Checking Battery Condition
Periodic Service CAUTION To avoid personal injury: Be sure to stop the engine and remove the key when attempting to make following checks changes. Never fail to check the fuel lines periodically the fuel lines are subject to wear and aging fuel may leak out ①... -
Page 49: Adjusting Toe-In
Periodic Service ◆Direction for storage When the battery is being activated, When storing the vehicle for a long period, hydrogen and oxygen gases in the remove the battery from the vehicle, store in battery are extremely explosive. keep a dry place out of direct sunlight. open sparks and flames away from the battery at all times, especially The battery shall self-discharge while it is... -
Page 50: Cleaning Muffler
Periodic Service The spark arrester is located inside of muffler body, and fastened with bolts. Loosen the bolts and remove the spark arrester. Shake loosened particles out of the screen assembly and lightly clean the screen with wire brush. Soak in solvent and again clean with wire brush if necessary. -
Page 51: Replacing Engine Oil Filter
Periodic Service Oil can be hot and can burn. CAUTION Park the vehicle on a flat surface, remove To avoid personal injury: the seat and open the adjust hatch cover. Be sure to stop the engine before Remove the oil filter. replacing oil. -
Page 52: Checking Brake Pedal
Periodic Service oil can be hot and can burn. Slightly depress the brake pedal and Park the vehicle on a flat surface, raise measure free travel at the top of the pedal the cargo bed, and mount the safety stroke. support. -
Page 53: Checking Radiator Hose And Clamp
Periodic Service light comes on. more than the boiling point, which is called If it does not, check the bulb or brake “Overheating”. light switch. Stop the vehicle operation in a safe place and keep the engine unloaded idling. ■ Checking Radiator Hose and Clamp Don’t stop the engine suddenly, but stop it Park the vehicle on a flat surface and raise after about 5 minutes of unloaded idling. -
Page 54: Every 400 Hours
Periodic Service is worn to minimum allowable. ① Drain plug ① 3mm(0.12in) IMPORTANT: Do not operate the vehicle immediately after EVERY 400 HOURS changing the transmission fluid. ■ Changing Transmission Fluid Run the engine at medium speed for a few ... -
Page 55: Every 500 Hours
Periodic Service ■ Changing Brake Fluid Consult your local Dealer for this service. (See “Checking Brake Fluid Level” in “DAILY CHECK” in “PERIODIC SERVICE” section. ■ Flushing Cooling System and Changing Coolant CAUTION To avoid personal injury: Do not remove the radiator cap while ... -
Page 56: Anti-Freeze
Periodic Service some container underneath the engine body. Do not pour waste onto the grounds, down a drain, or into any water source. Also, observe the relevant environmental protection regulations when disposing of antifreeze. If it freezes, coolant can damage the cylinders and radiator. -
Page 57: Replacing Radiator Hose (Water Pipes)
Periodic Service of pressure within the cooling system. This service. Adding the LLC ■ Replacing Brake Master Cylinder (Inner 1) Add only water if the mixture reduces in parts) amount by evaporation. 2) If there is a mixture leak, add the LLC of Consult your local dealer for this service. -
Page 58: Storage
Periodic Service STORAGE CAUTION To avoid personal injury: Do not clean the vehicle when the engine is running. To avoid the danger of exhaust fume poisoning, do not operate the engine in closed building without proper ventilation. ① Slow-blow fuse box cover When storing, remove the key from the ... -
Page 59: Removing The Vehicle From Storage
Periodic Service storage procedures. Once utside, park the vehicle and let the Keep the vehicle in a dry place where the engine idle for at least five minutes. Shut vehicle is sheltered from the elements. the engine off and work around vehicle Cover the vehicle. -
Page 60: Troubleshooting
Troubleshooting ENGINE TROUBLESHOOTING If something is wrong with the engine, refer to the table below for the cause and its corrective countermeasure. Trouble Cause Countermeasure Check the fuel tank and fuel filter。 Check the electric fuel pump. Check the injector. ... -
Page 61: Diagnostic Trouble Code Table
Troubleshooting Diagnostic Trouble Code Table Mt05 Malf Code Table:23 Malf code in MT05 Description P0107 MAP Circuit Low Voltage or Open P0108 MAP Circuit High Voltage P0112 IAT Circuit Low Voltage P0113 IAT Circuit High Voltage or Open P0117 Coolant/Oil Temperature Sensor Circuit Low Voltage P0118 Coolant/Oil Temperature Sensor Circuit High Voltage or Open P0122... -
Page 62: Battery Troubleshooting
Troubleshooting BATTERY TROUBLESHOOTING Trouble Cause Countermeasure Preventive measure Battery overused until lights are dim. Charge the battery Charge the battery Battery sufficiently. properly. been recharged. Keep the terminal Starter does not function Clean the terminal ... -
Page 63: Machine Troubleshooting
Troubleshooting MACHINE TROUBLESHOOTING Trouble Cause Countermeasure Replace throttle cable; High idling speed of engine Replace throttle petal Replace the throttle High rotary speed for clutch Replace he junior clutch spring; connection. Replace the primary clutch. ... -
Page 64: Options
OPTIONS Consult your local dealer for further details. Roof; Windshield; Windlass ; Motor Scan KF90121; Rear Trailer Hitch & Pin(2〞); EPS. 12-1... - Page 65 Where a warrantable condition exists, HISUN will repair your vehicle at no cost to you, including diagnosis, parts and labor. If an emission-related part on your vehicle is defective, the part will be repaired or replaced by HISUN. This is your EMISSION CONTROL SYSTEM WARRANTY.
- Page 66 Warranty defects shall be remedied during customary business hours at any authorized HISUN dealer located within the United States of America in compliance with the Clean Air Act and applicable regulations of the United States Environmental Protection Agency. Any part or parts replaced under this warranty shall become the property of HISUN.
- Page 67 ADDITIONAL INFORMATION. Any replacement part that is equivalent in performance and durability may be used in the performance of any maintenance or repairs by the owner. However, HISUN is not liable for these parts. The owner is responsible for the performance of all required maintenance.
- Page 68 HISUN MOTORS 310 East University Dr McKinney, Texas 75069 PH (972) 446-0760 TF (877) 838-6188 hisunmotors.com...
Need help?
Do you have a question about the HS 500UTV-5/HS and is the answer not in the manual?
Questions and answers
how to adjust the toe in
To adjust the toe-in on a Hisun HS 500UTV-5/HS, you need to adjust the tie rod length.
This answer is automatically generated
how to adjust the front steering
To adjust the front steering on a Hisun HS 500UTV-5/HS, adjust the tie rod length. This helps set the correct wheel-to-wheel distance at the front as specified in the manual.
This answer is automatically generated
My new Vector 500 is showing a E118 on my dashboard