Table of Contents
Advertisement
Advertisement
Table of Contents

Related Manuals for Toto Link n500rdg


Summary of Contents for Toto Link n500rdg
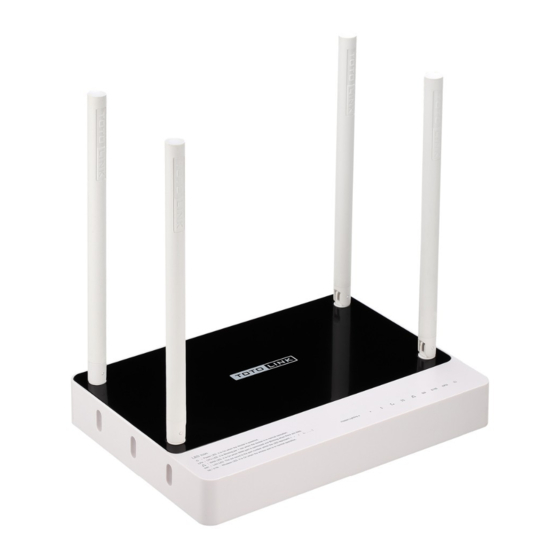
- Page 1 User Manual TOTOLINK Dual Band Wireless-N Router...
-
Page 2: Table Of Contents
Table of Contents 1. ABOUT THIS GUIDE ....................... 3 1.1 Overview of the User’s Guide ..................... 3 2. INTRODUCTION ......................3 2.1 Overview ..........................3 2.2 Features ..........................3 2.3 Panel Layout ........................4 2.3.1 Front Panel ............................4 2.3.2 Rear Panel ............................5 3. - Page 3 5.2.6 WDS Setup ............................. 21 5.2.7 WPS Setup ............................22 5.2.8 Advanced Setup ..........................22 5.3 Wireless (5GHz) ......................... 23 5.4 NAT/Routing ........................24 5.4.1 Port Forwarding ..........................24 5.4.2 DMZ / Twin IP ..........................25 5.4.3 Port Trigger ............................. 25 5.4.4 Misc Setup ............................
-
Page 4: About This Guide
1. ABOUT THIS GUIDE Thank you very much for purchasing this Wireless N Dual Band Router. This guide will introduce the features of this device and tell you how to connect, use and configure the Router to connect with Internet. Please follow the instructions in this guide to avoid affecting the Router’s performance by improper operation. -
Page 5: Panel Layout
2.3 Panel Layout 2.3.1 Front Panel The front panel of this wireless router consists of 9 LEDs, which is designed to indicate connection status. This indicator lights blue while the router receiving power, otherwise it is off. POWER This indicator keeps blinking blue after the router powered on. This indicator lights blue when the router’s 2.4G wireless enabled. -
Page 6: Rear Panel
blue. 2.3.2 Rear Panel The figure below shows the real panel of the router. The power socket is used to connect the power adapter. DC IN RST: With the router powered on, press and hold the button for more than 5 seconds. -
Page 7: Hardware Installation
3. HARDWARE INSTALLATION 3.1 Hardware Installation For those PCs you wish to access Internet by this router, each of them must be properly connected with the router through UTP Cables. 1. Connect your PC’s LAN port to one of the router’s LAN port using UTP cable. 2. - Page 8 If the result displayed is similar to that shown in above figure, it means that the connection between your PC and the Router has been established. If the result displayed is similar to that shown in the above figure, it means that your PC has not connected to the Router successfully.
-
Page 9: Connecting To Internet
4. CONNECTING TO INTERNET This chapter introduces how to configure the basic functions of your Dual Band Wireless Router so that you can surf Internet. 4.1 Login Web Interface With a Web-based utility, for example Google Chrome, this Router is easy to configure and manage. - Page 10 Note: If the above screen does not prompt, it means that your web-browser has been set to using a proxy. Go to Tools menu>Internet Options>Connections>LAN Settings, in the screen that appears, cancel the Using Proxy checkbox, and click OK to finish it. Now, you have got into the Router’s configuration interface.
-
Page 11: Changing Password
4.2 Changing Password Now, we recommend that you change the password to protect the security of your Router. Please go to Advanced Setup—System—Admin Setup change the password required to log into your Router. New Login ID: type in the name that you use to login the web interface of the router or change a new one. -
Page 12: Dhcp User
4.3.1 DHCP User For DHCP User, your computer will get dynamic IP address from your ISP (Internet Service Provider) automatically. No need to do any settings here. 4.3.2 PPPoE User (ADSL) If you use ADSL virtual dial-up to connect Internet, please choose this option. Your ISP must have provided the User ID and Password. -
Page 13: Static Ip
User ID: a specific valid ADSL user name provided by your ISP. Password: the corresponding valid password provided by your ISP. Knowledge Extension: Point-to-Point Protocol over Ethernet (PPPoE) is a virtual private and secure connection between two systems that enables encapsulated data transport. It replies on two widely accepted standards: PPP and Ethernet. -
Page 14: Wireless Setup (2.4Ghz)
Subnet Mask: This is used to define the device IP classification for the chosen IP address range. 255.255.255.0 is a typical net mask value for Class C networks. Generally it is provided by your ISP. Default Gateway: This is the IP address of the host router that resides on the external network and provides the point of connection to the next hop towards the Internet. -
Page 15: Wpa-Psk/Wpa2-Psk (Recommended)
there are few applications that can decrypt the WEP key in less than 10 minutes. 4.4.2 WPA-PSK/WPA2-PSK (Recommended) Wi-Fi Protected Access (WPA) is the most dominating security mechanism in industry. It is separated into two categories: WPA-personal or called WPA Pre-Share Key (WPA/PSK), and WPA-Enterprise or called WPA/802.1x. - Page 16 This page allows you to upgrade the wireless router firmware to the latest version. Please NOTE, do not power off the device during the uploading process because it may cause damage to your system. After finishing the settings above, you’d better restart your computer and the Router to connect to Internet successfully.
-
Page 17: Advanced Setup
5. ADVANCED SETUP The Advanced Setup includes Network, Wireless, NAT/Routing, Firewall, Utility, Traffic and System. Most of these settings are only for more technically advanced users who have sufficient knowledge about wireless LAN. Also they should not be changed unless you know what effect the changes will have on your Wireless Router. -
Page 18: Internet Setup
5.1.3 Internet Setup We have discussed this setting on Internet Setup. You can also reconfigure the parameters on this page. 5.1.4 LAN/DHCP Server Click LAN/DHCP Server, you will enter the page that allows you configure the LAN port and DHCP Server. IP Address: This is the IP address to be represented by the LAN (including WLAN) -
Page 19: Wireless (2.4Ghz)
interface that is connected to the internal network. This IP will be used for the routing of the internal network (it will be the Gateway IP for all the devices connected on the internal network). Subnet Mask: This is used to define the device IP classification for the chosen IP address range. -
Page 20: Wireless Setup
5.2.2 Wireless Setup Click Wireless Setup, you will be able to configure the basic wireless function. We have discussed this setting on Wireless Setup (2.4GHz). 5.2.3 Multiple BSS This page is used to create multiple SSID for different LANs. -
Page 21: Wireless Multibridge
SSID: define the SSID by yourself. Access Policy: setup the access policy as you want. SSID Broadcast: choose to hide or broadcast your SSID. WMM: it is an abbreviation of Wi-Fi Multimedia. It defines the priority levels for four access categories derived from 802.1d (prioritization tabs). -
Page 22: Mac Authentication
5.2.5 MAC Authentication You can control the PC to connect the wireless Router through MAC authentication. 5.2.6 WDS Setup WDS means Wireless Distribution System. It is a protocol for connecting two access points wirelessly. Usually, it can be used for the following application: 1. -
Page 23: Wps Setup
5.2.7 WPS Setup WPS (Wi-Fi Protected Setup) provides easy procedure to make network connection between wireless station and wireless access point with the encryption of WPA and WPA2. It is enabled by default. 5.2.8 Advanced Setup Advanced Setup is for advanced parameter settings. For common users, please just keep the default configuration. -
Page 24: Wireless (5Ghz)
40MHz is the channel spectrum with the width of 40MHz (selected by default). TX Power: please refer to the description on the page. TX Burst: Please just keep the default. Preamble Length: this option is to define the length of the sync field in an 802.11 packet. Most modern wireless network uses shot preamble with 56 bit sync filed instead of long preamble with 128 bit sync filed. -
Page 25: Nat/Routing
5.4 NAT/Routing Click the plus sign beside NAT/Routing menu to open us all the parameters contained, see below: 5.4.1 Port Forwarding On this page, you can redirect common network services automatically to a specific device behind the NAT firewall. This setting is only necessary when you want to host some sort of servers like a Web server or mail server on the private local network behind your Gateway's NAT firewall. -
Page 26: Dmz / Twin Ip
Internal Port: Set the LAN range. 5.4.2 DMZ / Twin IP The DMZ (Demilitarized Zone) host feature allows one local host to be exposed to the Internet for a special-purpose service such as Online Game and video conferencing. DMZ host forwards all the ports at the same time. Any PCs whose port is being forwarded must have its DHCP client function disabled and should have a new static IP Address assigned to it, because its IP Address may be changed when using the DHCP function. -
Page 27: Routing Table
5.4.5 Routing Table You can add or delete the static routing rules here. 5.5 Firewall Click the plus sign beside Firewall menu to show up all the parameters contained, see below: 5.5.1 Internet Access Control Internet Access Control provides multiple security protection. It can achieve MAC/Port/IP filtering, Internet access time control and other functions that enable user to control Internet access. -
Page 28: Net Detector
5.5.2 Net Detector Net Detector provides some basic virus protection function that allows user to have a safer network communication. -
Page 29: Mgmt Access List
5.5.3 Mgmt Access List 5.5.4 Misc Setup Misc Setup: Generally maintain the default. 5.6 Utility Click the plus sign beside Utility menu to open up all the parameters contained, please see below:... -
Page 30: Vpn Setup
5.6.1 VPN Setup The wireless router provides PPTP protocol VPN connection, and it supports 5 VPN users at most. Please enter the account information to connect the VPN server. VPN (PPTP) Setup Mode: Start Encryption (MPPE): MPPE encryption Click Apply (this is very important, if you don’t click Apply, the settings below will not work). VPN (PPTP) Account VPN Account: This is set by you. -
Page 31: Wol
DDNS service provider from the dynamic analysis server (3322, dyndns.org) and to update the DNS database. Then DDNS will bind the dynamic IP address to a fixed domain name. When other users on the Internet want to access this domain name, the dynamic DNS server will return the correct IP address. -
Page 32: Traffic
5.7 Traffic Click the plus sign beside the Traffic menu to show up all the parameters contained, see below: 5.7.1 QoS Setup This page is used to control the wireless speed of connected PC. -
Page 33: Connection Info
Operation: You can choose to Start or Stop this function on your Router. Internet Type: Any Internet type you want to control bandwidth. Download/Upload: Set the bandwidth range of the Router. QoS Rule Setup Smart QoS: You can choose to use Smart QoS for convenient. If you select this option, you don’t need to do the below settings. -
Page 34: Connection Control
5.7.3 Connection Control Connection Control shows the Max connection, Max UDP connection, Max ICMP connection and Max connection of each PC. These settings are only for advanced users, common users are not recommended to change them. 5.7.4 Wired Port Setup This page shows the connection status of the PC connected with your router by cables. -
Page 35: Switch Setup
5.7.5 Switch Setup This page is used to specify the LAN port data transmission. 5.8 System Click the plus sign beside the System menu to open up all the parameters contained, please see below:... -
Page 36: System Log
5.8.1 System Log System Log shows the working status of the wireless router, user can check the running status information here: 5.8.2 Admin Setup We have discussed Account Setup before; here we focus on Admin E-mail Setup. -
Page 37: Firmware Upgrade
Admin E-Mail Setup: If you want to receive IP routing log by email, set up Email address and SMTP server to receive it. 5.8.3 Firmware Upgrade This page allows you to upgrade the Access Point firmware to new version. Please note: DO NOT power off the device during the upload because it may crash the system. -
Page 38: Config Backup/Restore
5.8.5 Config Backup/Restore This webpage allows you to save current settings to a file and reload the settings from the file which was saved previously. Besides, you could reset the current configuration to factory default. 5.8.6 Misc Setup Misc Setup provides Host name, Auto Saving, Auto Redirection, Login page setup, UPNP setup and Restart System functions.
Need help?
Do you have a question about the n500rdg and is the answer not in the manual?
Questions and answers