Stihl HL 100 Instruction Manual
Hide thumbs
Also See for HL 100:
- Instruction manual (68 pages) ,
- Manual (120 pages) ,
- Technical information (9 pages)
Table of Contents
Advertisement
Advertisement
Table of Contents

Related Manuals for Stihl HL 100


Summary of Contents for Stihl HL 100
- Page 1 STIHL HL 95, 100 Instruction Manual...
-
Page 3: Table Of Contents
Specifications Maintenance and Repairs Disposal EC Declaration of Conformity This instruction manual is protected by copyright. All rights reserved, especially the rights to reproduce, translate and process with electronic systems. HL 95, HL 95 K, HL 100, HL 100 K... -
Page 4: Guide To Using This Manual
The user is responsible for avoiding Warning where there is a risk of an injury to third parties or damage to their accident or personal injury or serious property. damage to property. HL 95, HL 95 K, HL 100, HL 100 K... - Page 5 Only use cutting blades and accessories that are explicitly approved for this power tool by STIHL or are technically HL 95, HL 95 K, HL 100, HL 100 K...
- Page 6 Start the engine at least 3 meters from automatically to the idle position. the fueling spot, outdoors only. HL 95, HL 95 K, HL 100, HL 100 K...
- Page 7 / stop switch to 0 or STOP. uneven ground. Some versions of the machine can be carried on a harness to relieve the Clear away fallen branches, scrub and weight on the operator's arms. cuttings. HL 95, HL 95 K, HL 100, HL 100 K...
- Page 8 – see also blades moving while the engine is idling. "Before Starting". Check the fuel system in particular for leaks and make sure the safety devices are working properly. Do HL 95, HL 95 K, HL 100, HL 100 K...
- Page 9 (whitefinger the necessary technical information. disease). Vibration behavior is influenced by the condition of the AV elements – check the AV elements at regular intervals. HL 95, HL 95 K, HL 100, HL 100 K...
-
Page 10: Using The Unit
WARNING Adjustable gearbox: Set cutter bar to required angle. K versions (HL 95 K / HL 100 K) are not approved for cutting close to the ground. Remove the blade scabbard. Start the engine. If you use a harness: Put on the harness and attach it to the machine. - Page 11 Set angle of adjustable cutter bar to maximum so that the unit can be held in a lower, less tiring position (with shoulder strap) while still providing adequate reach. HL 95, HL 95 K, HL 100, HL 100 K...
-
Page 12: Approved Power Tool Attachments
1) 2) Power scythe HL 0° Long reach hedge trimmer HL 135° Long reach hedge trimmer 1) 3) Pole pruners 1) 2) Pick tines Special harvester SP 10 Special harvester HL 95, HL 95 K, HL 100, HL 100 K... -
Page 13: Assembling The Unit
(4). Place the clamp (6) against the drive tube. Line up the holes. Insert the screws (7) with washers (8). Fit the square nuts (9) and screw home the screws. HL 95, HL 95 K, HL 100, HL 100 K... -
Page 14: Fuel
Poor quality gasoline or engine oil may damage the engine, sealing rings, hoses and the fuel tank. Gasoline Use only high-quality brand-name gasoline with a minimum octane rating of 90 – leaded or unleaded. HL 95, HL 95 K, HL 100, HL 100 K... - Page 15 STIHL 50:1 two-stroke engine oil: 50 parts gasoline to 1 part oil Pressure may build up in the canister – open it carefully. Clean the fuel tank and canister from time to time. HL 95, HL 95 K, HL 100, HL 100 K...
-
Page 16: Fueling
Turn the cap counterclockwise until are at a standstill – engine at idle speed. it can be removed from the tank opening. Remove the cap. HL 95, HL 95 K, HL 100, HL 100 K... - Page 17 The sliding sleeve butts against the The gearbox becomes hot during housing when the pin is properly operation. To reduce the risk of burn engaged (after making adjustment). injury, do not touch the gear housing. HL 95, HL 95 K, HL 100, HL 100 K...
-
Page 18: Fitting The Harness
F – normal run position – the engine carabiner (3) must be at about the is running or can start same height as your right hip. START – ignition is switched on – the engine can start HL 95, HL 95 K, HL 100, HL 100 K... - Page 19 NOTICE Do not stand or kneel on the drive tube Set the choke knob (8): since it will otherwise be permanently For cold start to g bent and damaged. HL 95, HL 95 K, HL 100, HL 100 K...
-
Page 20: Operating Instructions
– see "Storing the Unscrew and dry off the spark plug. Machine". Open the throttle wide and pull the starter rope several times to clear the combustion chamber. HL 95, HL 95 K, HL 100, HL 100 K... -
Page 21: Cleaning The Air Filter
If the cutting attachment continues to keep rotating in idle even after Insert the screw and tighten it down adjustment, have the machine checked firmly. by a servicing dealer. HL 95, HL 95 K, HL 100, HL 100 K... -
Page 22: Lubricating The Gearbox
Working in an easily operation. Unscrew the filler combustible or explosive atmosphere may cause a fire or an explosion. This can result result in serious injuries or damage to property. HL 95, HL 95 K, HL 100, HL 100 K... -
Page 23: Sharpening Instructions
Refit the filler plug and tighten it down firmly. Do not operate your machine with dull or damaged cutting blades. This may cause overload and will give unsatisfactory cutting results. HL 95, HL 95 K, HL 100, HL 100 K... -
Page 24: Storing The Machine
Thoroughly clean the machine – pay special attention to the cylinder fins and air filter. Store the machine in a dry, high or locked location. Out of the reach of children and other unauthorized persons. HL 95, HL 95 K, HL 100, HL 100 K... -
Page 25: Maintenance And Care
Decoke after first 139 hours of opera- Combustion chamber tion, then every 150 hours of operation All accessible screws and nuts (not adjust- Retighten ing screws) Check Anti-vibration elements Have replaced by servicing dealer HL 95, HL 95 K, HL 100, HL 100 K... - Page 26 Visual inspection Cutting blades Clean Sharpen Check Gearbox lubrication Replenish Safety labels Replace STIHL recommends an authorized STIHL servicing dealer. Spray with STIHL resin solvent after cleaning HL 95, HL 95 K, HL 100, HL 100 K...
-
Page 27: Minimize Wear And Avoid Damage
Rewind starter – servicing dealer. Spark plug – STIHL recommends that you have Components of antivibration system – servicing and repair work carried out exclusively by an authorized STIHL HL 95, HL 95 K, HL 100, HL 100 K... -
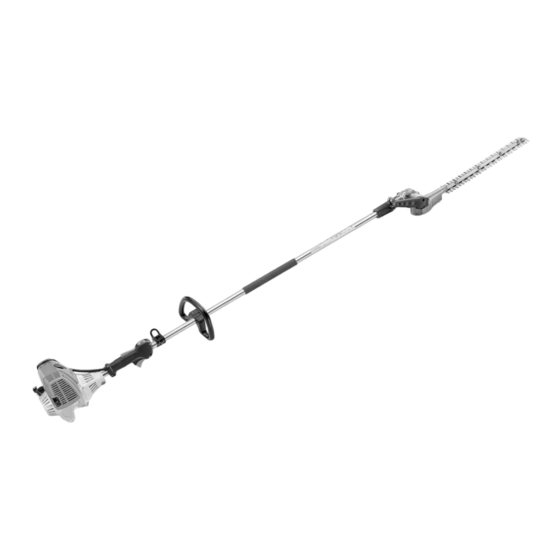
Page 28: Main Parts
15 Starter grip 16 Muffler 17 Cutting blades 18 Blade drive gear 19 Angle drive 20 Drive tube 21 Sliding sleeve 22 Adjusting lever 23 Quadrant 24 Blade guard (scabbard) Serial number HL 95, HL 95 K, HL 100, HL 100 K... -
Page 29: Specifications
9,500 rpm HL 95: 5.0 m/s Tooth height: 20 mm Valve clearance, HL 95 K: 5.0 m/s Sharpening angle: 45° to horizontal inlet: 0.10 mm Valve clearance, exhaust: 0.10 mm HL 95, HL 95 K, HL 100, HL 100 K... -
Page 30: Maintenance And Repairs
Original STIHL parts can be identified by see www.stihl.com/reach. the STIHL part number, the { logo and the STIHL parts symbol K (the symbol may appear alone on small parts). HL 95, HL 95 K, HL 100, HL 100 K... -
Page 31: Ec Declaration Of Conformity
EN ISO 10517, EN 55012, EN 61000-6-1 The measured and guaranteed sound power levels were determined according to Directive 2000/14/EC, Annex V, using the ISO 11094 standard. HL 95, HL 95 K, HL 100, HL 100 K... - Page 32 0458-388-0121-E englisch www.stihl.com *04583880121E* 0458-388-0121-E...
Need help?
Do you have a question about the HL 100 and is the answer not in the manual?
Questions and answers