Stihl FSE 52 Instruction Manual
Hide thumbs
Also See for FSE 52:
- User manual ,
- Instruction manual (208 pages) ,
- Instruction manual (96 pages)
Table of Contents
Advertisement
Advertisement
Table of Contents

Related Manuals for Stihl FSE 52


Summary of Contents for Stihl FSE 52
- Page 1 STIHL FSE 52 Instruction Manual...
-
Page 3: Table Of Contents
English Contents Dear Customer, Guide to Using this Manual Safety Precautions and Working Thank you for choosing a quality engineered STIHL product. Techniques Using the Unit It has been built using modern Approved Combinations of Cutting production techniques and comprehensive quality assurance. -
Page 4: Guide To Using This Manual
STIHL's philosophy is to continually (stones, glass, wire, etc.). Such objects operation. improve all of its products. For this may ricochet and then hit the operator. - Page 5 Always switch off the power tool and accessories that are explicitly approved overall and jacket combi- unplug it from the power supply. for this power tool by STIHL or are nation, do not wear a Transporting by vehicle: Properly secure technically identical. If you have any work coat.
- Page 6 Left hand on the loop handle and right Using unsuitable extension cords – switched off – flywheel hand on the control handle. can be dangerous. Use only effect. extension cords approved for outdoor use which are labeled as such and have the appropriate wire gauge. FSE 52...
- Page 7 Do not cut wet grass. Do not leave the power tool outdoors in Take care in slippery conditions on the rain. slopes and uneven ground. FSE 52...
- Page 8 To reduce the risk of injury, always The period of usage is shortened by: switch off the power tool and unplug it STIHL recommends the use of genuine Any personal tendency to suffer – from the power supply before manually STIHL replacement parts.
-
Page 9: Using The Unit
Swing the trimmer back and forth in foot. an arc. The cutting height is determined by the distance of the mowing line from the lawn surface. Avoid contact with fences, walls, rocks, etc. since it will result in a higher rate of wear. FSE 52... -
Page 10: Approved Combinations Of Cutting Attachment And Deflector
Guide the mowing line along the edge of the lawn – the bump guard maintains the required ground clearance. Disposal Do not throw cuttings in the garbage can – they can be composted! FSE 52... -
Page 11: Mounting The Loop Handle
Ease the ends of the loop handle (1) slightly apart and push it onto the control handle (3) until it snaps into position. Insert the screw (4) through the holes. Screw on the star knob (5) and tighten it down firmly. FSE 52... -
Page 12: Adjusting Angle Of Shaft
90° on the shaft (3) and engage it one of 4 positions: A, B, C required position. engage it in position: 0° or 90° or D. Transport Position The shaft can be set to its shortest length for easy transportation. FSE 52... -
Page 13: Converting Unit To Power Edger
220 V – 240 V: Up to 20 m 1.5 mm 20 m to 50 m 2.5 mm 100 V – 127 V: Up to 10 m AWG 14 / 2.0 mm 10 m to 30 m AWG 12 / 3.5 mm FSE 52... -
Page 14: Switching On
(1) and hold it in that Adjustment of Nylon Line". position. Depress the trigger switch (2). Manual Adjustment of Nylon Line Switch off the machine. Disconnect the plug from the wall outlet. Turn the trimmer on its back. FSE 52... -
Page 15: Replacing Spool With Nylon Line
English Install a new prewound spool. Replacing Spool with Nylon Line STIHL AutoCut 2-2 Always check the mowing head for signs of wear before replacing the spool with nylon line. Push home the button (1) on the spool as far as stop. -
Page 16: Storing The Machine
The resilience and service life of the nylon line can be increased by storing it in a container filled with water. Store the machine in a dry, high or locked location – out of the reach of children and other unauthorized persons. FSE 52... -
Page 17: Maintenance And Care
Check operation Trigger switch, trigger switch lockput Have replaced by dealer Cooling inlets Clean All accessible screws and nuts Retighten Visual inspection Cutting attachment (mowing head) Replace Check tightness Safety labels Replace STIHL recommends a STIHL servicing dealer. FSE 52... -
Page 18: Minimize Wear And Avoid Damage
English servicing dealer. STIHL dealers are Minimize Wear and Avoid regularly given the opportunity to attend Damage training courses and are supplied with the necessary technical information. Observing the instructions in this manual helps reduce the risk of unnecessary If these maintenance operations are not wear and damage to the power tool. -
Page 19: Main Parts
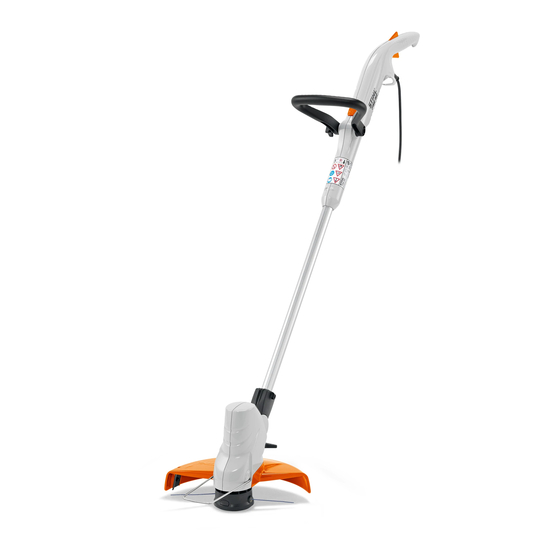
Strain relief (cord retainer) Cooling inlets Lock button for control handle Star knob Loop handle 10 Shaft 11 Motor housing 12 Deflector 13 Locking lever for motor housing 14 Bump guard 15 Line limiter blade 16 Mowing head Serial number FSE 52... -
Page 20: Specifications
When repairing the machine, only use with Directive 2006/42/EC is 2.0 m/s replacement parts which have been for the vibration measurement. approved by STIHL for this power tool or 1140 mm to 1310 mm (depending on are technically identical. Only use high- REACH... -
Page 21: Disposal
ANDREAS STIHL AG & Co. KG trimmer Make: STIHL Model: FSE 52 STIHL products must not be thrown in Serial identification: 4816 the garbage can. Take the product, conforms to the relevant provisions of accessories and packaging to an Directives 2006/42/EC, 2014/30/EU,... - Page 22 English FSE 52...
- Page 24 0458-777-0121-A englisch www.stihl.com *04587770121A* 0458-777-0121-A...
Need help?
Do you have a question about the FSE 52 and is the answer not in the manual?
Questions and answers