Stihl FSE 60 Instruction Manual
Hide thumbs
Also See for FSE 60:
- Instruction manual (372 pages) ,
- Instruction manual (20 pages) ,
- Instruction manual (92 pages)
Table of Contents
Advertisement
Available languages
Available languages
STIHL FSE 60
{
Instruction Manual
Manual de instrucciones
WARNING
Read Instruction Manual thoroughly
before use and follow all safety
precautions – improper use can
cause serious or fatal injury.
ADVERTENCIA
Antes de usar la máquina lea y siga
todas las precauciones de
seguridad dadas en el manual de
instrucciones – el uso incorrecto
puede causar lesiones graves o
mortales.
Advertisement
Chapters
Table of Contents

Related Manuals for Stihl FSE 60


Summary of Contents for Stihl FSE 60
- Page 1 STIHL FSE 60 Instruction Manual Manual de instrucciones WARNING Read Instruction Manual thoroughly before use and follow all safety precautions – improper use can cause serious or fatal injury. ADVERTENCIA Antes de usar la máquina lea y siga todas las precauciones de seguridad dadas en el manual de instrucciones –...
- Page 2 Instruction Manual 1 - 27 Manual de instrucciones 28 - 56...
-
Page 3: Table Of Contents
Mounting the Deflector Mounting the Cutting Attachment Contact your STIHL dealer or the STIHL distributor for your area if you do not Connecting to Power Supply understand any of the instructions in this Fitting the Harness manual. -
Page 4: Guide To Using This Manual
Keep Children Away – All visitors your STIHL dealer or the STIHL A bullet marks a step or procedure. should be kept at a distance from distributor for your area for assistance. - Page 5 Be sure switch is equipment or from your STIHL dealer. off when plugging in. 11. Don´t Abuse Cord – Never carry appliance by cord or yank it to disconnect from receptacle.
-
Page 6: Safety Precautions And Working Techniques
Have be carefully checked to determine your STIHL dealer show you how to that it will operate properly and operate your electric trimmer. Observe perform its intended function. Check... - Page 7 Most of these safety precautions and should not interfere with a pacemaker. Prolonged use of an electric trimmer (or warnings apply to the use of all STIHL When in doubt, however, consult your other machines) exposing the operator electric trimmers. Different models may...
- Page 8 STIHL electric trimmer, their use all foreign objects (gravel, hands. may, in fact, be extremely dangerous. glass, wire, etc.) thrown...
- Page 9 120 Volt appliances using coupling (2). ply and have a dealer 0 - 6 amps replace the power supply Cord length (ft) 25 50 100 150 cord. Immediately Wire size (AWG) 18 16 replace any damaged extension cords. FSE 60...
- Page 10 To unplug, grasp the plug not the To reduce the risk of eye and other injury cord. always wear proper eye protection (see the chapter on "Proper Clothing") and ensure that bystanders are at least 50 feet (15 m) away. To reduce the risk FSE 60...
- Page 11 Check damaged parts. Before further slopes or uneven ground. Always hold the trimmer firmly with both use of the trimmer, a guard or other part hands. Wrap your fingers tightly around that is damaged should be carefully the handles, keeping the handles FSE 60...
- Page 12 If the maintenance or repair work or cleaning after the throttle trigger is tool continues to loosen, see your STIHL the electric trimmer. Do not attempt any released (flywheel effect). dealer.
- Page 13 For an illustration of the various cutting STIHL Autocut 5-2 Mowing Head tools and instructions on proper mount- Nylon cutting line advances auto- ing see the chapter on "Mounting the matically when tapped against the Mowing Head"...
-
Page 14: Approved Combinations Of Cutting Attachment, Deflector, Handle And Harness
Based on the cutting attachment being used: Mowing heads Choose the proper deflector in order to reduce the risk of injury from thrown STIHL AutoCut C 52 objects and contact with the cutting STIHL AutoCut 5 - 2 attachment. FSE 60... -
Page 15: Mounting The Drive Tube
Insert the hex nut (3) in the loop Tighten down the screw (3) in the handle (1). housing firmly. Squeeze the ends of the clamp together, fit the screw (4) with washer (5) from the other side and tighten down firmly. FSE 60... -
Page 16: Mounting The Deflector
English STIHL AutoCut 5-2 Mounting the Deflector Mounting the Cutting Attachment Placing Power Tool on the Ground Push the deflector (1) over the clamp (2) as far as stop. Switch off the power tool. Lay your trimmer on its back with the loop handle facing down and the output shaft facing up. -
Page 17: Connecting To Power Supply
English STIHL AutoCut C 5-2 Connecting to Power Supply The voltage and frequency of your power supply and the voltage and frequency specified on the unit must be the same. Use an extension cord specifically approved for outdoor applications. Extension Cords... -
Page 18: Fitting The Harness
Strain Relief opening (4). Slip the loop (3) over the hook (5) The strain relief (cord retainer) protects and pull it tight. the appliance cord against damage. Connect the extension cord plug to a properly installed wall outlet. FSE 60... -
Page 19: Switching On
The cutting attachment must not touch the ground or any other objects. Press down the starting lockout lever (1) and hold it in that position. Squeeze the trigger switch (2). FSE 60... -
Page 20: Maintaining The Mowing Head
The blade (1) on the deflector (2) trims surplus line to the correct STIHL AutoCut C 5 - 2 length – avoid tapping the mowing head more than once at a time. Line feed operates only if both lines still Disassembling the mowing head and have a minimum length of 2.5 cm (1 in). - Page 21 "Mounting the Mowing Head". Push the straight end of each line through one sleeve (5) in the mowing head (3) until you feel a noticeable resistance – and then continue pushing as far as stop. FSE 60...
- Page 22 English STIHL AutoCut 5 - 2 Removing remaining nylon line Hold the mowing head steady. Use green-coded nylon line with a diameter of 2.0 mm (0.08 in). Rotate the spool counterclockwise until the shortest line is about 10 cm Cut two 3 m (9ft 9in) lengths of (4 in).
- Page 23 (5) as the spool is pushed into Assembling the mowing head position. Pull out the ends of the lines as far NOTICE as stop. Check that the spring is installed (see Mount the mowing head on the "Mounting the Mowing Head"). machine. FSE 60...
-
Page 24: Maintenance And Care
Have replaced by dealer Check operation Switch, starting lockout Have replaced by dealer Cooling inlets Clean All accessible screws and nuts Retighten Visual Inspection Cutting attachment (mowing head) Replace Check tightness Safety labels Replace STIHL recommends a STIHL servicing dealer. FSE 60... -
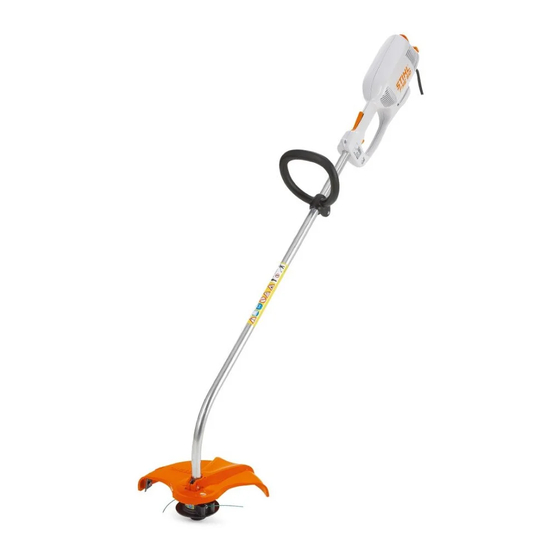
Page 25: Main Parts
English Main Parts Power Supply Cord Cooling air intake slots Trigger Switch Starting Lockout Lever Carrying Loop Loop Handle Drive Tube Mowing Head Line Length Limiter Blade 10 Deflector 11 Strain Relief Serial Number FSE 60... -
Page 26: Specifications
Supplies electric to current motor. Motor receptacles and trimmer plug. Cooling air intake slots Cooling air flows to the motor FSE 60, 120 V version through the slots. Voltage: 120 V Trigger Switch Frequency: 60 Hz To switch the machine "on"... -
Page 27: Maintenance And Repairs
Genuine STIHL parts can be identified by the STIHL part number, the STIHL products must not be thrown in { logo and, in some cases, by the garbage can. Take the product, the STIHL parts symbol K. The... -
Page 28: Trademarks
Any unauthorized use of these Ematic ™ ® trademarks without the express written EASYSTART FixCut ™ consent of ® FARM BOSS ANDREAS STIHL AG & Co. KG, HT Plus ™ ® Waiblingen is strictly prohibited. iCademy IntelliCarb ™ ® MAGNUM Master Control Lever ™... -
Page 29: Addresses
English Addresses STIHL Inc. 536 Viking Drive P.O. Box 2015 Virginia Beach, VA 23452-2015 FSE 60... - Page 30 Montaje del accesorio de corte Comuníquese con su representante de Conexión eléctrica de la máquina STIHL o el distribuidor de STIHL para su Uso de la correa para hombro zona si no se entiende alguna de las Encendido de la máquina instrucciones dadas en el presente Apagado de la máquina...
-
Page 31: Acerca De Este Manual De Instrucciones
Mejoramientos técnicos LEA TODAS LAS INSTRUCCIONES Muchas de las instrucciones de uso y La filosofía de STIHL es mejorar Evite los entornos peligrosos - No seguridad vienen acompañadas de continuamente todos sus productos. utilice el aparato en lugares ilustraciones. - Page 32 (2) del cordón de más grueso. Cuanto menor el tire del mismo para desconectarlo extensión. número de calibre, tanto más del receptáculo. Mantenga el grueso el cordón. cordón alejado de fuentes de calor, aceite y bordes afilados. FSE 60...
- Page 33 Reemplace los cordones dañados o 18. Mantenga su aparato con esmero. solicite al concesionario autorizado Siga las instrucciones para lubricar STIHL que los repare. la máquina y cambiar sus Para reducir el riesgo de sacudidas accesorios. Inspeccione el cordón eléctricas, este equipo tiene un enchufe eléctrico del aparato...
-
Page 34: Medidas De Seguridad Y Técnicas De Manejo
Pida Nunca deje la orilladora funcionando sin fatiga, consulte a su médico antes de a su concesionario STIHL que le enseñe vigilancia. utilizar la orilladora. el manejo de la orilladora eléctrica. - Page 35 ADVERTENCIA cara, STIHL recomienda usar también del carpio. una careta o protector facial adecuado Según los datos obtenidos por STIHL en sobre las gafas o anteojos de seguridad. Estas condiciones reducen la capacidad la actualidad, el motor eléctrico de esta de las manos de sentir y regular la máquina no debe interferir con un...
- Page 36 STIHL. Si bien es posible conectar a la (una clavija es más ancha que la otra) y identificación. En caso de duda, utilice el orilladora eléctrica de STIHL ciertos...
- Page 37 Deslice el lazo sobre el gancho (5) y tire A, SJOW-A, SJTW-A o SJTOW-A. del cordón para dejarlo ajustado. Protector contra tirones Para reducir el riesgo de desconectar el cordón del aparato del alargador cuando se está trabajando: FSE 60...
- Page 38 ADVERTENCIA accesorios tales como el hilo y piezas Asegúrese que el interruptor esté en similares. posición de apagado al enchufar la máquina al suministro de energía eléctrica para evitar los riesgos de FSE 60...
- Page 39 Las 15m (50ft) herramientas de corte pueden usarse solamente para las operaciones descritas en su manual. Para reducir el riesgo de ocasionar lesiones a los ojos u otras partes del cuerpo (vea el capítulo "Vestimenta FSE 60...
- Page 40 Si la herramienta de corte o el deflector se atasca o queda pegado, siempre apague el motor, desconecte el enchufe eléctrico y asegúrese que la herramienta de corte está detenida FSE 60...
- Page 41 / EE.UU de piezas no fabricadas por STIHL ADVERTENCIA ADVERTENCIA puede causar lesiones graves o mortales. No rocíe la orilladora con agua, la Mantenga las manos y humedad puede crear riesgos de los pies lejos de la herra - Mantenga su orilladora con esmero.
- Page 42 Uso de las cabezas segadoras La cabeza segadora Autocut de STIHL produce una terminación limpia y ordenada. Se usa solamente en las orilladoras equipadas con una cuchilla...
-
Page 43: Combinaciones Aprobadas De Accesorio De Corte, Deflector, Mango Y Arnés
STIHL AutoCut C 52 STIHL AutoCut 5 - 2 Para reducir el riesgo de sufrir lesiones debido a la pérdida de control y al contacto con el accesorio de corte,... -
Page 44: Montaje Del Tubo De Mando
Apriete firmemente el tornillo (3) en Inserte la tuerca hexagonal (3) en el la caja. mango tórico (1). Comprima los extremos de la abrazadera, instale el tornillo (4) con la arandela (5) por el otro lado y apriételos firmemente. FSE 60... -
Page 45: Montaje De La Barra De Defensa
/ EE.UU STIHL AutoCut 5-2 Montaje de la barra de Montaje del accesorio de defensa corte Colocación de la herramienta motorizada en el suelo Empuje el deflector (1) sobre la abrazadera (2) hasta el tope. Apague la herramienta motorizada. - Page 46 / EE.UU STIHL AutoCut C 5-2 Retire la cabeza segadora. Sujete la cabeza segadora firmemente. Destornille la tapa en sentido contrahorario. Deslice la cabeza segadora (2) por encima del tubo (5) y engrane el Deslice la cabeza segadora (2)
-
Page 47: Conexión Eléctrica De La Máquina
Conecte el enchufe del alargador a cordón) protege el cordón eléctrico del Cordones de 2 m (6,5 pies) o más de un tomacorriente de pared aparato contra el daño. largo: 1,5 mm , tipo H07 RN - F correctamente instalado. FSE 60... -
Page 48: Uso De La Correa Para Hombro
El accesorio de corte no deberá tocar el suelo ni ningún otro objeto. Presione la palanca de bloqueo de estacionamiento (1) y manténgala en esa posición. Comprima el gatillo (2). FSE 60... -
Page 49: Almacenamiento De La Máquina
2,5 cm (1 pulg). Si el hilo mide menos de 2,5 cm (1 pulg): ADVERTENCIA Para reducir el riesgo de sufrir lesiones, siempre apague el motor antes de ajustar el hilo de nilón con la mano. FSE 60... - Page 50 Instale la cabeza segadora – vea De ser necesario, retire la cabeza "Montaje de la cabeza segadora". segadora. STIHL AutoCut C 5 - 2 Desarmado de la cabeza segadora y retiro del hilo de nilón restante Durante el funcionamiento normal, se utiliza todo el hilo de nilón disponible en...
- Page 51 / EE.UU Enrollado del hilo en el carrete STIHL AutoCut 5 - 2 Retiro del hilo de nilón restante Sujete la cabeza segadora firmemente. Use hilo de nilón codificado verde Gire el carrete en sentido de 2,0 mm (0,08 pulg) de diámetro.
- Page 52 Doble los extremos de los hilos por hasta que paren. encima del borde de los agujeros Verifique que el resorte esté instalado para formar un gancho. Instale la cabeza segadora en la (vea "Montaje de la cabeza segadora"). máquina. FSE 60...
-
Page 53: Información Para Mantenimiento
Entradas de enfriamiento Limpiar Todos los tornillos y tuercas accesibles Volver a apretar Inspección visual Accesorio de corte (cabeza de segado) Reemplazar Revisar el apriete Etiquetas de seguridad Reemplazar STIHL recomienda acudir a un concesionario STIHL para servicio. FSE 60... -
Page 54: Componentes Importantes
Aberturas de admisión de aire de enfriamiento Gatillo Palanca de bloqueo de arranque Argolla de transporte Mango tórico Tubo de mando Cabeza segadora Cuchilla limitadora del largo del hilo 10 Deflector 11 Protector contra tirones Número de serie FSE 60... -
Page 55: Especificaciones
Aberturas de admisión de aire de FSE 60, versión de 120 V enfriamiento 11 Protector contra tirones El aire de enfriamiento pasa al Voltaje: 120 V Sostiene al cordón de extensión y... -
Page 56: Información De Reparación
STIHL utilizando piezas de repuesto genuinas de STIHL. No se debe botar los aparatos STIHL en Los repuestos genuinos STIHL se el basurero. Lleve el producto, los identifican por medio del número de... -
Page 57: Marcas Comerciales
Ematic ™ ® uso de estas marcas comerciales sin el EASYSTART FixCut ™ consentimiento expreso por escrito de ® FARM BOSS ANDREAS STIHL AG & Co. KG, HT Plus ™ ® Waiblingen. iCademy IntelliCarb ™ ® MAGNUM Master Control Lever ™... -
Page 58: Direcciones
/ EE.UU Direcciones STIHL Inc. 536 Viking Drive P.O. Box 2015 Virginia Beach, VA 23452-2015 FSE 60... - Page 60 This product contains a chemical Este producto contiene una sustancia known to the State of California to química conocida en el Estado de cause cancer. California como causante del cáncer. 0458-238-8621-A englisch / spanisch USA englisch / spanisch USA www.stihl.com *04582388621A* 0458-238-8621-A...
Need help?
Do you have a question about the FSE 60 and is the answer not in the manual?
Questions and answers