Table of Contents
Advertisement
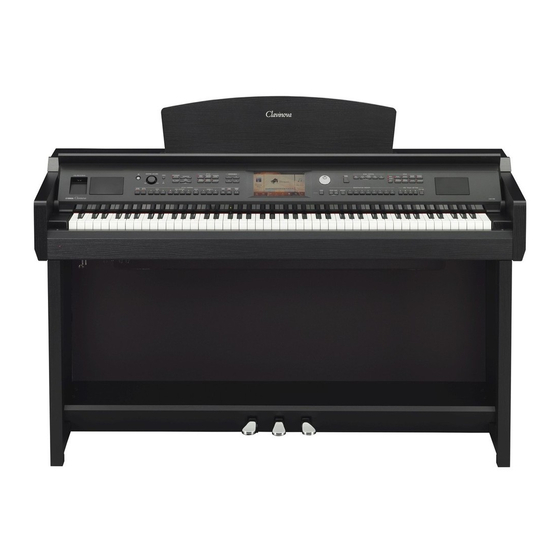
CVP - 709
CVP - 705
R e f e r e n c e M a n u a l
This manual explains the functions called up by touching each icon shown in the Menu display, as well as other
detailed functions and operations.
Please read the Owner's Manual first for basic operations, before reading this Reference Manual.
Using the PDF manual
• To quickly jump to items and topics of interest, click on the desired items in the "Bookmarks" index to the left of
the main display window. (Click the "Bookmarks" tab to open the index if it is not displayed.)
• Click the page numbers that appear in this manual to go directly to the corresponding page.
• Select "Find" or "Search" from the Adobe Reader "Edit" menu and enter a keyword to locate related information
anywhere in the document.
NOTE
The names and positions of menu items may vary according to the version of Adobe Reader being used.
• Unless indicated otherwise, the illustrations and displays as shown in this manual are based on the CVP-709 (in English). These are
for instructional purposes only, and may appear somewhat different from those on your instrument.
• The explanations in this manual apply to the firmware version 1.00. Yamaha may from time to time update firmware of the product
without notice for improvement. We recommend that you check our website for later releases and upgrade your firmware.
http://download.yamaha.com/
• The company names and product names in this manual are the trademarks or registered trademarks of their respective companies.
EN
Advertisement
Table of Contents

Related Manuals for Yamaha Clavinova CVP-709


Summary of Contents for Yamaha Clavinova CVP-709
- Page 1 • The explanations in this manual apply to the firmware version 1.00. Yamaha may from time to time update firmware of the product without notice for improvement. We recommend that you check our website for later releases and upgrade your firmware.
-
Page 2: Table Of Contents
Contents Chapter 1 Functions Called Up by Touching Each Icon Shown in the Menu Display This chapter explains the functions called up by touching each of the icons shown in the Menu display. Adjusting the Tempo......................5 Transposing the Pitch in Semitones .................. 6 Changing the Split Point, Fingering Type and Chord Detection Area...... - Page 3 Chapter 2 Other Functions and Settings This chapter explains the detailed functions and operations called up by displays not included in the Menu display. Adjusting the Accompaniment Volume or Turning Each Accompaniment Part On/Off in the Piano Room ......................105 Displaying the Instruments Assigned to the Keyboard (Drum Kit Tutor) ....
- Page 4 Chapter 1 Functions Called Up by Touching Each Icon Shown in the Menu Display This chapter explains the functions called up by touching each of the icons shown in the Menu display. CVP-709/CVP-705 Reference Manual...
-
Page 5: Adjusting The Tempo
Adjusting the Tempo Indicates the tempo value during playback of the metronome, Style and MIDI Song. Indicates the tempo value of the current Style. The Style will be started at this tempo. When you select an Audio Style (CVP-709 only), the upper limit of the tempo will be shown below the tempo value. -
Page 6: Transposing The Pitch In Semitones
Transposing the Pitch in Semitones You can transpose the overall pitch of the instrument (the keyboard sound, Style playback, MIDI Song playback, and so on) in semitone steps. Master Transposes the overall pitch of the instrument, except for the Audio Songs and input sound from a microphone or the [AUX IN] jack. -
Page 7: Changing The Split Point, Fingering Type And Chord Detection Area
Changing the Split Point, Fingering Type and Chord Detection Area Split Point/Fingering Type For information about Split Point and Fingering Types, refer to the Owner’s Manual. Specifying Chords with Your Right Hand for Style Playback By changing the Chord Detection area from the left-hand section to the right-hand section, you can play a bass line with your left hand while using your right hand to play chords for controlling Style playback. -
Page 8: Learning How To Play Specific Chords (Chord Tutor)
Learning How To Play Specific Chords (Chord Tutor) If you know the name of a chord but don’t know how to play it, this function indicates you the notes you should press. Root Lets you select the desired Chord Root. Type Lets you select the desired Chord Type. -
Page 9: Adjusting The Volume Balance
Adjusting the Volume Balance For information about this display, refer to the Owner’s Manual. CVP-709/CVP-705 Reference Manual... -
Page 10: Editing The Volume And Tonal Balance (Mixer)
Editing the Volume and Tonal Balance (Mixer) The “Panel” – “Song Ch9-16” Part Selection tabs at the top of the Mixer display let you adjust the sound for each corresponding part, while “Master” lets you make overall sound adjustments for the entire instrument. NOTE When an Audio Song is selected, you cannot set the parameters related to the Song part or channels. - Page 11 Editing the Volume and Tonal Balance (Mixer) EQ (Equalizer) Equalizer (also called “EQ”) is a sound processor that divides the frequency spectrum into multiple bands that can be boosted or cut as required to tailor the overall frequency response. The “Panel” – “Song Ch9-16” Part Selection tabs at the top of the Mixer display let you adjust the EQ for each corresponding part, while “Master”...
- Page 12 Editing the Volume and Tonal Balance (Mixer) Select the desired EQ type to be edited. FLAT: • Flat EQ settings. The gain of each frequency is set to 0dB. LOW CUT: • EQ setting for decreasing the level of the low frequencies, making the sound clearer. LOW BOOST: •...
- Page 13 Editing the Volume and Tonal Balance (Mixer) Insertion Effect Lets you assign the desired Insertion Effect Type for each part by touching the area above each knob. You can adjust the degree to which each Effect is applied by using the knobs. If you want to assign each of the Insertion Effects to a specific Part and select an Effect Type, touch (Setting) at the upper right of this area and make necessary settings in the window.
- Page 14 Editing the Volume and Tonal Balance (Mixer) Touch (Save), then save the settings as a User Effect type. Up to 3 Effect types can be stored for each of the Reverb, Chorus and Variation Effect Blocks while up to 10 Effect types can be stored for the Insertion Effect Blocks.
- Page 15 Editing the Volume and Tonal Balance (Mixer) Pan/Volume You can adjust the Pan (stereo position of the sound) and Volume for each Part. This display is not available when the “Master” tab is selected at the top of the Mixer display. Determines the stereo position of each part (channel).
-
Page 16: Master Compressor
Editing the Volume and Tonal Balance (Mixer) Master Compressor Compressor is an effect commonly used to limit and compress the dynamics (softness/loudness) of an audio signal. For signals that vary widely in dynamics, such as vocals and guitar parts, it “squeezes” the dynamic range, effectively making soft sounds louder and loud sounds softer. -
Page 17: Block Diagram
Editing the Volume and Tonal Balance (Mixer) Block Diagram CVP-709 CVP-705 * MIC EFFECT = 3 Band EQ/Noise Gate/Compressor, VH = Vocal Harmony, VE = Vocal Harmony Effect CVP-709/CVP-705 Reference Manual... -
Page 18: Editing Music Notation (Score) Settings
Editing Music Notation (Score) Settings Select a MIDI Song then touch [Score] to call up the music notation of the current MIDI Song. You can change the notation indication as desired to suit your personal preferences. Indicates the name of the current Song. Also, the tempo value is shown at the right end. If you want to change the Song, touch the Song name to call up the Song Selection display. - Page 19 Editing Music Notation (Score) Settings View Setting From the display called up via (View Setting), you can set the parameters related to the view of the notation. Size Determines the display resolution (or zoom level) of the notation. Left Turns indication of the left-hand notation on or off. If an “-” indication appears at this parameter and is unavailable, go to the “Detail Setting”...
-
Page 20: Editing Lyrics Display Settings
Editing Lyrics Display Settings Select a MIDI Song, and then touch [Lyrics] to call up the lyrics of the current MIDI Song. You can change the lyrics indication as desired to suit your personal preferences. Indicates the name of the current Song. Also, the current measure number is shown at the right end. If you want to change the Song, touch the Song name here to call up the Song Selection display. -
Page 21: Showing The Text Display And Editing Text Display Settings
Showing the Text Display and Editing Text Display Settings You can view the text file (.txt) created by using a computer on the instrument’s display. This feature enables various useful possibilities, such as the showing of lyrics, chord names, and text notes. Showing the Text Display If you want to view the text in a USB flash drive, connect the USB flash drive containing text data to the [USB TO DEVICE] terminal beforehand. -
Page 22: Editing Text Display Settings
Showing the Text Display and Editing Text Display Settings Editing Text Display Settings Indicates the current text file which is shown on the display. Touching here calls up the text File Selection display which lets you select an original text file in the USB flash drive or copy it from the USB flash drive to the internal User memory. -
Page 23: Using Keyboard Harmony
Using Keyboard Harmony Set the Keyboard Harmony function to “On.” When this is set to “On, ” Harmony or Echo is applied to your keyboard performance automatically. Adjust related parameters such as Harmony type and volume. NOTE The available parameters differ depending on the Harmony type. Type Lets you select one of the Harmony types, which are divided into the following groups. - Page 24 Using Keyboard Harmony Multi Assign Type The Multi Assign effect automatically assigns notes played simultaneously on the right-hand section of the keyboard to separate parts (Voices). Both of the keyboard parts [Main] and [Layer] should be turned on when using the Multi Assign effect. The Main and Layer Voices are alternately assigned to the notes in the order you play.
-
Page 25: Microphone Settings
Microphone Settings This section lets you set parameters for various Effects that are applied to the microphone sound. You should make both “Vocal” and “Talk” settings — “Vocal, ” for your singing performance, and “Talk, ” for making announcements between songs, for example. - Page 26 Microphone Settings Pitch Detect Lets you set how the pitch of the microphone sound during performance is detected. (only when Vocal Type Set this to obtain the most natural vocal harmony, depending on your voice. “Vocal” is • Low: Setting for lower voices. This setting is also appropriate for growling selected) and shouting.
-
Page 27: Vocal Harmony Settings
Vocal Harmony Settings This section allows you to set various Vocal Harmony parameters, even though just selecting a Vocal Harmony Type will call up the appropriate settings and you need not edit these parameters normally. If you want to make more detailed settings for your performance, read this chapter. - Page 28 Vocal Harmony Settings Editing the Vocal Harmony Type By editing the parameters of the preset Vocal Harmony type, you can create your original Vocal Harmony type. Touch the Vocal Harmony name to call up the Vocal Harmony Selection display. Select the desired Vocal Harmony type. Depending on the selected Vocal Harmony type, edit the relevant settings as desired.
- Page 29 Vocal Harmony Settings Type Determines how the harmony notes are applied to the microphone sound by selecting one of the Chordal Types. Almost all Types apply the harmony notes based on the chord specified via the left hand section of the keyboard, chord section of the keyboard, or the Song data, with the exception of the following two Types.
- Page 30 Vocal Harmony Settings Harmony Lets you set how the Harmony notes are assigned or voiced to the Lead note (microphone sound). For details, refer to the “MIDI Reference” (Vocal Harmony Assign Parameter List) on the website. When the Harmony mode is set to “Chordal” •...
- Page 31 Vocal Harmony Settings To Harmony Adjusts the Effect depth applied to the Harmony notes. Reverb Depth Adjusts the Reverb depth applied to the microphone sound. This setting is equivalent to that in the Mixer display (page 14). Chorus Depth Adjusts the Chorus depth applied to the microphone sound. This setting is equivalent to that in the Mixer display (page 14).
-
Page 32: Creating/Editing Music Finder Records
Creating/Editing Music Finder Records Creating/Editing a Record You can create a new Record or edit the currently selected Record. If you want to edit the existing Record, select the desired Record on the Music Finder display. This operation is not necessary when you create a new Record from scratch. Call up the operation display. - Page 33 Creating/Editing Music Finder Records Beat Lets you enter the desired Beat which will be used for sorting the Records. This is not available for Song Records. NOTE The setting here is just for sorting the Records, and does not affect the actual beat of the specified Style.
- Page 34 Creating/Editing Music Finder Records Calling up the Song or Style registered to Music Finder You can call up the registered Song or Style in the same way as the other records. Refer to the Owner’s Manual for details. NOTE If you register a Song or Style in the USB flash drive to a Record, make sure to connect the same USB flash drive to the [USB TO DEVICE] terminal when you call it up via the Music Finder Record.
-
Page 35: Calling Up Registration Memory Numbers In Order (Registration Sequence)
Calling Up Registration Memory Numbers in Order (Registration Sequence) For changing the panel setup quickly during a live performance, this instrument features the Registration Sequence which lets you call up the eight setups in any order you specify, by simply using the ASSIGNABLE buttons or the pedal as you play. - Page 36 Calling Up Registration Memory Numbers in Order (Registration Sequence) Program a Sequence order in which the Registration Memory number is to be called up. Basically, press the desired Registration Memory number button on the panel, then touch [Insert] to enter the selected number.
-
Page 37: Disabling Recall Of Specific Items (Registration Freeze)
Disabling Recall of Specific Items (Registration Freeze) Registration Memory lets you recall all the panel setups you made with a single button press. However, there may be times that you want certain items to remain the same, even when switching Registration Memory setups. For example, you may want to switch Voice settings while keeping the same Style. -
Page 38: Assigning A Specific Function To Each Pedal Or Assignable Button
Assigning a Specific Function to Each Pedal or ASSIGNABLE button Pedal You can assign various functions to the three pedals of the instrument, instead of the original functions (damper, sostenuto and soft). Likewise, various functions can be assigned to the Footswitch or Foot Controller connected to the [AUX PEDAL] jack. - Page 39 Assigning a Specific Function to Each Pedal or ASSIGNABLE button Assignable Pedal Functions For functions indicated with “*”, use only the Foot Controller; proper operation cannot be done with a Footswitch. For functions indicated with “**”, they can be assigned also to the ASSIGNABLE [1] – [4] buttons. Articulation 1/2** When you use a Super Articulation Voice that has an effect assigned to the pedal/ footswitch, you can enable the effect by pressing the pedal/footswitch.
- Page 40 Assigning a Specific Function to Each Pedal or ASSIGNABLE button Vibe Rotor On/Off** Switches the Vibe Rotor on and off when the Insertion Effect Type (page 45) is set to “VibeRotor” in the “Legacy” category. Keyboard Harmony On/ Switches the Keyboard Harmony (page 23) function on and off.
- Page 41 Assigning a Specific Function to Each Pedal or ASSIGNABLE button Assignable You can assign a specific function to each of the ASSIGNABLE [1] – [4] buttons, letting you call up often used functions quickly. Likewise, you can also assign each of the icons shown in the Menu display to each of these buttons. Select the item for each of ASSIGNABLE buttons.
-
Page 42: Editing A Voice (Voice Edit)
Editing a Voice (Voice Edit) The Voice Edit feature allows you to create your own Voices by editing some parameters of the existing Voice. Once you’ve created a Voice, you can save it as a User Voice for future recall. This section covers the editing of Voices other than Organ Flutes Voices, since the method of editing is different between them. - Page 43 Editing a Voice (Voice Edit) Editable Parameters in the Voice Edit display Common Volume Adjusts the volume of the current edited Voice. Touch Sense Depth Adjusts the touch sensitivity (velocity sensitivity), or how greatly the volume responds to your playing strength. Offset Touch Sensitivity Depth Touch Sensitivity Offset...
- Page 44 Editing a Voice (Voice Edit) Sound Filter Filter is a processor that changes the timbre or tone of a sound by either blocking or passing a specific frequency range. The parameters below determine the overall timbre of the sound by boosting or cutting a certain frequency range.
-
Page 45: Keyboard Harmony
Editing a Voice (Voice Edit) Modulation Amplitude Determines the degree to which the pedal modulates the amplitude (volume). LFO Pitch Determines the degree to which the pedal modulates the pitch, or the vibrato effect. LFO Filter Determines the degree to which the pedal modulates the Filter cutoff frequency, or the wah effect. -
Page 46: Editing An Organ Flutes Voice (Voice Edit)
Editing an Organ Flutes Voice (Voice Edit) The Organ Flute Voices can be edited by adjusting the footage levers, adding the attack sound, applying effect and equalizer, etc. Select the desired Organ Flutes Voice. From the [Organ] Category, touch [Organ Flutes], then select the desired Organ Flutes Voice. On the Voice Edit display called up via [Menu] →... - Page 47 Editing an Organ Flutes Voice (Voice Edit) As necessary, touch (Setting) then set the parameters related to the Effects and EQ. The parameters are same as those in the Effect display and EQ display of the previous chapter “Editing a Voice (Voice Edit)”...
-
Page 48: Creating/Editing Styles (Style Creator)
Creating/Editing Styles (Style Creator) The Style Creator function lets you create an original Style by recording the rhythm pattern via the keyboard performance and using the already-recorded Style data. Basically, select a preset Style that is closest to the type you want to create, then record the rhythm pattern, bass line, chord backing, or phrase (referred to as “Source Pattern”... - Page 49 Creating/Editing Styles (Style Creator) Basic Procedure for creating a Style The detailed instructions are described on the reference page of each step. Select the desired Style as starting data. Call up the Style Creator display via [Menu] → [StyleCreator]. On the “Basic”...
- Page 50 Creating/Editing Styles (Style Creator) Basic The explanations here apply to step 3 on page 49. This display lets you set the basic parameters such as Section selection. Initializes all channel data of all Sections belonging to make the current Style empty. Touch here Initialize Style when you want to create the Style data from scratch.
-
Page 51: Realtime Recording
Creating/Editing Styles (Style Creator) Realtime Recording The explanations here apply to step 4 on page 49. In the “Rec Channel” display, you can create the channel data via the Realtime Recording. Realtime Recording Characteristics in the Style Creator Loop Recording Style playback repeats the rhythm patterns of several measures in a “loop, ”... - Page 52 Creating/Editing Styles (Style Creator) Available Voices for recording For the Rhythm1 channel, any except Organ Flutes Voices can be used for recording. For the Rhythm2 channel, only Drum/SFX kits can be used for recording. Press the STYLE CONTROL [R/J](START/STOP) button to start recording. Since already recorded data plays back, turn each channel on or off by touching as desired.
- Page 53 Creating/Editing Styles (Style Creator) If necessary, select a Voice then practice the bass line, chord backing, or phrase to be recorded. Touch the instrument icon (illustration) to call up the Voice Selection display then select the desired Voice. After selecting, touch [Close] to return to the original display. With the selected Voice, practice the phrase or chord backing to be recorded.
-
Page 54: Step Recording
Creating/Editing Styles (Style Creator) Step Recording The explanations here apply to step 4 on page 49. In the Step Recording (Style Edit) display called up by touching (Edit) at the upper right of the display, you can record or edit notes one by one. This Step Recording procedure is essentially the same as that for Song Recording (page 62) with the exception of the points listed below:... - Page 55 Creating/Editing Styles (Style Creator) Channel Edit The explanations here apply to step 5 on page 49. The “Channel Edit” display lets you edit the already recorded channel data. Select the Target channel then edit the desired parameters. After editing the desired parameter, touch [Execute] to actually enter the edits for each setup window. When execution is completed, this button changes to [Undo], letting you restore the original data if you are not satisfied with the results.
- Page 56 Creating/Editing Styles (Style Creator) Dynamics This changes the velocity/volume (or accent) of certain notes in the Style playback. The Dynamics settings can be applied to each channel individually or all channels of the selected Style. Accent Type Determines the type of accent applied — in other words, which notes are emphasized.
- Page 57 The explanations here apply to step 5 on page 49. The Style File Format (SFF) combines all of Yamaha’s Style playback know-how into a single unified format. Setting the SFF related parameters determines how the original notes are converted to the actual sounded notes based on the chord you specify in the Chord area of the keyboard. The conversion flow is shown below.
- Page 58 Creating/Editing Styles (Style Creator) Target Ch Select the target channel to be edited. Source Root/ These settings determine the original key of the Source Pattern (i.e., the key used when recording the pattern to the channel other than the Rhythm channels). If you set “Fm7” here, specifying Chord “Fm7”...
- Page 59 Creating/Editing Styles (Style Creator) NTR/NTT Selects the Note Transposition Table which determines how the notes in the Source Pattern are transposed according to the Chord Type change. (Note Type Transposition When NTR is set to “Root Trans” or “Root Fixed”: Rule/Note When NTR is set to Root Fixed, the transposition table used does not do Transposition...
- Page 60 Creating/Editing Styles (Style Creator) NTR/NTT Arpeggio Suitable for arpeggio-played sound of the guitar, resulting in beautiful Type four-note arpeggio sounds. (Note Transposition The channel for which this is set to “On” will be played back by the bass root note, when Rule/Note the on-bass chord is recognized by the instrument.
-
Page 61: Creating/Editing Midi Songs (Song Creator)
Creating/Editing MIDI Songs (Song Creator) The Owner’s Manual covers how to create an original Song by recording your keyboard performance (see instructions of Realtime Recording). This Reference Manual shows how to create an original Song by entering notes one by one (instructions of the Step Recording) and how to improve the already created Song by editing the detailed parameters. - Page 62 Creating/Editing MIDI Songs (Song Creator) Basic Procedure for creating a Song This section covers the basic procedure for Step Recording. Select the desired Song or create a new empty Song. To create an empty Song, press the [I] (REC) button, then touch [New MIDI] and [Cancel] in order. Call up the Song Creator display via [Menu] →...
- Page 63 Creating/Editing MIDI Songs (Song Creator) Recording Melodies via Step Recording The explanations here apply when one of “Ch1” – “Ch16” is selected in step 5 on page 62. With [Step Rec] turned on at the bottom left of the display, you can input the notes one by one, using the controls below. ...
- Page 64 Creating/Editing MIDI Songs (Song Creator) Note Type, Note Touching [Note Type] repeatedly will alternate the type of the note indications at right Indication in order: normal, dotted, and triplet. Select one of three types, then select (turn on) one of the note indications with which the next note is input. If you touch the selected note indication (which is turned on) again, a rest will be input with the corresponding length.
- Page 65 Creating/Editing MIDI Songs (Song Creator) Enter a quarter-note rest. Touch the quarter-note ( ), that has been turned on, just once to input a quarter-note rest. Be careful not to touch the same note (which is turned on) several times. Doing so results in multiple rest being input for the corresponding times.
- Page 66 Creating/Editing MIDI Songs (Song Creator) Recording Chord/Section Change Events via Step Recording The explanations here apply when “Chord” is selected in step 5 on page 62. With [Step Rec] turned on at the bottom left of the display, you can input the Chord/Section Change events for Style playback one by one. NOTE (CVP-709 only) The Audio part of an Audio Style cannot be recorded.
- Page 67 Creating/Editing MIDI Songs (Song Creator) Example of Step Recording — Chord/Section Events Main A Break Main B * The numbers shown in the illustration correspond to the following operation step numbers. These instructions show how to input the Chord/Section change events of the above notation via Step Recording. Before starting, note the following points: •...
- Page 68 Creating/Editing MIDI Songs (Song Creator) Enter the chords for the Main B section. Press the MAIN VARIATION [B] button. Touch the whole-note length ( ) to turn it on. Play the chord C in the chord section of the keyboard. The Chord and Section change events are now entered.
- Page 69 Creating/Editing MIDI Songs (Song Creator) Editing Target Specifies the Editing Target. • Ch 1 – Ch 16: When one of these is selected, you can edit the channel data. • SysEx: Lets you edit System Exclusive data which applies to all channels. •...
- Page 70 Creating/Editing MIDI Songs (Song Creator) Event List Sys/Ex. Displays the System Exclusive data in the Song. Keep in mind that (System Exclusive) you cannot create new data or change the contents of the data here; however, you can delete, cut, copy, and paste the data. Meta Displays the SMF meta events in the Song.
- Page 71 Creating/Editing MIDI Songs (Song Creator) Channel Edit — Editing Channel Data The explanations here apply to step 6 on page 62. The Channel Edit display lets you correct or convert the specific portion of the Song data. After editing the desired parameter, touch [Execute] to actually enter the edits for each setup window. When execution is completed, this button changes to [Undo], letting you restore the original data if you are not satisfied with the results.
- Page 72 Creating/Editing MIDI Songs (Song Creator) Quantize Strength Determines how strongly the notes will be quantized. A setting of 100% produces exact timing. If a value less than 100% is selected, notes will be moved toward the specified quantization beats according to the specified percentage. Applying less than 100% quantization lets you preserve some of the “human”...
-
Page 73: Voice Settings
Voice Settings Tune Lets you adjust the pitch related parameters for each keyboard part. Tuning Determines the pitch of each keyboard part. If a VRM Voice is selected as the Main part, the tuning of the resonance sound of all VRM Voices is set to the same as the tuning of the Main part. - Page 74 Voice Settings Piano Page 1/2 Lets you set the Piano-related parameters which are available only for the VRM Voices. Refer to the Owner’s Manual “Playing Realistic Resonance-enhanced Piano Sounds (VRM Voices). ” Page 2/2 Lets you set the Piano-related parameters which are available only for some of the piano Voices in the “Piano” category (listed in the “Target Voice List”...
-
Page 75: Voice Set
Voice Settings Voice Set Each Voice is linked to its default Voice Set parameter settings, equivalent to those in the Voice Edit display (page 42) for the Voices other than the Organ Flutes Voices. Although usually these settings are automatically called up by selecting a Voice, you can also disable this feature. - Page 76 Voice Settings Cool! Voices reproduce the complex characteristics of Electric Instruments, by Cool! utilizing sophisticated programming techniques in both voicing, and the use of DSP effects. Sweet! Voices are acoustic instruments which feature the sampled vibrato of the Sweet! original player, creating a far more realistic and emotional performance than synthesized vibrato.
- Page 77 Touch the desired category, such as “GM&XG” and “MegaVoices.” NOTE You can find the “Legacy” folder in this display. This folder contains previous Yamaha Clavinova Voices (such as CVP- 609, 605 etc.) for data compatibility with other models. Select the desired Voice.
-
Page 78: Style Playback Related Settings
Style Playback Related Settings Setting • Off: The Style volume does not respond to your playing strength. Dynamics Control • Narrow: The Style volume changes over a narrow range in response to your playing strength. In other words, you must play very strongly or softly to have the volume change. - Page 79 Style Playback Related Settings ACMP On/Off Default Determines whether the [ACMP ON/OFF] button is on or off when the power is turned on. OTS Link Timing This applies to the OTS Link function. This parameter determines the timing in which the One Touch Settings change with the MAIN VARIATION [A] –...
- Page 80 Style Playback Related Settings Style Characteristics On the Style Selection display, icons defining the Style characteristics are indicated at left of the Style name. Audio (CVP-709 only): • Refer to the Owner’s Manual. Pro: • These Styles provide professional and exciting arrangements combined with perfect playability. The resulting accompaniment exactly follows the chords of the player.
-
Page 81: Song Settings Related To Playback/Recording
Song Settings Related to Playback/Recording Guide If you use the Guide function, the keyboard guide lamps indicate the notes (location and timing) for you to play. Also, when you sing along with a MIDI Song playback using a connected microphone, the instrument automatically adjusts the timing of the MIDI Song playback to match your vocal performance. - Page 82 Song Settings Related to Playback/Recording Part Ch Right Determines which channel is assigned to the right-hand part. Left Determines which channel is assigned to the left-hand part. Auto Set When set to “On, ” this automatically sets the proper MIDI channels for the right- and left hand parts pre-programmed in the commercially available Song data.
-
Page 83: Playing Backing Parts With The Performance Assistant Technology
Song Settings Related to Playback/Recording Chord Detection Determines the priority of the chords for accompaniment, either the ones contained in the MIDI Song being played back or the chord you’ve just played in the chord section of the Priority keyboard. •... - Page 84 Song Settings Related to Playback/Recording Mode Rec Start Determines the recording start behavior. • Normal: Overwrite recording starts when Song playback is started via the SONG [R/ K] (PLAY/PAUSE) button or when you play the keyboard in the Synchro Standby mode. •...
- Page 85 Song Settings Related to Playback/Recording Press the SONG CONTROL [R/K] (PLAY/PAUSE) button to start recording. At the Punch In point specified in step 2, play the keyboard to start actual recording. At the Punch Out point specified in step 2, stop playing the keyboard. Touch (Save) which appears in the Song area of the Home display to save the recorded Song.
-
Page 86: Fine Tuning The Pitch
Fine Tuning the Pitch Master Tune – Fine Tuning the Pitch of the Entire Instrument You can fine-tune the pitch of the entire instrument in 0.2 Hz steps —useful when you play the Clavinova along with other instruments or CD music. Please note that the Tune function does not affect the Drum Kit or SFX Kit Voices and Audio Songs. - Page 87 Fine Tuning the Pitch Select the desired Scale type (temperament). You can select one of various scales for playing in custom tunings for specific historical periods or music genres. Type • Equal: The pitch range of each octave is divided equally into twelve parts, with each half- step evenly spaced in pitch.
-
Page 88: Setting The Touch Sensitivity Of The Keyboard
Setting the Touch Sensitivity of the Keyboard You can adjust the touch response of the instrument (how the sound responds to the way you play the keys). This setting does not change the weight of the keyboard. For information about this display, refer to the Owner’s Manual. CVP-709/CVP-705 Reference Manual... -
Page 89: Metronome Settings
Metronome Settings Metronome Volume Determines the level of the metronome sound. Sound Determines which sound is used for the metronome. • Bell Off: Conventional metronome sound, with no bell. • Bell On: Conventional metronome sound, with bell. • English Voice: Count in English •... -
Page 90: Midi Settings
MIDI Settings In this section, you can make MIDI-related settings for the instrument. This instrument gives you a set of ten pre- programmed templates that let you instantly and easily reconfigure the instrument to match your particular MIDI application or external device. Also, you can edit the pre-programmed templates and save up to ten of your original templates. - Page 91 MIDI Settings Master KBD In this setting, the instrument functions as a “master” keyboard, playing and controlling one or more connected tone generators or other devices (such as a computer/sequencer). (Master Keyboard) Song With this setting, only the Song channels 1 – 16 are transmitted from this instrument via the corresponding channel numbers 1 –...
- Page 92 MIDI Settings Local Control Turns the Local Control for each part on or off. When Local Control is set to “On, ” the keyboard of the instrument controls its own (local) internal tone generator, allowing the internal Voices to be played directly from the keyboard. If you set Local to “Off, ” the keyboard and controllers are internally disconnected from the instrument’s tone generator section so that no sound is output when you play the keyboard or use the controllers.
- Page 93 MIDI Settings Touch [R] to call up the other page then select which MIDI messages are to be transmitted for each Part. The following MIDI messages can be set on the Transmit/Receive display. Note (Note events) • ......page 69 CC (Control Change) •...
- Page 94 MIDI Settings MIDI transmission/reception via the USB terminal, Wireless LAN, and MIDI terminals The relationship between the MIDI terminals, Wireless LAN and the [USB TO HOST] terminal which can be used for transmitting/receiving 32 channels (16 channels x 2 ports) of the MIDI messages is as follows: MIDI reception MIDI transmission MIDI IN...
- Page 95 MIDI Settings Chord Detect – Setting the Chord Type for Style Playback The explanations here apply when you call up “Chord Detect” display in step 2 on page 90. The settings here let you determine the chord type for Style playback, based on the note messages received via MIDI. The note on/off messages received at the channel(s) set to on are recognized as the notes for detecting chords in Style playback.
-
Page 96: Making Global Settings (Utility)
Making Global Settings (Utility) Speaker/Connectivity Speaker Determines how the sound is output from the speaker of this instrument. • Headphone Switch: Speaker sounds normally, but is cut off when headphones are inserted to the [PHONES] jack. • On: Speaker sound is always on. •... -
Page 97: Usb Flash Drive
Making Global Settings (Utility) Display/Touch Screen Display Home Theme Touch and change the theme (background) of the Home display. The available settings are Piano/White/Black. Brightness Touch [L]/[R] to adjust the brightness of the display. Time Stamp Determines whether the time stamp of a file is shown on the User tab of the File Selection display or not. - Page 98 Adjusts the volume of Voice Guide. To use Voice Guide, you need to download the Voice Guide (audio) file from the Yamaha website, and save it to USB flash drive, which you then connect to this instrument. For information on using Voice Guide, refer to the Voice Guide Tutorial Manual (simple text file).
- Page 99 Making Global Settings (Utility) Factory Reset/Backup Factory Reset — Restoring the Factory Programmed Settings On page 1/2, checkmark the boxes of the desired parameters then touch [Factory Reset] to initialize the settings of the parameters which are checkmarked. System Restores the System Setup parameters to the original factory settings. Refer to “Parameter Chart” in the Data List for details about which parameters belong to the System Setup.
- Page 100 Making Global Settings (Utility) User Effect The User Effect settings including the following data can be managed as a single file. • User Effect types (page • User Master EQ types (page • User Master Compressor types (page • User Vocal Harmony types (page •...
-
Page 101: Wireless Lan Settings
For general operating instructions, refer to the iPhone/iPad Connection Manual on the website. This section covers only operations that are specific to the CVP-709/CVP-705. For information about the compatible smart devices and application tools, access the following page: http://www.yamaha.com/kbdapps/ Infrastructure Mode Networks Connecting to a network listed on the display: From the Networks listed on the display, select the desired one. - Page 102 Wireless LAN Settings Adhoc Mode Initialize Initializes the connection setup to the default factory status. Detail Sets the detailed parameters. • 1/3 page: Sets the SSID, security, password, and channel. • 2/3 page: Sets the IP address and other related parameters. •...
-
Page 103: Making The Time Settings
Making the Time Settings This icon is shown only when the USB Wireless LAN adaptor (which may not be included depending on your area) is connected to the [USB TO DEVICE] terminal. Make sure the adaptor is connected before executing any operations. For details on the connections, refer to the “iPhone/iPad Connection Manual”... -
Page 104: Other Functions And Settings
Chapter 2 Other Functions and Settings This chapter explains about the detailed functions and usages called up by displays except the Menu display. CVP-709/CVP-705 Reference Manual... -
Page 105: Adjusting The Accompaniment Volume Or Turning Each Accompaniment Part On/Off In The Piano Room
Adjusting the Accompaniment Volume or Turning Each Accompaniment Part On/Off in the Piano Room Press the [PIANO ROOM] button to call up the Piano Room display. Touch at the upper right of the display. Session players appear in the display. Session players can be shown or hidden by touching Session players Touch the picture of the session players to call up the accompaniment list. - Page 106 Turns all parts, except those of rhythm and bass, on or off. Turns the rhythm parts and bass parts on or off. Turns the bass part on or off. Move the slider to adjust the volume of the accompaniment. Touch here to go back to the accompaniment list. CVP-709/CVP-705 Reference Manual...
-
Page 107: Displaying The Instruments Assigned To The Keyboard (Drum Kit Tutor)
Displaying the Instruments Assigned to the Keyboard (Drum Kit Tutor) You can play various drums and percussion instruments or SFX (sound effects) sounds on the keyboard by using Drum Voices or SFX Voices. When an icon of Drum Kit Tutor appears in the Voice area of the Home display or below the Voice Selection display, you can call up the key assignment by touching the icon. -
Page 108: Recording The Right- And Left-Hand Parts Separately (Midi Recording)
Recording the Right- and Left-hand Parts Separately (MIDI Recording) The Multi Channel Recording method lets you record data to each channel independently, one by one, up to 16. Here, you will learn how to create a complete, two-handed piano piece by recording the right-hand part to channel 1, and then recording the left-hand part to channel 2 while listening to the already recorded data. - Page 109 4 - 1 4 - 2 NOTE If you want to cancel recording, touch [Cancel] in the display or press the SONG CONTROL [REC] button before going on to step 5. Play the keyboard with your right hand. Recording begins automatically as soon as you play a note on the keyboard. You can also start recording by touching [Rec Start] or pressing the SONG CONTROL [PLAY/PAUSE] button.
- Page 110 Confirm that [Overwrite MIDI] is selected. Specify the target channel and part for recording. 10-1 From the display, set the Main part to [Rec], and set all other parts to [Off]. 10-2 Touch the channel number under the Main part you set to [Rec] in step 10-1. In the setting display that appears, specify channel 2 for recording.
- Page 111 Saving the Recorded Performance On the Home display, touch (Save) shown in the Song area. The Song Selection display appears for selecting a destination to save the recorded Song. NOTICE The recorded MIDI Song will be lost if you change to another Song or you turn the power off without executing the Save operation.
-
Page 112: Recording Style Playback First, Then Melodies
Recording Style Playback First, Then Melodies The Multi Channel Recording method lets you create a song by recording a style first and then a melody on top of it. Here, you will learn how to record a style to channels 9 – 16 first, and then record a melody to channel 1 while listening to the already recorded style. - Page 113 4 - 1 4 - 2 NOTE If you want to cancel recording, touch [Cancel] in the display or press the SONG CONTROL [REC] button before going on to step 6. Press STYLE CONTROL [SYNC START] button and then play the Style by specifying the chord in the Chord Section.
- Page 114 Recording a Melody Touch [I] (Rec) to call up the Song Recording window. Confirm that [Overwrite MIDI] is selected. Specify the target channel and part for recording. 10-1 From the display, set the Main part to [Rec], and set all other parts to [Off]. 10-2 Touch the channel number under the Main part you set to [Rec] in step 10-1.
- Page 115 After you finish your performance, touch [J] (Stop) on the Home display to stop recording. To hear the recorded performance, touch [R/K] (Play/Pause). This finishes recording of the Style and the melody. Now, let’s save the recorded performance as a file (below). Saving the Recorded Performance Save the recorded data as a file by following the instructions on page...
-
Page 116: Index
Index Numerics Drums ..........76 Dynamics ..........56 3 Band EQ ......... 25 Karao-Key ........81 Dynamics Control ......78 Key Off Sampling ......74 Key Signature ........19 Accompaniment ......105 Keyboard Harmony ......23 Echo ...........24 Adhoc Mode ........102 Keyword ........... 33 Effect ........... - Page 117 Reverb ..........14 Transpose ........6, 72 Root Fixed ........58 Tremolo ..........24 Manual Development Department Root Trans (Root Transpose) ..58 Trill ............24 © 2015 Yamaha Corporation Rotary Speaker ......... 46 Tuning ........73, 86 Published 07/2015 MW-A0 CVP-709/CVP-705 Reference Manual...
Need help?
Do you have a question about the Clavinova CVP-709 and is the answer not in the manual?
Questions and answers