Table of Contents
Advertisement
Quick Links
®
User's Manual
Thank you for purchasing our product.
This manual provides explanations of the installation and
operation of the MCR-4TC.
Please make sure the following items are included in the
package.
USB Mini-B Cable
User's Manual Set
(Warranty Included)
© Copyright T&D Corporation. All rights reserved.
2015.12 16504960010 4th Edition
MCR-4TC x 1 unit
US-15C x 1
"MCR for Windows"
CD-ROM x 1
AA Alkaline Battery (LR6)
x 2
Card Slot Cover
x 1
Advertisement
Table of Contents

Related Manuals for T&D MCR-4TC


Summary of Contents for T&D MCR-4TC
- Page 1 ® User’s Manual Thank you for purchasing our product. This manual provides explanations of the installation and operation of the MCR-4TC. Please make sure the following items are included in the package. MCR-4TC x 1 unit “MCR for Windows” CD-ROM x 1...
- Page 2 Important Notices and Disclaimers In order to properly use this product, please carefully read all docu- ments that accompany the product before using. T&D Corporation accepts no responsibility for any malfunction of and/or trouble with this product or with your computer that is caused by the improper handling of this product and will deem such trouble or malfunction as falling outside the conditions for free repair outlined in the attached warranty.
-
Page 3: Safety Precautions And Instructions
Safety Precautions and Instructions Safety Precautions and Instructions The following items should be strictly obeyed for the safe usage of this product, and for protecting yourself and other people from bodily harm and/or damage to property. Explanation of Symbols Warning Symbols Failure to follow the instructions with this symbol DANGER could cause serious injury or even death. - Page 4 DANGER To Prevent Serious Accidents Do not disassemble, repair or modify the unit and accessories. Do not use the unit in any environment that is exposed to chemicals and harmful gases. Doing so may cause corrosion and/ or other danger to the unit. Also, coming in contact with hazardous substances may cause bodily harm to the user or people nearby.
- Page 5 We are not responsible for any damage, malfunction or trouble, whether direct or indirect, caused by the use of our product. Do not put anything on top of the cable. This may cause overheat- ing. Do not disconnect the USB cable during USB communication. Doing so may cause adverse effects to the unit and/or PC.
- Page 6 CAUTION Do not place or store in the following areas: • Areas exposed to direct sunlight • Areas exposed to excessive heat or high temperatures such as near fire or heating equipment • Areas exposed to static electricity • Areas exposed to strong magnetic fields •...
-
Page 7: Before Using This Product
Please be careful about the procedures for Installation. (For USB communication between your computer and a MCR-4TC) In order to use a USB connection to communicate between the unit and a computer, it is necessary to install the software and the USB device driver. -
Page 8: Table Of Contents
LCD Display and Icons -------------------------------------------------- 11 About How Data is Recorded -------------------------------- 14 Using SD Memory Cards ------------------------------------- 15 Supported Memory Cards ---------------------------------------------- 15 Using MCR-4TC Installing the Battery ----------------------------------------- 17 Usable Power Sources -------------------------------------------------- 17 Changing the Batteries -------------------------------------------------- 17... - Page 9 Downloading Recorded Data to a PC ----------------------- 48 Download Recorded Data using “MCR for Windows”---------------- 48 Recorded Data File ------------------------------------------------------ 49 Download Recorded Data from all Connected MCR-4TC Units ----- 50 Analyzing Recorded Data ------------------------------------ 51 Open Recorded Data ---------------------------------------------------- 51...
-
Page 10: Overview
SD Memory Card USB Connection Main Features in Rec Settings Recording Mode Recording Method Measurements Recording Interval and Trend Graph Recording Channel Coupling Image Slaves Master Throughout this manual, the MCR-4TC is also referred to as “the device” or “the unit”. -
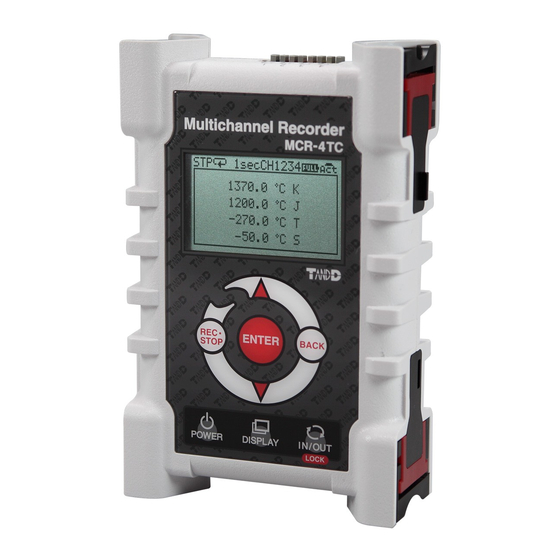
Page 11: Appearance Diagram And Part Names
Appearance Diagram and Part Names [TOP] [FRONT] [SIDE] [BACK] 1. Input Terminal 2. Coupling Lug 3.LCD Display 4.Touch Panel (touchpad and control wheel) [BOTTOM] 5. SD Memory Card Slot 6. USB Port 7.Battery Cover... -
Page 12: Explanation Of Buttons
Explanation of Buttons Press to change the selected menu or settings item (by going up or down), and to increase or decrease the values shown in the LCD. Press to confirm the selected menu, operation, or value. Press to jump to the [Start Recording] or [Stop Recording] menu.* Press to return to the previous screen in the menu or cancel the current operation.*... -
Page 13: Touch Panel Operation Methods
Touch Panel Operation Methods There are two ways to operate the touch panel as follows: - Touchpad operation - Control wheel operation Terms and gestures related to operations Tap (touch) Press-and-hold Control Wheel (hold down) Operation (rotate) Tap desired area of touch panel. -
Page 14: Lcd Display And Icons
LCD Display and Icons The following contains some brief explanations about icons. Each menu will be explained later in the “Menu List” pages. LCD backlight will be ON during operation. Recording Status Shows the recording status. REC: Recording in progress STP: Recording stopped PRG: Waiting for programmed start IMM: Preparing immediate start Recording Mode... - Page 15 These indicate that there are more menu items above or below for view. Use on the touch panel to scroll up and down. An item marked with an arrow denotes it has been selected. on the touch panel to move the arrow up and down.
-
Page 16: About How Data Is Recorded
About How Data is Recorded The MCR-4TC records measurement data to its internal memory. A recording session is one cycle from recording start to stop, and the MCR-4TC can record multiple sessions. The number of recording sessions and number of data readings which can be recorded depends upon the number of channels, the recording interval and other settings. -
Page 17: Using Sd Memory Cards
Supported Memory Cards - SD Memory Cards - SDHC Memory Cards IMPORTANT - SDXC memory cards cannot be used. - It is possible to run a quick test to see if your memory card works in MCR-4TC. See p.40 for details. -
Page 18: Using Mcr-4Tc
Using MCR-4TC The following shows the basic flow of procedures. Use MCR-4TC Use PC Getting Ready Install the batteries (see p.17) Getting PC Ready Install the provided software (see p.44) Connect the device to a PC (see p.46) Setting up the Device (see p.31) / Making Recording Settings (see p.26) * Recording Settings can be made both on the device and from a PC. -
Page 19: Installing The Battery
- When you wish to replace batteries while recording is in progress, make sure to connect the USB cable to your PC for USB bus power. - If the MCR-4TC runs out of power while processing data on a SD memory card, the data on the card may be corrupted. -
Page 20: Measuring Temperature
3. When removing the wire, push down on <B> and gently pull the wire out of the hole <A>. * MCR-4TC supports the following thermocouple types: K, R, S, T, and J. * Temperature can only be measured within the heat-durability range of the sensor being used. -
Page 21: About The Measurements Display
About the Measurements Display The font size used to display the measurements automatically changes depending on the number of channels. * You can change the number of channels by going to the Main Menu and selecting [Record Settings] > [Rec.Channel]. About the Trend Graph Display A trend graph is displayed for each channel of data. -
Page 22: Operating The Trend Graph
Operating the Trend Graph to highlight the desired item, and tap <ENTER>. While the selected item is blinking, use again to change the value, and tap <ENTER>. * If no operations are performed or a change is not confirmed with <ENTER> while the selected item is blinking, the operation will be canceled and the selected item will return to the original value. -
Page 23: Increasing Recording Channels
Coupling of MCR-4TC and MCR-4V is possible. Refer to the MCR-4V User's Manual for its operating instructions. IMPORTANT When using MCR-4V as the Master and MCR-4TC as the Slave, Group Recording cannot be started if the measurement interval of the Master is less than 100ms. -
Page 24: Storage Location For Group Recording
Storage Location for Group Recording When performing a group recording for multiple units, recorded data will be stored in each unit's memory. To analyze recorded data on a PC, either download data using “MCR for Windows”, or export data to the SD memory card to transfer to a PC. -
Page 25: Group Operations Via Master
Group Operations via Master Group operations such as the starting and stopping recording for the connected units can only be performed via the Master. Upon the start of a group recording, the main recording settings will be temporarily copied to all connected Slaves. Upon the stopping of recording all copied settings will be returned to their original state. -
Page 26: Starting Recording By Group
Starting Recording by Group Make recording settings for each device separately; no matter if it is a Master or a Slave. * See p.26-27 for a list of the possible setting items. * See p.23 for the settings that are/are not controlled by the Master. From the main menu of the Master, select [Record Settings] - [Start Recording]. -
Page 28: About Menus
About Menus [Recording Settings] Menu [Back] Stop Recording [Back] Start Recording [Back] Method: IMMED(indv) / IMMED(indv) PGM(indv) / IMMED(grp) / PGM(grp) Month/Day/Year HH:MM:SS* Rec.Mode: Endless Endless / One Time Rec.Method: Instant Instant / Average Rec.Interval: 10 sec 100 / 200 / 500ms / 1 / 2 / 5 / 10 / 15 / 20 / 30sec / 1 / 2 / 5 / 10 / 15 / 20 / 30 / 60min Rec.Channel: CH1234 CH1 / CH2 / CH3 / CH4 / CH12 / CH23 / CH34... - Page 29 Save/Restore Sett. [Back] Save Settings1 Save Settings2 Save Settings3 Save Settings4 Restore Settings1 Restore Settings2 Restore Settings3 Restore Settings4 *1: Will only appear when the recording start method is set to PGM (programmed start).
-
Page 30: [Data List] Menu
[Data List] Menu Displayed Items when Recording Stopped: [Back] * List number, date, and time shown below are examples. Display Graph [Back] No4 Jul 30 '13 16:19:45 No3 Jul 29 '13 15:42:51 Export Selctd Data [Back] No4 Jul 30 '13 16:19:45 No3 Jul 29 '13 15:42:51 Export All Data [Back]... -
Page 31: Displayed Items During Endless Recording
Displayed Items during Endless Recording: [Back] Expt Curr Data Now Formatted & Blank Card? Auto Data Export*1 [Back] Quick Format [Back] *1: When recording in one-time mode, [Auto Data Export] will not be displayed. -
Page 32: [Memory Card] Menu
[Memory Card] Menu [Back] Quick Format [Back] Memory Card Test [Back]... -
Page 33: [Operation Settings] Menu
[Operation Settings] Menu [Back] Set Contrast: 65 0 to100 Check Memory [Back] Memory: Data: Set Clock [Back] Nov/07/'13 16:43:22 Time Zone GMT+09:00 DST 00:00 Beep: ON ON / OFF All / OFF Click Key Lock: OFF OFF / 240 to 5 sec. Unit of Temp: °C °C / °F Burnout Detect: ON... -
Page 34: Explanation Of Items In Each Menu
Explanation of Items in Each Menu [Record Settings] Menu Items [Stop Recording] Click [OK] to stop recording. [Start Recording] Click [OK] to start recording. [Method: IMMED(indv) / PGM(indv) / IMMED(grp) / PGM(grp)] IMMED(indv): Starts recording immediately. PGM(indv): Starts recording on the specified date and time. IMMED(grp): Starts Group Recording immediately. - Page 35 [Rec. Interval: user-specified time] Select from 18 choices: 100, 200, 500 msec. / 1, 2, 5, 10, 15, 20, 30 sec. / 1, 2, 5, 10, 15, 20, 30, 60 min. (default setting is 10 sec) IMPORTANT - It is not possible to make different recording interval settings for each channel. [Rec.
-
Page 36: [Data List] Menu Items (When Recording Stopped)
[Data List] Menu Items (when recording stopped) [Display Graph] From the displayed list, select data you wish to view in a graph and tap <ENTER>. See p.35 for details on how to read and control the view of recorded data graphs. [Export Selctd Data] From the displayed list, select data to export to the SD memory card and tap <ENTER>. -
Page 37: How To Read Graphs Of Recorded Data
How to Read Graphs of Recorded Data The graph can be scrolled on the display by using or control wheel operation to move to the left or right. 1. While scrolling, the time of recorded data appears on the top of the screen. - Page 38 7. Skimming Level (Horizontal Axis Scale) Set skimming level for X-axis divisional boxes. Skim×1 : The space between dots (data points on graph) is same as the recording interval value Skim×n : The space between dots (data points on graph) is “n” times the recording interval value Enlarged View The horizontal axis of...
- Page 39 Scroll Screen Change Screen Skimming Level (Horizontal Axis Scale) to change. Vertical Axis Scale to change. Set the max and min for the axis range. Recording Channel to change. Menu Screen * When changing settings as above, if no operations are performed or a change is not confirmed with <ENTER>, the change will automatically be applied and the graph will return to the “Scroll”...
-
Page 40: [Data List] Menu Items (During Endless Recording)
[Data List] Menu Items (during endless recording) [Expt Curr Data Now] Use this to immediately export the data currently being recorded to the SD memory card. IMPORTANT Memory cards are not included. Please purchase separately. [Auto Data Export] To prevent data loss in Endless mode, this menu will automatically export the data to be overwritten to the SD memory card. -
Page 41: Canceling [Auto Data Export]
Canceling [Auto Data Export] If you wish to cancel the auto data export process, select [Back] and tap <ENTER>. The displayed message will be cleared when the process is terminated. Restrictions on [Auto Data Export] - The exporting process will be terminated when the SD card is removed. - The process will be terminated when an SD card write error occurs. -
Page 42: [Memory Card] Menu Items
[Memory Card] Menu Items [Quick Format] Select [OK] to format your SD memory card for use in the MCR-4TC. IMPORTANT - This process will erase all recorded data from the SD memory card. It is recommended to make backups of recorded data to a PC before formatting the memory card. -
Page 43: [Operation Settings] Menu Items
- It is not possible to set the clock while recording is in progress. - Please make sure that the date and time settings in the MCR-4TC are correct, if they are not, the recording start time and recording time of downloaded data will be incorrect. - Page 44 Please be careful when initializing a device as it is not possible, after initialization, to retrieve previous settings info or recover deleted or corrupted data. Do not turn off the power of the MCR-4TC during initialization. Termination of the initialization process may cause damage or malfunction to the device.
-
Page 46: Using A Pc With Mcr-4Tc
By using the supplied software, it is possible to make Device Settings and Recording Settings from a computer, as well as download recorded data from the MCR-4TC to your computer for graph view and data analysis. Installing the Supplied Software... - Page 47 Select “Install “MCR for Windows” and click [Execute] to start the installation. Follow the directions as they appear to complete the installation. * If a window appears such as the one below during installation, click [Install] or [Continue Anyway]. After installation, “MCR for Windows” will appear in the Windows Start Screen or Start Menu.
-
Page 48: Connecting The Device To A Pc
MCR-4TC unit that is connected with a USB communication cable. - When connecting a MCR-4TC to a PC, connect only one unit at a time. If you connect multiple units at the same time, they may not be recognized properly. -
Page 49: Making Settings Via Pc
Making Settings via PC The following items are not included on the device menu, and can only be set or changed from “MCR for Windows” by connecting the device to a computer via USB. Channel Name Create and assign names to each of the channels to be used for record- ing. -
Page 50: Downloading Recorded Data To A Pc
Downloading Recorded Data to a PC Data stored in the internal memory of MCR-4TC can be down- loaded to a computer in either of the following two ways: - Use an SD memory card to export recorded data and transfer to a PC.* - Use “MCR for Windows”... -
Page 51: Recorded Data File
Click [Download]. Recorded Data File One recorded data file (.r4T) is created for each recording session. Storage Location of Recorded Data and File Name The default setting is as follows. Storage Folder: C:\Users\username\Documents(or My Documents)\TandD Corp\MCR File Name: Serial number_rec.month_rec.day_rec.year_rec.time (hhmmss).r4T To change the default storage folder, click and specify the desired folder. -
Page 52: Download Recorded Data From All Connected Mcr-4Tc Units
Download Recorded Data from all Connected MCR-4TC Units Connect the Master unit to your computer via USB. Get a data list for the Master. (see p.48) Click [Search for Slave] to get data lists for the connected Slave units. Place a check next to the target data. -
Page 53: Analyzing Recorded Data
Analyzing Recorded Data Open Recorded Data In the storage folder for the downloaded recorded data on your PC (p.48), double click on the desired recorded data file. “T&D Graph” will be opened and a graph displayed. Print Graphs Open recorded data from the “T&D Graph”. Make any desired adjustments to the window size and aspect ratio to be reflected in the printed graph. -
Page 54: Other
USB driver. • Connect a different USB device (mouse, digital camera, etc...) other than the MCR-4TC to your computer and see if it operates properly. • If your computer has more than one USB port, try connecting the USB cable to a different port. - Page 55 Is it possible to adjust or alter recorded data that has been downloaded by the MCR-4TC? In order to maintain the integrity and trustworthiness of the recorded data, the software has been designed to not allow modifications to be carried out on actual recorded data.
- Page 56 The software “MCR for Windows” does not start, why not? Please check the following: • The software may not have been installed correctly. Try reinstalling “MCR for Windows”. • Check to see if the software was installed with Administrator rights. (For Windows 7 or earlier:) •...
- Page 57 When the .Net Framework 4 Client Profile is in the list above: Follow the steps below to repair the .Net Framework 4 Client Profile. 1. Select Microsoft .NET Framework 4 Client Profile and click [Uninstall or Change]. 2. In the maintenance box, select “Repair .NET Framework 4 Client Profile to its original state”...
-
Page 58: Specifications
One Time (Stop recording when capacity is full) Recording Start Method Immediate Start or Programmed Start (by individual logger or by group) Group Recording Up to 4 units (16 channels) can be recorded simultaneously. (Coupling of MCR-4TC and MCR-4V is possible. (*3)) - Page 59 Communication Interfaces USB Communication Communication Time Download Times for Full Data via USB - From the master or a single unit: Approx. 1 minute 30 seconds - From a slave unit: Approx. 4 minutes 30 seconds External Memory SD Memory Card, SDHC Memory Card (*4) (For Manual or Automatic Data Export) Power AA Alkaline Battery x 2 (AA Ni-MH batteries may also be...
-
Page 60: Software (Mcr For Windows)
Other The .NET Framework 4 Client Profile is required. *1: MCR-4TC has superior noise filter, but the measurement may sometimes fluctuate due to strong noise. Especially when the recording interval is set to 200 ms or less, the filtering becomes weaker and hence the fluctuation may become greater. - Page 61 Option AC Adaptor AD-05A2 / AD-05C2 USB Mini-B Type Input : AC100 to 240V Output:DC5V, 1A Frequency : 50/60Hz Cable Length : 1.5m AD-05A2 AD-05C2 Plug Type...
- Page 63 A list of distributors can be found at: http://www.tandd.com/about_tandd/contactus/ Product Information Product information can be found at: http://www.tandd.com/product/ Multichannel Temperature Recorder MCR-4TC User's Manual T&D CORPORATION 817-1 Shimadachi, Matsumoto, Nagano 390-0852, Japan Website: http://www.tandd.com/ FAX: +81-263-40-3152 E-mail: support@tandd.com...
Need help?
Do you have a question about the MCR-4TC and is the answer not in the manual?
Questions and answers