Custom Audio Electronics Q3X User Manual
Hide thumbs
Also See for Q3X:
- User manual (88 pages) ,
- User manual (100 pages) ,
- Short manual (32 pages)

Related Manuals for Custom Audio Electronics Q3X


Summary of Contents for Custom Audio Electronics Q3X
- Page 1 USER MANUAL CUSTOM S.p.A.
- Page 3 CUSTOM S.p.A. GENERAL SAFETY INFORMATION THE CE MARK AFFIXED TO THE PRODUCT CERTIFY THAT THE Via Berettine 2/B Your attention is drawn to the following actions PRODUCT SATISFIES THE BA- that could compromise the characteristics of the 43010 Fontevivo (PARMA) - Italy SIC SAFETY REQUIREMENTS.
- Page 5 MANUAL For details on the commands, refer to the manual with code 77200000001400...
-
Page 7: Table Of Contents
TABLE OF CONTENTS 1 INTRODUCTION ............. . 9 1.1 Document structure . - Page 8 7 SPECIFICATION ............. 51 7.1 ...
-
Page 9: Introduction
1 INTRODUCTION 1.1 Document structure This document includes the following chapters: 1 INTRODUCTION information about this document 2 DESCRIPTION general description of device 3 INSTALLATION information required for a correct installation of the device 4 OPERATION information required to make the device operative 5 ... -
Page 11: Description
2 DESCRIPTION 2.1 Box contents Remove the device from its carton being careful not to damage the packing material so that it may be re-used if the device is to be transported in the future. Make sure that all the components illustrated below are present and that there are no signs of damage. If there are, contact Customer Service. -
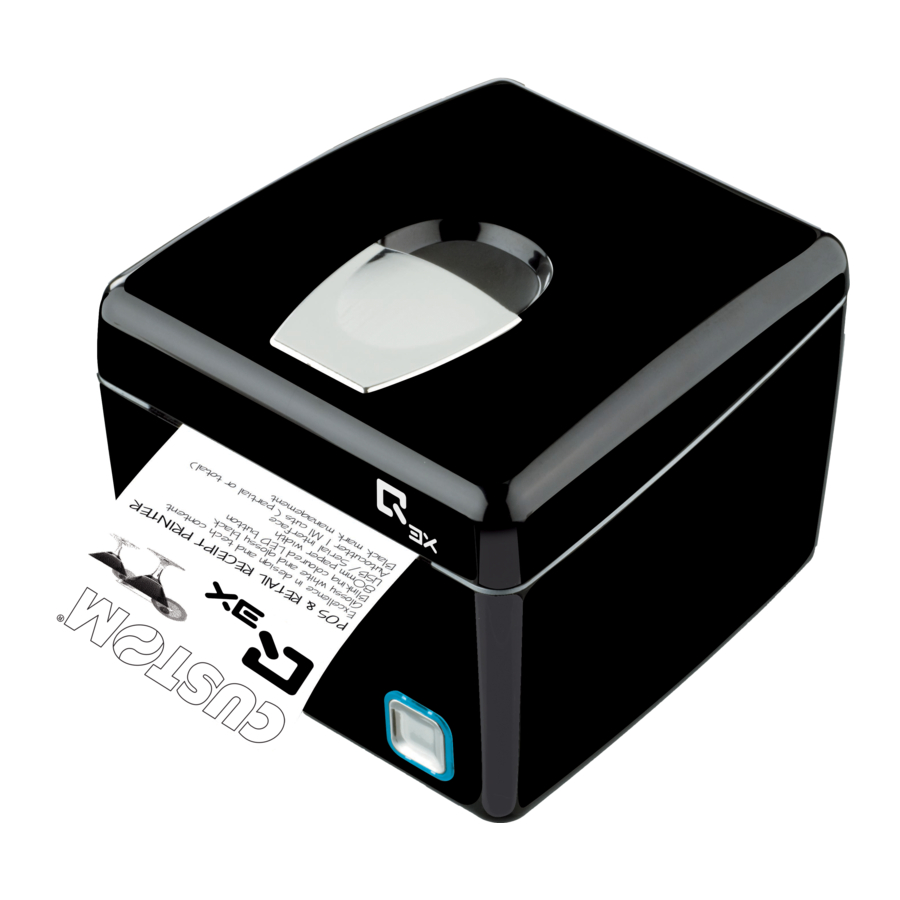
Page 12: Device Components
2.2 Device components External view 1. Paper compartment cover 2. Opening lever for paper compartment 3. Paper out 4. Status LED 5. FEED key 6. ON/OFF key 7. Power supply port 8. Drawer port 9. USB interface port 10. RS232 serial interface port 11. - Page 13 Internal view 1. Temperature sensor for the print- head 2. Sensor for paper and black mark detection 3. Sensor for cover open...
-
Page 14: Product Label
2.3 Product label PC = Product code (14 digits) SN = Serial number HW = Hardware release XXXXXXXXXXXXXX 0000000000000000000... -
Page 15: Key Functions: Power Up
2.4 Key functions: power up POWER UP FEED Hold Hold down down Print the SETUP report FEED FEED Fast Fast Hold Hold push push down down enter the skip the SETUP MODE SETUP MODE FEED FEED Hold Hold Fast Fast down down push... -
Page 16: Key Functions: Standby
2.5 Key functions: standby STANDBY FEED advance the paper (manual feed) -
Page 17: Status Messages
2.6 Status messages The status LED indicates hardware status of device. Given in the table below are the various led signals and the corre- sponding device status. Q3X (standard models) STATUS LED DESCRIPTION DEVICE OFF R/G/B DEVICE ON: READY MODE... - Page 18 Q3X (WiFi models, Bluetooth® models) STATUS LED DESCRIPTION DEVICE OFF DEVICE ON: READY MODE. WHITE BLUE CABLE COMMUNICATION ACTIVE AND/OR WHITE/BLU CABLE COMMUNICATION WiFi OR BLUETOOTH® DEACTIVATED RECEIVE DATA RECEPTION ERRORS BLUE (PARITY, FRAME ERROR, OVERRUN ERROR) COMMUNICATION STATUS COMMAND NOT RECOGNIZED...
-
Page 19: Installation
3 INSTALLATION 3.1 Connections The following igure shows the possible connections for the device. Serial standard cable standard cable Power Supply cable (included) Power supply serial device USB device ATTENTION: In some conditions, we recommend the installation of a ferrite core on the power supply cable. NOTES: If serial and USB connectors are inserted, communication port is USB. -
Page 20: Pinout
3.2 Pinout POWER SUPPLY Tripolar female connector 1 +24 Vdc 2 GND 3 GND 4 Frame GND ATTENTION: Respect power supply polarity. NOTE: Power supply cable The following igure shows the connector pinout of the power supply cable for the device: Tripolar male connector n.c. +24 V Power supply cable USB INTERFACE Female USB type B connector 1 USB0-VBUS (in) 2 D0 -... -
Page 21: Rs232 Serial Interface
RS232 SERIAL INTERFACE Female DB9 connector 1 DTR 2 TX During transmission, takes the values “0” and “1” depending on data. 3 RX During reception, takes the values “0” and “1” depending on data. 4 n.c. 5 GND 6 DTR When “1”, device is power on. -
Page 22: Drawer Connector
DRAWER CONNECTOR Female RJ12 connector 1 GND 2 SOL1 (out) Drawer 1 command 3 CASS (in) Drawer status 4 +24 Vdc 5 n.c. 6 GND ATTENTION: This device can manage drawers of different power supplies (6V, 12V, 18V, 24V). To prevent a current overload, check and set correctly the kind of cash drawer. -
Page 23: Driver And Sdk
3.3 Driver and SDK The drivers are available for the following operating system: OPERATING DESCRIPTION INSTALLATION PROCEDURE SYSTEM Driver for Windows XP Driver for Windows VISTA (32/64bit) From the START menu, press Run Driver for Windows 7 (32/64bit) and type-in the path where the SW Windows was saved on your PC, then click OK. -
Page 25: Operation
4 OPERATION 4.1 Switch the device ON/OFF For printing receipts with wide black zones, we recommend to replace the included power supply with the optional power supply that provides a peak IN DC 24V current higher for larger time intervals (see Technical specification for power supplies codes). -
Page 26: Opening Cover
4.2 Opening cover Lift the opening lever for the cover. Open the device cover. -
Page 27: Loading The Paper Roll
4.3 Loading the paper roll To change the paper proceed as follows. At every change of paper, check inside the device to locate and remove any scraps of paper. PAPER CORE MAX 10mm Open the device cover (see par. 4.2). Place the roll in the paper compartment and pull out the paper for a few centimetres. -
Page 28: Pairing With Bluetooth® Devices
4.4 Pairing with Bluetooth® devices The Bluetooth® connectivity of Q3X allows the wireless printing from a PC (ex. using a text editor or third-part software) or from a mobile device Android, Apple® and Windows Phone after installing the application “CustomPrint”. - Page 29 “Pairing BT” = Enabled Bluetooth Bluetooth pairing request Device “Q3x_XXXXXXXXXXXX” Available devices <Bluetooth device> PIN contains letters or symbols Type this PIN on the other device. <Bluetooth device> Enable the Bluetooth® to Pair detect the device. If “Pairing BT” parameter of the device is set to Bluetooth Enabled (see par.
- Page 30 Make sure that the “Wireless” parameter of the printer is set to ON (see par. 5.4) and the printer is on. Bluetooth Pairing To pair with Q3X from an Apple® device, follow the instruc- Request tions below: “Q3x_XXXXXXXXXXXX” would like to pair with your <device>.
- Page 31 Make sure that the “Wireless” parameter of the printer is set to ON (see par. 5.4) and the printer is on. Pairing accessory To pair with Q3X from a Windows Phone device, follow the Make sure that this PIN “ 000000 ” instructions below:...
-
Page 33: Configuration
5 CONFIGURATION 5.1 Coniguration mode To enter the coniguration mode and print a SETUP report with the operating parameters of the device, proceed as follows. FEED While pressing the FEED key, switch on the device by pressing the ON/OFF key. PRINTER SETUP The device prints the report with the settings parameters. Follow the instruction printed on paper to proceed with configuration procedure. -
Page 34: Setup Report
5.2 Setup report The following igures show the setup reports of the device. The shown values for parameters are sample values; for the list and the description of device parameters see the following paragraphs. Q3X (standard models) Q3X printer DEVICE NAME and SCODE <code> rel 2.22 FIRMWARE MODULES RELEASE FCODE <code> rel 1.00 PRINTER SETUP PRINTER TYPE ........Q3 PRINTING HEAD TYPE ......KRB72 INTERFACE ..........USB... -
Page 35: Printer Setup
Q3X (WiFi models) Q3X printer DEVICE NAME and SCODE <code> rel 2.22 FIRMWARE MODULES RELEASE FCODE <code> rel 1.00 PRINTER SETUP PRINTER TYPE ........Q3 PRINTING HEAD TYPE ......KRB72 INTERFACE ..........USB PROGRAM MEMORY TEST....OK DYNAMIC RAM TEST......OK DEVICE EXTERNAL MEMORY TEST ....OK STATUS CUTTER TEST........OK... - Page 36 Q3X (Bluetooth® models) Q3X printer DEVICE NAME and SCODE <code> rel 2.22 FIRMWARE MODULES RELEASE FCODE <code> rel 1.00 PRINTER SETUP PRINTER TYPE ......PRINTING HEAD TYPE ....KRB72 INTERFACE ........BLUETOOTH PROGRAM MEMORY TEST... DYNAMIC RAM TEST..... EXTERNAL MEMORY TEST ..
-
Page 37: Device Status
5.3 Device status The device operating status is indicated in the coniguration print-out in which, next to the name of the components dis- played, the following information is given: PRINTER TYPE device model PRINTING HEAD TYPE print head model INTERFACE interface present PROGRAM MEMORY TEST OK appears if functioning and NOT OK if faulty DYNAMIC RAM TEST OK appears if functioning and NOT OK if faulty EXTERNAL MEMORY TEST OK appears if functioning and NOT OK if faulty CUTTER TEST... -
Page 38: Printer Parameters
5.4 Printer parameters This device allows the coniguration of the parameters listed in the following table. The parameters marked with the symbol are the default values. Settings remain active even after the device has been turned off and they are stored in non-volatile memory. Activation of the Bluetooth® module or WiFi on the device: Wireless NOTE: If the “Wireless”... - Page 39 Bit for the parity control of the serial interface: RS232 PARITY None = parity bit omitted Even = even value for parity bit Odd = odd value for parity bit NOTE: Parameter valid only with serial interface. Handshaking: RS232 HANDSHAKING XON/XOFF = software handshaking Hardware =...
- Page 40 Alignment management: NOTCH ALIGNMENT Disabled = the notch alignment is not performed Enabled = the notch alignment is performed NOTCH THRESHOLD Threshold value (in percent) for the recognition of the presence of notch by the notch sensor: 0.75V 1.50V 2.25V 1.00V 1.75V 2.50V...
- Page 41 Setting of the font type: FONT TYPE Enables the use of the 256 characters font tables International Chinese GB18030 = Enables the use of the chinese extended font GB18030-2000 NOTE: When the “INTERNATIONAL” font is enabled, you need to choose the character code table (parameter “CODE TABLE”).
-
Page 42: Hexadecimal Dump
5.5 Hexadecimal dump This function is used for the diagnosis of the characters received from the communications port. Characters are printed as hexadecimal code and the corresponding ASCII code (see below). Each line is preceded by a counter in hexadecimal that indicates the number of bytes received. -
Page 43: Maintenance
6 MAINTENANCE 6.1 Paper jam Open the device cover (see par. 4.2). Pull the paper in order to have the damaged part outside the device. Lift the damage paper, check and remove possible scraps of paper Close the cover. along the cutter path. -
Page 44: Planning Of Cleaning Operations
6.2 Planning of cleaning operations The regular cleaning of the device keeps the print quality and extends its life. The following table shows the recommended planning for the cleaning operations. EVERY PAPER CHANGE Printhead Use isopropyl alcohol Rollers Use isopropyl alcohol EVERY 5 PAPER CHANGES Cutter Use compressed air... -
Page 45: Cleaning
6.3 Cleaning For periodic cleaning of the device, see the instructions below Sensors Disconnect the power supply cable and open the device cover (see par. 4.2) ATTENTION: Do not use alcohol, solvents, or hard brushes. Do not let water or other liquids get inside the device. Alcohol, solvent Clean the device sensors by using compressed air. - Page 46 Paper path Print head Disconnect the power supply cable and Disconnect the power supply cable and open the device cover (see par. 4.2) topen the device cover (see par. 4.2) ISOPROPYL ALCOHOL ATTENTION: ATTENTION: Do not use alcohol, solvents, or hard brushes. Do not use solvents, or hard brushes.
- Page 47 Printing roller Case Disconnect the power supply cable and Disconnect the power supply cable open the device cover (see par. 4.2) ATTENTION: Do not use alcohol, solvents, or hard brushes. Do not let water or other liquids get inside the device. Alcohol, solvent ISOPROPYL ALCOHOL To clean the device,...
- Page 48 Cutter Disconnect the power supply cable and open the device cover (see par. 4.2) ATTENTION: Do not use alcohol, solvents, or hard brushes. Do not let water or other liquids get inside the device. Alcohol, solvent Clean the cutter compartment from the inside using compressed air.
-
Page 49: Upgrade Irmware
6.4 Upgrade irmware 9. Select the serial communication port (ex. COM1): Select the system communication port WARNING: During communication between PC/device Available port for the irmware update it is strictly forbidden to discon- COM1 nect the communication cable or to remove the power COM2 Firmware rel.: None Printer type: None Cancel COM3... - Page 50 UPDATE VIA USB INTERFACE Select Printer <device1> <device2> ATTENTION: <device3> Only during the irmware update, the connection be- <device4> <device5> tween PC and device must be direct, without the use of wireless HUB. Only during the irmware update, do not connect or disconnect other USB devices.
-
Page 51: Specification
7 SPECIFICATION 7.1 Hardware speciications GENERALS Head temperature, paper presence, Sensors detection of black mark, cover open MTBF 127 243 hours Emulations CUSTOM/POS Windows XP, VISTA (32/64bit), Windows 7 (32/64bit), Windows 8 (32/64bit), Windows 8.1 (32/64bit), Printing driver OPOS, Linux (32/64bit), Android INTERFACES USB port... - Page 52 Printing mode Normal, 90°, 180°, 270° Printing format Height/Width from 1 to 8, bold, reverse, underlined, italic 54 character code tables (see par. 7.7) Character fonts Extended chinese GB18030-2000 UPCA, UPCE, EAN13, EAN8, Printable barcode CODE39, ITF, CODABAR, CODE93, CODE128, CODE32, PDF417 Normal = 140 mm/sec (2) (3) Printing speed...
- Page 53 Wireless speed 11 Mbps Protocol supported TCP/IP, IPv4 Security 40 bits and 128 bits WPA and WPA2 encryption Antenna 2.4-GHz chip antenna Power supply DC 3.3V BLUETOOTH® MODULE SPECIFICATIONS Bluetooth® = 2.0 Class 2 - SPP (Serial port proile) Communication speed PRINTER ELECTRICAL SPECIFICATIONS Power supply 24 Vdc ±10% (optional external power supply) Medium consumption Stand-by consumption 0.05 A...
-
Page 54: Character Speciications
Storage temperature from -20 °C to +70 °C Storage relative humidity from 10% Rh to 90% Rh NOTES: (1) : Control board (2) : Respecting the regular schedule of cleaning for the device components. (3) : Referred to a standard CUSTOM receipt (L=10cm, Density = 12,5% dots on). (4) : For receipts with wide black zones is recommended the optional power supply cod. -
Page 55: Device Dimensions
7.3 Device dimensions Length 140 mm Height 117 mm Width 150 mm Weight 920 g NOTES: Dimensions referred to devices without paper roll. All the dimensions shown in following igures are in millimetres. -
Page 56: Power Supply Dimensions Cod. 961Ge020000001
7.4 Power supply dimensions cod. 961GE020000001 Length 112 mm Height 27 mm Width 48 mm All the dimensions shown in following igures are in millimetres. AC INLET +24V DC OUTPUT WIRE... -
Page 57: Power Supply Dimensions Cod. 963Ge020000003 (Optional)
7.5 Power supply dimensions cod. 963GE020000003 (optional) Length 127 mm Height 35.5 mm Width 56 mm All the dimensions shown in following igures are in millimetres. AC INLET +24V DC OUTPUT WIRE... -
Page 58: Paper Speciication
7.6 Paper speciication Paper with black mark for ixed sensor The following image shows the placement of the black mark on the thermal side of the paper. For more information about the use of paper with black mark see Chapter 10. All the dimensions shown in following igures are in millimetres. -
Page 59: Character Sets In Custom/Pos Emulation
7.7 Character sets in CUSTOM/POS emulation The printer has 3 internal fonts with a width of 11, 15, 20 cpi, which can be associated with one of the coding tables stored on the device. The selection of the font and the encoding table is done via command (see the commands manual of the device) or through the Setup procedure by properly setting the parameter “Chars / Inch”, “Code Table”... - Page 60 <CodeTable> Character Tables PC861 - Icelandic on request PC862 - Hebrew PC864 - Arabic PC869 - Greek on request ISO8859-2 - Latin 2 on request ISO8859-15 - Latin 9 on request PC1098 - Farci on request PC1118 - Lithuanian on request PC1119 - Lithuanian on request PC1125 - Ukranian...
-
Page 61: Consumables
8 CONSUMABLES The following table shows the list of available consumables for device: DESCRIPTION CODE 67300000000398 THERMAL PAPER ROLL weight = 58g/m width = 80mm Ø external = 80mm Ø core = 12mm... -
Page 63: Accessories
9 ACCESSORIES The following table shows the list of available accessories for device: DESCRIPTION CODE 961GE020000001 POWER SUPPLY (for technical speciications, see the paragraph 7.1) 963GE020000003 POWER SUPPLY (for technical speciications, see the paragraph 7.1) 26500000000352 SERIAL CABLE 9 pin male connector - 9 pin female connector 1.8 mt 26500000000356 USB CABLE AB type 1.8 mt... -
Page 65: Alignment
10 ALIGNMENT Device is provided with a sensor for the use of alignment notch in order to handle roll of tickets with pre-printed ields and a ixed length; The alignment notch may be formed by black mark printed on paper (see par.7.6). The alignment sensor assembled on the device is “relection” sensor: this kind of sensor emits a band of light and detects the quantity of light relected to it. The presence of the notch is therefore detected by the amount of light that returns to the sensor, considering that the light is relected by the white paper and absorbed by the black mark. The following paragraphs show how to correctly set the coniguration parameters of device in order to assure the alignment. -
Page 66: Enable Alignment
10.1 Enable alignment Device is provided with one sensor for alignment, placed on the upper lat of device. To guarantee the alignment, it is necessary to correctly choose the sensor to use for the notch detection depending on the type of notch and its location on the ticket. To do this, you must enable the parameter “Notch Alignment” during the Setup procedure (see chapter 5) and set the cor- rect value of this parameter as described in the following table. - Page 67 Paper with black mark on the thermal side In the standard model the detection of black mark and paper presence is performed by the ixed sensor. SENSOR 1 direction of paper feed THERMAL SIDE...
-
Page 68: Calibration
10.2 Calibration The sensor calibration occurs automatically and consists in adjusting the quantity of light emitted to match the degree of whiteness of the paper used and the degree of black of the mark printed on paper. The device automatically performs the self-calibration during the Setup procedure only if the “Notch Alignment” parameter is set to a value other than “Disabled”... - Page 69 The following igure shows an example of paper with the non-thermal paper printed with black marks and other graphics (for example, a barcode): the outgoing voltage is constant while passing the white paper between two notches, presents a peak at each black mark and presents some “noise” at each barcode. In this case, the optimal value for the “Notch Threshold” parameter is located about halfway between the peak value and the maximum value of the “noise”.
-
Page 70: Alignment Parameters
10.3 Alignment parameters The “alignment point” is deined as the position inside the ticket to use for the notch alignment. The distance between the notch edge and the alignment point is deined as “Notch Distance”. Referring to the front of the notch, the value of “Notch Distance” value varies from 0mm minimum and 22mm maximum. If the “Notch Distance” value is set to 0, the alignment point is set at the beginning of the notch. Alignment point: Alignment... - Page 71 The following igure shows a simpliied section of the device with the paper path and the distances (in mm) between the alignment sensor, the print head, cutter (cutting line) and paper out mouth. A = distance between printing head and cutter= 15 mm B = distance between printing head and alignment sensor = 13.5 mm...
- Page 72 CUSTOM/POS EMULATION To deine the alignment point you need to set the device parameters that compose the numerical value of the “Notch Dis- tance” parameter. (see par.5.4). For example, to set a notch distance of 15mm between the notch and the alignment point, the parameters must be set on the following values: Notch Distance [mm x 10] Notch Distance [mm x 1] Notch Distance [mm x .1] The “Notch Distance” parameter, may be modiied as follows: • ...
-
Page 73: Printing Area
10.4 Printing area In order to print ticket containing only one notch and to not overlay printing to a notch (that will make it useless for the next alignment), it is important to well calibrate: • The height of the printing area of ticket according to the inter-notch distance The following igure shows an example of tickets with “Notch Distance” set to 0: Cutting line Printing line... -
Page 75: Technical Service
Write down the data printed (worldwide) on the product label (see paragraph 2.3) support@customamerica.com (specific for North/South American customers) Send an e-mail to the Technical Service, with the data collected. Q3X printer SCODE. <code> rel 1.00 FCODE. <code> rel 1.00 PRINTER SETTINGS PRINTER TYPE... - Page 80 CUSTOM S.p.A. World Headquarters Via Berettine, 2/B - 43010 Fontevivo, Parma ITALY Tel. +39 0521 680111 - Fax +39 0521 610701 info@custom.biz - www.custom.biz All rights reserved www.custom.biz...
Need help?
Do you have a question about the Q3X and is the answer not in the manual?
Questions and answers