Advertisement
Advertisement
Table of Contents

Related Manuals for Bissell POWERFORCE COMPACT 1520 SERIES


Summary of Contents for Bissell POWERFORCE COMPACT 1520 SERIES
- Page 1 1520 SERIES...
-
Page 2: Safety Instructions
If the plug does not fit fully in the outlet, reverse the plug. If it still does not fit, contact a qualified electrician to install a proper outlet. Do not change the plug in any way. www.BISSELL.com... -
Page 3: Table Of Contents
Thanks for buying a BISSELL vacuum Safety Instructions... 2 We’re glad you purchased a BISSELL vacuum. Everything we know about Product View....4... -
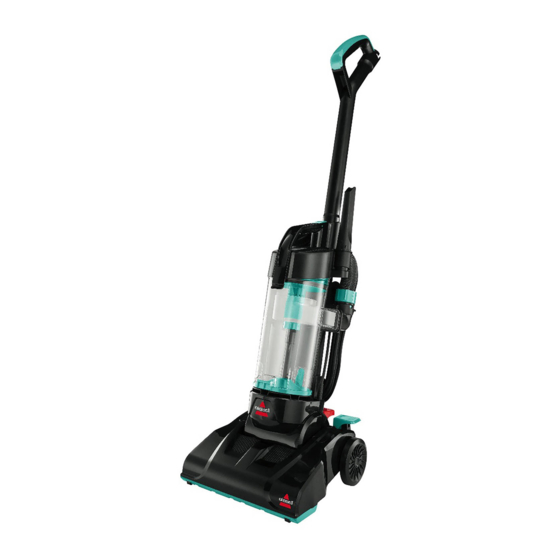
Page 4: Product View
To reduce the risk of electric shock, turn danger of suffocation, keep away from you are familiar with all instructions and power switch off and disconnect polarized babies and children. operating procedures. plug from electrical outlet before performing maintenance or troubleshooting checks. www.BISSELL.com... -
Page 5: Assembly
2. Normal Cleaning - Press handle release pedal once. Use for most household floor cleaning tasks. 3. Low Cleaning - With the vacuum in normal cleaning position, press handle release pedal again. Use for reaching under low furniture, such as tables, chairs, or beds. www.BISSELL.com... -
Page 6: Operations
Special tools either on the end of the vacuum hose or on the end of the High Your BISSELL vacuum is not only a powerful Reach Extension Wand. carpet and rug vacuum cleaner, it’s also a versatile above floor vacuum cleaner when you select one of the special tools. - Page 7 2. Step on the pedal again to turn the not place vacuum cleaner close enough to objects to pull vacuum “Off”. them into rotating brush. Cord Hook Upper Quick Release Cord Wrap Power Lower Quick Switch Release Pedal Cord Wrap www.BISSELL.com...
-
Page 8: Maintenance & Care
Filter 3. Holding Dirt Container over garbage bin, press Release Button on back. Snap bottom back into Upper Tank place. 4. Put the Dirt Container back on the vacuum and push to lock into place. Dirt Container Full Line www.BISSELL.com... - Page 9 NOTE: When replacing the filter set, the white fabric side should be installed first. The dark foam side should be all that’s visible once the filters are in place Filter Set half-circle locating features www.BISSELL.com...
- Page 10 Upper Quick Release cord wrap is pointed up towards the handle and the Lower Quick Release cord wrap is pointed down towards the floor. 3. Clip molded plug to power cord to secure. www.BISSELL.com...
- Page 11 Remove debris from this area. 9. When finished cleaning, reposition floor brush and drive belt. Turn floor brush by hand several times in the direction of the motor to align the belt on the floor brush. Then replace the brush cover and screws. www.BISSELL.com...
-
Page 12: Maintenance & Care
5. Place ends of floor brush down into slots on sides as shown. 6. Turn floor brush by hand several times in the direction of the motor shaft. If properly installed, drive belt will align itself on floor brush. 7. Replace brush cover and five screws. www.BISSELL.com... - Page 13 Replace stretch hose by sliding over inlet and rotating upwards towards the lock position. NOTE: If the debris cannot be reached through the hose, then follow the instructions for cleaning the air passageway in the “Clean and replace rotating floor brush” section. Screws www.BISSELL.com...
-
Page 14: Troubleshooting
Please do performed by an authorized service representative. not return Thank you for selecting a BISSELL product. this product For any questions or concerns, BISSELL is happy to to the store. be of service. Contact us directly at 1-800-237-7691. www.BISSELL.com... -
Page 15: Warranty
BISSELL Consumer Care. Limited One-Year Warranty Subject to the *EXCEPTIONS AND EXCLUSIONS identified below, upon Website or E-mail: receipt of the product BISSELL will repair or replace (with new or www.BISSELL.com remanufactured components or products), at BISSELL’s option, free Or Call:... - Page 16 Sunday 10am - 7pm ET Visit the BISSELL website: www.BISSELL.com When contacting BISSELL, have model number of cleaner available. Please record your Model Number: ___________________ Please record your Purchase Date: ___________________ NOTE: Please keep your original sales receipt. It provides proof of purchase date in the event of a warranty claim.
Need help?
Do you have a question about the POWERFORCE COMPACT 1520 SERIES and is the answer not in the manual?
Questions and answers