ESAB Powercut 650 Instruction Manual
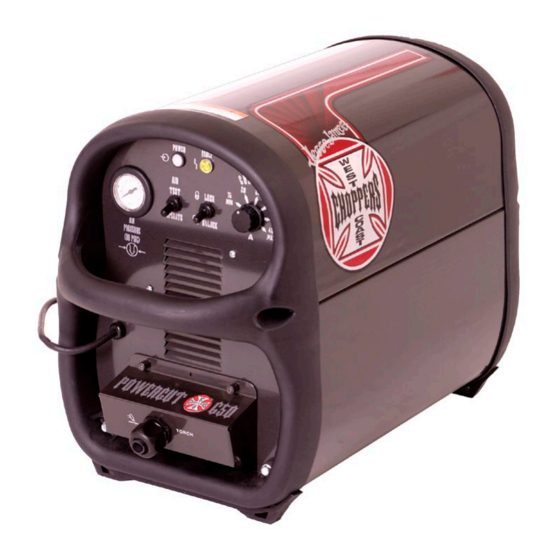
Portable plasma cutting system
Hide thumbs
Also See for Powercut 650:
- Instruction manual (56 pages) ,
- Instruction manual (30 pages) ,
- Instruction manual (56 pages)
Table of Contents
Advertisement
Quick Links
Download this manual
See also:
Instruction Manual
Advertisement
Table of Contents
Troubleshooting

Related Manuals for ESAB Powercut 650


Summary of Contents for ESAB Powercut 650
- Page 1 POWERCUT 650 Portable Plasma Cutting System Instruction Manual ESAB Cons ole I te m No. 0 5 5 8 0 05 3 3 8 0558005347 12/2007...
- Page 2 Be sure this information reaches the operator. You can get extra copies through Your supplier. caution these instructions are for experienced operators. if you are not fully familiar with the principles of operation and safe practices for arc welding and cutting equipment, we urge you to read our booklet, “precautions and safe practices for arc Welding, cutting, and gouging,”...
-
Page 3: Table Of Contents
Location ..............................9 Inspection ..............................9 Connections .............................10 3.4.1 Primary Electrical Input Connections ....................10 3.4.2 Connecting Powercut 650 for 208 Vac Input ................11 Secondary Connections ........................12 Assembling PT-31XLPC Consumable Parts ...................13 section 4 operation .............................15 Powercut 650 Controls..........................15 Cutting with the PT-31XLPC .......................17 Operating Techniques ...........................17... - Page 4 taBle of contents...
-
Page 5: Safety
section 1 safetY precautions... - Page 6 section 1 safetY precautions...
-
Page 7: Introduction
• Patented XT nozzles - extended shape gives good The Powercut 650 comes out of the box ready to go! The torch is attached with visibility as well as good consumable life parts in place, primary cord is attached and the filter/regulator is installed. Just hook up the air, plug it in and cut. -
Page 8: General
Includes the following items: Seat - 0558000510 (19679) O-ring - 0558000514 (950790) Do not use any torch with this power source other than the esaB brand pt-31xlpc torch. serious injury may occur if used with any other torch. Wheel Kit For easy transport of system ............ -
Page 9: Installation
There should be at least one foot of clearance between the Powercut 650 power source and wall or any other ob- struction to allow freedom of air movement through the power source. -
Page 10: Connections
section 3 installation connections electric shocK can Kill! precaution- 3.4.1 primarY electrical input connections (figure 3.1) ary measures should be taken to provide maximum protection against electrical A line (wall) disconnect switch with fuses or circuit breakers should be provided at shock. -
Page 11: Connecting Powercut 650 For 208 Vac Input
3.4.2 connecting poWercut 650 for 208 vac input The Powercut 650 power source with 208/230 vac, single-phase input capability is factory set for 230 vac input. If using 208 vac input, the Powercut 650 must be reconnected as follows before connecting to 208 vac input power. -
Page 12: Secondary Connections
3.5 seconDarY connections (refer to fig. 3.3) The Powercut 650 is supplied from the factory with the complete PT-31XLPC torch and the work cable with clamp assembly pre-installed. No further installation is required. For information on torch connections or refitting the torch (see Sec. -
Page 13: Assembling Pt-31Xlpc Consumable Parts
TION OF HEAT SHIELD. closed when the shield is removed. al- WaYs replace torch With the proper torch manufactureD BY esaB since it alone contains esaB’s patenteD safetY interlocK. figure 3.4 assembly of “xt” consumable parts... - Page 14 section 3 installation...
-
Page 15: Operation
(located on rear panel). When placed in ON position, the white pilot light will glow indicating control circuit is energized and the cooling fan will run. The Powercut 650 is now in the "READY" mode given a suitable air supply electric shocK can kill. - Page 16 section 4 operation flow fault: The fault light will be mostly on but will flick off for approx.1/10th of a second every second. This indicates that the air flow supply is low. Seconds over temperature: The fault light will be mostly off but will flick on for approx. 1/10th of a second every second.
-
Page 17: Cutting With The Pt-31Xlpc
6. In the postflow mode, the arc can be restarted immediately by depressing the torch switch. The two second preflow will automatically cancel. position the powercut 650 at least 10 feet (3 meters) from the cutting area to protect the unit from sparks and hot slag 4.2 operating techniques... - Page 18 COMING BACK AGAINST AND DAMAG- ING THE TORCH. figure 4.3. piercing technique using the pt-31xlpc cutting speed range — powercut 650 (using air with xt consumables 40 a @ 75 psi) nozzle - p/n 20860, electrode - p/n 20862 With 1/16" standoff (tip to Work Distance)
-
Page 19: Common Cutting Problems
Listed below are common cutting problems followed by the probable cause of each. If prob- lems are determined to be caused by the Powercut 650, refer to the maintenance section of this manual. If the problem is not corrected after referring to the maintenance section, contact your ESAB representative. - Page 20 section 4 operation...
-
Page 21: Maintenance
5 maintenance 5.0 inspection anD cleaning Frequent inspection and cleaning of the Powercut 650 is recommended for safety and if this equipment does not operate proper operation. Some suggestions for inspecting and cleaning are as follows: properly, stop work immediately and investigate the cause of the malfunction. -
Page 22: Troubleshooting
section 5 maintenance 5.2 trouBleshooting Check the problem against the symptoms in the following troubleshooting guide. The remedy may be quite simple. If the cause cannot be quickly located, shut off electric shocK can Kill! Be sure that all the input power, open up the unit, and perform a simple visual inspection of all the primary power to the machine has been components and wiring. -
Page 23: Troubleshooting Guide
section 5 maintenance 5.3 trouBleshooting guiDe Difficult starting. • Change electrode • Change nozzle • Check for good, clean connection of work lead to workpiece • Check air pressure (65 - 75 psig) • Check torch power cable for continuity Depress torch switch. After 2 seconds, is high frequency present? Repair power Repair/replace source high frequency unit no air Is air hose connected? Connect Is air adjusted to 65 - 75 psig? Adjust... - Page 24 Is air check switch OFF? Turn switch OFF Does arc start when nozzle contacts work without depressing torch switch? Check for short in torch switch Does air flow even when Powercut 650 power switch is OFF? Replace Repair power solenoid valve source figure 5-3.
- Page 25 Turn on main disconnect Is plug in receptacle? Insert plug in receptacle Is cooling fan turning? Replace pilot light Check voltage at receptacle and input power line Check main fuses Faulty power switch on Powercut 650 figure 5-4. sequence of operations...
- Page 26 • input rating. The light will not turn OFF even when correct voltage is restored. Reset by placing Powercut 650 power switch OFF and then ON again. NOTE: When in LOCK-IN mode, the FAULT light will turn on during second...
-
Page 27: Sequence Of Operation
section 5 maintenance 5.4 sequence of operation locK-in "off" position PUSH RELEASE TORCH SWITCH GAS SOLENOID VALVE OPEN CLOSE 2 SEC. 10 SEC PREFLOW Postflow FLOW SWITCH CLOSE OPEN FAULT OVERLOAD LIGHT ENERGIZE HF CIRCUIT INVERTER CUTTING ARC (CURRENT) notes: When the torch switch is pushed during postflow period, the postflow and preflow times are canceled, and the HF is energized immediately. - Page 28 section 5 maintenance locK-in "on" position PUSH RELEASE PUSH RELEASE TORCH SWITCH OPEN CLOSE GAS SOLENOID VALVE PREFLOW 2 SEC. 10 SEC Postflow CLOSE OPEN FLOW SWITCH FAULT PILOT LIGHT ENERGIZE HF CIRCUIT INVERTER CUTTING ARC (CURRENT) notes: When the torch switch is pushed during postflow period, the postflow and preflow times are canceled, and the HF is energized immediately.
-
Page 29: Re-Fitting The Pt-31Xlpc Torch
section 5 maintenance re-fitting the pt-31xlpc torch For operator safety, the torch connections are located on the output terminal board behind the lower portion of the front panel. Remove access cover to torch connection compart- ment from the front panel of power source. Thread the power cable and switch lead of the PT-31XLPC through the Strain Relief on the Access Cover. - Page 30 section 5 maintenance note: Schematics and Wiring Diagrams on 279.4mm x 431.8mm (11” x 17”) paper are included inside the back cover of this manual.
-
Page 31: Replacement Parts
To ensure proper operation, it is recommended that only genuine ESAB parts and products be used with this equipment. The use of non-ESAB parts may void your warranty. Replacement parts may be ordered from your ESAB Distributor. - Page 32 section 6 replacement parts...
- Page 33 section 6 replacement parts...
- Page 34 section 6 replacement parts...
- Page 35 section 6 replacement parts...
- Page 36 section 6 replacement parts...
- Page 37 section 6 replacement parts...
- Page 38 section 6 replacement parts...
- Page 39 section 6 replacement parts...
- Page 40 section 6 replacement parts...
- Page 41 section 6 replacement parts...
- Page 42 notes...
- Page 43 reVision historY Original release April, 2005 Revision 08/2005 - Made various updates per D. Smith and in replacement parts section, updated finger guard from: p/n 0558002994 to: p/n 0558005659 per CN-053103. Revision 12/2005 - Updated all rear view pics per D. Smith. Revision 12/2007 - Updated Replacement Parts to revision "0558004210-R"...
- Page 44 Welding & cutting products, florence, sc Welding equipment communication guiDe - customer serVices CUSTOMER SERVICE QUESTIONS: Telephone: (800)362-7080 / Fax: (800) 634-7548 Hours: 8:00 AM to 7:00 PM EST Order Entry Product Availability Pricing Order Information Returns ENGINEERING SERVICE:...
Need help?
Do you have a question about the Powercut 650 and is the answer not in the manual?
Questions and answers