Table of Contents
Advertisement
Quick Links
Advertisement
Table of Contents

Related Manuals for i-mobile Hitz 18 TV


Summary of Contents for i-mobile Hitz 18 TV
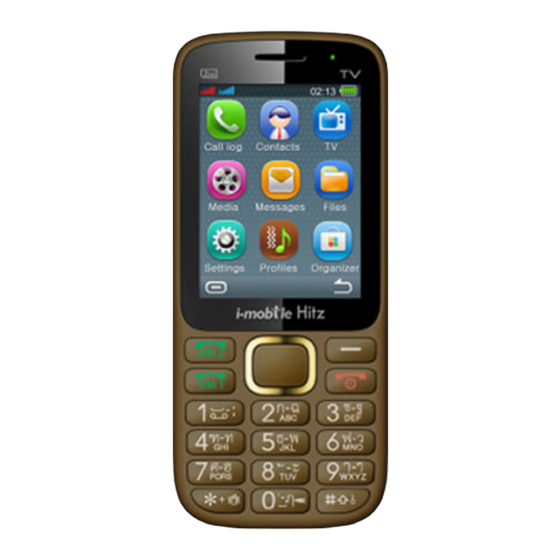
- Page 1 USER MANUAL...
- Page 2 Contents ...
-
Page 3: Getting Started
1 Getting started 1.1 Battery Please use the approved batteries, and only use the battery charger approved by the device producer to charge your battery. 1.1.1 Install &remove battery Remove: 1. Remove the back cover of the device by pushing forwards;... - Page 4 4.1.2 Charging Connect the charger to a power supply, and then plug in the charger pin to the charger jack on the top. Charger animation will be displayed if the device is powered off. When it is powered on, the power status icon at the top right corner of the screen will blink circularly.
-
Page 5: Sim Card Installation
1.2 SIM card installation SIM1 SIM2 Keep the metallic face of a SIM card downward, and slide it gently to the position of SIM 1. Keep the metallic face of the other SIM card downward, and slide it gently to the position of SIM 2. To remove a SIM card, please power off your device first, remove the battery and slide the card out gently. -
Page 6: File Manager
Memory Card 1.4 Headset Insert the headset into the headset jack on top of the device if required. 1.5 File manager File manager is used to manage the phone and the memory cards respectively. 1. Connect to a computer The USB function of the device is available, no matter the device is powered on or off. - Page 7 Config” interface automatically after the USB cable is plugged in. In the interface, select “Mass storage” to start File manager. If your memory cards are inserted, the computer will pop up removal disks, respectively representing your device and memory cards. After you enter, you will find some preset files or folders.
-
Page 8: Call Functions
>Disk management; 2. Right click the disk of a memory card, and select Format. 3. In Allocation Unit Size, select Default and then confirm. 1.6 Power on and off Press and hold the End key to switch your device on/off. If SIM lock or Phone lock is activated, please enter the password as required. -
Page 9: Text Entry
there is a missed call of SIM 1 or SIM 2. 2.3 Call options During a call, you can press the left soft key to enter Call options. The options differ according to your call status. Here below are a few of them: Hold, End single call, New call, Phonebook, Call history, Messages, Mute, DTMF, Volume etc. -
Page 10: Menu Operation
Switch to Thai input method. Following the sequence of letters on a key, you can press the key once to insert the first letter on the key, twice for the second letter, etc.,until the highlight is on your desired letter. Then release the key to input it. -
Page 11: Menu Functions
view menus of all levels. 4.2 Access shortcuts At the Standby menu, press the left navigation key to write message, the up navigation key to enter the Camera, the down navigation key to enter Music, the right navigation key to enter Inbox, the center key to enter the Shortcuts. - Page 12 5.4 Media Enter MP3 to select your favorite video clip to play. The device supports MP3. While playing, you can press the left/right key to control the playing progress, press the up/down key to adjust the volume. In the FM radio interface, you can customize Settings, enter Channel list, Turn on/off or switch to another channel.
- Page 13 Enter Video recorder to see video preview interface. Press Options menu: Switch to camera, Camcorder settings, Video settings, White balance, Effect settings, Restore default. After configuration, press Center key to start or pause. When the recording is completed, press right soft key to stop recording.
- Page 14 device will play the preset message tone and the device will play the preset message tone and the correspond- ing unread message icon will also appear on top of the screen. You can select to tap and view the new message, or access Inbox to read.
- Page 15 memory cards. You can also select one to View, Rename, 5.7 Settings Phone settings In Phone settings, you can configure the settings below: Schedule power on/off, Language, Preferred Input, Shortcuts, dedicated key, Flight mode, Display settings In Phone settings, you can configure the settings blew: Wallpaper, Screen auto lock, Show data and time, Show operator name, LCD setting, Picture quality,LED indicator.
- Page 16 Call divert Call divert is a network function. With this function, an incoming can be diverted to another phone number or voice mailbox, avoiding missing it. There are several diverts available: Divert all voice calls, Divert if unreachable, Divert if no answer, Divert if busy, Divert all data calls, and Cancel all (diverts).
- Page 17 Whitelist You can set the status of the whitelist. when whitelist mode is set on, allowing only revenue numbers in the white list to make a call. Auto call record Turn on call recording Call time reminder You can set a fixed time or a time period to remind you during your call.
- Page 18 connections between the device and other devices (Bluetooth headset, PC or handheld Bluetooth device etc) to realize voice calls, object exchange etc. Settings are as follows: Power: Activate or deactivate Bluetooth. Visibility: Set whether Bluetooth of the device can be ...
- Page 19 Security settings You can configure the security settings for Phone, SIM1 and SIM2 to protect your device or SIM cards from unauthorized use. The preset password of your phone is 0000. Please revise it to be yours immediately. SIM1/SIM2 PIN lock ...
- Page 20 Auto keypad lock can prevent from unintentional operation on keypad. At the standby mode,hold and press # to lock the keypad. When the keypad is locked,you can hold and press # to unlock the keypad. Data protection You can set a password for the message, phonebook, call history and file manager.
- Page 21 The device provides you with several profiles so that you can customize the following settings to meet your different needs: ringtone, volume, alert type, ring type, prompt tone The device provides you with several profiles so that you can customize the following settings to meet your different needs: ringtone, volume, alert type, ring type, prompt tone and answer mode.
-
Page 22: Battery Safety Information
6 Battery Safety information 6.1 Operation information Your device is powered by a rechargeable battery. The battery can be charged and discharged hundreds of times but it will eventually wear out. When the talk and standby times are notably shorter than normal, please buy a new battery. -
Page 23: Safety Information
7 Safety information 7.1 Operating environment Remember to follow any special regulations in force in any area and always switch off your device when its use is prohibited or when it may cause interference or danger. Use the device only in its normal operating positions. Do not keep the device near credit cards and other magnetism medium, some accessories can bring magnetism that may be delete the data. - Page 24 pacemaker when the device is switched on. Not carry the device in a breast pocket. Hold the device to the ear opposite the pacemaker. If you have any reason to suspect that interference is taking place, switch off your device immediately. 7.2.2 Hearing aids Some digital wireless devices may interfere with some hearing aids.
-
Page 25: Care And Maintenance
resulting in body injury even death. Switch off the device at refueling points such as near gas pumps at service stations. Observe restrictions on the use of radio equipment in fuel depots, storage, and distribution areas, chemical plants or where blasting operations are in progress. -
Page 26: Specific Absorption Rate (Sar) Information
instructed in this guide. Do not drop, knock, or shake the device. Rough handling can break internal circuit boards and fine mechanics. Do not use harsh chemicals, cleaning solvents, or strong detergents to clean the device. Do not paint the device. ... - Page 27 • While there may be differences between the SAR levels of various i-Mobile phone models, they are all designed to meet the relevant guidelines for exposure to radio waves. • The SAR limit recommended by the international Commission on Non-Ionizing Radiation Protection (ICNIRP), which is 2W/kg averaged over ten (10) grams of tissue.
-
Page 28: Battery Information
10 Battery Information Type Capacity li-ion 900 mAh • The battery life depends on many factors, including the SIM card, network conditions, settings, usage and enviorenment. Making calls, turning on the backlight and media • player will consume more battery power. The standby time is shorter when the network is •... -
Page 29: Condition Of Warranty
Within the warranty period, maintenance or parts replacement is free of charge. Should be noted that i-mobile reserves the rights no return the damaged part. i-mobile provides warranty for mobile phone and accessory with the terms and conditions that are... - Page 30 In cellular network / signal and sounds that are used with mobile phone and accessory is the service of independent operators, not i-mobile. Therefore, i-mobile will not be responsible for the working process, the readiness of the service, and the area covered.
- Page 31 Using of mobile phone and accessory together with, or connect with the mobile phone or accessory that are neither provided nor certified by i-mobile including any accessory are inappropriate to use together with mobile phone and accessory.
- Page 32 the...
- Page 33 Customer has already purchased. The warranty will not cover the damage that occurs from the use of any device under “i-mobile brand” with other products which are not the product of i-mobile.
Need help?
Do you have a question about the Hitz 18 TV and is the answer not in the manual?
Questions and answers